Search the Community
Showing results for tags 'yosemite'.
-
Hey I'm start by saying a lot of the info if not all is already on here scattered... Im just make a write up quick to show u what is needed.. Dell Optiplex 745 q6700 8gb ram hd5450 512mb ssd 120 gb Yo need MACPWN and Yosemite app and a working mac or the same one with a previous version.. Make the USB be PATIENT!!!! it took about 30 minutes to complete and the status didn't move much ... once done u need kext utility and IOATA kext ver 2.5.1 and insert that to S/L/E of usb installer then rebuild permmison now set up ur bios as follows disket usb sata only leave the one with the hdd ur going to us turn off the rest then put it in legacy mode.. now boot off the usb and install OS X yosemite after install use kext uftilitys to put in all the kext from the usb installing in the EFI folder and add in your network kext and sound kext all to S/L/E and rebuild then go to disk utility and resize you partition make a 1gb partition ms dos format now install clover to the 1gb partition u can add themes now and u don't need to check everything off and then you r good just reboot and u will be booting from your hard drive now you can fix ur setup and may sure ur mac is on SATA 0 you should be good to go also u need to add graphic but that easy u can find the hd5450 kext or wtvr one u use and put the kext in S/L/E ad rebuild

- 1 reply
-
- 1
-

-
- Dell Optiplex
- 745
- (and 2 more)
-
Hello, I'm trying to install Yosemite on my m4600 laptop but I'm not really sure on how to do it, I've tried it following this tutorial but I got a black screen right after chimera (chameleon, stolen and rebranded) (chameleon, stolen and rebranded) booted the installer, I've tried several boot flags but no luck. Then I tried to do it with Clover; it got stuck on the Apple loading screen, it wouldn't progress. I have no idea on how to do it or fix the black screen or loading screen, can someone help please?
-
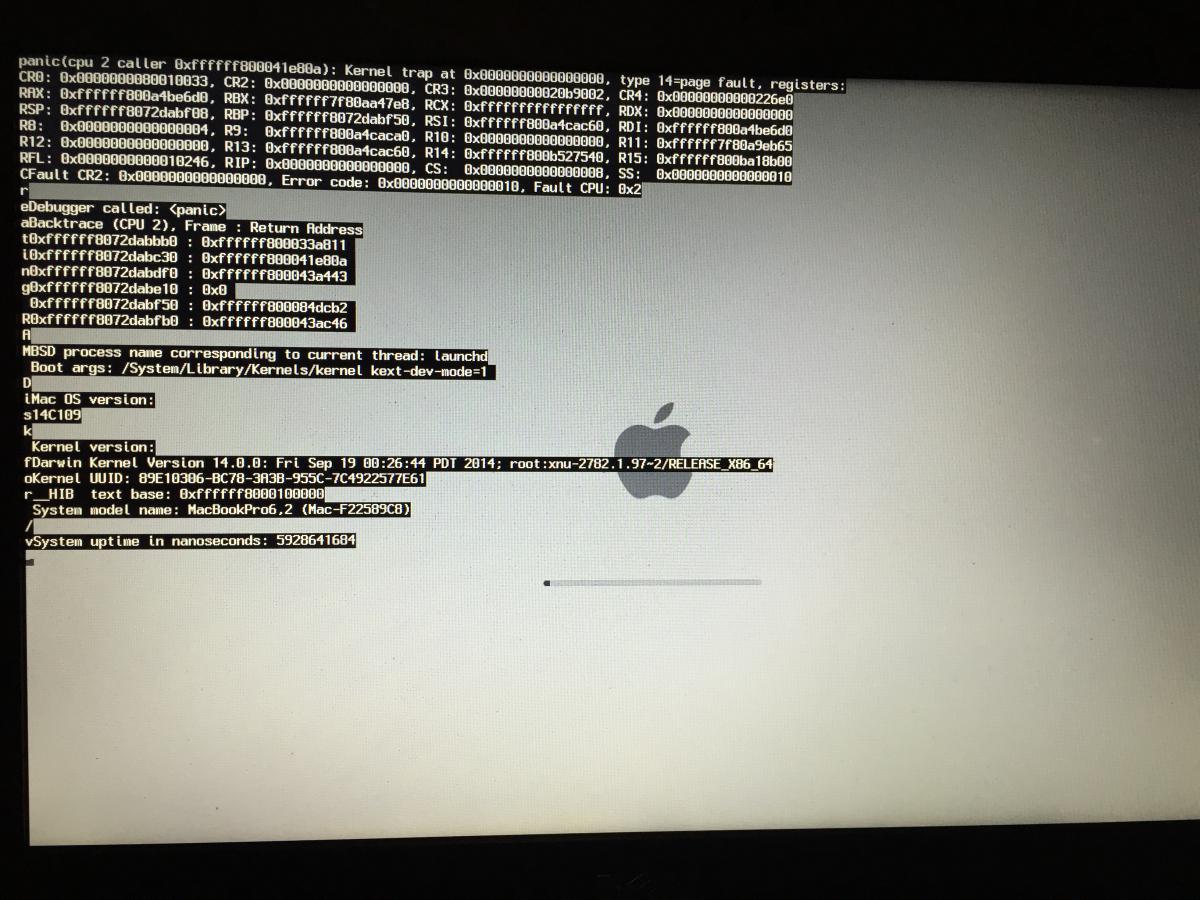
While following https://osxlatitude.com/index.php?/topic/7376-dell-latitude-e6410-yosemite-nvidiaintel/I encountered the following error (see attached). Please let me know how i can fix this
-
Hi, i just managed to install Yosemite on my T410. I have full QE/CI and everything is working well except sleep: The T410 goes to sleep but wakes up without backlight. I tried a few different dsdt files I found for the T410 but none of them fixed the sleep problem. Adding darkwake=0 to the org.chameleon.Boot.plist did not help too ... Did anyone of you have working sleep with the T410 on OS X Yosemite? Any help would be amazing! Thanks a lot, Barki
-
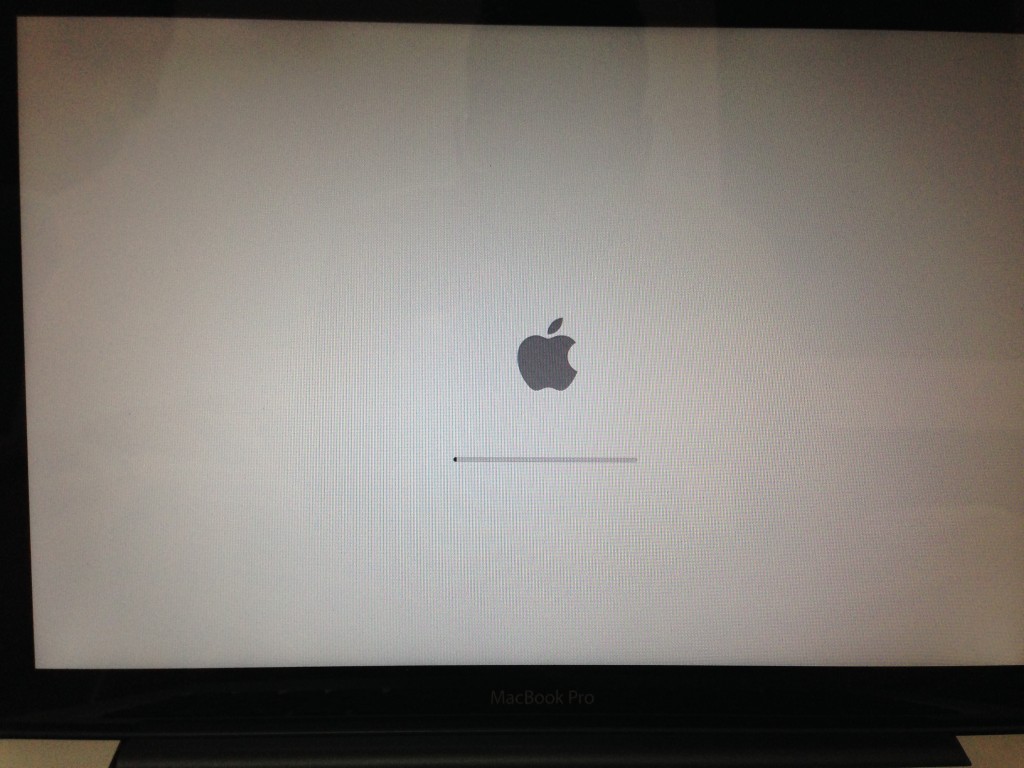
Hello everybody, I have a problem when try to install yosemite in my notebook, i followed a tutorial from other channel for create the usb bootable downloading the yosemite installer from appstore, when in select the icon for start the installation in boot screen, appear the apple logo and the progress bar is stopped and not show some progress, seems like that the screen is freezed, look the photo. Please can somebody help me?, thank you very much.
-
hi guys, I read the thread submitted by Jake Lo about installation of Mavericks on Thinkpad T410s. As I'm getting one next week I'd like to know if it's possible to install Yosemite on it. Do I have any problems 'cause the T410s doesn't support UEFI? best wishes 12$
-
 After installing OS X Yosemite in my Lenovo Y410p i don't have a great user experience with the trackpad neither with the keyboard, sometimes when i'm writing the cursor jumps to somewhere else, and when i-m using the usb mouse (i have to plug it after the os is loaded if not it is not recognized) and then use the trackpad it gets crazy... i'm using voodoops2.kext by rehabman (the latest version), do someone knows how to fix that? or know about another PS2 kext ?
 -
I've already installed OS X Yosemite using Clover Bootloader, following RehabMans guide, already made some dsdt patches, but now want to install windows 8, but in the bios there's no DVD-ROM to select as first boot entry, or when getting into boot menu i can't select the DVD, also tried with a bootable usb but it is not detected to boot, but it appears at the clover bootloader when selecting either the dvd or usb it freeze. what can i do?
-
I made some progress getting Yosemite working on my X1 Carbon. - Multi-boot using Clover - Yosemite, MS 8.1, Ubuntu - HD4400 graphics using Rehabman's FakeID and Jake Lo's patch from Clover - Sound using VoodooHDA - Trackpad using VoodooPS2Controller - Pstate stepping using SSDT generation script - Batter using Rehabman's smart battery and DSDT patches - Hardware monitoring - DWA-131 wireless N What's not working yet - Wake from sleep - Native wireless and ethernet/display through USB docking - Graphics not perfect; strange spots and lines; not a big dea - Need to press the power button for 2 secs after boot; it goes blackl Installation: - Prepared a USB using unifail - Put a patched kernel (Haswell patch) - Installed the latest Chameleon 2.3svn-r2510 - Had a kernel panic with just "-x" option. Had to specify "-x -no-zp" to get the installer up and running. - Installation done. Post-Installation: - DSDT: Able to extract DSDT from Ubuntu, and after numerous tries, finally got it compiled. - Graphics: HD4400 graphics is working with Clover and Jake's AppleIntelFramebufferAzul.kext. The screen blacks out. Wait for a few seconds, press the power button for 2 sec and then hit the enter button. 2500x1440 resolution! - Sound (ALC3232/ALC292) working using VoodooHDA v2.8.7. - SSDT: CPU stepping works with the attached SSDT.aml - Battery using Rehabman's kext and DSDT patches Attachments: - 12/19/14 - Graphics, Battery, and Trackpad work. - 01/02/15 - Clover package including SSDT. - 01/07/15 - Revised DSDT - Battery is working now.
-
 Well I got my E6520 working on Yosemite 10.10 after spending some time this evening !! I think pretty much everything is working. I got it installed in a similar way as I had Maverick installed. I had Maverick (10.9) working on a partition. See my post: Dell E6520 with NVS 4200M on Mavericks . I created a partition (InstallYosemite) and loaded Yosemite using the following command: sudo /Applications/Install\ OS\ X\ Yosemite.app/Contents/Resources/createinstallmedia --volume /Volumes/InstallYosemite --applicationpath /Applications/Install\ OS\ X\ Yosemite.app --nointeraction Then, created /Extra in the InstallYosemite partition. I was able to boot after specifying -x option and installed Yosemite to the new partition. I believe I was using MBeast boot loader which was based on Chameleon v2.2 r2404. After OS was installed, I had problem booting from the partition. Tried MBeast, Clover, myHack, and other version of Chameleon. I ended using the latest Chameleon (Chameleon-2.3svn-r2510) and able to boot and upgrade extensions. You can skip extension upgrade steps and simply use the attached Extra. Don't forget to run KextWizard to update the /Extra and /S/L/E ! 12-12-2014: - Graphics (no lagging) - same DSDT - Sound - same AppleHDA - Battery - same ACPBatterManager - Touchpad - same VoodooPS2Controller - CPU stepping - same SSDT - Disk - TRIM Patch IOAHCIFamilty.kext 10.10.x - Network - AppleIntelE1000e v3.1.0 - FakeSMC v6.11.1328 - AppleACPIPlatform v10.9.5 Let's forget to credit where due: - OSX Crew - Disable NVS4200M and using H3000 (Optimus enabled) - E6520 on Mountain Lion by lgashu http://forum.osxlati...-mountain-lion/ - collection of 10.9 kext from iFail - ssdt generation - RevoGirl's blog - touchpad - RhabmanMerg - SDHC - heemsker - others that I missed Attachments: Extra-Yosemite-Install put this into / of the Yosemite installation partition Extra-E6520-Yosemite-<date> put this into / after installing Yosemite; if I update extensions, I will provide updates with a different date Extra-E6520-Yosemite-12-12-2014.zip Extra_Yosemite_Install.zip
 -
 This is a guide on how to install Yosemite on a Dell Latitude E5440 (2014 version) with Intel HD 4400 Graphics, i5 Processor and Clover UEFI as bootloader. Special thanks to Herve, JakeLo, serotizm, and nguyenmac which provided a very useful guide and which this guide takes a lot of info from: Requirements: - Yosemite App downloaded to /Applications directory on your mac - CloverUEFI.zip files located on attachments below - AppleHDA.kext.zip located on attachments below USB Installer Preparation: 1. Prepare a USB with 8GB or more, format by Disk Utility: - Partition Layout: 2 Partitions - 1st Partition: Name CLOVER, Format: MS-DOS (FAT), Size: >300MB - 2nd Partition: Name MacUSB, Format: Mac OS Extended (Journaled), Size: >7GB - Options: Master Boot Record - Download the CloverUEFI.zip files and copy the whole directory into the CLOVER partition in your USB. 2. Create Yosemite Installer partition (need a Mac), - Download Yosemite Install app from AppStore. - Enable Hidden Files to be shown by opening up a terminal and running the following command: defaults write com.apple.finder AppleShowAllFiles YES - Hold 'alt' on your keyboard, then right click on the Finder icon in the dock and click Relaunch. - Right click to Yosemite Install app > Show Package Contents > Contents > Shared Support and open InstallESD.dmg - Open OS X Install ESD partition, open BaseSystem.dmg (hidden file) - Use Disk Utility to clone OS X Base System to MacUSB partition. - Rename the newly created/restored "OS X Base System" partition in your USB to "Install OS X Yosemite" - Go to System/Installation of "Install OS X Yosemite" and delete the alias “Packagesâ€, then go to “OS X Install ESD†partition, copy the “Packages†folder to System/Installation of "Install OS X Yosemite" - Copy BaseSystem.dmg and BaseSystem.chunklist (hidden files) from "OS X Install ESD" to "Install OS X Yosemite" (on your USB) You can hide the hidden files again in your mac by running the following command from a terminal window and relaunching Finder: defaults write com.apple.finder AppleShowAllFiles NO BIOS Preparation - Enable UEFI Boot Option - Set SATA to AHCI - Disable Legacy Boot Option - Disable "Wake on LAN" - Make sure Data Execution Prevention is enabled - Plug your USB to the laptop Yosemite Installation - Upon turning the laptop on, press F12 to enter the one-time boot up menu - Choose to boot from your USB - Once Clover Boot Menu appears, choose "Boot OS X from Install OS X Yosemite" and press enter. Already the config.plist supplied on the zip file is configured with the boot-arguments that worked for me. - Press spacebar if a nagging screen about Mouse/keyboard appears. Install screen will appear, use Disk Utility to format your drive as GPT, create a Mac OS X Extended (Journaled) partition and install Yosemite to your formatted partition. - Restart once the installation finishes - Boot from your USB again. - Once in the Clover Boot Menu, PRESS F4, and then select to boot from the partition you created and installed OS X on the previous steps. - If all is good and the force is strong with you, it should boot up. Now you can create your account and configure the settings. Post Installation For this part we will install the Clover Bootloader on the hard drive where Yosemite is installed, and since the USB you used worked to boot up, its best to use these same files for the permanent bootloader. - Open a Terminal window a run the following command: diskutil list and then take note of the IDENTIFIER of the EFI partition from the main hard drive where Yosemite is installed, and run the following command: newfs_msdos -v EFI -F 32 /dev/rIDENTIFIER using the IDENTIFIER from your EFI Partition. Don't forget the "r" before your IDENTIFIER - Make sure Disk Utility is closed - Open a Terminal Window and run the following command: defaults write com.apple.DiskUtility DUDebugMenuEnabled 1 - Open Disk Utility - You will now see a "Debug" menu in the top menu option - Enable the "Show every Partition" option - Now on the list of partitions you will see an "EFI" Partition under your main hard drive. Right click on it and choose to mount it. - Go to the EFI partition we just mounted and copy all the contents of your CLOVER partition to the root of the EFI partition. - Remove your USB and reboot. - You should now be able to see the Clover Menu without having the USB on your computer. Before selecting to boot up from your partition, PRESS F4 (only this time is needed...), and select your partition and press ENTER. - Yosemite should boot up now. Hope this helps!! Best Regards, jorgexgb AppleHDA.kext.zip CloverUEFI.zip
-
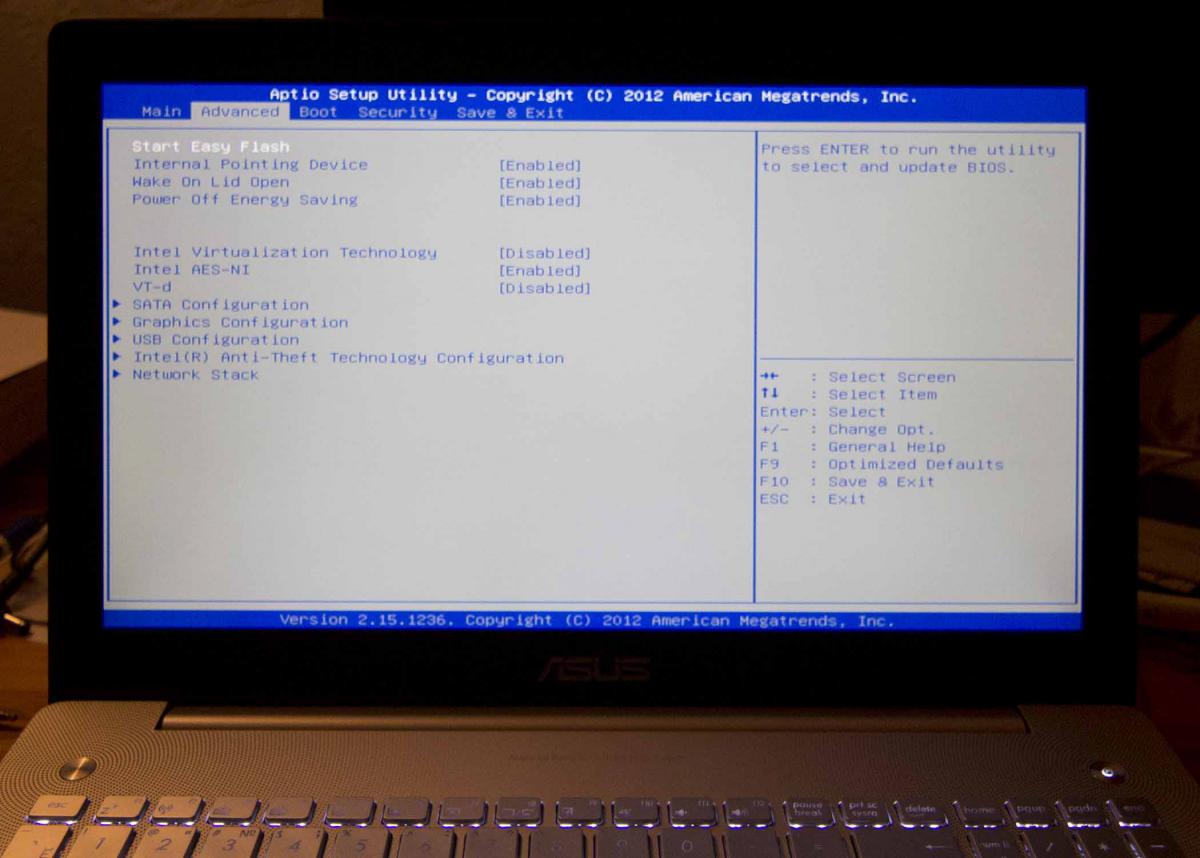
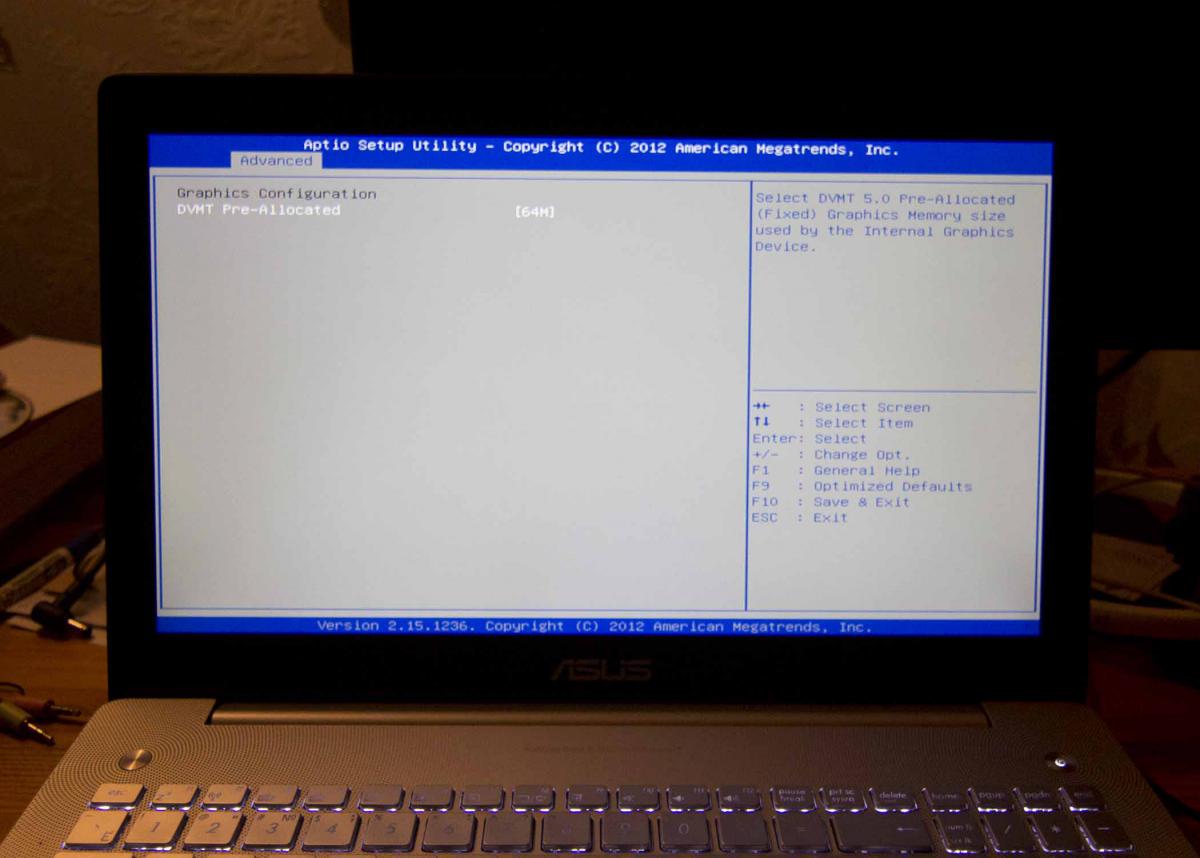
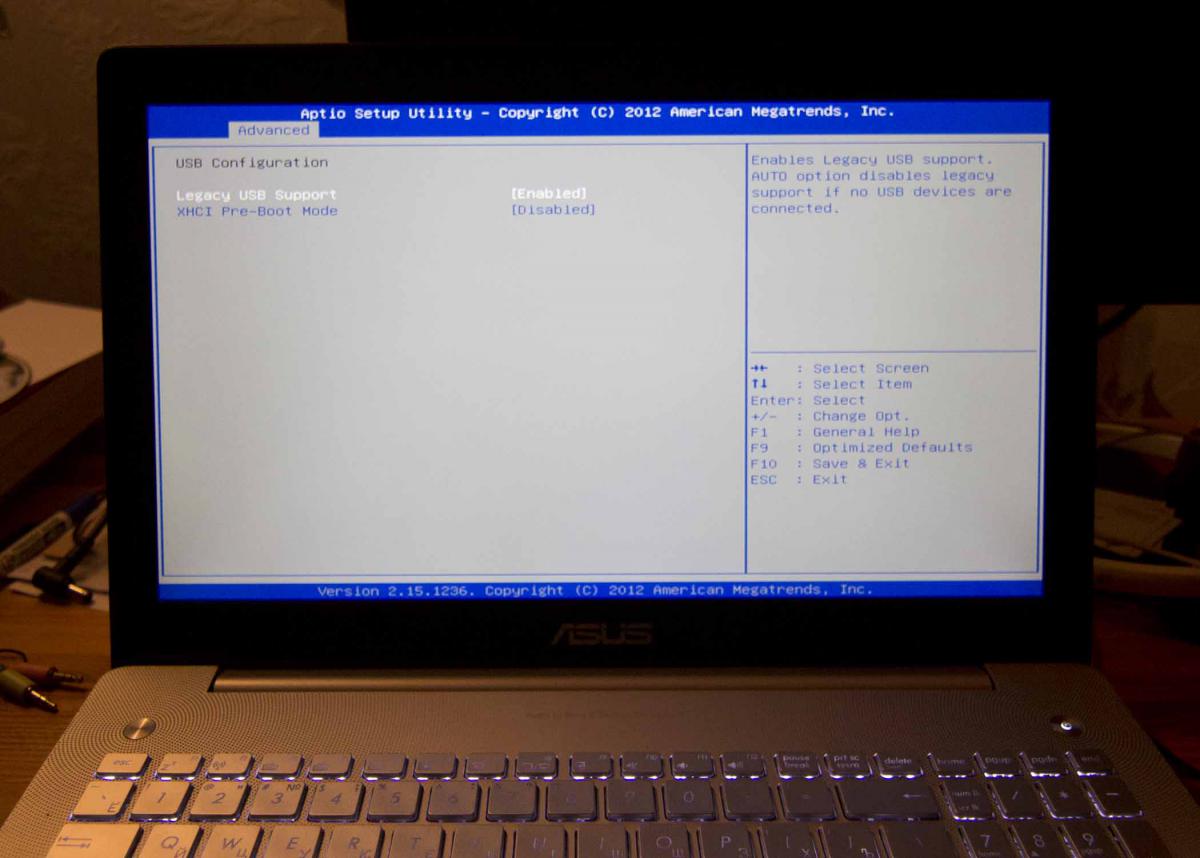
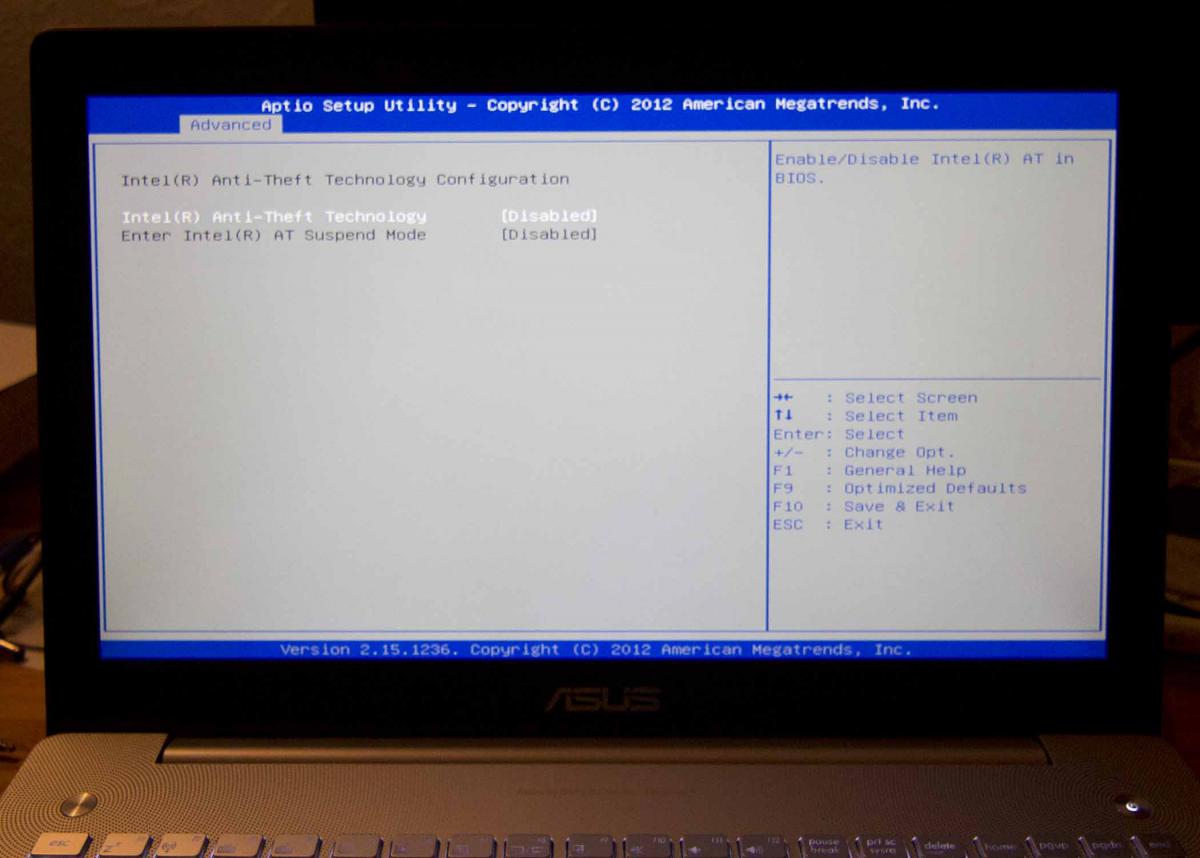
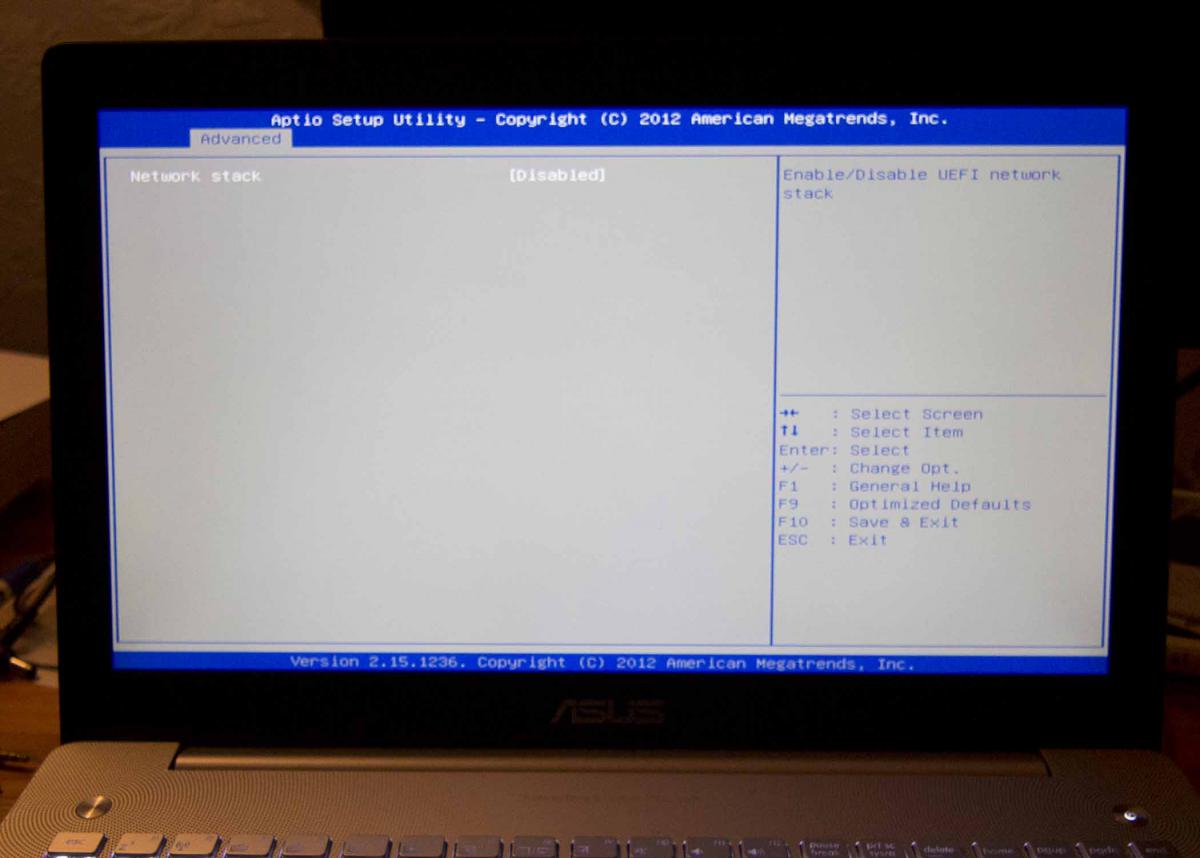
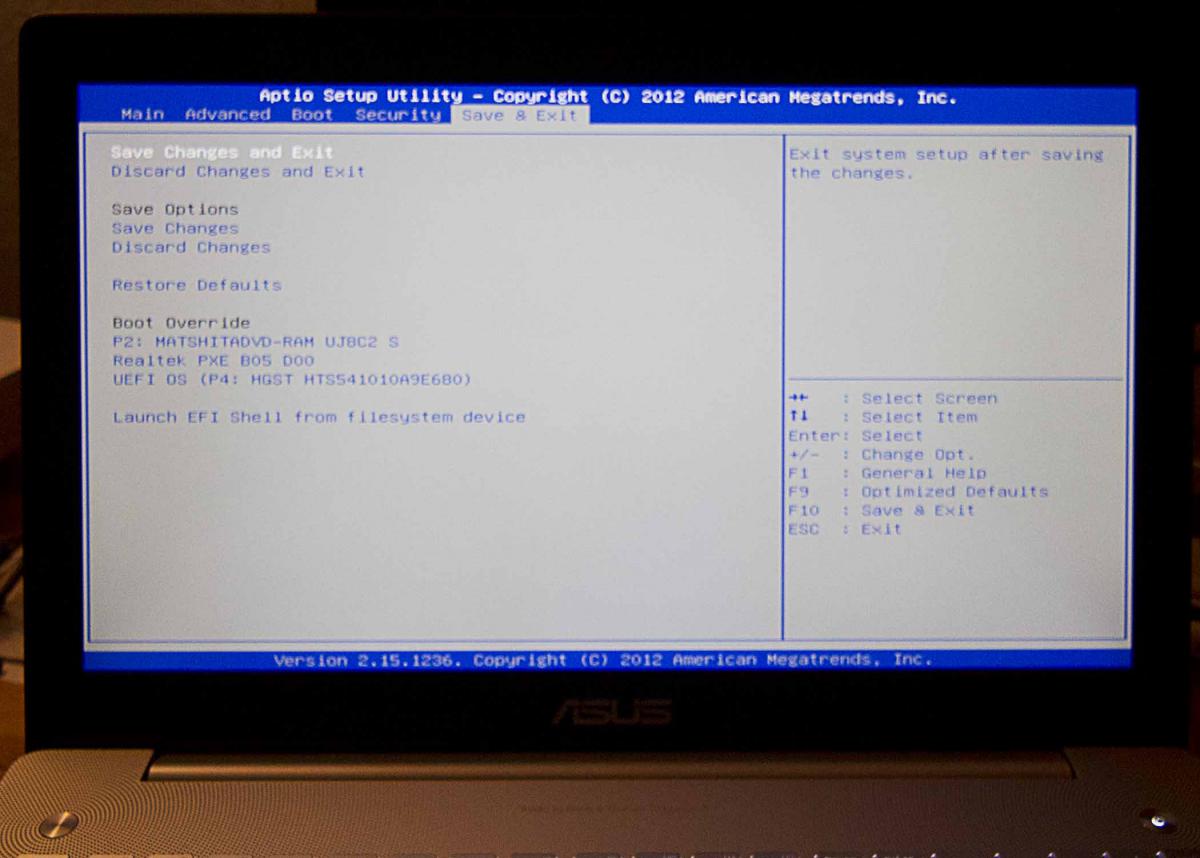
Hello everyone! I'm Italian and I'm new to this forum, so I'm sorry for my English. I recently replaced the optical drive of my Asus N550JV-CM149H Notebook with a HDD caddy to put a second HDD and I wanted to try installing OSX Yosemite in that HDD in dual boot with Windows 8.1 64-bit installed in the primary HDD (upgraded from Windows 8 64-bit through the Windows Store with all Asus factory defaults). So I have a few questions for you: 1) What are the differences between installing OSX Yosemite trough Chameleon or Clover? Is Clover better for UEFI Motherboards? 2) I tried to follow some Clover OSX Installation guides (this and this https://applelife.ru/threads/asus-n550jv-n750jv-na-haswell.41594/) for my Notebook in order to set the correct BIOS settings and OSX kexts. Are the kexts for OSX Mavericks compatible with OSX Yosemite? Are the UEFI settings in the attached images correct? 3) If I install OS X Yosemite on the second HDD (which by the way is installed in the SATA port 0 as the primary HDD is installed in SATA port 1 as you can see in the attached image), I might have problems of HDD priority or problems with the Windows Boot Manager for launching Windows? There are little specs of my Notebook: NOTEBOOK: Asus N550JV-CM149H MOTHERBOARD CHIPSET: Intel Lynx Point HM86, Intel Haswell BIOS: American Megatrends Inc. Ami Bios N550JV.208 (DMI, ACPI, UEFI) CPU: Mobile QuadCore Intel Core i7-4700HQ, 3400 MHz GPU: NVIDIA GeForce GT 750M 4 GB DDR3, Intel HD Graphics 4600 RAM: 2x SK Hynix HMT41GS6AFR8A-PB 8 GB DDR3-1600 DDR3 SDRAM WIFI: Qualcomm Atheros AR9485WB-EG Wireless Network Adapter ETHERNET: Realtek RTL8168/8111 PCI-E Gigabit Ethernet Adapter (PHY: Realtek RL8111) PCI BLUETOOTH: Qualcomm Atheros AR3012 Bluetooth 4.0 + HS TOUCHSCREEN: ELAN PS/2 Port Smart-Pad WEBCAM: USB2.0 UVC HD Webcam Is there something that may not work? Thanks in advance for the help!
-
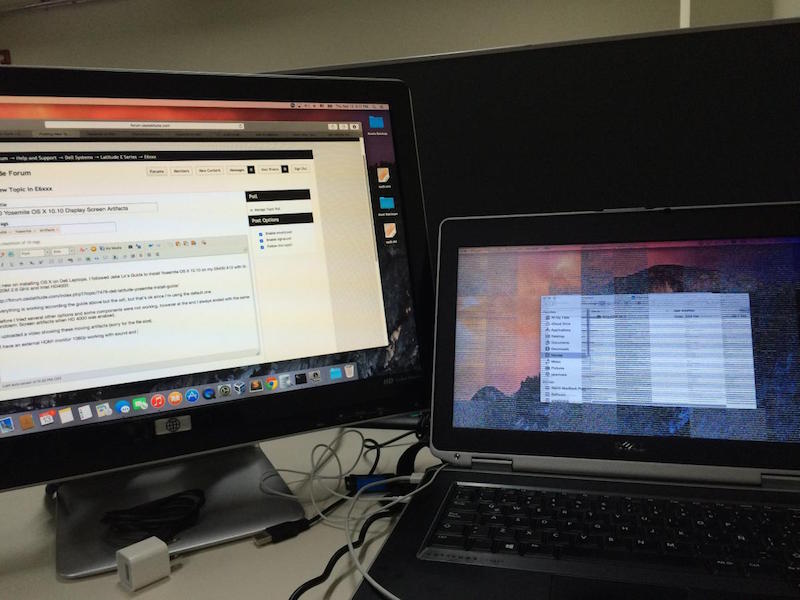
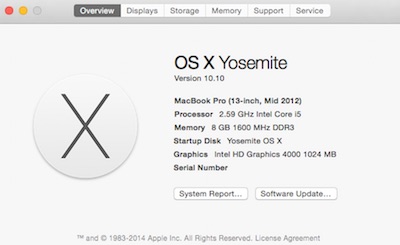
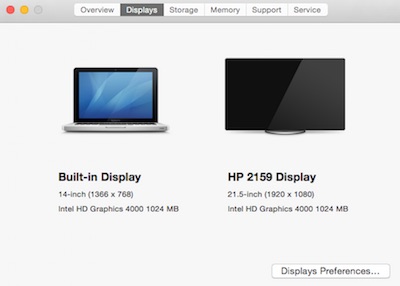
Hi I'm new on installing OS X on Dell Laptops. I followed all Jake Lo's Guide to install Yosemite OS X 10.10 on my E6430 A12 with i5-3320M 2.6 GHz and Intel HD4000 https://osxlatitude.com/index.php?/topic/7478-dell-latitude-yosemite-install-guide/ Everything is working according the guide above but the wifi, but that's ok since I'm using the default one. Before I tried several other options and some components were not working, however at the end I always ended with the same problem: Screen artifacts when HD 4000 was enabled. I uploaded a video showing these moving artifacts (sorry for the file size). I have an external HDMI monitor 1080p working with sound and no artifacts or any problems at all. The built-in display on the laptop is always showing these moving artifacts and lines. I really appreciate any help please. Thanks in advance E6430 A12 i5 3320M 2.6 GHz 8 GB RAM Regards Alex IMG_5568.MOV DSDT_ssdt_boot_smbios.zip
-
Hi Folks, I was able to get Yosemite up and running on my e6320 and wanted to start a thread to iron out the last few wrinkles and help others get started. If anyone has this laptop and/or can help with the final issues, it would be greatly appreciated. Working: -Ethernet -Sound -Graphics (Display Port via Dock, DVI via Dock, Internal Display) -Sleep -Function Buttons, Trackpad, Volume Keys etc -Wireless (swapped older macbook pro card in) -SD Card Reader (working with patched AppleSDXC) Not Working: -Webcam (This has never worked, i believe it may not ever work) -VGA Output -HDMI Output (HDMI screens are recognized, but will display fully blank) Not Tested: -HDMI Audio To create the installation media, I followed the guide here (summarized below) You will need an 8GB+ flash drive, and an existing OSX installation Open Disk Utility (/Applications/Utilities/Disk Utility) and Partition your flash drive as Master Boot Record, 1 Partition, HFS+ named "Yosemite". Download Install OS X Yosemite.app Right click on the installer (Found in /Applications) > show package contents Navigate to Contents/Shared Support and double click on the InstallESD.dmg (The .dmg should now mount and appear on your desktop) In the terminal issue the following command: open "/Volumes/OS X Install ESD/BaseSystem.dmg" Open Disk Utility and Restore the BaseSystem.dmg to your flash drive Issue the following commands in terminal: cp "/Volumes/OS X Install ESD/BaseSystem.dmg" /Volumes/Yosemite/ cp -a "/Volumes/OS X Install ESD/BaseSystem.chunklist" /Volumes/Yosemite/ rm /Volumes/Yosemite/System/Installation/Packages cp -a /Volumes/OS\ X\ Install\ ESD/Packages /Volumes/Yosemite/System/Installation/Packages Now install Clover to your USB drive. (download it from here) Selecting the options shown in the linked image: http://imgur.com/if2O3hQ Merge all the files in the attached zip into the "CLOVER" folder on your Flash drive (done via terminal command below, if you downloaded the zip to your Downloads folder) cp -R ~/Downloads/CLOVER/* /EFI/CLOVER/ Once you have completed the install, repeat the Clover install and Kext / DSDT copy over to your installed HDD. CLOVER.zip
-
Hello, I've created a Yosemite installation USB using Uni-Beast (f*ck sensored words). I'm booting the installation using the following flags: USBBusFix=Yes GraphicsEnabler=No -v -f It boots, but before the GUI should start, I'm getting a black screen. The USB stops loading screen, I've been waiting for about 10 minutes. Unfortunately I can't show you any errors because the black screen is just "showing" too fast. Could anyone help me with this? Thank you!
-
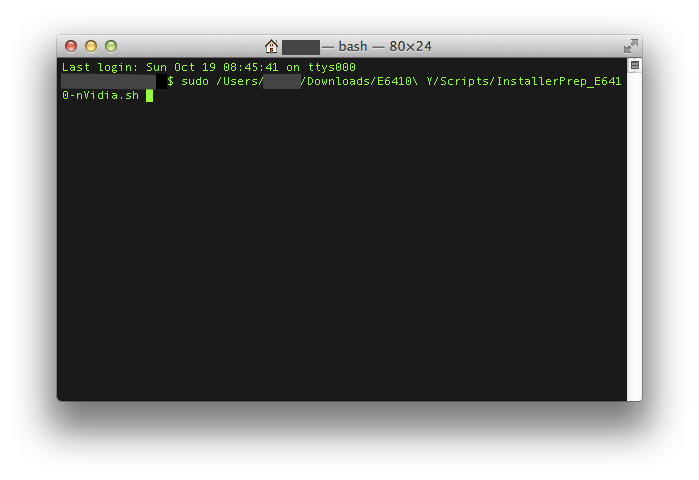
The Guide (DiskMaker X, Chameleon) Hello all, As of last night/this morning, I finally got my E6410 nVidia to work with OS X Yosemite! This is my third guide for the E6410 nVidia (the first one was on Mountain Lion, the second on Mavericks). Since myHack 4.0 is not ready yet, I have written this guide to use DiskMaker X, Chameleon 2.2 r2401, and a couple of shell scripts written by myself. Feel free to examine or modify the scripts to conform to your needs. If you do however, please note any changes you make so we can help you if you need it. If you experience any problems with the guide, please refer to the Troubleshooting section in Post #3. The machine I am working with is a Dell Latitude E6410 with nVidia graphics: 2.53 GHz Intel Core i5 4 GB 1067 MHz DDR3 NVS 3100M 512 MB BIOS version A14 What works: Webcam Trackpad & Nub (thanks to bpedman and yeahoon) Wifi - Dell 1510/Broadcom 4322 (thanks to Darvinko) Ethernet Graphics (1280x800; max resolution for my LCD) Bluetooth (thanks to alerphjuan) Two-Finger Scrolling with Trackpad SD Card Reader Audio What doesn't work: Sleep iMessage/FaceTime Before you begin: If you are new to this, please first read about what a hackintosh is and what creating/using/maintaing one entails (a simple google search for "hackintosh" worked for me) Read through this guide COMPLETELY before beginning This guide assumes that you have backed up all your data (if you need it) and are okay with erasing EVERYTHING on your hard drive I am not responsible if your laptop doesn't turn out as you'd hoped/expected (don't expect everything to work ) Although this guide may look long and daunting, it should only take about 1-3 hours (3.5 hours max). I tried to make it as quick and easy as I could If you have any questions/comments/concerns that you would like to share, please post them in the Help & Support -> Dell Systems -> Latitude E Series -> E6xxx -> E6410 (nVidia/Intel (depending on your graphics configuration)) - Yosemite Help Thread: http://forum.osxlati...forum/51-e6xxx/ If you have agreed with/done the above, you may proceed with the guide... You will need the following: A working Mac/Hackintosh A Dell Latitude E6410 with an nVidia NVS 3100M (the guide assumes you have the NVS 3100M Graphics Card, though it should still work with Intel Graphics, just without QE/CI, or full graphics accelleration), A12 (or greater) BIOS A hard drive that you are okay with erasing completely An 8 GB or greater flash drive that you are okay with erasing A copy of OS X Yosemite from the Mac App Store (It's free!) This zip file:E6410 Y.zip Patience, hope, and a pinch of faith in the guide Once you have those 7 things (the last one especially ), continue... Upgrade/Clean Installs and MBR Support: For those of you coming from any version of Mountain Lion/Mavericks that was previously installed on your E6410 using my old guide, you may skip Steps 19-28 if you would like to perform an "Upgrade" installation. Simply select the partition that you have Mountian Lion/Mavericks on and install. For those of you that never had OS X on your E6410 or those that just want to start fresh, you will need to perform a "Clean" install. Please read through the entire guide and complete all steps for the best results. Also, for those who have MBR Disks, you can install Yosemite by copying the OSInstall.frawework file from the MBR Support folder to "[iNSTALLER ROOT]/System/Library/PrivateFrameworks/" after you finish Creating the Installer. You may be prompted to Overwrite/put your password in. Select yes and input your password when prompted. Creating the Installer Make sure your Yosemite copy is in the Applications folder on your working Mac/Hackintosh Extract the E6410 Y.zip file that you downloaded above to a convenient location. No matter where you do it, just remember the location! Plug in your 8 GB or greater flash drive nowNOTE: If the drive doesn't show up on the desktop/in Finder, make sure it is partitioned/formatted as the following (you may use Disk Utility to do this): 1 Partition, GUID Partition Table, and Mac OSX Extended (Journaled) Open the E6410 M folder and then the Applications folder. Run DiskMaker X 4b4 by double-clicking it and "Open" if asked if you want to open it Click "Yosemite (10.10)" The program should find the copy of Yosemite in your Applications folder as long as you didn't rename it. If it did, click "Use this copy" and proceed. If it doesn't/finds a copy located somewhere else, click "Use another copy" and select the right one. Choose "An 8 GB USB thumb drive" and select the flash drive (NOTE: Make sure you select the correct one if you have more than one connected to your system; the application will erase the selected flash drive) You will then be warned about erasing the disk. If it is the right one, select "Erase then create the disk" Click "Continue" at the next promptNOTE: Try not to do/run any other applications while this is running. It opens windows and modifies things via the GUI. You may also miss certain prompts. If you do, the program has a tendency to timeout, causing you to re-run it and start over. After about a minute, you will receive a prompt to enter administrative credentials. Enter this here and click "Ok" The process will take 20-40 minutes depending on the computer/flash drive being used When it finishes, you will hear a "roar"... at this time click "Quit" to exit or "Make a donation" to support the creator Rename your flash drive to "E6410Y" by finding "Yosemite Install Disk - 10.10" in the Finder sidebar, right clicking it, and then selecting "Rename 'Yosemite Install Disk - 10.10'" Return to the Applications folder inside the E6410 Y folder. Run Chameleon-2.2svn-r2401 by double-clicking it. Click "Continue" (x3) Click "Agree" when prompted Click "Change Install Location ..." Select the E6410Y drive in the list and click "Continue" Next, click "Install" When prompted, enter your administrative password. After about 3-10 seconds, it should finish. Click "Close" when it does. Now, return to the E6410 Y folder and find Scripts. Open it, and find the InstallerPrep_E6410-nVidia.sh and InstallerPrep_E6410-Intel.sh. Keep this window open and move on to the next step. Open up Terminal (Spotlight search for it or navigate to /Applications/Utilities), type in "sudo[sPACE]" (without the quotes) and drag the correct version of the InstallerPrep shell script to the Terminal window. It should look something like this (for nVidia): NOTE: Your window will most likely look different then mine (black text, white background); I just have a different theme enabled. Hit the Enter/Return key and type in your password. You won't see each character show up, but once you're done, just hit Enter/Return and if you entered it correctly, the script will run. When it finishes, press any key to exit the script Eject the Drive and disconnect it from the machine Installation Plug your Installation flash drive into the E6410 Make sure your battery life is greater than 50% if you plan on not connecting to a power source Turn on the laptop and press F12 to enter the "One time boot menu..." Select "BIOS Setup" from the list by using the up and down arrow keys to scroll and the Enter button to select Click on "Load Defaults" and then OK At the warning (If you get one), click OK Then, expand the "System Configuration" settings (in the left pane) by clicking on the red "+" next to it Click on "SATA Operation" (also in the left pane) and select "AHCI" At the warning (If you get one), click OK Expand the "Virtualization Support" settings (in the left pane) Click on "Enable VT for Direct I/O" Uncheck "Enable VT for Direct I/O" Click on "Apply" in the bottom right and then "Exit" Turn the machine back on if it doesn't come up by itself and press F12 again to enter the "One time boot menu..." At the menu, select "USB Storage Device" When you reach the bootloader (the silver screen with different hard drives and flash drives on it), make sure the "E6410Y" is selected and wait for the computer to boot If you (and I) did everything right, the machine should boot up into the installer without a hitch (If it doesn't, refer to the Troubleshooting post below) Select your language and click on the arrow below to continueSTART SKIPPING STEPS HERE FOR UPGRADE INSTALLATIONS At the next screen, select "Utilities" from the menu bar on top Click on "Disk Utility" When it opens, select the hard drive (not the partition; you should see a "Partition" tab to the right; you won't see this if you've selected a partition) you are okay with erasing completely (again, make sure it's the right one) When you've verified you've selected the hard drive, navigate to the "Partition" tab (again, you won't see this if you selected a partition) Select "1 Partition" from the drop-down under "Partition Layout" (unless you're an advanced user; then you can select as many as you need/want) Then, next to "Format", select "Mac OS Extended (Journaled)" Give your partition a name (on a normal mac, the partition is normally labeled "Macintosh HD") Then click on "Options..." and make sure "GUID Partition Table" is selected; if it's not, select it Lastly, click on "Apply" When that finishes, hit Command+Q (or just click the red "X" in the top left of the window) You should now be at the Install OS X screen now; Click "Continue" and "Agree"STOP SKIPPING STEPS HERE FOR UPGRADE INSTALLATIONS Select the partition/disk you would like to install OS X to and click "Install" (and "Continue" if not connected to a power source) The process will take about 20-50 minutes If/when the machine reboots (you may have to hold down the power button to turn it off, and then press it again to turn it back on), press F12 again and boot from the "USB Storage Device" Press a key to interrupt the boot from USB, select the drive/partition on which you installed Yosemite and boot the OS Post Installation Proceed through the Setup process When you reach the Desktop, open up System Preferences and then Security & Privacy in the top row Click the little padlock in the bottom left of the window and enter your password Click the bubble next to "Anywhere" and then click "Allow From Anywhere" when prompted Close System Preferences and navigate to the E6410 Y folder on the flash drive Open up the Applications folder and then run Chameleon-2.2svn-r2401 Click "Continue" (x3) Click "Agree" when prompted Click "Change Install Location ..." if the drive currently selected is not the correct one. If it is, proceed to Step 11. Select the drive/partition you installed drive in the list and click "Continue" Next, click "Install" When prompted, enter your administrative password After about 3-10 seconds, it should finish. Click "Close" when it does. Now, return to the E6410 Y folder and find Scripts. Open Terminal and type "sudo[sPACE]" (without the quotes) and drag the correct version of the PostInstall shell script to the Terminal window. See the above picture... Hit the Enter/Return key and type in your password. You won't see each character show up, but once you're done, just hit Enter/Return and if you entered it correctly, the script will run. When it finishes, press any key to exit the script Eject the Drive and disconnect it from the machine Reboot You should see the bootloader now and it should begin loading Yosemite shortly. Enjoy OS X Yosemite on your E6410! Finally, I would like to thank everyone who has helped make this a possibility (Special thanks to Darvinko, Tengokuu, dafob, jebediah, alerphjuan, jansenspencer, roar2000, Dr. Monkey, and the everyone else over in the Mountain Lion and Mavericks Help threads), bpedman & yeahoon (for the trackpad/trackstick) as well as the creator of DiskMaker X. I couldn't have gotten this working without them. Remember: If you have any questions/comments/concerns that you would like to share, please post them in the Help & Support -> Dell Systems -> Latitude E Series -> E6xxx -> E6410 (nVidia/Intel (depending on your graphics configuration)) - Yosemite Help Thread: http://forum.osxlati...forum/51-e6xxx/
-
Hi, I've been desperately trying in vain, to get Yosemite to install on my Dell E5540. My Specs: Dell E5540 with I5-4310U @2GHz 8GB RAM Intel HD4400 with Nvidia Gforce GT720M Intel Ethernet I218-LM Network Card (I've disabled the un-suported Intel WIFI) AHCI is Enabled for SATA I've followed the below guide to no avail (along with other guides in the forums) https://osxlatitude.com/index.php?/topic/6461-guide-e7440-with-clover/&do=findComment&comment=36589 Not once have I been able to get to the Installation screen. Could someone please enlighten me as to what I'm doing wrong... (With Mavericks I tried the patched Mach_Kernel for 10.9.4 which also resulted in a continuous boot loop) I've attached my EFI Folder along with the modified DSDT.aml file. All Im looking to do, is to get LAN / Sound & Video working on Yosemite. EFI.zip
-
Hey folks - I was wondering if anybody got a working App Store Yosemite 10.10 build to install using myhack on the E6500 and if so if they can post instructions? or using unifail for that matter? Anyone know what version of myhack supports it (or does any version support 10.10 as of right now)? I just got 10.9.5 to install and I am hoping to just be able to switch to 10.10 ....But that all depends on what the fine folks on this site which i rely on so much so can do !!!
-
hello rufabf, regarding your guide, can you send your dsdt