Search the Community
Showing results for tags 'chromeos'.
-
Morning, Lets face facts, as nice as ChromeOS might be - the animations is a big fail from Google - this half-wit implementation is utterly slow and when you have alot of tabs and android apps open - extremely lagging. So.. lets kill it fire.. sortof anyway - ironicly - Google is here for the saving. Orginal link: https://appuals.com/disable-chromeos-window-animation/ First of all - You need to be in dev mode (face facts, doing anything cool with your chromebook requires that) - and before you can get into that - you will properly need to reset your device - meaning.. DO BACKUP. Anyway, once you are in dev mode, its fairly easy. 1. Popup a shell: CTRL+ALT+T 2. Type: shell (to open a shell) 3. Type: sudo su (to be come root) Now, we need to modify a file call chrome_dev.conf which is located in ETC, but changing that might cause it to be overwritten on a firmware update.. so lets make a copy of it and do a mount. Type this: cp /etc/chrome_dev.conf /usr/local mount --bind /usr/local/chrome_dev.conf /etc/chrome_dev.conf echo '--wm-window-animations-disabled' >> /etc/chrome_dev.conf restart ui exit This should effectively kill most animations and make your chromeos feel alot faster. //Leon
- 1 reply
-
- chromeos
- animations
-
(and 1 more)
Tagged with:
-
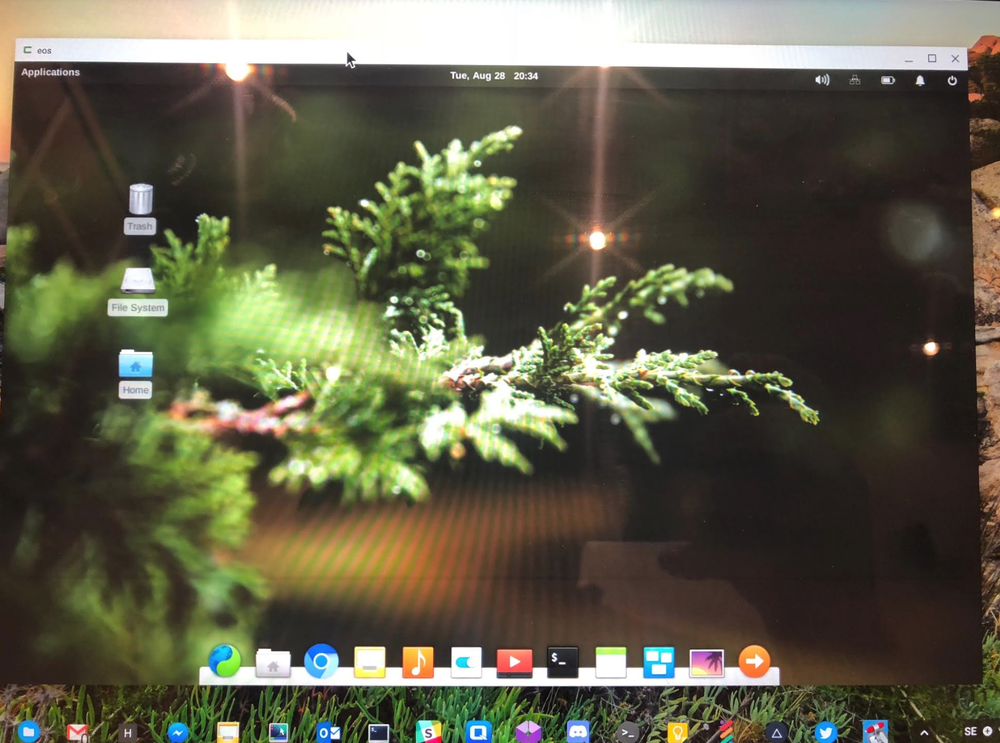
Hi, In a earlier thread we discussed howto make a good container for running Ubuntu 16.x with the unity interface - and while unity is a pretty sweet interface - Elementary OS might just suit us macOS geeks a tad better - sadly, no such target exists in crouton today and the solutions found on github for adding it dosent seem stable .. or well.. buggy at best. So, how now the best solution seems to install a standard ubuntu with xfce4 and modify it to suit our needs. I can't take the credits for making this guide - but i did put together a crouton backup that you can download directly from OSXL. Download link: http://files.osxlatitude.com/leon/crouton/eos-20180828-1804.tar.gz Quick restore guide: 0. As always, you need to be in developer mode, have crouton on your machine at have created atleast one machine 1. Download the file into your downloads folder 2. Open a console CTRL+ALT+T, change to shell and nagivate to your download folder 4. Now restore the container with: sudo edit-chroot -f /media/removable/your_path_on_drive_to_backup_file -r chrootname_of_your_choice 5. After restore, test to run it with "sudo startxfce4" 6. If it dident work to run it, try upgrading it with XIWI (notice that need to have the XIWI plugin installed in chrome for that to work) ... type: sudo sh ~/Downloads/crouton -t xiwi -u -n chroot_name_that_you_used_before If you did everything right you should get something pretty like this... btw.. user is "lsb" and password is "123123" ------ If you rather wanna do the hard work urself - just follow this guide: http://bobsbitsandbytes.blogspot.com/2013/09/installing-pantheon-theme-on-chromebook.html Enjoy!
-
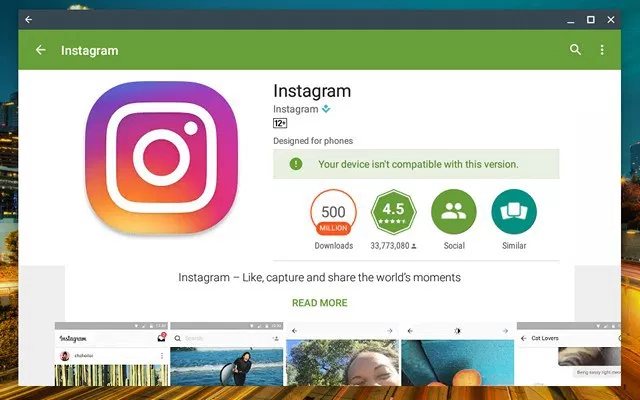
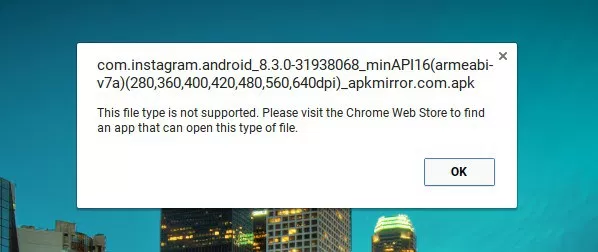
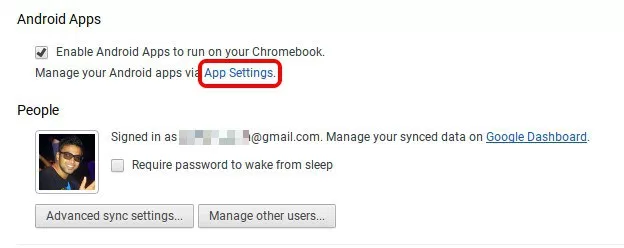
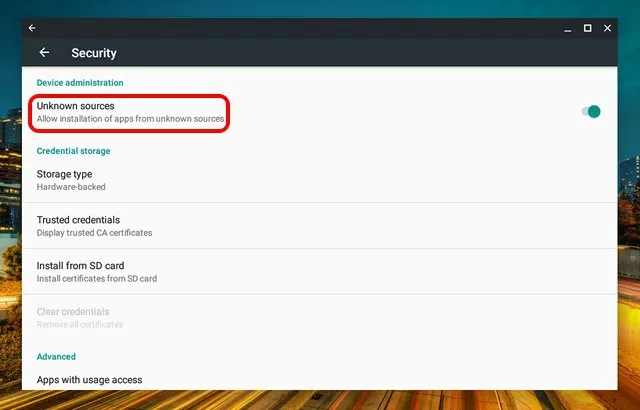
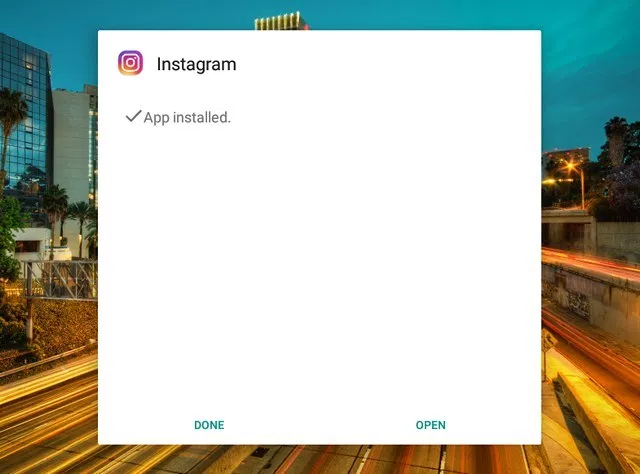
Orginal: https://beebom.com/how-to-install-android-apps-from-apk-files-on-chromebook/ Android apps coming to Chromebooks might very well be the defining moment for Google’s Chrome OS platform. In our usage of Android apps on Chromebook, we have found Chromebook’s functionality to have multiplied innumerably. However, there’s one catch, that is, many apps on the Play Store aren’t compatible with the Chromebook. For instance, apps like WhatsApp, Instagram, Uber, Inbox by Gmail, Chromecast, PayPal and more are incompatible because of various reasons like the fact that Play Store treats the Chromebook as an Android 6.0 tablet, the lack of GPS on Chromebooks etc. Thankfully, you can always sideload Android apps through APK files but Chromebook natively does not support these files. The good news is, there’s a way to install APK files on Chromebook and that’s what we are about to tell you. So, without further ado, let’s get on with it, shall we? Note: To install APKs, you will have to enable “Unknown Sources” and the option is only available on Chromebooks with developer mode enabled. To do it, check out our detailed post on how to enable developer mode on Chromebook. The Play Store is available on the Chrome OS 53 update through the developer channel and it’s only available for Chromebook Flip, as of now. So, before you try to install any APK files, check out our post on how to get Play Store. If you have the aforementioned Chrome OS build, here are the steps to install APK files on Chromebook: 1. Firstly, you will need a file manager Android app from the Play Store. So, open up Play Store and install the file manager you want. We used Solid Explorer in our test. 2. Then, download the APK files of apps you want to install from APKMirror.com. Meanwhile, go to Chrome OS Settings and click on “App Settings” in the Android Apps section. 3. The Android like Settings page should open up. Here, go to Security and turn on “Unknown sources”. 4. Once the APK file is downloaded, open the file manager app and go to the Downloads folder. Here, open the APK file and you should see the usual app installation interface from Android. Press “Install“. 5. The app installation might take a little longer than usual but the good news is, all the APKs we tried to install, did install without any fuss. Once the app is installed, tap “Open” to start using the app. Note: While most of the apps install via the APK files route, not all of them work. For instance, Instagram works fine but apps like Uber, which require location services don’t work.
-
Orginal: https://www.reddit.com/r/Crostini/wiki/howto/backup How to Backup Containers Performing routine backups is always a good practice, and containers are no exception. Currently, this process is not the most straightforward due to the locked down termina VM, so here's how you can protect your data in case you need to powerwash. Everything will assume working with the default penguin container when you enable Linux within Chrome OS settings. Backup We will use LXC/LXD's image management tools to create and export the image. Enter into the termina VM through crosh by pressing ctrl+alt+t in the Chrome browser. Then we must stop the container, publish it, export the image to a backup file, and put that file somewhere we can access it. The termina VM is extremely locked down and the only writable locations are /tmp and $LXD_CONF (/mnt/stateful/lxd_conf). Step 1: Stop Container An alternative way to stop container from the below instructions is to issue the command sudo shutdown -h now from within the container itself crosh> vsh termina (termina) chronos@localhost ~ $ lxc list +---------+---------+------+------+------------+-----------+ | NAME | STATE | IPV4 | IPV6 | TYPE | SNAPSHOTS | +---------+---------+------+------+------------+-----------+ | penguin | RUNNING | | | PERSISTENT | 0 | +---------+---------+------+------+------------+-----------+ (termina) chronos@localhost ~ $ lxc stop penguin --force (termina) chronos@localhost ~ $ lxc list +---------+---------+------+------+------------+-----------+ | NAME | STATE | IPV4 | IPV6 | TYPE | SNAPSHOTS | +---------+---------+------+------+------------+-----------+ | penguin | STOPPED | | | PERSISTENT | 0 | +---------+---------+------+------+------------+-----------+ Step 2: Publish Container (termina) chronos@localhost ~ $ lxc publish penguin --alias backup Container published with fingerprint: 8ff49b7f315b5253ec2c5a38c97567bb33d4bd16c957d903ace4d9d9b56e9ef9 Step 3: Export Image (termina) chronos@localhost ~ $ lxc image export backup $LXD_CONF/backup Image exported successfully! Step 4: Start Container (termina) chronos@localhost ~ $ lxc start penguin (termina) chronos@localhost ~ $ lxc list +---------+---------+------+------+------------+-----------+ | NAME | STATE | IPV4 | IPV6 | TYPE | SNAPSHOTS | +---------+---------+------+------+------------+-----------+ | penguin | RUNNING | | | PERSISTENT | 0 | +---------+---------+------+------+------------+-----------+ Step 5: Push Backup File Into Container Because of the locked down nature of the termina VM, we can't easily get at the file we just created so we will move it into our container's home directory where it will appear within the Chrome OS Files App. Note: you have to substitute "YOURUSERNAME" in the path below with the username in your penguin container. (termina) chronos@localhost ~ $ lxc file push $LXD_CONF/backup.tar.gz penguin/home/YOURUSERNAME/backup.tar.gz Alternate Step 5 Instead of simply pushing the file to the VM, we can mount the $LXD_CONF directory in our penguin container. This makes it much easier to use in the long run, saves on storage, and avoids the no space left on device error. (termina) chronos@localhost ~ $ lxc config device add penguin lxd-conf disk source=$LXD_CONF path=/mnt/lxd_conf This creates a directory inside the container at /mnt/lxd_config that contains all of our images. Use the mv command inside penguin to move the backup to your user directory and finally use ChromeOs's files app to move the backup somewhere safe! USERNAME@penguin ~ $ sudo mv /mnt/lxd_conf/FILENAME.tar.gz /home/USERNAME/FILENAME.tar.gz Copy the file out of your Linux Files in the ChromeOS File App and you are done! Step 6: Access your Backup File from Files App You can now open your Files App in Chrome OS, browse to Linux Files and access your backup file. Restore This section is in need of updating and isn't up to date with the above backup section. Feel free to take a moment and improve on it This is essentially the reverse of the backup steps. Once your archive is inside some "helper" container, we can pull it into the "/tmp" directory on the termina VM using the following: lxc file pull helper/tmp/backup.tar.gz /tmp We then import the image: lxc image import /tmp/backup.tar.gz --alias backup Finally we can create a new container using this image instead of the default Google image: lxc init backup penguin Issues With 4+ GB Images (or Anything Other Files) and Getting Them into Termina This sub-section was updated on 7/24/18 and is tested working on a Pixelbook running the Dev Channel Version 69.0.3473.0, in case this breaks later There are some odd issues with the way lxd works which end up making it difficult to import large files into Termina. Images can, however, quickly surpass this size, presenting obvious issues. Luckily, there is a process to get around this. First, you will need to use the split command to break apart your file into pieces smaller than 4 GB. To be safe, I will tell it to make 3 GB files. USERNAME@penguin ~ $ split -b 3GB backup.tar.gz backupSplit.tar.gz. This command will produce as many 3 GB files as needed to break apart all of backup.tar.gz into parts. (6GB = 2 files) The parts will have names backupSplit.tar.gz.aa backupSplit.tar.gz.ab backupSplit.tar.gz.ac ... backupSplit.tar.gz.zz. Then, use any method (see Alternate Step 5 above for my personal favorite method) to get the new 3GB files into termina. Once they are all there, we will use the cat command to recombine them. <useless nerd stuff> This command, short for catinate, is really interesting. It basically prints out the raw contents of any file in Linux, even those such as tar files that we wouldn't normally consider to have any raw content. This works because what split is doing is actually cutting the raw data at that point. These two tools, originally meant to work with text files and generally do totally different things, work together really well in this use case! Anyway, we can then use the linux commands > and >>, called append, to take the raw command line output output of catand add it to a file, as we'll see in a second. > just stores the would-be command line output to the file specified after the command while >> specifically appends the output to the end of the specified output. </useless nerd stuff> Method 1 We can do the recombination in a few ways. If it's just a few files, we can do it this way: (termina) chronos@localhost ~ $ cat backupSplit.tar.gz.aa > backupRecompiled.tar.gz (termina) chronos@localhost ~ $ cat backupSplit.tar.gz.ab >> backupRecompiled.tar.gz (termina) chronos@localhost ~ $ cat backupSplit.tar.gz.ac >> backupRecompiled.tar.gz This takes the raw content of the first file backupSplit.tar.gz.aa and puts it in backupRecompiled.tar.gz. It then appends the contents of backupSplit.tar.gz.ab and backupSplit.tar.gz.acto the end of that file. Method 2 If for some reason you have a stupidly huge backup that produces more than ~5 parts, you will want to do this in a better way. This better way is to use something of which I forgot the name (someone please correct me!), but basically acts as a for loop in this case. See below: (termina) chronos@localhost ~ $ cat backupSplit.tar.gz.?? > backupRecompiled.tar.gz This uses the question mark wildcards (??) to have the cat command run on all of the files starting with backupSplit.tar.gz. and ending with any two characters. I am listing both Methods 1 and 2 here is because 1) Method 1 is a better explanation of how these commands work and 2) Method 1 worked better for me (Method 2 should work and is the more elegant solution, but I guess it didn't feel like it on my system ¯\_(ツ)_/¯) After you have your full, recombined image in termina, proceed back up the section on restoring and start with lxc image import. Good luck with your data recovery!


