
Leaderboard

Popular Content
Showing content with the highest reputation on 08/13/19 in Posts
-
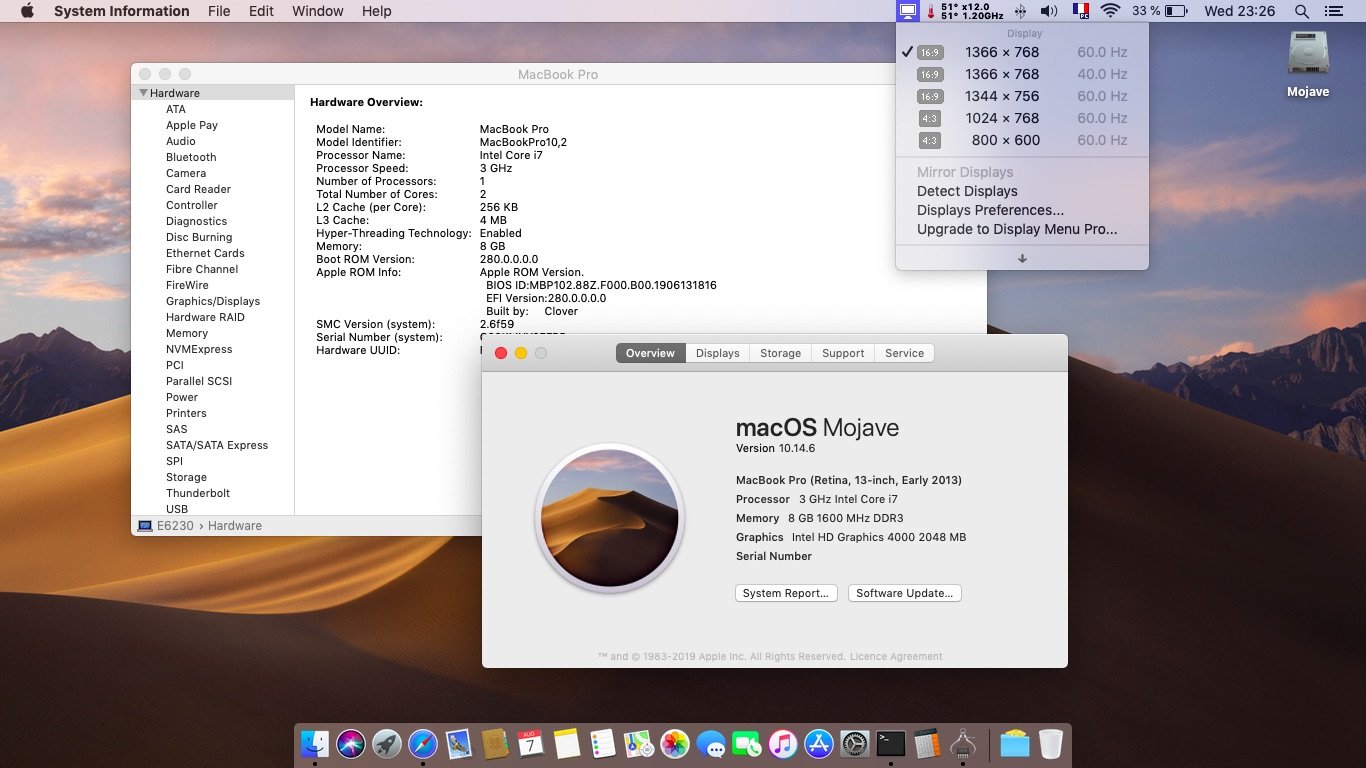
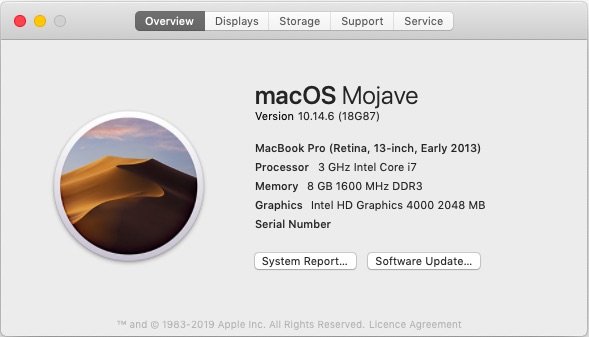
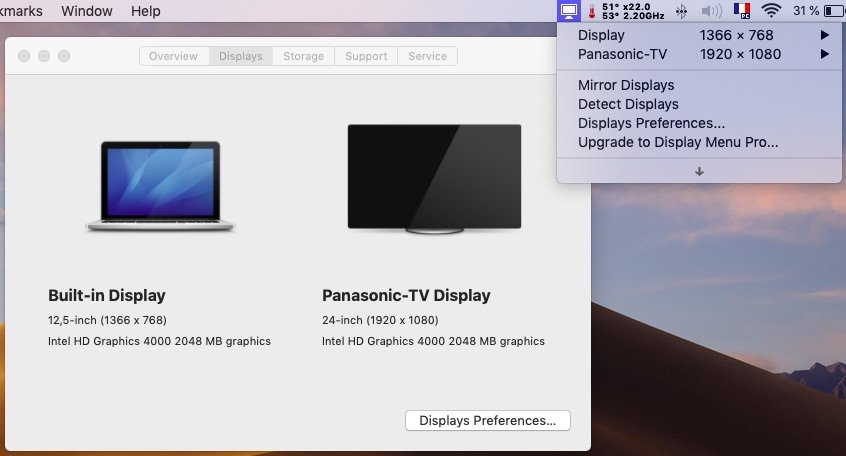
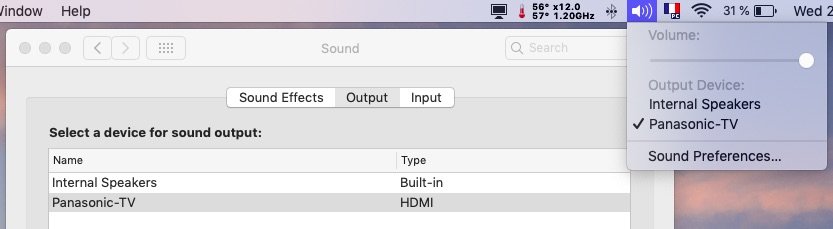
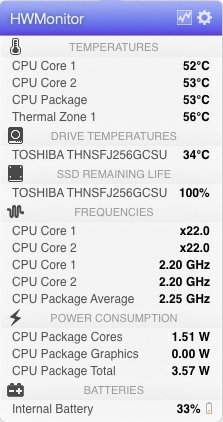
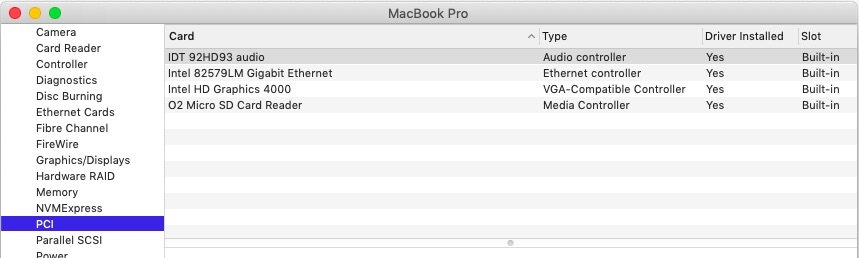
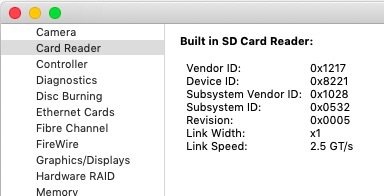
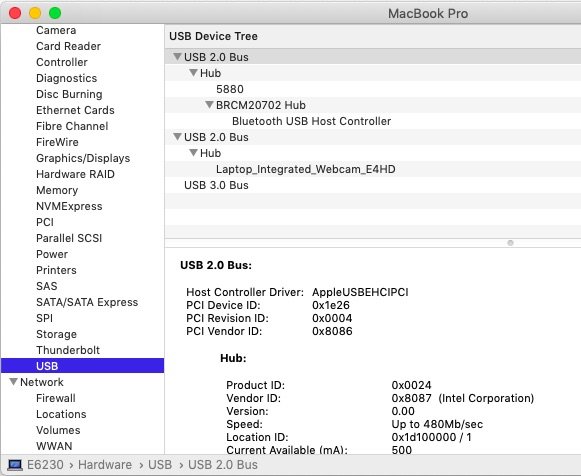
Last update: 29 Mar 2020 Target macOS release: Mojave 10.14.x This is a Clover-based installation using the well-known/well documented vanilla method detailed below: Working: full graphics acceleration on Intel HD4000 graphics (with Lilu v1.3.7 + WEG v1.3.0) multi-display with HDMI OOB audio, including jack microphone input and headset output (with AppleALC v1.3.9 & layout 12 + CodecCommander v2.7.1) HDMI audio (with Capri Framebuffer patch) built-in GigEthernet LAN connection (with AppleIntelE1000e v3.1.0 or latest IntelMausiEthernet kext) wireless and bluetooth with any compatible card integrated webcam (OOB) full CPU power management, including Turbo boost (with CPU-specific generated ssdt) sleep (Lid, Energy Saver settings, Apple menu, Fn-F1, PWR button) & wake (Lid, PWR button) battery management (with ACPIBatteryManager v1.90.1) SD card reader (with DSDT patch for compatibility with Apple's default reader) keyboard (with Dr Hurt's VoodooPS2Controller R6 + DSDT patch for brightness control) touchpad including tap-to-click (with Dr Hurt's VoodooPS2Controller R6) left combo eSATA/USB2.0 + right USB3.0 ports (with Hackintool's generated USBPorts + Rehabman's FakePCIID kexts for multiplexing) ExpressCard slot OOB Not working: VGA output unsupported Not tested: SmartCard reader fingerprint scanner GeekBench v2.4.4 (32bit) gives a slightly improved 8100+ rating: 1) 10.14 USB installer creation Using a USB key of 16GB minimum, create a Mojave USB installer through the following Terminal command: sudo <path>/Install\ macOS\ Mojave.app/Contents/Resources/createinstallmedia --volume /Volumes/<USB key> where: <path> = location of Mojave installation package (eg: /Applications if freshly downloaded) <USB key> = name of formatted USB volume (eg: USB_16GB) The process will take several minutes. Once completed: Setup your BIOS for UEFI mode install Clover bootloader on the USB installer with the following customised settings: Clover for UEFI booting only Install Clover in the ESP UEFI Drivers AudioDxe DataHubDxe FSInject SMCHelper ApfsDriverLoader AptioMemoryFix Fat PartitionDxe Ps2MouseDxe UsbMouse.Dxe VBoxHfs Themes (optional) Install Clover Preference Pane (optional) you may use version r5035 attached below: Clover_v2.5k_r5035.pkg.zip once Clover is installed, run Clover Configurator app and mount the freshly created EFI partition of the USB installer Clover Configurator.zip open this EFI partition and transfer the files & folders from the Latitude E6230 Mojave Clover pack below to the EFI/Clover folder: E6230_Mojave_pack.zip E6230_Mojave_pack_#2.zip E6230_Mojave_pack#3.zip E6230_Mojave_pack_#4.zip if your E6230 is fitted with a different CPU than those cared for in the bootpack (i5-3340M/i7-3540M), remove the SSDT.aml table from Clover's EFI/Clover/ACPI/patched folder (default table is for i7-3540M); you'll generate you own CPU-specific power management table in post-installation phase. 2) 10.14 installation boot the Mojave USB installer at the Clover main menu, select the "Install macOS Mojave" partition (but don't press [ENTER]) press [SPACE], select -v verbose option in the menu, then choose to boot with the selected options proceed with installation, creating & formatting the target Mojave installation through Disk Utility as/if required on 1st reboot, boot off the USB installer and select the freshly created "macOS install from <target Mojave partition>" repeat this until this partition is no longer offered and only the target Mojave partition is left to boot Reboot the target Mojave partition via your USB installer 3) Post-installation tuning Once the target Mojave partition has booted, complete the 1st boot configuration tuning Once at the desktop, install Clover bootloader on the Mojave partition/disk with the customised settings listed above Once Clover is installed, launch Clover Configurator app and mount the freshly created EFI partition of the Mojave partition/disk Open this EFI partition and transfer the files & folders from the above Latitude E6230 Mojave Clover pack to the EFI/Clover folder You may then reboot and verify that Mojave boots off your disk through Clover If your E6230 is fitted with a different CPU than the models stated above, download Pike R Alpha's SSDT generator tool and generate your own CPU-specific SSDT. Copy the resulting SSDT.aml file to Clover's EFI/Clover/ACPI/patched folder. - - - - - - - - - - Edit #1: 16 Aug 2019 Updated pack #2: revised patched (A19) DSDT to fix to a small coding error causing issues with battery monitoring. - - - - - - - - - - Edit #2: 20 Aug 2019 Updated pack #3: added the USBPorts kext I had forgotten in pack #2. - - - - - - - - - - Edit #3: 29 Mar 2020 Updated pack #4: fixed a small copy/paste mistake in HDMI audio patch in pack #3.
 1 point

This leaderboard is set to London/GMT+01:00