Hervé
-
Posts
10077 -
Joined
-
Last visited
-
Days Won
569
Content Type
Profiles
Articles, News and Tips
Forums
Everything posted by Hervé
-
I've had that in the past; it was my USB installer. Afer making a new one, all was Ok.
-
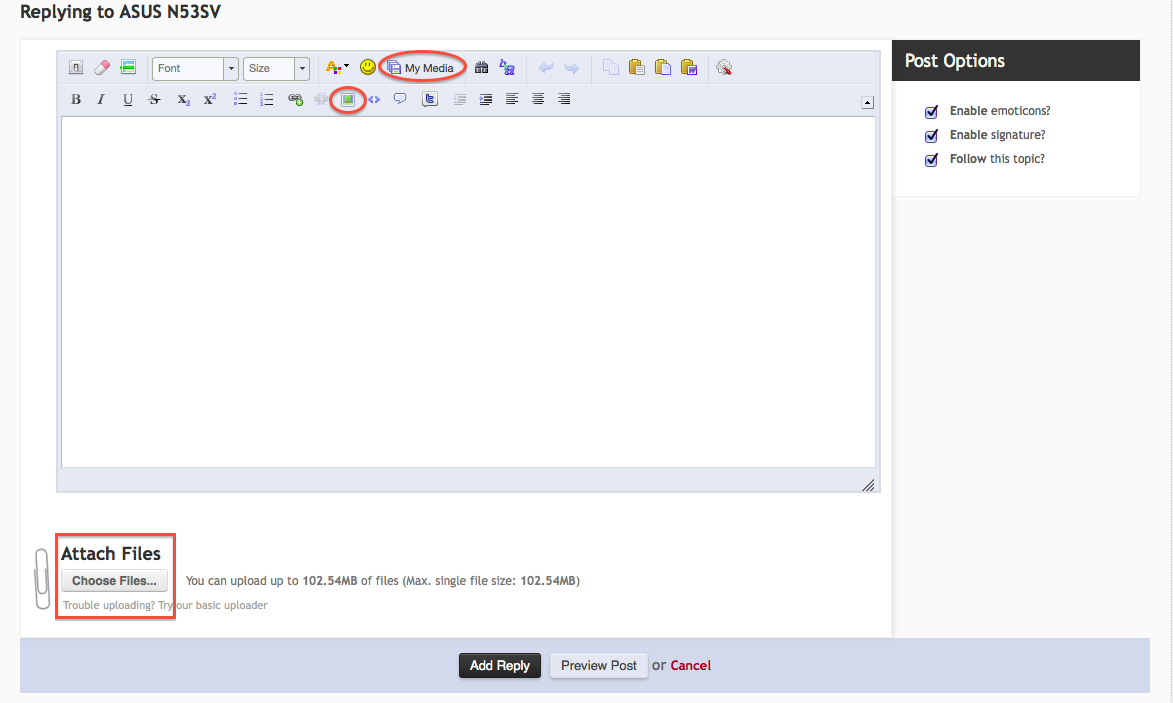
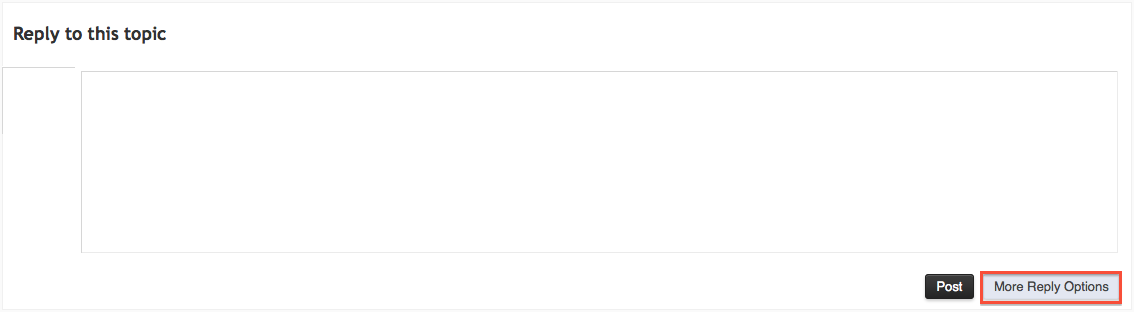
Come on! Ever noticed the "More Reply options" button?

-

E6410 with nVidia NVS 3100M graphics - Mountain Lion Guide
Hervé replied to v3ct0r's topic in The Archive
10.8.3 is perfectly Ok, as long as it's a retail version. -
Actually, copy the attached Chameleon boot file to the root of your Lion partition, that will sort you out. Overwrite the existing file. Cham_boot_v2251.zip
-
Mmm, 'just realised the BCM5751 kext is 32bit only, so if you're still booting with option x86_64, you won't have Ethernet, true. I take it you've been unable to install Chameleon Wizard and update to Chameleon v2248 or above, right? Try and boot off your myHack USB installer, then interrupt Chameleon and select your Lion HDD partition to boot Lion. If that fails, I'll send you the Chameleon boot file to copy to the HDD root.
-
Good, then as long as you have the AppleBCM5751Ethernet kext in /Extra/Extensions (i.e. you've used the D820 bootpack), the Ethernet port should work. PS: By now, you should also know what to do with that Intel wireless card...
-
No Ethernet? Mmm, that is one of the essentials covered by the boot pack (unlike wireless which depends on the specific card...) and I've just verified that SL + Lion D820 boot packs do contain the BCM5751 kext. All is Ok on that front. Don't you see the card in the Network Preferences Panel at all, even if you try to add an interface? Can you post the output of the Terminal command lspci -nn and list the kexts you have in /Extra/Extensions?
-
E6410 with nVidia NVS 3100M graphics - Mountain Lion Guide
Hervé replied to v3ct0r's topic in The Archive
Yes, sounds like installation is a bit screwed then... -
v0.2.1? That must be quite old. I briefly had a D420 earlier this year (on which I put SL 10.6.8) and noticed no issue with VoodooHDA v2.7.x or 2.8.x, I can't remember which one it was exactly. Probably the 2.7.2/2.7.3 and or 2.8.1/2.8.2 we have in EDP.
-
Having installed Mac OS X, now is the time for the EDP System Build.
-
E6410 with nVidia NVS 3100M graphics - Mountain Lion Guide
Hervé replied to v3ct0r's topic in The Archive
Try and repair your permissions with Disk Utility -
E6410 with nVidia NVS 3100M graphics - Mountain Lion Guide
Hervé replied to v3ct0r's topic in The Archive
myHack normally takes care of deleting and rebuilding the cache in /S/L/C/com.kext.apple.caches/... but you can do it manually in case permissions got screwed. Can't give you a link from the top of my head, but it certainly is on kexts.com. Google for it. Last version is 4.2.2, but if you use an earlier version, you'll be prompted to update. -
E6410 with nVidia NVS 3100M graphics - Mountain Lion Guide
Hervé replied to v3ct0r's topic in The Archive
Cham Wizard is a great tool, I highly recommend it. Great to edit boot plist and select SMBIOS plist; Perfect to update Chameleon or switch to different versions. -
Use the D820 pack, unless it causes you issue, but I would not think so. Only then may you use the D620 pack.
-
E6410 with nVidia NVS 3100M graphics - Mountain Lion Guide
Hervé replied to v3ct0r's topic in The Archive
You're running a Vanilla installation, right? Can you post a screencopy of your boot plist when opened in Cham Wizard? -
What was the issue? And with which version of VoodooHDA?
-
If you used myHack3.2, there's an issue booting in 32bit mode. You can either make a new installer with myHack3.1.2 or try and boot the existing one with option: arch=x86_64. After installation is done, you'd have to do the same thing until you update to Chameleon v2248 or later. Please read Announcements&News + EDP Bugs section, the issue is well detailed there. It's obviously not visible enough since people keep asking this same thing on and on...
-
E6410 with nVidia NVS 3100M graphics - Mountain Lion Guide
Hervé replied to v3ct0r's topic in The Archive
Is Kext Wizard actually compatible with Lion and ML in the way it actually handles cache? I've never used it since switching to myHack to avoid conflicts like Mario said. -
E6410 with nVidia NVS 3100M graphics - Mountain Lion Guide
Hervé replied to v3ct0r's topic in The Archive
Try to delete the cache and manually re-create it. -
Apple changed IOBluetoothFamily kext in 10.8.5 again (made it very much like in Mavericks) so you'll probably need to patch the kext to recover Bluetooth. They've basically added a new PlugIn (whose name eludes me right now) that seems to overwrite individual manufacturer's kexts (eg: CSR) and that appears to kill off most Bluetooth adapters. However, if you patch the appropriate PlugIn kext with your hardware PCI ids, you should get BT services again. I helped Leon that way after he updated one of his laptops to ML 10.8.5 last week. For audio, try to switch to VoodooHDA if you have not already done so. Again, audio loss or trouble is being repeatedly reported by Hackintosh users after updating to 10.8.5.
-
E6410 with nVidia NVS 3100M graphics - Mountain Lion Guide
Hervé replied to v3ct0r's topic in The Archive
I'm quite surprised you mention Extensions.mkext as that was last seen on Leopard or Snow Leopard as far as I know. Unless I'm massively mistaken, that is no longer used in Lion or ML. Your cache can be found in /System/Library/Cache/com.apple.kext.caches/Startup. You would normally see files of the following sort: pc20:Startup admin$ ls -l total 21464 -rw-r--r-- 1 root wheel 81911 Sep 19 22:46 IOKitPersonalities_i386.ioplist.gz -rw-r--r-- 1 root wheel 41 Sep 19 22:46 KextPropertyValues_OSBundleHelper_i386.plist.gz -rw-r--r-- 1 root wheel 10902476 Sep 19 22:46 kernel cache You can manually rebuild your cache with the kextcache CLI command. For instance: sudo touch /System/Libraries/Extensions sudo kextcache -system-prelinked-kernel -
E6410 with nVidia NVS 3100M graphics - Mountain Lion Guide
Hervé replied to v3ct0r's topic in The Archive
Hi, there's a couple of things you can check: 1) status of -f flag in the Chameleon boot plist; it should be off. 2) presence/absence of any rogue manual boot option at Chameleon bootstrap; press a key at Chameleon delay bar to check if any cache related option or boot flag has remained after the ?: prompt or not. If you find something, delete it, boot your system and once you're back into OS X, remove the NVRAM plist file that is in /Extra. Then reboot and evaluate how it goes... -
No such BIOS option on those D620/D820 models, no. For the rest, look up EDP pages for compatibility table and bootpack, you'll have your answer... You could also browse the forum section dedicated to D8xx models.
-
Anyone installed 10.8.5 successfully on their E65xx?
Hervé replied to daspazz's topic in The Archive
With ML, ANV-Slice PS2 kexts are kind of a must... So, opt for that in EDP System Build if it's not the default setting. -
After a surge of articles last Spring, September is looking busy again on the article front with very practical stuff published so far this month. There will be more to come of course... Keep tuned to the web site too.