All Activity
- Earlier
-

Elitebook 840 G3: issues with apps after waking from sleep
Hervé replied to thadrumr's topic in HP Systems
Weird. -

Elitebook 840 G3: issues with apps after waking from sleep
thadrumr replied to thadrumr's topic in HP Systems
Sorry to necro this thread but I was able to fix video playback after sleep. For some reason you need to enable "remote management" for video playback to work after sleep. -
I've tried OCLP with my GT210 in Monterey and Ventura and it doesn't offer a patch (works great with my HD4000 IGPU, though, so I'm quite confident I'm doing it the right way ). My guess is that it may support Tesla cards in Big Sur but not after.
-
 gelhimother changed their profile photo
 -
Unsure if this link is allowed. This is a link towards Github with a working EFI for Tahoe 26.2. Change the SMBIOS and it works flawlessly.
-
 riky67 changed their profile photo
 -
There were no major differences in the DSDT. There were only minor discrepancies, such as the _CRS values for Device (PCI0) and the presence or absence of Gigabit LAN on RP06. I’ll continue investigating to see if there’s anything else that can be done.
-
Hi, it's all a little long in the tooth after so many years now but the Latitude D630 and D830 with nVidia dGPU were very close cousins of these Inspiron 1520 laptops. You may want to compare the DSDT/ACPI tables of both models with those of your Inspiron 1520 on the basis that there were no shutdown/reboot issues on the D630/D830 under Mac OS X/OS X/macOS..
-
I have discovered a potential fix for the long-standing shutdown issues on the Dell Inspiron 1520 (ICH8M + NVIDIA GPU). It appears that a significant delay (Sleep) is required to achieve a successful shutdown. By writing 0 to SLP_SMI_EN to disable SMI generation, followed by a long Sleep command—specifically Sleep(0xFFFF) or at least Sleep(0x2710)—I have successfully achieved shutdowns on macOS 10.4 through 10.7, as well as 13, 14, and 15. Short delays like Sleep(0x10) or Sleep(0x16) invariably result in failure. like: Method (_PTS, 1, NotSerialized) { If (LEqual (Arg0, 0x05)) { Store (Zero, SLPE) Sleep (0xFFFF) } } The behavior varies across different macOS versions: 10.8 - 10.10: Unstable. Sometimes it succeeds, but often the screen goes black while the fans continue to spin, or the system reboots. 10.11 - 10.12: Always results in a reboot. 10.13 - macOS 12: The screen turns off, but the fans stay on indefinitely. The reason why success rates are higher in very old and very new versions, while mid-era OS versions are unstable, remains unknown. Furthermore, it takes approximately 30 seconds to 1 minute for the hardware to complete the shutdown process. This suggests that the hardware requires a significantly longer time to prepare for power-off compared to other machines of the same generation. This is almost certainly due to a firmware bug. While this is an unconventional fix, It is encouraging to find a working method for these models, which were previously thought to have no consistent solution for the shutdown problem. may work for the following models: Inspiron 1420 / 1520 / 1720 Vostro 1400 / 1500 / 1700 XPS M1330 Note that rebooting is also unstable on these models, sometimes succeeding and sometimes failing, likely due to a similar underlying cause. What I have tested so far: USB Power: Investigated behaviors around USB power, but it doesn't seem to be the cause. OSID: Tested with 0x10 (Windows XP) and 0x20 (Windows Vista), but with no significant change. BIOS Settings: Disabled LAN, Wi-Fi, Bluetooth, SDHC, and Module Bay in the BIOS, but the issue persists. The following older thread might also be helpful for reference: https://www.insanelymac.com/forum/topic/266803-dsdt-shutdown-nvidia-dells-not-zero-slpe-trick-alternate-ich8-method/ If you have any insights, suggestions, or ideas for a more fundamental solution, please let me know. Any feedback would be greatly appreciated!
-
this efi works to install and load bigsur but the OC is really old ive tried the updater but i get oc: grabbed zero system-id for sb this is not allowed maybe this will help someone....i hope as the file size was too big i could only get the kext's and bits, you need open core 0.7.2 and this booted BigSur 10.7.10 this includes the plist and files i couldnt get the TP to work properly but it sees battery wifi etc my bios is 1.42.0 OC072.zip ive found an Open Core updater used that and then open this plist and look for secureboot and it might say its setting is default i chose "disabled" and it now boots BigSur again just need upto date Kext now
-
Platforms compatibility & requirements for OS X/macOS
Hervé replied to Hervé's topic in Intel Platforms
Updated following the release of macOS Tahoe. -
 Dell Inspiron 14 5458 (Broadwell-U) - OpenCore Legacy Patcher - Mojave 100% working! Install Notes: use of /Library/Extensions for kexts that do not inject through bootloader. https://www.dropbox.com/scl/fi/ql7q9atvhff55t2vxsr3k/Dell-Inspiron-14-5458-macOS-Support.zip?rlkey=ld6a9f43ecs0davrq0dqjqc8b&st=k17s9k98&dl=0 I see this Model going for $100... its not *SO cheap if you Upgrade the RAM to 16gb.... I'm getting the full 2gb vram, and macOS doesnt page to disk so thats nice... Some maintenance: 1) System and user cache for a substantial problem fix and speed issues /Library/Cache ~/Library/Cache Delete the contents, not the folders. 2) macOS won't boot open DiskUtility and repair permissions... some people cant use pfix(maps) If it's completely broken: sudo chown root:admin / sudo touch /System/Library/Extensions 3) Rebuilding kextcache In Terminal: sudo chmod -Rf 755 /S*/L*/E* sudo chmod -Rf 755 /L*/E* sudo chown -Rf 0:0 /S*/L*/E* sudo chown -Rf 0:0 /L*/E* sudo kextcache -i / Then reboot. 4) Rebuild prelinked kernel kernelcache -i /Volumes/macOS 5) Fixing broken fonts and icons sudo rm -rfv /Library/Caches/com.apple.iconservices.store sudo find /private/var/folders/ \( -name com.apple.dock.iconcache -or -name com.apple.iconservices \) -exec rm -rfv {} \ sudo touch /Applications/* killall Dock killall Finder sudo atsutil databases -remove The only thing you can do about a kext that was not signed or has an invalid signature is rebuild cache and hope that gatekeeper picks it up
-

Lenovo X1C5 : DP (or HDMI) working but can't get 4K output
jamieakers replied to jamieakers's topic in Lenovo systems
Just wanted to follow up on this and give you a big thank you Herve for your advice - and you were absolutely right that 64MB is required. I've been surviving with a lower resolution, but thought "enough is enough" and a week ago bought a programmer (£5 from Amazon) and then carefully followed the steps here: https://github.com/tylernguyen/x1c6-hackintosh/blob/main/docs/BIOS/modding-the-BIOS.md I had Macronix BIOS but the normal instructions worked absolutely fine, just another command-line argument to add. Was extremely nervous doing this! Rebooted into BIOS and the Advanced menu was visible. So, upped the video memory to 64MB and with few other changes I've now got glorious 4K from my X1 Carbon Gen 5 using the DisplayPort over USB-C. One cable!
-
 slinger2g changed their profile photo
 -

Kernel panic while upgrading to Tahoe, thinkpad i7 10th gen laptop
Baio77 replied to pawan2joy's topic in Lenovo systems
Can you also attach the ioreg? Do you have duplicates in ACPI, You use SSDT X390, which already includes several patches. This could cause system instability. For the trackpad, you use too many Kexts, the PS2 Kext. You must disable the plug-ins if you use I2C Kexts. This also causes problems, except for the keyboard. -

Kernel panic while upgrading to Tahoe, thinkpad i7 10th gen laptop
pawan2joy replied to pawan2joy's topic in Lenovo systems
Im able to install but my only issue is Trackpad clicking doesnt work properly and USB mouse deoesnt get detected.. if i map my OC folder with proptree it works but i get kernel panic. removed itwlm and IO80211FamilyLegacy.kext, AppleALC.kext skipped for size issues EFI.zip -
Kernel panic while upgrading to Tahoe, thinkpad i7 10th gen laptop
pawan2joy replied to pawan2joy's topic in Lenovo systems
not able tconfig.zipo make it work, if i share config.plist, can you please help. -
 Isaiah Harrison joined the community
 -
Kernel panic while upgrading to Tahoe, thinkpad i7 10th gen laptop
Hervé replied to pawan2joy's topic in Lenovo systems
Moved to the support section. Again, this thread is not a guide, please post in the relevant section! Yes, you need to update your usual add-on kexts: Lilu & PlugIns, RestrictEvents, AMFIPass, etc. See this thread about early findings with 1st Beta version and/or this one. If you need more, you know the drill... -
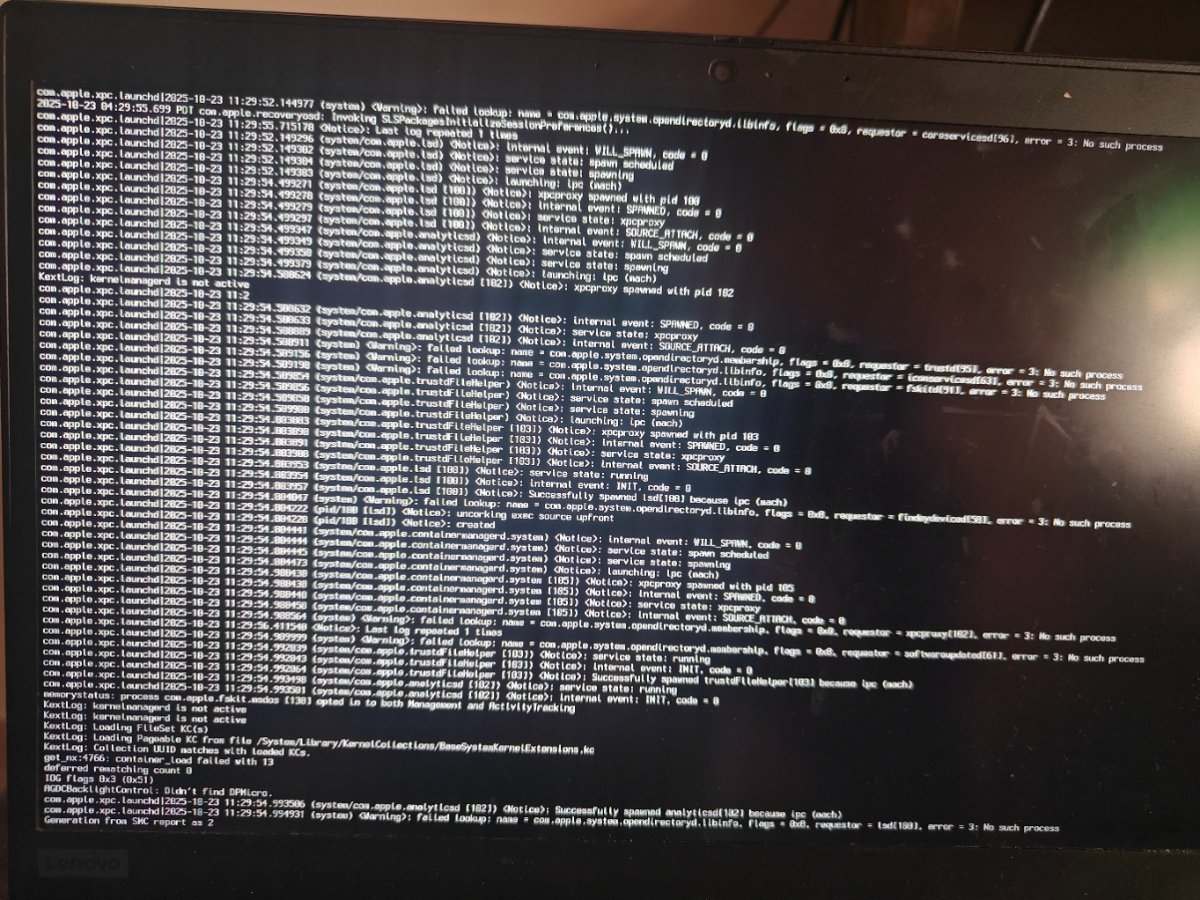
HI, I have Lenovo thinkpad i7 10th gen laptop successfully running Sequoia with Opencore, while upgrading to Tahoe, its giving KP as per attached screenshot. Do i need use any Bootargs specifically for Tahoe or need to update any Kexts.
-
 Gisz changed their profile photo
 -
Gisz joined the community
-
 Danalozai joined the community
 -
 BrettWeigel joined the community
 -
Lenovo X1C5 : DP (or HDMI) working but can't get 4K output
jamieakers replied to jamieakers's topic in Lenovo systems
Thank you for your assistance, I've learnt a lot and i really appreciate it. -
Lenovo X1C5 : DP (or HDMI) working but can't get 4K output
Hervé replied to jamieakers's topic in Lenovo systems
Actually, 00009000 is 9MB and 00003001 is 19MB. As I mentioned before, 4K usually requires a minimum of 64MB of pre-allocated DVMT so that the selected framebuffer can be run natively without patching. This is a value set in BIOS so, given yours is set to 32MB, you must find a way to patch BIOS. No way around this as far as I know. -
Lenovo X1C5 : DP (or HDMI) working but can't get 4K output
jamieakers replied to jamieakers's topic in Lenovo systems
You'll be delighted to hear your assumption is spot on correct... tried this and it booted absolutely fine, but no 4k output. Not sure what I was thinking, yes you're correct of course the internal display is connected to port 0 LVDS. Clearly been a long day at work! Thank you for your explanation here. This really helped and cleared up my confusion... and there seems to be plenty of confusion around these values on various sites around the web!! I tried this with framebuffer-fbmem set to 00009000 (19mb) and framebuffer-stolenmem to 00003001 (9mb) and still no luck with 4k video. Are there minimum values required to support 4k? Starting to think might just need to sort out the BIOS.
-
Lenovo X1C5 : DP (or HDMI) working but can't get 4K output
Hervé replied to jamieakers's topic in Lenovo systems
Another thing you could experiment with is switching to KBL framebuffer 0x59160000: ID: 59160000, STOLEN: 34 MB, FBMEM: 0 bytes, VRAM: 1536 MB, Flags: 0x00000B0B TOTAL STOLEN: 35 MB, TOTAL CURSOR: 1 MB (1572864 bytes), MAX STOLEN: 103 MB, MAX OVERALL: 104 MB (109588480 bytes) Model name: Intel HD Graphics KBL CRB Camellia: CamelliaDisabled (0), Freq: 1388 Hz, FreqMax: 1388 Hz Mobile: 1, PipeCount: 3, PortCount: 3, FBMemoryCount: 3 [0] busId: 0x00, pipe: 8, type: 0x00000002, flags: 0x00000098 - ConnectorLVDS [1] busId: 0x05, pipe: 9, type: 0x00000400, flags: 0x00000187 - ConnectorDP [2] busId: 0x04, pipe: 10, type: 0x00000800, flags: 0x00000187 - ConnectorHDMI 00000800 02000000 98000000 01050900 00040000 87010000 02040A00 00080000 87010000 All you'd require would then be to: 1) patch stolenmem to, say, 30MB (=0x01E00000, which you specify as 00 00 E0 01). Other value to try is 26MB (00 00 A0 01) 2) patch con1 from 01050900 00040000 87010000 to 0204A000 00080000 87010000 (using framebuffer-con1-alldata patch)) 3) patch con2 from 0204A000 00080000 87010000 to 03060A00 00040000 87010000 (using framebuffer-con2-alldata patch) This is derived from here: https://www.insanelymac.com/forum/topic/345377-surface-pro-patch-the-framebuffer-properly-to-get-rid-of-the-dvmt-assertion-patch/ I don't know if that will bring support for 4K output (probably not) but it's worth a shot. -
Lenovo X1C5 : DP (or HDMI) working but can't get 4K output
Hervé replied to jamieakers's topic in Lenovo systems
Any advanced settings in your BIOS setup? If there are no specific settings for DVMT in your laptop's BIOS, you'll have to scrounge the Net for valid information I'm afraid. But I'm pretty sure it is 32MB by default, especially if you look at the Clover config posted in the repo you mentioned in your opening post: One thing you can do, though, is experiment with fbmem and stolenmem values in the manner I described in my article linked above. As long as the sum of them remains lower than DVMT pre-allocated value, you'll be Ok. So you could try to boot with fbmem+stolenmem set to, say, 30MB, then boot with fbmem+stolenmem set to, say, 34MB. If you boot Ok with 30MB but not with 34MB, you'll know that DVMT is set to 32MB. You use KBL FB 0x591B0000 which is defined as follows: ID: 591B0000, STOLEN: 38 MB, FBMEM: 21 MB, VRAM: 1536 MB, Flags: 0x0000130B TOTAL STOLEN: 39 MB, TOTAL CURSOR: 1 MB (1572864 bytes), MAX STOLEN: 136 MB, MAX OVERALL: 137 MB (144191488 bytes) Model name: Intel HD Graphics KBL CRB Camellia: CamelliaDisabled (0), Freq: 1388 Hz, FreqMax: 1388 Hz Mobile: 1, PipeCount: 3, PortCount: 3, FBMemoryCount: 3 [0] busId: 0x00, pipe: 8, type: 0x00000002, flags: 0x00000098 - ConnectorLVDS [2] busId: 0x04, pipe: 10, type: 0x00000800, flags: 0x00000187 - ConnectorHDMI [3] busId: 0x06, pipe: 10, type: 0x00000400, flags: 0x00000187 - ConnectorDP 00000800 02000000 98000000 02040A00 00080000 87010000 03060A00 00040000 87010000 fbmem is set to 21MB stolenmem is set to 38MB You therefore need DVMT to be set to at least 64MB to support the native framebuffer without patching. There is no way around this. Afaik, you'll only be able to set DVMT to 64MB by patching your BIOS and, from what I've read on the Net, it looks like you'd need some EPROM programming equipment... If nothing seems readily available, you could always post a BIOS mod request in the Hackintosh section of the bios-mods.com forum. NB: your Lenovo X1 Carbon is a laptop so I would have expected the built-in screen to be attached to the usual connector con0, not con1 as you stated earlier.
-
Lenovo X1C5 : DP (or HDMI) working but can't get 4K output
jamieakers replied to jamieakers's topic in Lenovo systems
Thanks for looking at this and getting back to me so quickly! Tried booting without fbmem + stolenmem but KP and refuses to boot. Reinstating stolenmem gets the machine to boot without issue. As using OC 0.9.5 at the moment switched to the debug version per Dortania's instructions. Making me wonder whether the 256MB setting in BIOS does set DVMT. It's labelled "Total Graphics Memory" but if there's some way to check please let me know - I couldn't find an obvious way from searching. Attached the produced OpenCore logs. If any other files would be handy to investigate please do let me know. opencore-2025-09-30-193108.txt.zip -
Lenovo X1C5 : DP (or HDMI) working but can't get 4K output
Hervé replied to jamieakers's topic in Lenovo systems
You're highly unlikely to obtain 4K out of macOS with your current framebuffer patches: Indeed, these apply the usual video memory patches (fbmem 9MB, stolenmem 19MB)) required when Intel DVMT is limited to 32MB. If, as I understood, you've set DVMT to 256MB in BIOS, then you can get rid of your fbmem + stolenmem patches. These are not compatible with 4K operation which usually requires DVMT to be set at a minimum of 64MB. See here: https://osxlatitude.com/forums/topic/17804-dvmtstolenmemfbmemcursormem-why-do-we-patch-these-for-broadwell-and-later I therefore recommend you remove/comment out your fbmem and stolenmem patches. In the same respect, you're highly unlikely to require to set VRAM, i.e. unifiedmem, to 2GB.
-
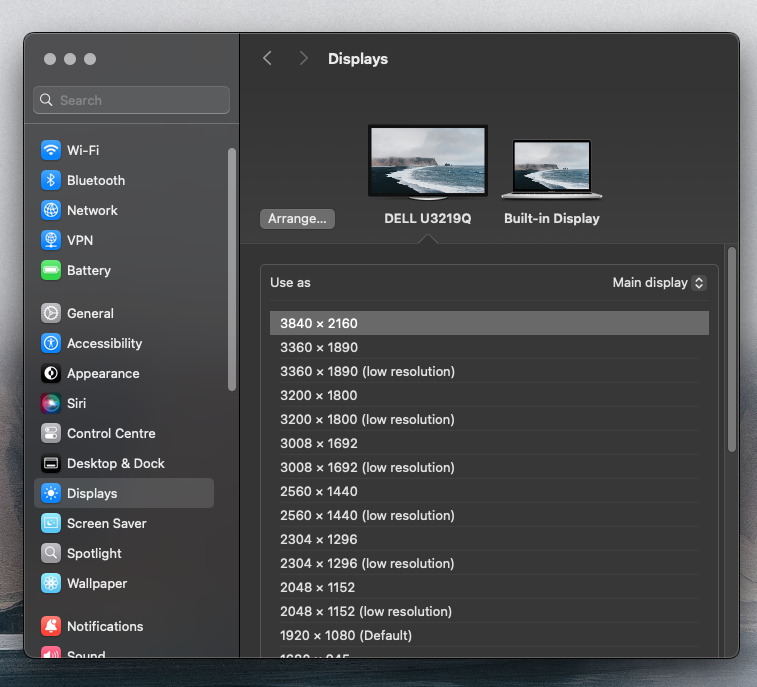
Had a good search, tried many things but cannot get 4K on my Lenovo X1 Carbon Gen 5 (Kaby Lake, Intel HD Graphics 620 ... NOT UHD Graphics 620). Setup using guide here: https://github.com/anathonous/X1C5-Hackintosh-OpenCore-MacOSX/ with my only changes being to use Heliport and itlwm.kext, and upgrading to latest versions of WhateverGreen.kext and AppleALC.kext. If it makes any difference I'm using a Dell U3219Q connected over USB-C (DP alt-mode) and it's recognised and working at 1440p, USB devices connected to the monitor also work fine (the USB isn't hotplug, not fussed about this. Audio also doesn't work but again not fussed). Booting from an Ubuntu USB stick and I get 4K - ruling out any issues with the cable or hardware. DVMT is also set at 256MB in BIOS so I don't think there's an issue there. Things I have tried... - enable-hdmi20 on and off in config.plist. No effect. - manually specifying the port as being DP in config.plist with framebuffer-con2-type (con1 is the internal panel). Black screen trying this. - a variety of AAPL,ig-platform-id taken from the WEG guide. No effect. - igfxmpc in boot-args. No effect. - igfxtypec (just in case) in boot-args. No effect. I've also validated the EDID reported to macOS is correct (checked using IORegistryExplorer) in terms of the supported resolutions. All help gratefully received, thank you! I'd prefer to get it working over USB-C but if it has to be HDMI so be it. config.plist.zip
-
 Released Sep. 15th, 2025. Version 26.0, build 25A354. Tahoe is the last version for Intel platforms and marks the end of the long road for Hackintosh computers as we've known it since 2006. It drops official support for all 8th gen. platforms + 9th gen. 2019 Coffee Lake MacBook Pro15,x and, somehow surprisingly, for 2020 Ice Lake-based MacBook Air9,1. This leaves final support for only a handful of 9th gen. and 10th gen. platforms. This being said, support for Kaby Lake graphics survives, all KBL kexts remaining present, so good news to all owners of Skylake laptops who will all be able to run Tahoe with full acceleration through the SKL graphics patch that's been available since Ventura. For other older iGPUs, patches should hopefully remain available through OCLP tool (once updated and released) to regain graphics acceleration. Officially supported Intel platforms are now limited to : 2020 iMac20,x (10th gen. Comet Lake) 2019/2020 MacBookPro16,x (9th gen. Coffee Lake and 10th gen. Ice Lake) 2019 MacPro7,1 (Cascade Lake) NB: macOS Ventura is now unsupported.


-
Topics
-