
Leaderboard

Popular Content
Showing content with the highest reputation on 11/17/18 in all areas
-
try run this to reset sudo nvram -c1 point
-
Sorry didn't look at your files until now. you don't need the DSDT and SSDT-0 -> SSDT-8 The 2 glitch patches are not needed with Whatevergreen With all that said, it still won't fix the issue. You could boot with verbose mode and you won't see the glitch...1 point
-
is your display 1080p or 4K? Try this Config, changed back to MBP15.1, with a new patch. See if it helps config.plist.zip1 point
-
Use Karabiner-Elements app, see here https://osxlatitude.com/forums/topic/9179-dell-latitude-e7x70-clover-uefi-only/?do=findComment&comment=648161 point
-
@eduardog131 No need to quote on your responds, makes it hard to read if it's only between 2 person. Give this new bootpack a try, fully hotpatched. Replaced into /EFI/Clover Remove AppleBacklightInjector.kext from /L/E or /S/L/E if you have it Repair permissions and rebuild cache @viking1304 When using AppleBacklightFixup.kext, you need to pair it with the SSDT-PNLF.aml from Rehabman's GitHub. The one used with AppleBacklightInjector.kext won't work with it. And you must disable the F%uT%04x to F%uTxxxx hot patch. You can find it in my attached bootpack. E7470_Mojave_Hotpatches.zip1 point
-
you can replace FakeSMC + ACPIBatteryManager with VirtualSMC+SMCBatteryManager the glitch is gone, but you end up with a 2-3 second black screen before login1 point
-
when you said "same thing", do you mean no graphics acceleration or not booting?1 point
-
@roniez just compress & attach the Clover folder without the themes folder1 point
-
The specs: BIOS A09 (Sata Operation -> AHCI mode, Bootlist Option -> UEFI) 4th Generation Intel Core i7-4700MQ Haswell processor (6MB Cache, up to 3.4GHz w/ Intel Turbo Boost) Slot-Loading Dual Layer DVD Burner, DVD+-RW, Stealth Black with Soft Touch Finish, 63WHr 8-Cell Primary Battery 8GB Dual Channel DDR3L at 1600MHz 750GB 7200RPM SATA III 6Gb/s Hard Drive, 256GB mSATA 14.0" High-definition WLED (1920 x 1080) 1 GB DDR5 nVidia GeForce GT 750M using NVIDIA Optimus technology Integrated Intel HD4600 GPU (PCI ven id 0x8086, dev id 0x0416) Killer NIC 1202 802.11n WiFi, Bluetooth 4.0 Killer E2200 PCI-E Gigabit Ethernet Integrated HD Webcam Realtek PCIE CardReader Backlit Keyboard 2 x USB 3.0 ports; 1 x USB 3.0 port with PowerShare; 1 x HDMI port; 1 x Mini Display-Port 1 x Audio microphone port; 1 x headphones/microphone combo port; 1 x headphone/speaker port Slots One half mini-card slot; 2 x full mini-card slots Working: Full QE/CI with HD 4600 / Disable nVidia GeForce GT 750m through DSDT/SSDT Wireless (Replaced with supported device) HDMI Video/ DP Video/ HDMI Audio Internal Speaker/Headphone/Mic USB 3.0 Webcam LAN WIP: Sleep/Wake (Wake up right away = GLAN) Update: I no longer have this system, try replacing with this DSDT for sleep dsdt.aml.zip Not Working: ExpressCard Keyboard Functions: Fn+Home = Disabled Touchpad Fn+F6, F7, F8 = Mute, volume control Fn+PageUP/PageDown = Brightness control Steps: Follow Clover UEFI Guide (v3270), replace Clover folder with Bootpack After Installation, install kexts in /EFI/Clover/Kexts/Others/LE to /Library/Extensions Repair permission and rebuild cache sudo chmod -Rf 755 /L*/E* sudo chown -Rf 0:0 /L*/E* sudo touch -f /L*/E* sudo kextcache -Boot -U / CLOVER_AlienWare14.zip
 1 point
 -
Sierra Same as El Capitan guide, just replace with attached Sierra bootpack. I no longer have this system, but this updated files should work. AlienWare14.zip1 point
-
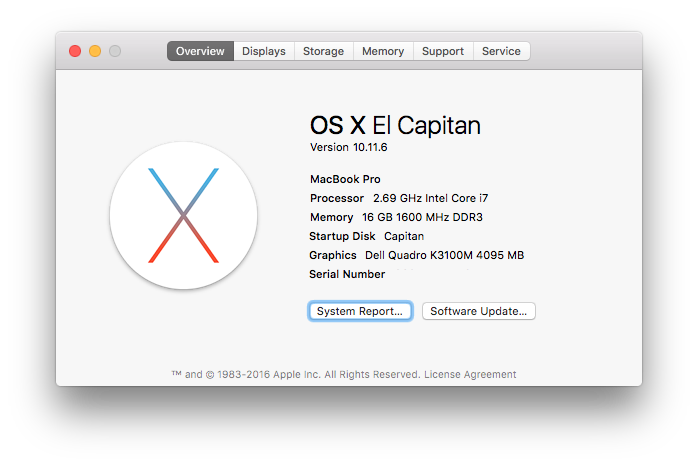
Chameleon Guide Target OS X release: Yosemite 10.10.2 The specs: BIOS A13 (needs HDD set to AHCI mode) Intel QM87 Express chipset Intel i7-4800MQ 2.69GHz quad-core Haswell-MB CPU -> needs Haswell-patched kernels integrated Intel HD4600 GPU (PCI ven id 0x8086, dev id 0x0416) discrete Nvidia Quadro K3100M GPU (PCI ven id 0x10de, dev id 0x11b6)17" 1920x1080 WideScreen LCD 16GB DDR3L-1600 RAM Intel i217-LM Gigabit Ethernet (PCI ven id 0x8086, dev id 0x153a) Realtek ALC3226 High Def audio (PCI ven id 0x8086, dev id 0x8c20) Intel wireless card 7260 (PCI ven id 0x8086, dev id 0x08b1 - unsupported) + Bluetooth 4.0 (PCI ven id 0x8087, dev id 0x07dc) Sonix Technology integrated HD webcam (USB internal, PCI ven id 0x0c45, dev id 0x64d2) O2 Micro SD card reader (PCI ven id 0x1217, dev id 0x8520) CD/DVD drive 1 x headset port 1 x mic port 1 x eSata/USB 2.0 port 4 x USB 3.0 1 x VGA 1 x HDMI 1 x DisplayPort 1 x 34mm ExpressCard BIOS Settings: Set BIOS to default. Then set SATA Operations to AHCI. Disable "Enable Switchable Graphics" Working: Full QE/CI with Nvidia Quadro K3100M (LVDS display) Wireless (Replaced with supported device) HDMI Video/ DP Video HDMI Audio with HDMIAudio.kext v1.0 ( Stop working after sleep and will require a reboot to work again) Internal Speaker/Headphone/Mic USB 3.0/USB 2.0/eSata Ports SD Card Reader DVD Player Webcam LAN WIP: HDMI Audio Fixed Sleep/Wake (not with LID close). Wake to blank screen unless AC is connected before wake. Not Working: ExpressCard SmartCard Reader Step 1: Prepare Bootable USB Drive Follow step #2 of guide here to create the Yosemite USB Installer Note: Add the patched Haswell Kernel (10.10.2) Step 2: Install OS X Yosemite Follow steps #3 from same guide above Note: Boot from the eSata/USB 2.0 combo port on the back Step 3: Post-Installation Follow steps #4 from guide above Note: Need to copy patched Haswell Kernel from Installer to HDD/SSD M6800.zip
1 point
-
Clover Guide (El Capitan & Sierra) BIOS Settings: Set BIOS (A16) to load default. Set UEFI boot option Enable Legacy ROM Option Set SATA Operations to AHCI. Disable "Enable Switchable Graphics" Disable Secure boot Disable TPM Working: Full QE/CI with Nvidia Quadro K3100M (LVDS display / not EDP) Wireless (Replaced with supported device) HDMI Video / DP Video HDMI Audio with HDMIAudio.kext v1.0 Internal Speaker/Headphone/Mic Brightness Control (Fn+F3, Fn+Insert) Fn+Prtscrn -> Disables Touchpad USB 3.0/USB 2.0/eSata Ports SD Card Reader DVD Player Webcam LAN WIP: Sleep/Wake with LID close/Open Note:Wake to blank screen and have to hard reboot unless AC is connected before wake. Not Working: ExpressCard SmartCard Reader Installation guide: Follow here to create the USB Installer, just replace El Capitan with Sierra app Post Install: When generating your own Smbios serial with Clover Configurator 4.41+, make sure to use the same Board-id from the bootpack below, otherwise blank internal screen Bootpack: M6800.zip For 10.12.4 /5 /6 M6800_Fix_Brightness.zip Credits: andrejkw (HDMIAudio), Joe82 (SDCard Reader), EmlyDinEsh, Rehabman, Piker-Alpha, Sontrg, toleda, Dr. Hurt (Alps), Mieze, Clover Team
1 point
-
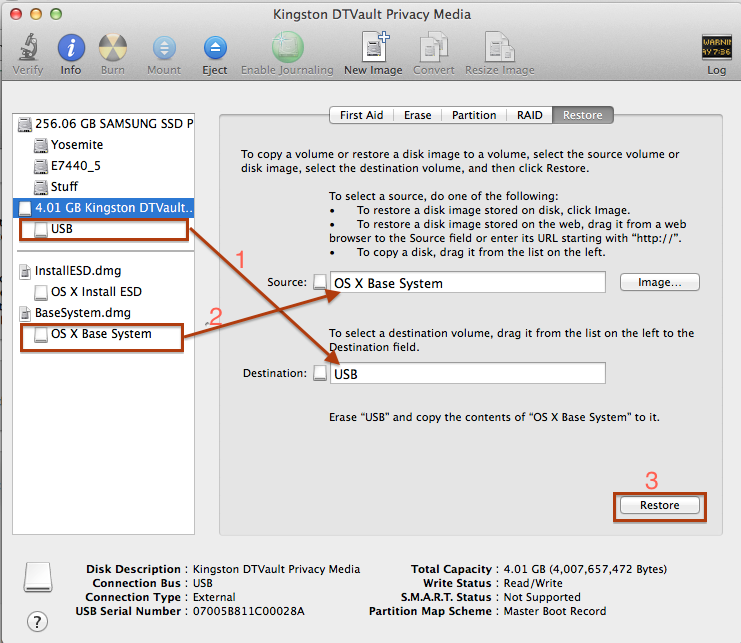
Dell Latitude Yosemite Install Guide Bootpack for models included in posts below: Latitude E6220 Latitude E6230 Latitude E7240 XPS L321x Optiplex 9010 Latitude E6420 Latitude E6430 Latitude E7440 Optiplex 780 Optiplex 9020 Latitude E6520 Latitude E6530 Latitude 6430u Optiplex 990 Optiplex 9030 AIO (New) BIOS: Set to Default, apply, then set SATA Operations to AHCI Overview 1. Download the OS X Yosemite Application from the Mac App Store 2. Prepare a Installer USB flash drive (8GB minimum) 3. Install OS X Yosemite 4. Install the bootloader and drivers to system drive STEP 1: Download OS X Yosemite 1. Open Mac App Store 2. Log in with your Apple ID 3. Download OS X Yosemite The Application Install OS X Yosemite will appear in /Applications. STEP 2: Prepare Bootable USB Drive This step extracts the OS X Installer contents, then installs Chameleon bootloader to the USB stick. 1. Insert the USB drive on a running OS X system 2. Open /Applications/Utilities/Disk Utility 3. Highlight the USB drive in left column 4. Click on the Partition tab 5. Click Current and choose 1 Partition 6. Click Options... 7. Choose GUID Partition Table 8. Under Name: type USB (You can rename it later) 9. Under Format: choose Mac OS Extended (Journaled) 10. Click Apply then Partition 11. Go to Applications, right click on “Install OS X Yosemite†> Show Package Contents > Contents > SharedSupport 12 . Open InstallESD.dmg 13. Launch ShowHiddenFiles and select “Show Special Files†( app attached at the end of guide) 14. Open BaseSystem.dmg (hidden) from “OS X Install ESD†15. Use Disk Utility to restore “OS X Base System†to USB (see image below) 16. After restore is complete, USB is now renamed to “OS X Base Systemâ€. Go ahead and rename it to “Install OS X Yosemite†17. Go to /System/Installation of “Install OS X Yosemite†and delete the alias “Packagesâ€. 18. Copy “Packages†from root of “OS X Install ESD†to /System/Installation of “Install OS X Yosemite†19. Copy BaseSystem.dmg and BaseSystem.chunklist (hidden files) from “OS X Install ESD†to root of “Install OS X Yosemite†20. Copy the folder /Kernels to /System/Library of “Install OS X Yosemite†( Kernels folder attached at end of guide) 21. Launch ShowHiddenFiles and select “Hide Special Files†22. Download the latest version of Chameleon ( attached in Apps below) 23. Open Chameleon package installer 24. Hit Continue, Continue, Continue, Agree. Change Install Location... 25. Choose “Install OS X Yosemite†26. Hit Continue to install Chameleon 27. Download the bootpack for your model, rename it as Extra to the root of “Install OS X Yosemite†28. You are now ready to install OS X Yosemite STEP 3: Install OS X Yosemite 1. Turn on the computer with the USB Installer connected 2. Press the F12 to choose boot device 3. Choose USB 4. When Chameleon boot screen is visible, choose Install OS X Yosemite with -v -f flags 5. The system will then boot into OS X Installer 6. For a new installation of OS X, you MUST erase and format the destination drive according to the following steps before continuing. If you are upgrading from Lion, Mountain Lion or Mavericks and you want to keep your files and apps, skip steps a-j. a. Choose Disk Utility b. Highlight your target hard drive for the Yosemite installation in left column. c. Click Partition tab d. Click Current and choose 1 Partition e. Click Options... f. Choose GUID Partition Table g. Under Name: type Macintosh SSD (You can rename it later) h. Under Format: choose Mac OS Extended (Journaled) i. Click Apply then Partition j. Close Disk Utility 7. When the installer asks you where to install, choose Macintosh SSD, or your existing install. 8. Upon completion, system will restart 9. Press the F12 to choose boot device 10. Choose USB 11. When Chameleon boot screen is visible, choose Macintosh SSD or your existing Install drive with -v -f flags The system will boot into the new drive, and complete the installation STEP 4: Post-Installation 1. Install Chameleon loader to Macintosh SSD 2. Copy the Extra folder from "Install OS X Yosemite" to Macintosh SSD 3. Install kexts from /Extra/Extensions/SLE to /System/Library/Extensions with kextwizard (app attached) 4. Rename NullCPUPowerManagement.kext to *.bak from /Extra/Extensions. Restore it before doing any updates to prevent KP 5. Repair permission and rebuild cache. Run command from terminal sudo chmod -R 755 /S*/L*/E* sudo chown -R 0:0 /S*/L*/E* sudo touch /S*/L*/E* sudo kextcache -Boot -U / 6. Go to System Preferences Enable Clicking for Trackpad Allow apps downloaded from: Anywhere for Security & Privacy 7. Generate a new smbios.plist for your CPU with Chameleon Wizard (app attached) 8. Tuned up your system Working: - Wifi (replaced with Broadcom BCM4322 rebranded, recognized as native Airport Extreme) - Keyboard / Touchpad / Trackstick - USB 2.0 / 3.0 if it exist for your model - SD Card reader if it exist (works sporadically on Exx20 models) - Screen Brightness - Battery Status - Audio with AppleHDA - HDMI Video / Audio (Auto Detection works) - QE/CI - Network Switch - Touchpad with 3 and 4 fingers multitouch gestures - Webcam Credits: This guide is based off of Fabio78’s Clover guide rewritten for Chameleon Included Apps: Chameleon Wizard, Kextwizard, ShowHiddenFiles, Chameleon Loader Apps.zip Kernels: Place folder in /System/Library of "Install OS X Yosemite". i.e /System/Library/Kernels/kernel 10.10.0 - 10.10.1 Kernels.zip 10.10.2 10.10.2_Kernels.zip 10.10.3 Vanilla Kernel 10.10.4 Vanilla Kernel 10.10.5 Vanilla Kernel For Haswell system, use Haswell_kernels i.e. i7-4600u, 10.10.0 - 10.10.1 Haswell_Kernels.zip 10.10.2 10.10.2_Haswell.zip Note: You'll have to copy the patched kernel to the installed drive after install! 10.10.3 Patched Kernel for Haswell Note: You'll have to copy the patched kernel to the installed drive after install! 10.10.4 10.10.4_Haswell.zip Note: You'll have to copy the patched kernel to the installed drive after install! 10.10.5 Patched Kernel for Haswell Note: You'll have to copy the patched kernel to the installed drive after install! Bootscreen fix: Fix for the boot screen glitches, install this to /S/L/E IOGraphicsFamily.kext.zip MBR Patch: Patch for system that could only boot with MBR or prefer MBR Install Thanks to CrazyBirdy Yosemite MBR Patch 10.10 (14A389).zip Yosemite_10.10.1_14B25_MBR_Patch.zip Yosemite_10.10.2_14C109_MBR_Patch.zip Yosemite_10.10.3_14D131_MBR_Patch.zip Yosemite_10.10.4_14E46_MBR_Patch.zip Yosemite_10.10.5_14F27_MBR_Patch.zip Troubleshooting: If you encounter "Can't find /System/Library/Kernel/Kernel" and your Yosemite Installed Drive shows as RAID, do the following: Boot with the USB installer, open up terminal and enter the following command: diskutil cs list you see something like below. Note the UUID in red and Revertible = Yes run diskutil cs revert UUID> , you can copy and paste the UUID reboot when finish. Boot with USB and select your Installed drive to complete your install BOOT 0 ERROR If you are using a 4k HDD you can get boot:0 error, to solve this issue do the following. Reboot system back into Yosemite installer (USB FLASH DRIVE). Launch Disk Utility Unmount the partition you installed Yosemite on Launch Terminal and execute the following command: diskutil list (to find the Disk Identifier of your Yosemite partition (eg. disk0s2) dd if=/usr/standalone/i386/boot1h of=/dev/disk0s2 Exit Terminal Boot normally Note: if you encounter an error that boot1h is not found when running step 6, download attached and place it in the USB Installer/usr/standalone/i386 and start from step 1 again boot1h.zip
1 point


This leaderboard is set to London/GMT+01:00