v3ct0r
-
Posts
383 -
Joined
-
Last visited
-
Days Won
24
Content Type
Profiles
Articles, News and Tips
Forums
Everything posted by v3ct0r
-
Try booting to the installer drive (E6410Y) after installing, not the drive or partition you installed to. Sometimes I've found it boots to the setup screen on the drive/partition with Yosemite, but other times it will just boot to the installation setup. If it gets to the installation setup, open up a Terminal window (utilities, terminal), and run these commands: mkdir /Volumes/[nameofpartitionwithYosemite]/System/Library/Kernels cp -R /System/Library/Kernels/kernel /Volumes/[nameofpartitionwithYosemite]/System/Library/Kernels Then reboot to the bootloader on the flash drive and pick the Yosemite partition.
-
Interesting... I just tried with a normal sd card and it worked OK (kinda... Had to boot with the card inserted). It still seems a bit awkward though, so I may just remove it from the zip file until it's updated. Good find though! I could honestly say I wouldn't have remembered to check that
-
Hey huskerphile, There's a good discussion going on about Clover in the nVidia thread (https://osxlatitude.com/index.php?/topic/7377-e6410-nvidia-yosemite-help-thread/). PlutoDelic has managed to successfully install Clover on his machine. Take a look at his posts over there. Unfortunately I haven't tested it yet, as I am quite busy and haven't had much time to experiment, so if you try it, be prepared to not be able to boot into your system for a while .
-
For those of you with the ACPI kernel panics, make sure you are using the rolled back AppleACPIPlatform.kext (you can find a working one in the zip file) and you REMOVE the AppleACPIPlatform.kext and the IOPlatformPluginFamily.kext from /System/Library/Extensions. Unfortunately I can't test much during this week (work's got me busy), so I'm sorry about that. Hopefully the weekends will give me some time to tinker with the audio or Clover... EDIT: I forgot to mention you can put the rolled back kext in the 10.10 folder. As long as it's removed from /S/L/E, it should be read from there.
-
Have you tried any other MacBook Pro strings? How does the MacBookPro5,1 fair?
-
@PlutoDelic, I just noticed the battery monitor issue, thanks for pointing that out. I'll see what I can do.. Also, what did you do to get audio to work?
-
Haha it's the stupid problems that'll get ya! I'm glad you figured it out. And you are most welcome. I'm just happy to help.
-
Hey ako, Do you see the speakers/headphone jack/line out/anything under Output Devices in System Preferences --> Audio? Thanks for letting us know about this!
-
The new guide is up! http://forum.osxlati...e-nvidiaintel/� Please make sure to post any responses you may have regarding Yosemite in the correct help thread (you can find the new E6410 Intel help thread here)
-
Post any questions, comments or concerns on the "Dell Latitude E6410 - Yosemite - nVidia/Intel" guide here if you have an E6410 with Intel Graphics...
-
Post any questions, comments or concerns on the "Dell Latitude E6410 - Yosemite - nVidia/Intel" guide here if you have an E6410 with nVidia Graphics...
-
Updates Audio This is long overdue, and my apologies for it taking so long. I haven't had this much free time in a while . Below you will find the Audio fix for the build. Just run the "AudioUpdate.sh" shell script and reboot when finished. You should have working sound after that... Audio Update.zip EDIT 02.09.15: FINALLY ADDED THE AUDIO FIX TO E6410 Y.ZIP. Fixed scripts Fixed a couple of errors in the InstallerPrep scripts.
-
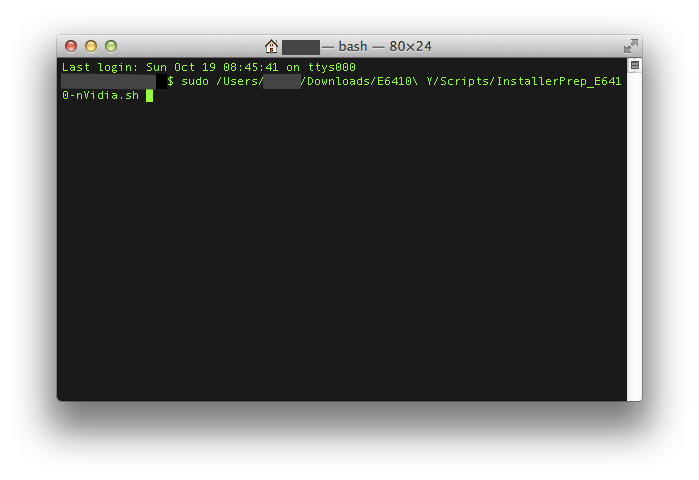
The Guide (DiskMaker X, Chameleon) Hello all, As of last night/this morning, I finally got my E6410 nVidia to work with OS X Yosemite! This is my third guide for the E6410 nVidia (the first one was on Mountain Lion, the second on Mavericks). Since myHack 4.0 is not ready yet, I have written this guide to use DiskMaker X, Chameleon 2.2 r2401, and a couple of shell scripts written by myself. Feel free to examine or modify the scripts to conform to your needs. If you do however, please note any changes you make so we can help you if you need it. If you experience any problems with the guide, please refer to the Troubleshooting section in Post #3. The machine I am working with is a Dell Latitude E6410 with nVidia graphics: 2.53 GHz Intel Core i5 4 GB 1067 MHz DDR3 NVS 3100M 512 MB BIOS version A14 What works: Webcam Trackpad & Nub (thanks to bpedman and yeahoon) Wifi - Dell 1510/Broadcom 4322 (thanks to Darvinko) Ethernet Graphics (1280x800; max resolution for my LCD) Bluetooth (thanks to alerphjuan) Two-Finger Scrolling with Trackpad SD Card Reader Audio What doesn't work: Sleep iMessage/FaceTime Before you begin: If you are new to this, please first read about what a hackintosh is and what creating/using/maintaing one entails (a simple google search for "hackintosh" worked for me) Read through this guide COMPLETELY before beginning This guide assumes that you have backed up all your data (if you need it) and are okay with erasing EVERYTHING on your hard drive I am not responsible if your laptop doesn't turn out as you'd hoped/expected (don't expect everything to work ) Although this guide may look long and daunting, it should only take about 1-3 hours (3.5 hours max). I tried to make it as quick and easy as I could If you have any questions/comments/concerns that you would like to share, please post them in the Help & Support -> Dell Systems -> Latitude E Series -> E6xxx -> E6410 (nVidia/Intel (depending on your graphics configuration)) - Yosemite Help Thread: http://forum.osxlati...forum/51-e6xxx/ If you have agreed with/done the above, you may proceed with the guide... You will need the following: A working Mac/Hackintosh A Dell Latitude E6410 with an nVidia NVS 3100M (the guide assumes you have the NVS 3100M Graphics Card, though it should still work with Intel Graphics, just without QE/CI, or full graphics accelleration), A12 (or greater) BIOS A hard drive that you are okay with erasing completely An 8 GB or greater flash drive that you are okay with erasing A copy of OS X Yosemite from the Mac App Store (It's free!) This zip file:E6410 Y.zip Patience, hope, and a pinch of faith in the guide Once you have those 7 things (the last one especially ), continue... Upgrade/Clean Installs and MBR Support: For those of you coming from any version of Mountain Lion/Mavericks that was previously installed on your E6410 using my old guide, you may skip Steps 19-28 if you would like to perform an "Upgrade" installation. Simply select the partition that you have Mountian Lion/Mavericks on and install. For those of you that never had OS X on your E6410 or those that just want to start fresh, you will need to perform a "Clean" install. Please read through the entire guide and complete all steps for the best results. Also, for those who have MBR Disks, you can install Yosemite by copying the OSInstall.frawework file from the MBR Support folder to "[iNSTALLER ROOT]/System/Library/PrivateFrameworks/" after you finish Creating the Installer. You may be prompted to Overwrite/put your password in. Select yes and input your password when prompted. Creating the Installer Make sure your Yosemite copy is in the Applications folder on your working Mac/Hackintosh Extract the E6410 Y.zip file that you downloaded above to a convenient location. No matter where you do it, just remember the location! Plug in your 8 GB or greater flash drive nowNOTE: If the drive doesn't show up on the desktop/in Finder, make sure it is partitioned/formatted as the following (you may use Disk Utility to do this): 1 Partition, GUID Partition Table, and Mac OSX Extended (Journaled) Open the E6410 M folder and then the Applications folder. Run DiskMaker X 4b4 by double-clicking it and "Open" if asked if you want to open it Click "Yosemite (10.10)" The program should find the copy of Yosemite in your Applications folder as long as you didn't rename it. If it did, click "Use this copy" and proceed. If it doesn't/finds a copy located somewhere else, click "Use another copy" and select the right one. Choose "An 8 GB USB thumb drive" and select the flash drive (NOTE: Make sure you select the correct one if you have more than one connected to your system; the application will erase the selected flash drive) You will then be warned about erasing the disk. If it is the right one, select "Erase then create the disk" Click "Continue" at the next promptNOTE: Try not to do/run any other applications while this is running. It opens windows and modifies things via the GUI. You may also miss certain prompts. If you do, the program has a tendency to timeout, causing you to re-run it and start over. After about a minute, you will receive a prompt to enter administrative credentials. Enter this here and click "Ok" The process will take 20-40 minutes depending on the computer/flash drive being used When it finishes, you will hear a "roar"... at this time click "Quit" to exit or "Make a donation" to support the creator Rename your flash drive to "E6410Y" by finding "Yosemite Install Disk - 10.10" in the Finder sidebar, right clicking it, and then selecting "Rename 'Yosemite Install Disk - 10.10'" Return to the Applications folder inside the E6410 Y folder. Run Chameleon-2.2svn-r2401 by double-clicking it. Click "Continue" (x3) Click "Agree" when prompted Click "Change Install Location ..." Select the E6410Y drive in the list and click "Continue" Next, click "Install" When prompted, enter your administrative password. After about 3-10 seconds, it should finish. Click "Close" when it does. Now, return to the E6410 Y folder and find Scripts. Open it, and find the InstallerPrep_E6410-nVidia.sh and InstallerPrep_E6410-Intel.sh. Keep this window open and move on to the next step. Open up Terminal (Spotlight search for it or navigate to /Applications/Utilities), type in "sudo[sPACE]" (without the quotes) and drag the correct version of the InstallerPrep shell script to the Terminal window. It should look something like this (for nVidia): NOTE: Your window will most likely look different then mine (black text, white background); I just have a different theme enabled. Hit the Enter/Return key and type in your password. You won't see each character show up, but once you're done, just hit Enter/Return and if you entered it correctly, the script will run. When it finishes, press any key to exit the script Eject the Drive and disconnect it from the machine Installation Plug your Installation flash drive into the E6410 Make sure your battery life is greater than 50% if you plan on not connecting to a power source Turn on the laptop and press F12 to enter the "One time boot menu..." Select "BIOS Setup" from the list by using the up and down arrow keys to scroll and the Enter button to select Click on "Load Defaults" and then OK At the warning (If you get one), click OK Then, expand the "System Configuration" settings (in the left pane) by clicking on the red "+" next to it Click on "SATA Operation" (also in the left pane) and select "AHCI" At the warning (If you get one), click OK Expand the "Virtualization Support" settings (in the left pane) Click on "Enable VT for Direct I/O" Uncheck "Enable VT for Direct I/O" Click on "Apply" in the bottom right and then "Exit" Turn the machine back on if it doesn't come up by itself and press F12 again to enter the "One time boot menu..." At the menu, select "USB Storage Device" When you reach the bootloader (the silver screen with different hard drives and flash drives on it), make sure the "E6410Y" is selected and wait for the computer to boot If you (and I) did everything right, the machine should boot up into the installer without a hitch (If it doesn't, refer to the Troubleshooting post below) Select your language and click on the arrow below to continueSTART SKIPPING STEPS HERE FOR UPGRADE INSTALLATIONS At the next screen, select "Utilities" from the menu bar on top Click on "Disk Utility" When it opens, select the hard drive (not the partition; you should see a "Partition" tab to the right; you won't see this if you've selected a partition) you are okay with erasing completely (again, make sure it's the right one) When you've verified you've selected the hard drive, navigate to the "Partition" tab (again, you won't see this if you selected a partition) Select "1 Partition" from the drop-down under "Partition Layout" (unless you're an advanced user; then you can select as many as you need/want) Then, next to "Format", select "Mac OS Extended (Journaled)" Give your partition a name (on a normal mac, the partition is normally labeled "Macintosh HD") Then click on "Options..." and make sure "GUID Partition Table" is selected; if it's not, select it Lastly, click on "Apply" When that finishes, hit Command+Q (or just click the red "X" in the top left of the window) You should now be at the Install OS X screen now; Click "Continue" and "Agree"STOP SKIPPING STEPS HERE FOR UPGRADE INSTALLATIONS Select the partition/disk you would like to install OS X to and click "Install" (and "Continue" if not connected to a power source) The process will take about 20-50 minutes If/when the machine reboots (you may have to hold down the power button to turn it off, and then press it again to turn it back on), press F12 again and boot from the "USB Storage Device" Press a key to interrupt the boot from USB, select the drive/partition on which you installed Yosemite and boot the OS Post Installation Proceed through the Setup process When you reach the Desktop, open up System Preferences and then Security & Privacy in the top row Click the little padlock in the bottom left of the window and enter your password Click the bubble next to "Anywhere" and then click "Allow From Anywhere" when prompted Close System Preferences and navigate to the E6410 Y folder on the flash drive Open up the Applications folder and then run Chameleon-2.2svn-r2401 Click "Continue" (x3) Click "Agree" when prompted Click "Change Install Location ..." if the drive currently selected is not the correct one. If it is, proceed to Step 11. Select the drive/partition you installed drive in the list and click "Continue" Next, click "Install" When prompted, enter your administrative password After about 3-10 seconds, it should finish. Click "Close" when it does. Now, return to the E6410 Y folder and find Scripts. Open Terminal and type "sudo[sPACE]" (without the quotes) and drag the correct version of the PostInstall shell script to the Terminal window. See the above picture... Hit the Enter/Return key and type in your password. You won't see each character show up, but once you're done, just hit Enter/Return and if you entered it correctly, the script will run. When it finishes, press any key to exit the script Eject the Drive and disconnect it from the machine Reboot You should see the bootloader now and it should begin loading Yosemite shortly. Enjoy OS X Yosemite on your E6410! Finally, I would like to thank everyone who has helped make this a possibility (Special thanks to Darvinko, Tengokuu, dafob, jebediah, alerphjuan, jansenspencer, roar2000, Dr. Monkey, and the everyone else over in the Mountain Lion and Mavericks Help threads), bpedman & yeahoon (for the trackpad/trackstick) as well as the creator of DiskMaker X. I couldn't have gotten this working without them. Remember: If you have any questions/comments/concerns that you would like to share, please post them in the Help & Support -> Dell Systems -> Latitude E Series -> E6xxx -> E6410 (nVidia/Intel (depending on your graphics configuration)) - Yosemite Help Thread: http://forum.osxlati...forum/51-e6xxx/

-
I will probably take you up on that Should have a guide up soon... I"ll post back here when I do. Thanks!
-
Unable to find the correct driver for the platform /ACPI/ [other stuff here]... Basically it wasn't reading anything from /S/L/E and it was because the script I was using to make the installer didn't extract EVERYTHING from the BaseSystem.dmg.
-
I JUST managed to get it to boot...been banging my head for most of the night trying to solve one last problem and figured it out... In the interest of time, I will be writing the Guide to cover Chameleon. If you guys want, I'll detail the Clover installation, but I won't be able to do it before next weekend...
-
It will be a bit more involved than just a minor update (you'll have to make the installer, boot from it, and install over your old system if you want to upgrade - clean install is also an option)... Unfortunately, I forgot about myHack not being able to support 10.10 just yet. I am working on a different way to go about the install right now, however it may take some time.
-
Yosemite was released today! I hope to have a guide for it up by this weekend...
-
Hm that's unfortunate. I guess we'll have to resort to outputting through the headphone jack. Regardless, good find on the DisplayPort work-around!
-
For the audio, have you tried Option (Windows Key)+Left Clicking the speaker icon in the menu bar and selecting the TV as the output?
-
Try and delete AppleHDA.next from /System/Library/Extensions and see if VoodooHDA is in /Extra/Extensions. Disk Utility can make decent block-for-block copies of drives...
-
Yes,the E6410 is compatible with Yosemite, so I will most likely outline the install process for it when it is released.
-
Updating now, will report back in about an hour in the Guide thread on the status.
-
E6410 with nVidia NVS 3100M graphics - Mountain Lion Guide
v3ct0r replied to v3ct0r's topic in The Archive
Make sure your disk mode is set to AHCI in the BIOS -
E6410 with nVidia NVS 3100M graphics - Mountain Lion Guide
v3ct0r replied to v3ct0r's topic in The Archive
After you create the installer, simply navigate to /System/library/extentions on the flash drive and delete the kext. If it isn't there, navigate to /extra/Extensions and delete it from there.