
Leaderboard


Popular Content
Showing content with the highest reputation on 11/26/18 in all areas
-
DisableTurboBoostBatery.kext doesn't work with VirtualSMC.kext and SMCBatteryManager.kext. Problem is here: void DisableTurboBoostBattery::actOnChangedPowerState() { if (pPowerSource && isOnAC != pPowerSource->externalChargeCapable() && pPowerSource->batteryInstalled()) { if ((isOnAC = pPowerSource->externalChargeCapable())) enable_tb(); else disable_tb(); } } Reason is simple - externalChargeCapable returns different values with VirtualSMC.kext and SMCBatteryManager.kext than with FakeSMC.kext and ACPIBatteryManager.kext. ExternalChargeCapable property has same value as ExternalConnected in case of FakeSMC.kext and ACPIBatteryManager.kext. On battery both values are false, on charger both values are true. With VirtualSMC.kext and SMCBatteryManager.kext only ExternalConnected property change value. It's true on charger and false on battery. ExternalChargeCapable is always true. This is the reason why disable_tb() is never called with VirtualSMC.kext and SMCBatteryManager.kext and Turbo Boost remains active. Fix should be simple as this: void DisableTurboBoostBattery::actOnChangedPowerState() { if (pPowerSource && isOnAC != pPowerSource->externalConnected() && pPowerSource->batteryInstalled()) { if ((isOnAC = pPowerSource->externalConnected())) enable_tb(); else disable_tb(); } } This should work in both usage cases - VirtualSMC.kext with SMCBatteryManager.kext and FakeSMC.kext with ACPIBatteryManager.kext. VirtualSMC implementation of ExternalChargeCapable looks proper based on documentation: ExternalConnected Type: bool IORegistry Key: kIOPMPSExternalConnectedKey True if computer is drawing external power ExternalChargeCapable Type: bool IORegistry Key: kIOPMPSExternalChargeCapableKey True if external power is capable of charging internal battery2 points
-
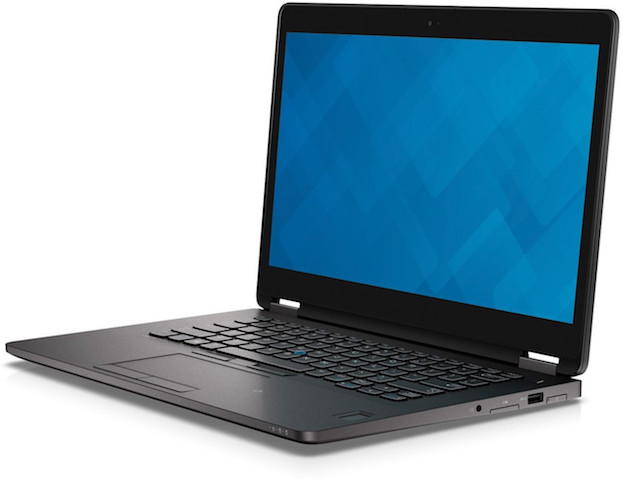
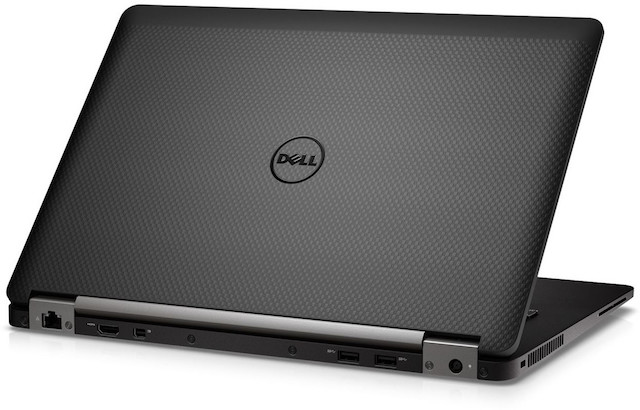
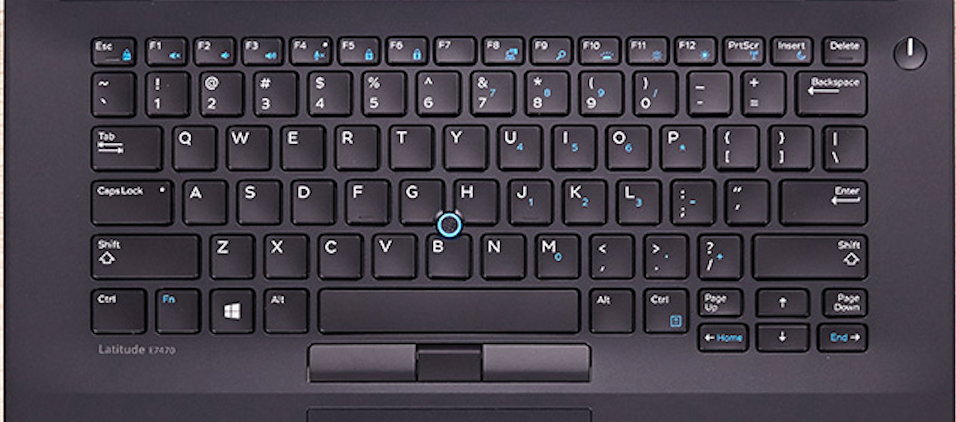
El Capitan Guide Specifications: Processor : Intel® Core i5-6300U / i7-6600U Processor Graphics Processor(GPU) : Intel® Integrated HD Graphics 520 Chipset : 6th Generation Intel®Core Storage : Samsung PM851 256GB M.2 Form factor Sata-SSD RAM : 16GB DDR4 SDRAM 2133 MHz; 2 slots supporting up to 16GB Wifi : Intel Wireless Gigabit Ethernet 802.11AC (M.2, 8260AC), Bluetooth 4.1 LAN : Intel I219-LM PCI-E Gigabit Ethernet Adapter Audio : Realtek® High Definition Audio ALC293 (ALC3235) USB 3.0 : Intel USB 3.0/3.1 xHCI Controller Touchpad : Alps Multi-touch Touchpad v7 Hardware Webcam : USB3.0 UVC HD WebCam Card reader : SD 4.0 Memory Card Reader Monitor : (14) FHD (1920x1080) Anti Glare (16:9) WLED, 300 nits, Magnesium Alloy LCD back Battery : 55 Wh ExpressCharge Capable (4-cell) Lithium-Ion Interface : 1 x Microphone/Headphone Combo jack 1 x Mini DisplayPort for external monitor 3 x USB 3.0 port(s) (one with PowerShare) 1 x RJ45 LAN Jack for LAN insert 1 x HDMI Working: Graphics with Acceleration Audio with patched AppleHDA Bluetooth /Wireless (Replaced with DW1560 / DW1830) HDMI Video / Audio mini DisplayPort / Audio LAN USB3.0 Webcam Battery Fn Hotkeys (Brightness & Audio control) Alps Touchpad / Trackstick Sleep, Processor P&C-States with Native power management Not working: Finger Sensor, smart card reader if you have one SD Card reader, unsupported, no driver DisplayPort on Port Replicator - no DP audio Work in Progress: HDMI Audio (no support yet) HDMI Audio Supported, updated files in the Sierra guide below Slow to boot/Restart/Shutdown Better when dual booting with Win10/not sure why Prerequisite: Set DVMT to 96MB (0x3) Source = FireWolf™s guide Steps to change the DVMT value (Done on Windows or WinPE) 1) Universal BIOS Backup ToolKit 2.0.exe - to backup the BIOS (DellInc.-1.5.3.rom) At time of writing - BIOS version 1.5.3 2) UEFITool.exe to find the module labeled Setup and extract the PE32 image section (setup.bin) Update: For Dell Only: Search with this GUID then extracting the PE32 body under it would be faster /easier than finding the module per guide 899407d7-99fe-43d8-9a21-79ec328cac21 3) Universal IFR Extractor.exe to extract setup.bin to a readable text file 4) Use notepad to search for DVMT in the text file, 2 were found at 0x432 and 0x433 Both with value of 0x1 but only 0x432 needs to be set to 0x3 5) Format a USB drive to fat32 and create a folder name EFI (SD Card works too) 6) Download the EFI Shell and extract the Boot folder into the newly created EFI folder i.e.. /EFI/Boot/bootx64.efi 7) Boot system with the USB and select UEFI Boot At the grub prompt, enter these commands, hit enter after each command, then exit and reboot setup_var 0x432 0x3 To verify, just enter setup_var 0x432 and hit enter, the value will be listed Note: Settings will retain after BIOS update but will reset if you select "Restore Settings" in BIOS!!! /!\ New Development: If you don't want to mod the BIOS as it might be difficult for some models, you could skip this step by adding 2 new kexts to /EFI/Clover/kexts/Other Lilu.kext & Whatevergreen BIOS Settings: Set to "Load Default", Apply, then set the following: TPM = Disabled Secure Boot = Disabled UEFI = Enabled SATA Operation = AHCI Wake on Lan /WLan = Disabled Enable Legacy Option ROMs = Disabled Installation: See here install guide, use below bootpack E7x70.zip Note: Must be OS X 10.11.4 and newer for Skylake support Post Install: Enable Brightness Control and Trackstick Scrolling Trackstick Scrolling Download and Install Karabiner Launch Karabiner/Preferences/Change key/Point Devices/CursorMove to ScrollWheel Enable MiddleClick+CursorMove to Scrollwheel Brightness Control Launch Karabiner/Preferences/Misc & Uninstall Under Custom Setting, click Open private.xml Replace file with the attached -> private.xml.zip Go back to Change Key Tab and select 'Reload XML' The new custom file will show on the very top call 'Remap Brightness Key' & 'Remap Volumes Key' Place the check marks there. Now use F11 & F12 for Brightness, use F1, F2, & F3 for Volumes Control (Keyboards with same/similar layout will work with custom xml above too) Note1: Personally use SmartScroll for Trackstick scrolling with Inertia. Don't really use Touchpad, 2 fingers scrolling and tap and drag does work. Note2: Please use this beta version of ssdPRGen.sh generate SSDT.aml for Skylake system Note3: If you're installing Sierra, there's a known artifact issue on the upper left corner! Update: Fix can be found here Credits: FireWolf, Joe82, EmlyDinEsh, Bronxteck, Hervé, Rehabman, Piker-Alpha, Sontrg, toleda, Dr. Hurt, Clover Team, ...everyone involved with getting Skylake supported
 1 point
 -
If it's anything similar to my E7470, you need to close the laptop so that the external monitor becomes primary. Then open the lid, the LCD will switch back to primary and the external becomes secondary. See here1 point
-
Mojave Mojave Guide Bootpacks - HD5500 Only Add this to /EFI/Clover replacing the old Exx50_Mojave.zip FYI, kexts in bootpack is outdated Make sure to 1st upgrade kexts found under /EFI/CLOVER/kexts/Other if you encounter issue Common links for new kexts: https://github.com/vit9696/Lilu/releases https://github.com/vit9696/Lilu/blob/master/KnownPlugins.md https://bitbucket.org/RehabMan/ - For Discrete Model Also add this to /EFI/Clover/ACPI/Patched SSDT-Disable-DGPU.aml.zip Follow Post Install above under Sierra Guide UPDATES1 point
-
Mojave Mojave Guide Bootpacks Replace into /EFI/Clover after you install Clover E7470_Mojave.zip FYI, kexts in bootpack is outdated Make sure to 1st upgrade kexts found under /EFI/CLOVER/kexts/Other if you encounter issue Common links for new kexts: https://github.com/vit9696/Lilu/releases https://github.com/vit9696/Lilu/blob/master/KnownPlugins.md https://bitbucket.org/RehabMan/ Note: 1) Post Install: Copy kexts in /EFI/Clover/kexts/Other/CopyToLE to /Library/Extensions. Repair permissions and rebuild cache 2) Enable this patch in Config.plist under KextsToPatch if you have: LiteOn, Plextor, or Hynix NVMe Hynix NVMe patch 10.13.x (Bit swap block size 0x10) -Syscl UPDATES1 point
-
This is fixed version of DisableTurboBoostBattery.kext that should work with both SMCBatteryManager and ACPIBatteryManager. DisableTurboBoostBattery_2.3.zip I performed tests on battery and on charger with SMCBatterManager and looks like everything finally works as expected. Please test properly with ACPIBatteryManager since I only did brief test on battery to see if TurboBoost is disabled or not, but I didn't done any tests on charger. Please let me know if there is any problem so I could fix this.1 point
-
Orginal: https://www.reddit.com/r/Crostini/wiki/howto/backup How to Backup Containers Performing routine backups is always a good practice, and containers are no exception. Currently, this process is not the most straightforward due to the locked down termina VM, so here's how you can protect your data in case you need to powerwash. Everything will assume working with the default penguin container when you enable Linux within Chrome OS settings. Backup We will use LXC/LXD's image management tools to create and export the image. Enter into the termina VM through crosh by pressing ctrl+alt+t in the Chrome browser. Then we must stop the container, publish it, export the image to a backup file, and put that file somewhere we can access it. The termina VM is extremely locked down and the only writable locations are /tmp and $LXD_CONF (/mnt/stateful/lxd_conf). Step 1: Stop Container An alternative way to stop container from the below instructions is to issue the command sudo shutdown -h now from within the container itself crosh> vsh termina (termina) chronos@localhost ~ $ lxc list +---------+---------+------+------+------------+-----------+ | NAME | STATE | IPV4 | IPV6 | TYPE | SNAPSHOTS | +---------+---------+------+------+------------+-----------+ | penguin | RUNNING | | | PERSISTENT | 0 | +---------+---------+------+------+------------+-----------+ (termina) chronos@localhost ~ $ lxc stop penguin --force (termina) chronos@localhost ~ $ lxc list +---------+---------+------+------+------------+-----------+ | NAME | STATE | IPV4 | IPV6 | TYPE | SNAPSHOTS | +---------+---------+------+------+------------+-----------+ | penguin | STOPPED | | | PERSISTENT | 0 | +---------+---------+------+------+------------+-----------+ Step 2: Publish Container (termina) chronos@localhost ~ $ lxc publish penguin --alias backup Container published with fingerprint: 8ff49b7f315b5253ec2c5a38c97567bb33d4bd16c957d903ace4d9d9b56e9ef9 Step 3: Export Image (termina) chronos@localhost ~ $ lxc image export backup $LXD_CONF/backup Image exported successfully! Step 4: Start Container (termina) chronos@localhost ~ $ lxc start penguin (termina) chronos@localhost ~ $ lxc list +---------+---------+------+------+------------+-----------+ | NAME | STATE | IPV4 | IPV6 | TYPE | SNAPSHOTS | +---------+---------+------+------+------------+-----------+ | penguin | RUNNING | | | PERSISTENT | 0 | +---------+---------+------+------+------------+-----------+ Step 5: Push Backup File Into Container Because of the locked down nature of the termina VM, we can't easily get at the file we just created so we will move it into our container's home directory where it will appear within the Chrome OS Files App. Note: you have to substitute "YOURUSERNAME" in the path below with the username in your penguin container. (termina) chronos@localhost ~ $ lxc file push $LXD_CONF/backup.tar.gz penguin/home/YOURUSERNAME/backup.tar.gz Alternate Step 5 Instead of simply pushing the file to the VM, we can mount the $LXD_CONF directory in our penguin container. This makes it much easier to use in the long run, saves on storage, and avoids the no space left on device error. (termina) chronos@localhost ~ $ lxc config device add penguin lxd-conf disk source=$LXD_CONF path=/mnt/lxd_conf This creates a directory inside the container at /mnt/lxd_config that contains all of our images. Use the mv command inside penguin to move the backup to your user directory and finally use ChromeOs's files app to move the backup somewhere safe! USERNAME@penguin ~ $ sudo mv /mnt/lxd_conf/FILENAME.tar.gz /home/USERNAME/FILENAME.tar.gz Copy the file out of your Linux Files in the ChromeOS File App and you are done! Step 6: Access your Backup File from Files App You can now open your Files App in Chrome OS, browse to Linux Files and access your backup file. Restore This section is in need of updating and isn't up to date with the above backup section. Feel free to take a moment and improve on it This is essentially the reverse of the backup steps. Once your archive is inside some "helper" container, we can pull it into the "/tmp" directory on the termina VM using the following: lxc file pull helper/tmp/backup.tar.gz /tmp We then import the image: lxc image import /tmp/backup.tar.gz --alias backup Finally we can create a new container using this image instead of the default Google image: lxc init backup penguin Issues With 4+ GB Images (or Anything Other Files) and Getting Them into Termina This sub-section was updated on 7/24/18 and is tested working on a Pixelbook running the Dev Channel Version 69.0.3473.0, in case this breaks later There are some odd issues with the way lxd works which end up making it difficult to import large files into Termina. Images can, however, quickly surpass this size, presenting obvious issues. Luckily, there is a process to get around this. First, you will need to use the split command to break apart your file into pieces smaller than 4 GB. To be safe, I will tell it to make 3 GB files. USERNAME@penguin ~ $ split -b 3GB backup.tar.gz backupSplit.tar.gz. This command will produce as many 3 GB files as needed to break apart all of backup.tar.gz into parts. (6GB = 2 files) The parts will have names backupSplit.tar.gz.aa backupSplit.tar.gz.ab backupSplit.tar.gz.ac ... backupSplit.tar.gz.zz. Then, use any method (see Alternate Step 5 above for my personal favorite method) to get the new 3GB files into termina. Once they are all there, we will use the cat command to recombine them. <useless nerd stuff> This command, short for catinate, is really interesting. It basically prints out the raw contents of any file in Linux, even those such as tar files that we wouldn't normally consider to have any raw content. This works because what split is doing is actually cutting the raw data at that point. These two tools, originally meant to work with text files and generally do totally different things, work together really well in this use case! Anyway, we can then use the linux commands > and >>, called append, to take the raw command line output output of catand add it to a file, as we'll see in a second. > just stores the would-be command line output to the file specified after the command while >> specifically appends the output to the end of the specified output. </useless nerd stuff> Method 1 We can do the recombination in a few ways. If it's just a few files, we can do it this way: (termina) chronos@localhost ~ $ cat backupSplit.tar.gz.aa > backupRecompiled.tar.gz (termina) chronos@localhost ~ $ cat backupSplit.tar.gz.ab >> backupRecompiled.tar.gz (termina) chronos@localhost ~ $ cat backupSplit.tar.gz.ac >> backupRecompiled.tar.gz This takes the raw content of the first file backupSplit.tar.gz.aa and puts it in backupRecompiled.tar.gz. It then appends the contents of backupSplit.tar.gz.ab and backupSplit.tar.gz.acto the end of that file. Method 2 If for some reason you have a stupidly huge backup that produces more than ~5 parts, you will want to do this in a better way. This better way is to use something of which I forgot the name (someone please correct me!), but basically acts as a for loop in this case. See below: (termina) chronos@localhost ~ $ cat backupSplit.tar.gz.?? > backupRecompiled.tar.gz This uses the question mark wildcards (??) to have the cat command run on all of the files starting with backupSplit.tar.gz. and ending with any two characters. I am listing both Methods 1 and 2 here is because 1) Method 1 is a better explanation of how these commands work and 2) Method 1 worked better for me (Method 2 should work and is the more elegant solution, but I guess it didn't feel like it on my system ¯\_(ツ)_/¯) After you have your full, recombined image in termina, proceed back up the section on restoring and start with lxc image import. Good luck with your data recovery!1 point
-
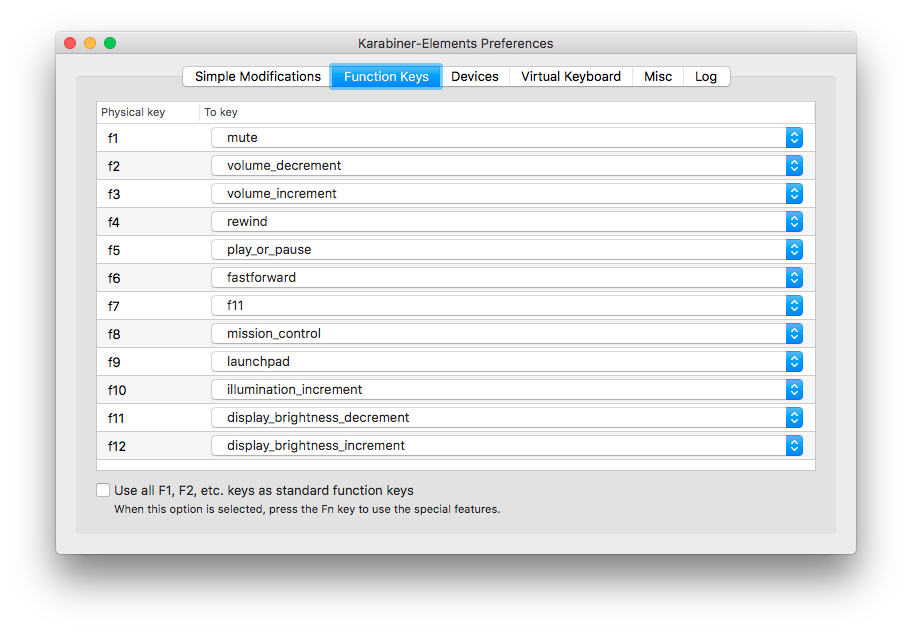
Sierra Guide See here for install guide, just replace with Sierra bootpack. E7x70_Sierra.zip - See Update files below Known Issue & Workaround: HDMI-Output works but if connect HDMI-Cable the local Display goes off and never recovers. I had tried different configurations but none panned out. Here's a workaround: Close the LID until you see the HDMI display becomes the primary display, then open the LID. It'll switch LCD as primary and HDMI as secondary. NOTE: Workaround is only needed on clean boot, no issue if system has gone through a sleep/wake cycle Update: Fixed it by modifying EDID with this kext, but not work for Mojave. Post Install: Enable Brightness Control and Trackstick Scrolling Trackstick Scrolling Download and install Smartscroll for trackstick scrolling Touchpad - 2 fingers scrolling, 2 finger tab for right click, tap and drag Brightness Control Download and Install Karabiner-Elements Launch Karabiner-Elements Copy karabiner.json to ~/.config/Karabiner karabiner.json.zip or copy the settings according to diagram below Now use F11 & F12 for Brightness, use F1, F2, & F3 for Volumes Control
1 point

This leaderboard is set to London/GMT+01:00