Leaderboard
Popular Content
Showing content with the highest reputation on 02/28/20 in all areas
-
None are plug and play. They all need kexts to work. DW1820a need an additional patch but also works, as far as wifi is concern. BT works for the most part. That is what I have on my E7270 currently.1 point
-
@Daniel PN I'm using the same files I uploaded in the guide that you're using, there's no issue with sleep and wake. Do you see blinking power light when system is asleep? When wake, if screen stays dark, try pressing Escape key to see if screen comes back on. If you have the Intel wireless still, try disabling Wifi in the BIOS. I have a DW1820a on this system working nicely. Note: When you sleep the system and then plug in the HDMI, it's not going to wake the system. You need to have the HDMI connected before you close the lid for the external monitor to stay on. When you open the lid, the LCD will come on as primary and then set the HDMI monitor as extended monitor.1 point
-
you can disable it @ the Clover GUI by pressing the spacebar and then selecting Block Injected Kexts locate the kext and select it once logged in you can remove it.1 point
-
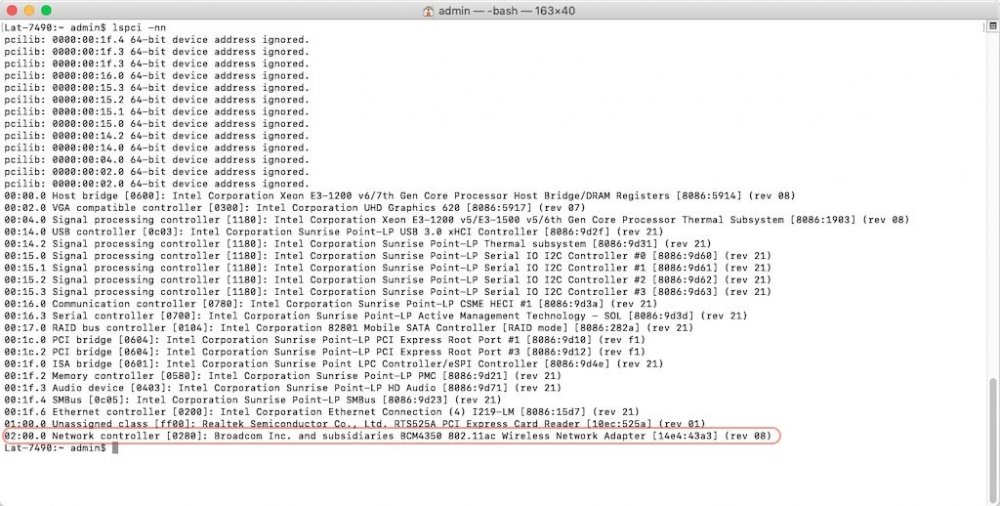
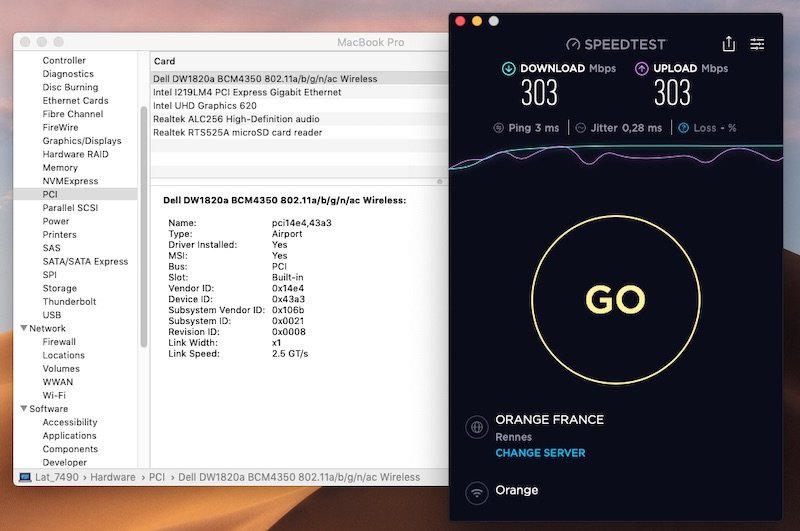
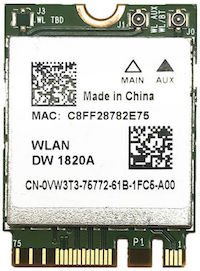
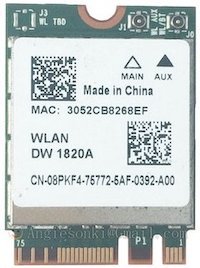
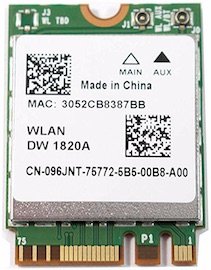
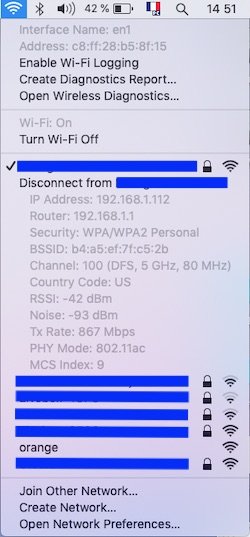
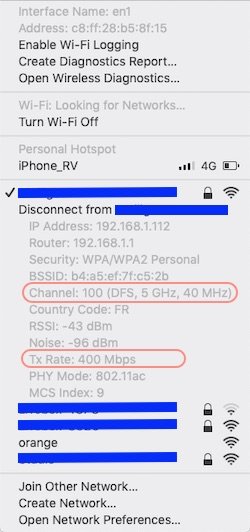
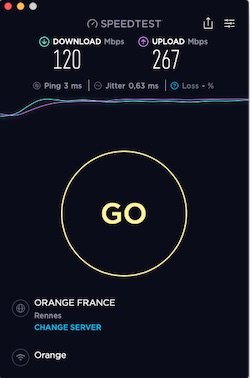
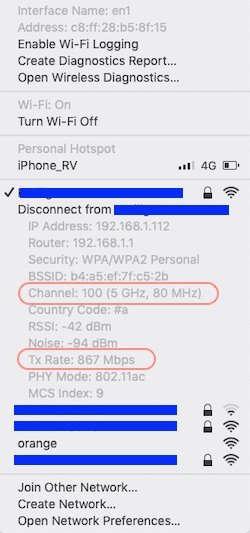
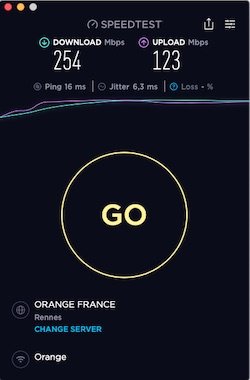
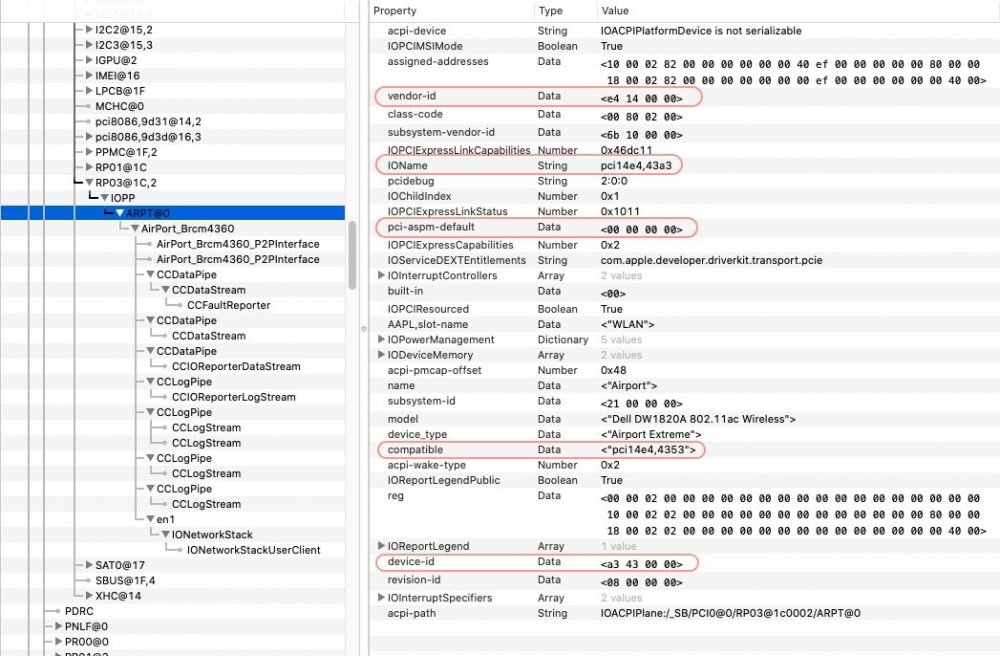
Last update: 28th Jan 2020 Dell DW1820A: Ok Ok Ok DW1820A is a pretty good combo card providing 2.4/5GHz 802.11ac wireless at 867Mbps + Bluetooth 4.1. As stated at Wikidevi, there appears to be a few different models of the card. Whilst they all carry the same Broadcom id 14e4:43a3, they each carry a different subsystem id/part #: 1028:0021 (part # CN-0VW3T3) -> 100% Ok with ASPM disabled (originally tested 100% Ok on my Latitude 7490 without ASPM tuning) 1028:0021 (part # CN-096JNT) -> 100% Ok with APSM disabled 1028:0022 (part # CN-096JNT) -> 100% Ok with APSM disabled 1028:0023 (part # CN-0VW3T3) -> 100% Ok with APSM disabled 1028:0023 (part # CN-08PKF4) -> 100% Ok with APSM disabled I acquired a Dell DW1820A a few months ago and was able to play with that card on a Latitude 7490 laptop (fitted with an M.2 2230 Key A+E WLAN slot) that I targeted for Mojave. The model I received was CN-0VW3T3. Before it was later established that not all DW1820A were equal, I purchased a 2nd one and, as it turned out to be, was lucky to receive another 0VW3T3 model. /!\ The 1st thing I want to report is that I encountered difficulties booting my Mojave USB installer and installing macOS with the card plugged in. I had to disable wireless in BIOS to be able to install Mojave. Once it was installed, booting Mojave with wireless enabled in BIOS would cause quite severe lag and performance degradation once at the desktop, as if the card just clogged up CPU ressources. This was because I had not applied any particular tuning for the card and, of course, this was resolved once I implemented the necessary fix detailed below. /!\ Searching through the Web for that DW1820A/BCM4350, I came accross a few forum posts/threads that mentionned: rolling back the Yosemite IO80211Family kext to get the card to work, although with instability and regular KPs removing AirPortBrcmNIC plugin kext from IO80211Family kext, patching AirPortBrcm4360 plugin kext with the id of the DW1820A and installing AirportBrcmFixup kext with a couple of parameters (Credits to Hugotai, cf. his post @Voldemort's place, 2nd Dec 2018) Whilst I did not really contemplate doing the 1st thing, I did envisage the 2nd one and started to look at the differences between Yosemite's version of IO80211Family kext and Mojave's. The main difference I had already noticed was that device id 14e4:43a3 was handled by AirPortBrcm4360 up to Sierra 10.12 and by AirPortBrcmNIC since High Sierra 10.13. Further reading and experimenting showed me that AirPortBrcmNIC kext was the root cause of the problem. Building on Hugotai's success, I seeked to work out an easier solution to bypassing AirPortBrcmNIC kext that would not require kext removal and Info.plist patching but, instead, something that could be implemented through hardware properties injection, either through DSDT/SSDT patching or bootloader (Clover or OpenCore) configuration. Once Hugotai's solution was verified and confirmed, I worked out the following Clover-based solution (because that's what I was using) for HighSierra/Mojave: identify the IOReg/ACPI device to which the DW1820A card is attached (use IORegistryExplorer app to that effect). Eg: RP0n@xx,yy->PXSX@0. in the absence of individual ACPI device entry under the PCI bridge for the card, select "FixAirport" ACPI Fix in Clover. That'll create a device "ARPT" @0 under the bridge and that's what you'll inject properties to. This may also require to select "AddDTGP" ACPI Clover fix if your DSDT does not possess any DTGP method. If running with Clover, use Clover Configurator app to that effect. inject the following properties either in DSDT or through bootloader config (latter recommended): compatibility of the card with Broadcom chips 14e4:4353 or 14e4:4331 that are handled by IO80211Family's PlugIn kext AirPortBrcm4360 ASPM disabling (required for most cards to avoid CPU clogging and system freeze) optionally, add SysProfiler's cosmetic info such as PCIe Slot, card's make and model, etc. and that's it ! Nothing to do to IO80211Family kext or its PlugIns which all remain untouched/unmodified/full vanilla in /S/L/E. It really could not be simpler... NB: if your card's country code absolutely requires to be changed, say for full 5GHz/80MHz operations, add the following steps: install AirportBrcmFixup kext in /L/E + repair permissions + rebuild your cache or inject it through Clover's EFI/CLOVER/kexts/Other add boot argument brcmfx-country=XX (where XX is the target value, eg: US, FR, #a, etc.) to the Boot section of your Clover config but, beware, I found that using AirportBrcmFixup (v1.1.9 at time of writing) with country code other than default's US setting of the card impacted my wireless performance (fluctuating and reduced RX/TX rate). For instance, with country code set to FR (for France), I would not connect at 80MHz on my 5GHz Wireless network, only at 40MHz which resulted in a local wireless connection limited to 400Mbps (vs. 867Mbps) and reduced my overall Internet RX rate by about 60% and TX rate by about 10%: with country code set to #a (to get full 80MHz connection), I could not obtain DFS channel mode to my local router and I noticed fluctuating/unstable RX/TX rates: without AirportBrmfixup, my wireless connection runs solid at 867Mbps and SpeedTest returns a solid TX and RX rates at 300Mbps (i.e. the maximum speed of my Internet connection). Properties injection through DSDT: On my laptop, the DW1820A was found attached to device RP03.PXSX located at IO address 0x001C0002, i.e. 1C,2. The DSDT patch required to inject properties could look like this (devices names will differ from one computer to another of course!): Device (RP03) // PCIe Root Bridge { name (_ADR, 0x001C0002) [...] [...] [...] Device (PXSX) // DW1820A card attached to this device (FixAirport Clover ACPI fix required if such device is missing) { Name (_ADR, Zero) [...] [...] [...] Method (_DSM, 4, NotSerialized) // _DSM: Device-Specific Method { If (LEqual (Arg2, Zero)) { Return (Buffer (One) { 0x03 }) } Return (Package () { "AAPL,slot-name", // Optional Buffer () { "WLAN" }, "device_type", // Optional Buffer () { "Airport Extreme" }, "name", // Optional Buffer () { "Airport" }, "model", // Optional Buffer () { "Dell DW1820A 802.11ac wireless" }, "compatible", // Mandatory Buffer () { "pci14e4,4353" // Declares compatibility with BCM43224; "pci14e4:4331" for BCM94331 may also be used }, "pci-aspm-default", // Mandatory for most cards Buffer (One) { 0x00 // Disables ASPM for PCIe device } }) } } } Properties injection through bootloader config: An easier alternative is to inject those properties in bootloader config (for Clover via Clover Configurator app for instance). This can be done within the Devices properties section by injecting the desired properties in the Properties sub-section: In the left part, add the PCIe address of the targeted device in the form PciRoot(0x0)/Pci(<root device address>)/Pci(<actual device address>) In the right part, add the above properties in single lines and with the right types (String, Data, Number) For instance, in the case of my laptop booting with Clover, the target device will be PciRoot (0x0)/Pci(0x1C,0x02)/Pci(0x0,0x0) for PCI0@0->RP03@1C,2->PXSX@0. Then, properties will be injected as lines of keys of 3 x possible types: strings, hex data blocks or numbers. For instance, to declare compatibility with 14e4:4353, the line will consist of Property Key set to compatible, Key Value set to pci14e4,4353 and Key Type set to STRING. The complete properties injection will be: Device = PciRoot(0x0)/Pci(0x1c,0x02)/Pci(0x0,0x0) Key = compatible | Value = pci14e4,4353 | Type = STRING Key = pci-aspm-default | Value = 0 | Type = NUMBER Key = AAPL,slot-name | Value = WLAN | Type = STRING (optional) Key = device_type | Value = Airport Extreme | Type = STRING (optional) Key = name | Value = Airport | Type = STRING (optional) Key = model | Value = Dell DW1820 (BCM4350) 802.11ac wireless | Type = STRING (optional) Once the device properties are injected in bootloader config or DSDT, there's nothing left to do but reboot the computer. The DW1820A card will then be fully active and able to connect to 2.4/5GHz networks at full speed. Results: On the Bluetooth side, once the usual Broadcom firmware patching kexts are installed (eg: Rehabman's BrcmFirmwareRepo + BrcmPatchRAM2 for instance), the BT4.1 module will be fully operational and capable of supporting AirDrop and Handoff! Links: Clover Configurator app Rehabman's Broadcom Firmware patching kexts Acidanthera AirportBrcmFixup kext - - - - - - - - - - Edit: 06 Jan 2020 Updated with freshly found ASPM disabling property injection that fixes all outstanding stability issues. DW1820A #096JNT and Foxconn T77H649 now tested 100% Ok. DW1820A #08PKF4 should be just the same. - - - - - - - - - - Edit: 28 Jan 2020 Finally got to test a DW1820A #08PKF4 and it's also 100% Ok with ASPM disabled.1 point


