
Leaderboard


Popular Content
Showing content with the highest reputation on 12/15/20 in all areas
-
 Dec. 2010-Dec. 2020 It's hard to believe that it's been 10 years already! What a road since the early days of Snow Leopard on the Latitude D430! To celebrate this, we've undertaken a small forum clean-up, implemented some optimisation on the hosting server side, upgraded the community board and splashed out on a new forum Theme. We hope you'll all enjoy it and thank you for your loyalty to OSXLatitude. OSXL Crew3 points
 -
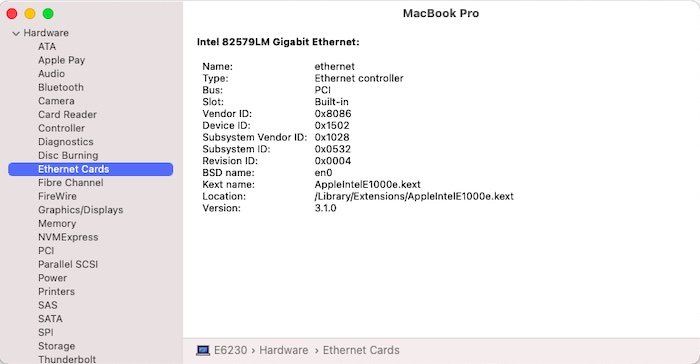
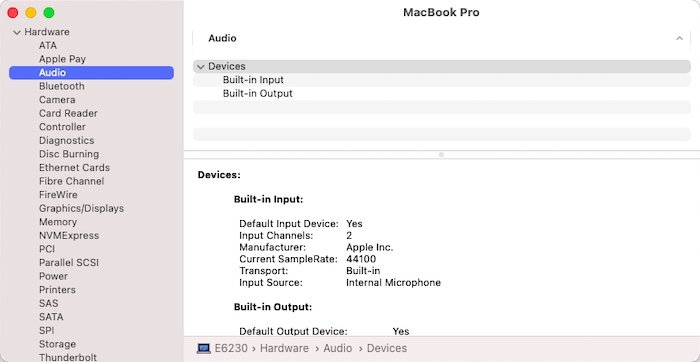
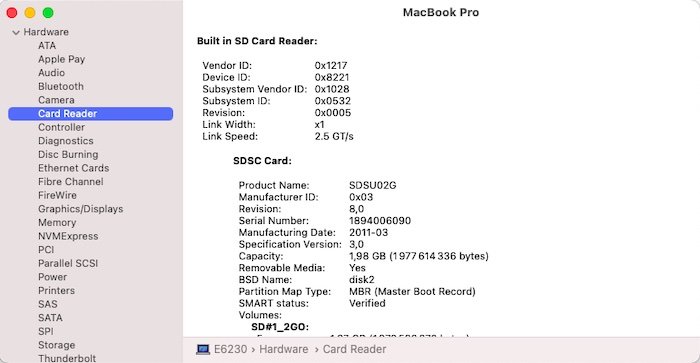
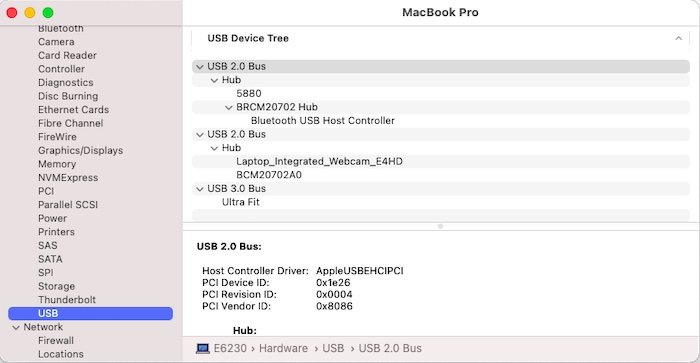
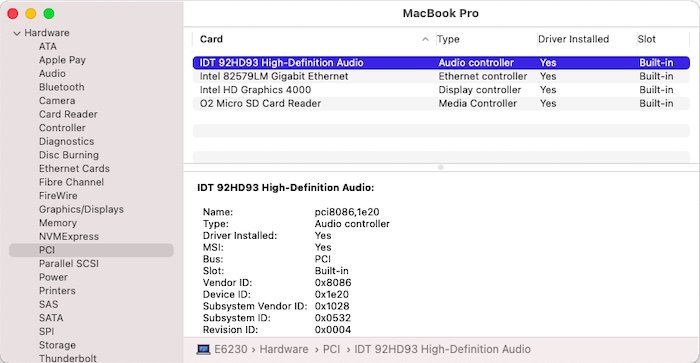
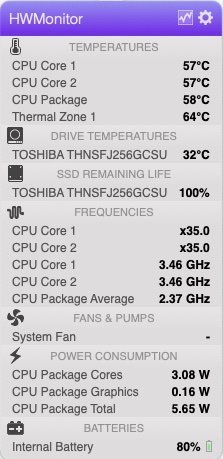
Last update: 06 Nov 2019 Specifications: BIOS A11 A19 A20 with HDD set to AHCI mode Intel QM77 (7 Series/C210) Express chipset 2 motherboards used: first, Intel dual-core Ivy Bridge i5-3340M 2.70GHz CPU (Turbo boost to 3.2GHz (2 cores) or 3.4GHz (1 core)) then, Intel dual-core Ivy Bridge i7-3540M 3.00GHz CPU (Turbo boost to 3.5GHz (2cores) or 3.7GHz (1core)) Integrated Intel HD4000 graphics (650MHz-1.25/1.30GHz) with 12.5" 1366x768 WLED LCD 4GB 8GB DDR3L-1600 RAM Intel 82579LM Gigabit Ethernet (PCI ven id 0x8086, dev id 0x1502) IDT 92HD93 (Codec 76DF) High Def audio (PCI ven id 0x8086, dev id 0x1e20) O2 Micro SD card reader (PCI ven id 0x1217, dev id 0x8221) Internal-USB Broadcom-based (BCM20702A0) DW380 Bluetooth 4.0 module (PCI ven id 0x413c, dev id 0x8197) Internal-USB Sonix Technology Co. webcam (PCI ven id 0x0c45, dev id 0x648b) (NB: some E6230 are fitted with Sonix dev id 0x6449 which is unsupported) 2 x USB 3.0 ports (1 with power share) 1 x combo eSATA + USB 2.0 port 1 x VGA output 1 x HDMI output 1 x headset jack port 1 x 34mm ExpressCard slot 1 x optional fingerprint reader E6230:~ admin$ lspci -nn pcilib: 0000:00:1f.3 64-bit device address ignored. pcilib: 0000:00:1b.0 64-bit device address ignored. pcilib: 0000:00:16.0 64-bit device address ignored. pcilib: 0000:00:14.0 64-bit device address ignored. pcilib: 0000:00:02.0 64-bit device address ignored. pcilib: 0000:00:02.0 64-bit device address ignored. 00:00.0 Host bridge [0600]: Intel Corporation 3rd Gen Core processor DRAM Controller [8086:0154] (rev 09) 00:02.0 VGA compatible controller [0300]: Intel Corporation 3rd Gen Core processor Graphics Controller [8086:0166] (rev 09) 00:14.0 USB controller [0c03]: Intel Corporation 7 Series/C210 Series Chipset Family USB xHCI Host Controller [8086:1e31] (rev 04) 00:16.0 Communication controller [0780]: Intel Corporation 7 Series/C210 Series Chipset Family MEI Controller #1 [8086:1e3a] (rev 04) 00:19.0 Ethernet controller [0200]: Intel Corporation 82579LM Gigabit Network Connection [8086:1502] (rev 04) 00:1a.0 USB controller [0c03]: Intel Corporation 7 Series/C210 Series Chipset Family USB Enhanced Host Controller #2 [8086:1e2d] (rev 04) 00:1b.0 Audio device [0403]: Intel Corporation 7 Series/C210 Series Chipset Family High Definition Audio Controller [8086:1e20] (rev 04) 00:1c.0 PCI bridge [0604]: Intel Corporation 7 Series/C210 Series Chipset Family PCI Express Root Port 1 [8086:1e10] (rev c4) 00:1c.1 PCI bridge [0604]: Intel Corporation 7 Series/C210 Series Chipset Family PCI Express Root Port 2 [8086:1e12] (rev c4) 00:1c.2 PCI bridge [0604]: Intel Corporation 7 Series/C210 Series Chipset Family PCI Express Root Port 3 [8086:1e14] (rev c4) 00:1c.3 PCI bridge [0604]: Intel Corporation 7 Series/C210 Series Chipset Family PCI Express Root Port 4 [8086:1e16] (rev c4) 00:1c.5 PCI bridge [0604]: Intel Corporation 7 Series/C210 Series Chipset Family PCI Express Root Port 6 [8086:1e1a] (rev c4) 00:1d.0 USB controller [0c03]: Intel Corporation 7 Series/C210 Series Chipset Family USB Enhanced Host Controller #1 [8086:1e26] (rev 04) 00:1f.0 ISA bridge [0601]: Intel Corporation QM77 Express Chipset LPC Controller [8086:1e55] (rev 04) 00:1f.2 SATA controller [0106]: Intel Corporation 7 Series Chipset Family 6-port SATA Controller [AHCI mode] [8086:1e03] (rev 04) 00:1f.3 SMBus [0c05]: Intel Corporation 7 Series/C210 Series Chipset Family SMBus Controller [8086:1e22] (rev 04) 02:00.0 Network controller [0280]: Qualcomm Atheros AR928X Wireless Network Adapter (PCI-Express) [168c:002a] (rev 01) 0b:00.0 SD Host controller [0805]: O2 Micro, Inc. OZ600FJ0/OZ900FJ0/OZ600FJS SD/MMC Card Reader Controller [1217:8221] (rev 05) E6230:~ admin$ For recommended BIOS settings, see here.
 1 point
 -
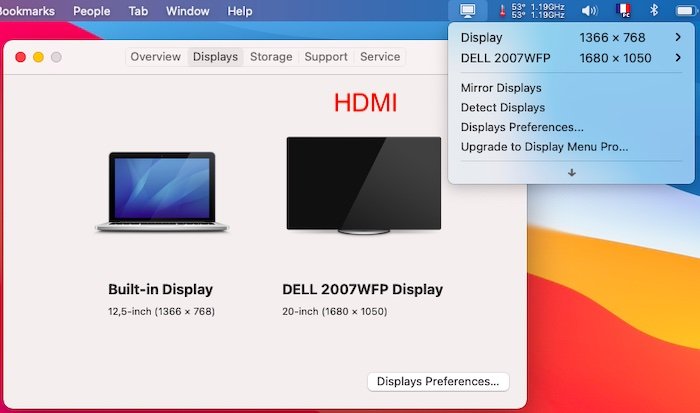
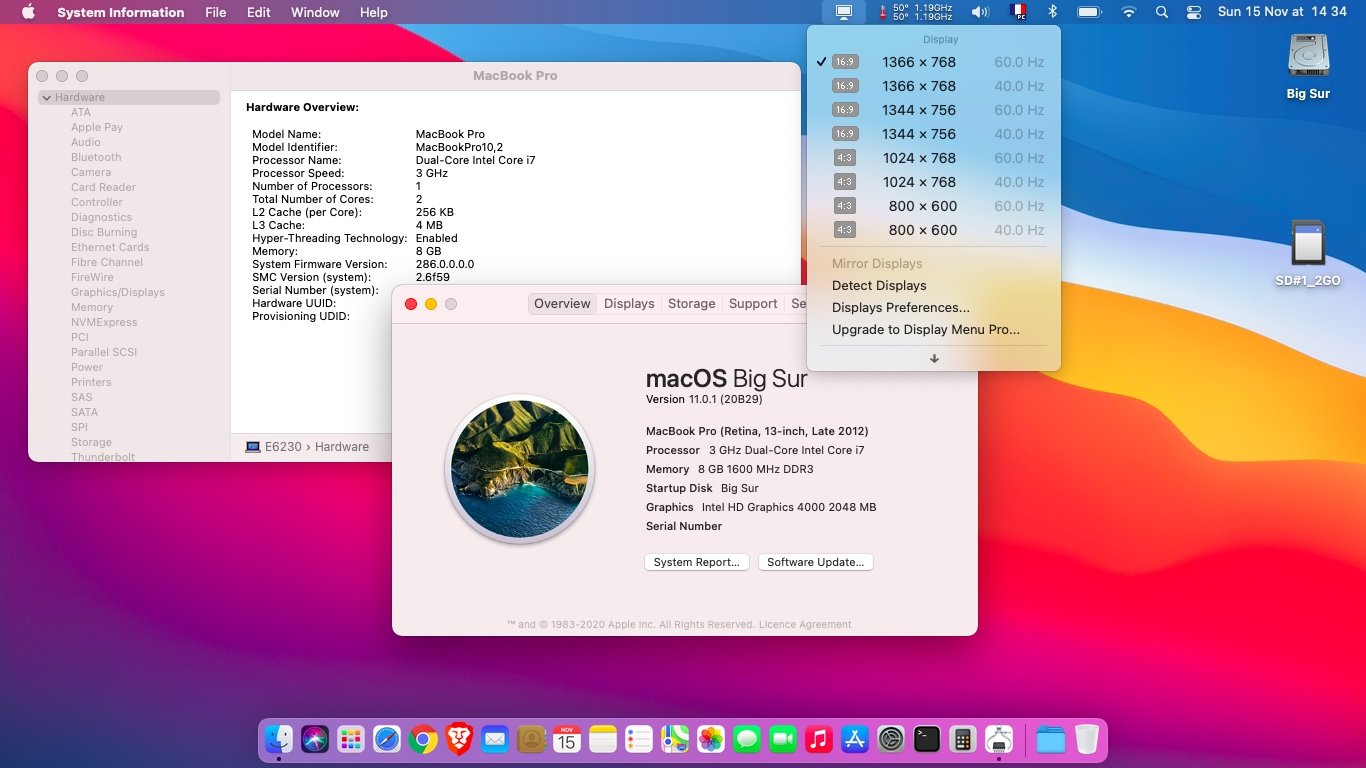
/!\ Refreshed Jan 2023 /!\ Target macOS release: Big Sur 11.x This is a Clover-based installation using the standard vanilla method detailed below: Working: full graphics acceleration on Intel HD4000 graphics (with Lilu v1.6.x + WEG v1.6.x) multi-display with HDMI OOB audio, including jack microphone input and headset output (with AppleALC v1.6.x & layout 12 + CodecCommander v2.7.x) HDMI audio (with Capri Framebuffer properties injection) built-in GigEthernet LAN connection (with AppleIntelE1000e v3.1.0 or latest IntelMausiEthernet kext) wireless and bluetooth with any compatible card integrated webcam (OOB) full CPU power management, including Turbo boost (with CPU-specific generated ssdt) sleep (Lid, Energy Saver settings, Apple menu, Fn-F1, PWR button) & wake (Lid, PWR button) battery management (with ACPIBatteryManager v1.90.1) SD card reader (with DSDT patch or property injection, for compatibility with Apple's default card reader) keyboard (with Dr Hurt's VoodooPS2Controller R6 + DSDT patch for brightness control) touchpad including tap-to-click (with Dr Hurt's VoodooPS2Controller R6) left combo eSATA/USB2.0 + right USB3.0 ports (with Hackintool's generated USBPorts; optional FakePCIID kexts for multiplexing) ExpressCard slot OOB Not working: VGA output unsupported Not tested: SmartCard reader fingerprint scanner GeekBench v4.4.x (64bit) results: 1) 11.x USB installer creation Using a USB key of 16GB minimum, create a Big Sur USB installer through the following Terminal command: sudo <path>/Install\ macOS\ Big\ Sur.app/Contents/Resources/createinstallmedia --volume /Volumes/<USB key> where: <path> = location of Big Sur installation package (eg: /Applications if freshly downloaded) <USB key> = name of formatted USB volume (eg: USB_16GB) The process will take several minutes. Once completed: install Clover boot loader on the USB installer with the following customised settings: Clover for UEFI booting only Install Clover in the ESP UEFI drivers Recommended drivers FSInject SMCHelper Human Interface Devices (optional) PS2MouseDxe USBMouseDxe FileSystem Drivers ApfsDriverLoader Memory fix drivers OpenRuntime Additional Drivers (optional) PartitionDxe Themes (optional) Install Clover Preference Pane (optional) you may use version r5144 attached below Clover_r5144.pkg.zip once Clover is installed, launch Clover Configurator app and mount the freshly created EFI partition of the USB installer Clover Configurator.zip add the (unzipped) HFSPlus driver attached below to the EFI/CLOVER/drivers/UEFI folder HFSPlus.efi.zip open the EFI partition and transfer the files and folders from the Latitude E6230 Big Sur Clover pack below to the EFI/CLOVER folder Clover_Pack_E6230_BigSur.zip /!\ If your E6230 is fitted with a different CPU than the i7-3540M, please remove the Power Management SSDT of the pack until you replace it by one applicable to your model (whether an existing SSDT or your own generated one) in the post-install phase. 2) 11.x installation boot the Big Sur USB installer at the Clover main menu, go to the "Options->configs" menu and select the "config_MBP11,1" config file. This is required to install (and later update as/when required) Big Sur on a supported Mac model. Press [ESC] twice to return to Clover main menu. at the Clover main menu, select the "Install macOS Big Sur" partition and press [ENTER] at Big Sur main installation screen, select Disk Utility to create & format APFS the target Big Sur disk/partition/volume. Note that installation won't work if target disk/partition/volume is formatted HFS+ exit DU and return to Big Sur main installation screen, then proceed with installation the installation process will reboot a temporary macOS installer partition to complete the installation. repeat this until the temporary partition is replaced by a final <Big Sur partition name> on Preboot entry. Each time, reboot via your USB installer and make sure to select the "config_MBP11,1" config file. when the partition <Big Sur partition name> on Preboot is displayed at Clover main menu, no need to call on the "config_MBP11,1" config file, the default one will do (MBP10,2 SMBIOS + -no_compat_check boot arg). 3) Post-installation tuning Once the finalised Big Sur installation has booted, complete the 1st boot configuration tuning Once at the desktop, mount the EFI partition of your Big Sur disk Copy the EFI folder of the E6230 Big Sur Clover pack to the mounted EFI partition You may then modify your SMBIOS info using Clover Configurator app and ensure you have unique numbers or unique combination of numbers (MLB, ROM, SystemSerialNumber and SystemUUID). Please note that, with MBP10,2 SMBIOS, Big Sur will not offer any updates because it'll be running on an unsupported platform. You'll only get updated offered if you boot with the MBP11,1 config file, MacBookPro11,1 being a supported model.
1 point
-
OpenCore Installation: Download MacOS Monterey / Big Sur / Catalina app Format a 16GB USB drive (GUID / Extended (Journaled)) Create USB Installer with createinstallmedia command Download attached folder and rename as EFI Mount EFI partition and add EFI folder Configure BIOS setting according to guide Boot with USB installer Complete installation Post Installation: Mount EFI partition of newly installed drive and copy EFI folder over Update / Change in Config.plist under PlatformID->Generic (use genSMBIOS or Hackintool.app) MLB, ROM, SystemSerialNumber and SystemUUID Note: Config is set for Broadcom DW1560 If you have Intel Wifi, rename Config-IntelWifi to Config.plist Updated to OC 0.6.9 If keyboard/touchpad does not work, replace VoodooPS2Controller-Alps with VoodooPS2Controller-R6 (not included, you should be able to find in forum) Multiboot from OC picker is also working! Updated to OC 0.7.5 Supports Monterey Special note: Added PS2 kext by SkyrilHD that supports multi gestures Updated to OC 0.7.9 Support Monterey 12.3.1 Updated to OC 0.8.7 Add IntelBTPatcher Replaced SkyrilHD's voodoo with Dortania's VoodooPS2Controller which has SkyrilHD's code added E7450_OC_0.8.7.zip E7450_OC_0.7.9.zip E7450_OC_0.7.5.zip E7450_OC_0.6.9.zip E7450_OC_0.6.6.zip E7450_OC_0.6.4.zip E7450_OC_0.6.3.zip
1 point
-
Catalina Catalina Guide Bootpack - HD5500 Only Replace into /EFI/Clover after you install Clover E7450_Catalina.zip - For Discrete Model Also add this to /EFI/Clover/ACPI/Patched SSDT-Disable-DGPU FYI, kexts in bootpack might be outdated Make sure to 1st upgrade kexts found under /EFI/CLOVER/kexts/Other if you encounter issue Common links for new kexts: https://github.com/vit9696/Lilu/releases https://github.com/vit9696/Lilu/blob/master/KnownPlugins.md https://bitbucket.org/RehabMan/ Follow Post Install above under Sierra Guide UPDATES1 point


.jpg.32ba5f6dc9e64893e73203ee3153d34f.jpg)

This leaderboard is set to London/GMT+01:00