
Leon
-
Posts
1235 -
Joined
-
Last visited
-
Days Won
58
Content Type
Profiles
Articles, News and Tips
Forums
Everything posted by Leon
-
Basically, you first create a share on your Linux/Windows for your Time Machine backups to go. I called mine "macbackup" and gave my user full permissions to the folder as well as set it to replicate so that I have a redundant backup of it. Next, open up a terminal window on the Mac and switch on the magic preference defaults write com.apple.systempreferences TMShowUnsupportedNetworkVolumes 1 Now, mount the share on your Windows Home Server using Finder. Back in the terminal window, you now have to create a sparse bundle file. Take a look at the links above for more information, but basically you type a command like the following hdiutil create -nospotlight -library SPUD -size [size_in_gigs]g -fs HFS+J -type SPARSEBUNDLE -volname "Backup of [hostname]" -verbose [hostname]_[mac_addr].sparsebundle Replacing [size_in_gigs] for the size you want to constrain time machine to use, [hostname] for the machine name of your mac and [mac_addr] for the mac address of the interface you want to use for the bacup (usually eth0 as doing the backup over wifi will take a while) I used something like the following command: hdiutil create -nospotlight -library SPUD -size 250g -fs HFS+J -type SPARSEBUNDLE -volname "Backup of martinmbp" -verbose martinmbp_002332c5437e.sparsebundle Then copy this over to the mounted share using something like cp -r [hostname]_[mac_addr].sparsebundle /Volumes/mackbackup/. Now, go to System Preferences, Time Machine and select Change Disk.. Pick your WHS share that you have copied the .sparsebundle to and then leave for a long time if this is your first backup. Seems to be working for me. I'll report back and edit this answer if I find any issues with it. Mileage may vary as Apple obviously left this functionality out for a reason, I'm assuming it is a technical one rather than a ploy to sell more Time Capsules so we'll see what happens. Update: Been using for few days so far and seems to be working ok. A couple of caveats: Reports of issues if you put the machine to sleep while performing a back-up. I did this as a test and had trouble getting the back-up volume to un-mount. In the end I had to reboot the machine to release the lock on whatever file was causing the issue. Problems if trying to restore from Time Machine backup using System CD. Because you have to set a preference to get the machine to pick up unsupported devices like Windows Home Server shares, it is unclear if you can restore a whole machine from the System CD that doesn't have the preference set. Personally I have a few whole image backups that I have kept around that I could restore from an external disk so this hopefully won't be an issue for me - the Time Machine stuff is really just an incremental backup. However I still need to test the restore process
-
By default in Mac OS X browsing to Windows 2008 and 2003 Servers is extremely slow, navigating from one directory level to the next can take a minute or longer. I utilize my Mac to access the office Windows 2008 and 2003 file servers and the speed to access these shares makes it almost impossible to work from a Mac. To make things even worse I do most of my work through a Cisco SSL VPN loaded on my Mac from home over a broadband connection. Out of pure frustration I started playing with settings in my SMB configuration and have found a way in Mac OS 10.6.7 to speed the process up drastically to where navigating folders is almost instantaneous (including over my VPN). This makes the Mac work just as fast as my Windows 7 workstation when connecting to Windows servers. In order to fix the slow SMB browsing you will need to edit the smb.conf file on your Mac. The file is only editable by the user root so you'll need to use a text editor that can authenticate (like BBEdit or TextWrangler) or do this in the Terminal. I did the latter. I had root enabled and used the 'su' command, but you can just use 'sudo' with your administrator account to accomplish the same thing. Once the file has been edited and saved you will need to restart your mac for the changes to take effect. Mac OS X being Unix at the core utilizes the Samba daemon to access Windows networks and the smb.conf file controls how Samba accesses these Windows shares. 2br Launch the Terminal (Applications/Utilities/Terminal). You can use the vi or the pico editors included with Mac OS X to edit the smb.conf file by typing sudo vi /etc/smb.conf or sudo pico /etc/smb.conf. You will be prompted for a password, utilize the password for your admin account. I used vi. In order to change anything within the file you will need to put vi into insert mode by typing the letter i (at the bottom you will see the word insert). Some handy vi editor tips: vi has 2 modes: 'Command Mode' and 'Insert Mode.' To switch between modes you use the letter i in Command Mode to switch to Insert Mode and when in Insert Mode you use the Escape key to switch to Command Mode. File saves are done in Command Mode and edits to the file are done in Insert Mode. You can search the file you are editing in Command Mode by typing /searchstring where searchtring is what you are looking for in the file. Scroll down to the line use spnego = yes and change the yes to a no. Continue to scroll down to stream support = yes and change this to no, on the line immediately below that says ea support = yes change this to no. In the next group that says darwin_streams:brlm = yes change this to no. Save the file by first taking vi out of insert mode by pressing the Escape key. Then to save the file and quit vi type :wq and press Return. Restart your Mac. This simple fix for slow SMB browsing decreased the time to open shares and files on my Windows 2008 server from my Mac drastically.
-
 1. So let’s begin creating a pseudo shell named /bin/ftpaccess debian:~# touch /bin/ftpaccess debian:~# echo 'echo "This accout is for ftp access only"' > /bin/ftpaccess debian:~# echo 'exit 0' >> /bin/ftpaccess debian:~# chmod +x /bin/ftpaccess 2. It’s also necessary to include the just created pseudo FTP shell/bin/ftpaccess in your /etc/shells file. echo '/bin/ftpaccess' >> /etc/shells 3. Then edit your /etc/passwd and change in the user shell, you should edit a line similar to: ftp-user:x:1011:1005:FTP User,,,:/home/ftp-user:/bin/bash Afterwards the same user /etc/passwd line declaration should look like: ftp-user:x:1011:1005:FTP user,,,:/home/ftp-user:/bin/ftpaccess Now the ftp-user user should have an FTP file transfer upload/download access to the server but it’s SSH, SCP and SFTP access will be disabled. Talking about disabling access of SFTP it’s worthy to mention the RSSH Project . RSS is quite cool and is able to restrict a shell access via SSH but same time allow users to use the SFTP and SCP protocols. Other user feedback/experience for accomplishing the same task is very welcome!
 -
The first question that popped into my head after it was revealed that Lion would be a download only upgrade was "what if I need a boot disk?" I've had too many hard drives crash, and had to reinstall too many operating systems to do without a physical boot disk. Plus I've never been one to tote around an external bootable hard drive. Thankfully creating a Lion boot disk is quite painless. 1. Purchase and download Lion from the Mac App Store on any Lion compatible Mac running Snow Leopard. 2. Right click on “Mac OS X Lion†installer and choose the option to “Show Package Contents.†3. Inside the Contents folder that appears you will find a SharedSupport folder and inside the SharedSupport folder you will find the “InstallESD.dmg.†This is the boot disc image we have all been waiting for. 4. Copy “InstallESD.dmg†to another folder like the Desktop. 5. Launch Disk Utility and click the burn button. Select the copied “InstallESD.dmg†as the image to burn, insert a standard sized 4.7 GB DVD, and wait for your new Lion Boot Disc to come out toasty hot.
-
Nginx and Apache2 are running great but there is only one tiny problem with the visitors ip’s. Normaly I let my nginx instance do the logging job, but if you let your Apache do it you will get some problems. Apache will see all incoming requests as coming from localhost (127.0.0.1). Right they are all from nginx. Solution: # Install rpaf module for Apache2 aptitude install libapache2-mod-rpaf # Enable it a2enmod rpaf Now add this to your apache.conf or httpd.conf RPAFenable On RPAFsethostname On RPAFproxy_ips 127.0.0.1 10.0.0.1 RPAFheader X-Forwarded-For # Restart apache2 /etc/init.d/apache2 restart This tells Nginx to forward the original remote IP-address in the header as it proxys ro Apache. Add this 3 Lines to your nginx.conf or to your enables site config: proxy_set_header Host $host; proxy_set_header X-Real-IP $remote_addr; proxy_set_header X-Forwarded-For $proxy_add_x_forwarded_for;
-
It seems like apple screwed up something in Lion DP4, causing GMA950 graphic adapters to show poor backlight light / dark screen. Replacing the AppleIntelIntegratedFramebuffer.kext in /s/l/e with the one from DP3 fixes the issue. I'v attached it to this blog post, use kext Helper to replace it and reboot.. Update 1) As mario pointed out, remember to repair permissions. //Leon FILE: AppleIntelIntegratedFramebuffer.kext_.zip
-
Sometimes it is very annoying to wait ten's of seconds to finish remote ssh server's reverse dns lookup procedure. It can be disabled on the server side but this process has a few tricks. First of all, you can make "UseDNS no" in /etc/ssh/sshd_config file, default answer is yes and if this line not shown in your config file, just add it to as below: UseDNS no This directive tells sshd process to check resolved host name for the connected client's ip address maps back to the very same ip address or not. After you have done the change, restart your SSH server with a: /etc/init.d/ssh restart NOTE: It does not prevent the sshd server from performing any DNS lookups at all. That's not the purpose of that directive. In order to remove dns lookups completely, you have to use -u0 options when starting sshd server. You can easily add this options to /etc/default/ssh or/etc/sysconfig/sshd or elsewhere suitable for your distribution. -u0 option's means that it will not put hostnames into the utmp structure (i.e. what you see when you type "who" at the shell prompt), which means that sshd will not perform DNS lookups for that purpose. However there are still cases where a lookup has to be performed when a user has "from=" like entries in his authorized_keys file, or when authentication methods or configuration directives are used that involve hostnames.
-
The other day i wanted to test LogMeIn Hamachi on a older G4 - to my big disappointment the damn thing is only supported on Intel macs.. and best of all.. you first get to know about it after installation. good work.. NOT.. Ever funnier, the uninstall app is also for Intel only.. WTF?!?!?! .. well ok.. after a great deal of research i put together a guide for howto uninstall the damn thing. 1. Remove the actual app from /Applications 2. Open terminal and type: sudo rm /usr/sbin/tuncfg sudo rm /usr/bin/hamachi sudo rm /usr/bin/hamachi-init rm -r /home//.hamachi Now remove any Hamachi/LogMeIn of the entries from: /System/Library/LaunchDaemons /Library/LaunchDaemons /System/Library/LaunchAgents /Library/LaunchAgents .. and finally remove: /System/Library/LaunchDaemons/tuncfgd.plist .. reboot.. Home this helps somebody out there...
-
UNIX includes a program named 'cron' to handle the execution of tasks on a specified schedule, regardless of whether the user is logged in or not. Cron does this through a series of simple text files known as 'crontabs' which control the scheduling of jobs. The cron daemon is used by the system for scheduled daily, weekly, and monthly maintenance, and can be used by users to run various programs at set intervals, such as to handle my site backup program as described elsewhere on this site. Read the rest of this article if you'd like a simple overview of what cron is and how it can be used. The system cron tasks are stored in /etc/crontab. You can "cat" this file to get an example of what a crontab looks like: user% cat /etc/crontab # $NetBSD: crontab,v 1.13 1997/10/26 13:36:31 lukem Exp $ # # /etc/crontab - root's crontab # SHELL=/bin/sh PATH=/bin:/sbin:/usr/bin:/usr/sbin HOME=/var/log #min hour mday month wday user command */10 * * * * root /usr/libexec/atrun # do daily/weekly/monthly maintenance 15 3 * * * root sh /etc/daily... 30 4 * * 6 root sh /etc/weekly... 30 5 1 * * root sh /etc/monthly... [NOTE: There are TABS between the items, so don't copy/paste anything you see here; type it with tabs between fields!] If you want even more info on what the system is actually doing for maintenance, follow the path under the COMMAND column, and "cat" the actual .sh files ... there's quite a bit going on for which you might like to leave your system running at least overnight on occasion! The basic format of the file is relatively self-explanatory, sort of! An "*" in a column reads as "every", and the "*/10" in the first command line means "every 10th minute". So the weekly maintenance is set to run at 30 mins, 4 hours (or 4:30am) every day of every month, on the 6th day of the week. After the scheduling block is a column for which user the command will run as (root in this case), and what the acutal command is that will be executed. You can add new system-wide tasks to the cron program by inserting lines into this file (but you must be 'root' in order to do so). More applicable to a typical user would be to schedule their own cron task. I did just that for my backup solution mentioned in another hint. To do this, I first copied the root crontab to a file in my directory (cp /etc/crontab ~/mycrontab). I then edited the 'mycrontab' file to look like this (I've skipped the header, which I left the same as the root file): #min hour mday month wday command 25 2,14 * * * sh path/to/getmybackup.sh The 'sh getmybackup' runs my backup download shell script (see the related article on automated backups), and the time section is set to run it twice a day - at 2:25am, and 2:25pm (1425 in military time). Once the edited file has been saved, the final step is to tell the 'cron' program to schedule the task: crontab mycrontab That's all there is to it; the task is scheduled and will be executed twice a day at the specified time, as long as my machine is powered on. You can see a list of currently scheduled tasks by typing "crontab -l" at the command prompt, and you can cancel a crontab with "crontab -r". Hope this helped shed a little light on the dark world of cron...and as usual, there's much more to this subject than I've covered here, but this should be enough to get you started. Good way to edit your crontab on mac: EDITOR=nano crontab -e
-
Creds goes to Kevin Worthington I optimized and corrected a few links so here is a ready to use guide for installing nginx on OSX 10.6+ #!/bin/bash ## DOWNLOADS sudo curl -OL h http://ftp.exim.llorien.org/pcre/pcre-8.01.tar.gz > /usr/local/src/pcre-8.01.tar.gz sudo curl -OL h http://nginx.org/download/nginx-0.8.33.tar.gz > /usr/local/src/nginx-0.8.33.tar.gz ## Install PCRE sudo mkdir -p /usr/local/src cd /usr/local/src tar xvzf pcre-8.01.tar.gz cd pcre-8.01 ./configure --prefix=/usr/local make sudo make install cd .. ## Install Nginx tar xvzf nginx-0.8.33.tar.gz cd nginx-0.8.33 ./configure --prefix=/usr/local --with-http_ssl_module make sudo make install ## Start Nginx sudo nginx You may even paste this into eg. build.sh to make it even easier.. after installation you will find: nginx.conf -> /usr/local/conf stop nginx: killall nginx start nginx: /usr/local/sbin/nginx
-
This is an example of a bash script which checks for some running process (daemon or service) and does specific actions (reload, sends mail) if there is no such process running. Requirements: Any modern Linux or OSX distribution Nearly any unix sistem with recent bash version, grep, ps We call ps (process list) command to list every system process and then use grep(filter) command to check if our process name is in that list, for example: $ ps ax | grep httpd 592 ?? Ss 8:22.25 /usr/local/apache/bin/httpd 3706 ?? I 0:58.06 /usr/local/apache/bin/httpd 3707 ?? I 0:40.12 /usr/local/apache/bin/httpd 3708 ?? I 0:49.56 /usr/local/apache/bin/httpd 3709 ?? I 1:02.86 /usr/local/apache/bin/httpd 3710 ?? I 1:12.26 /usr/local/apache/bin/httpd 3711 ?? I 1:20.03 /usr/local/apache/bin/httpd 3712 ?? I 0:48.79 /usr/local/apache/bin/httpd 3714 ?? I 1:01.60 /usr/local/apache/bin/httpd 3715 ?? I 0:58.91 /usr/local/apache/bin/httpd 3716 ?? I 0:42.88 /usr/local/apache/bin/httpd 28363 p3 S+ 0:00.01 grep httpd But if there is no such process, grep (filter) command will match itself, because command argument has exactly same string which is searched for: $ ps ax | grep nosuchprocess 28372 p3 S+ 0:00.01 grep nosuchprocess So, we have to add additional 'grep -v grep' filter that will remove process which command line contains 'grep' i.e. grep itself. Here is a script wich checks if SERVICE (variable at the beginning of script which contains service name) is running, and if it's not running, mails warning message to root: source code: bash script #!/bin/sh SERVICE='httpd' if ps ax | grep -v grep | grep $SERVICE > /dev/null then echo "$SERVICE service running, everything is fine" else echo "$SERVICE is not running" echo "$SERVICE is not running!" | mail -s "$SERVICE down" root fi WARNING!!! If you process name is too short and is substring of some other process command line, suggested approach could fail (for example, you checking for 'testd' process, but have running 'testdoo-doo-doo" which will result false positive) Though, highly unlikely, but if your process name will begin with 'grep', suggested approach could fail
-
iCloud’s ‘Documents in the Cloud’ doesn’t let you do much except upload iWork files for use with iOS devices. To use those documents on another Mac, you have to download the file using the iCloud web interface. Poking around in the ~/Library folder, you can find a ‘Mobile Documents’ folder that is used for syncing iWork documents. But it turns out you are not limited to iWork files if you just want to sync between Macs (i.e. no iOS use). If you are using iCloud and have the ‘Documents & Data’ option selected in the preference pane, you can navigate to ~/Library/Mobile Documents. Depending on whether or not you’ve used iWork and synced documents to iCloud, you may or may not find folders there for each of the iWork applications (e.g. com~apple~numbers). This doesn’t really matter. What is of use is that any files put into the ~/Library/Mobile Documents folder will automatically upload to iCloud and push to any other Mac you have that is signed in to the same iCloud account and has the ‘Document & Data’ iCloud preference checked. Lion even notifies you of version conflicts and allows you to resolve them when you open the document. While its not entirely like with mobileme – its one step in the right direction Enjoy!
-
This tutorial will guide you through the setup of a fully-featured seedbox running on a Debian or Ubuntu system, including: libtorrent 0.13.0 rTorrent 0.9 ruTorrent Web UI (3.0) This guide has been tested with Debian 6 (x86_64) and Ubuntu 11.04 (x86_64). To start, access your VPS via SSH (as the root user) and do the following to update your platform and install some required dependencies: # apt-get update # apt-get install subversion build-essential automake libtool libcppunit-dev libcurl3-dev libsigc++-2.0-dev unzip unrar-free curl libncurses-dev # apt-get install apache2 php5 php5-cli php5-curl Enable scgi for Apache: # apt-get install libapache2-mod-scgi # ln -s /etc/apache2/mods-available/scgi.load /etc/apache2/mods-enabled/scgi.load Install XMLRPC: # mkdir /install;cd /install # svn checkout http://xmlrpc-c.svn.sourceforge.net/...mlrpc-c/stable xmlrpc-c # cd xmlrpc-c # ./configure --disable-cplusplus # make # make install Intall libtorrent: # cd /install # wget http://vps6.net/src/libtorrent-0.13.0.tar.gz # tar xvf libtorrent-0.13.0.tar.gz # cd libtorrent-0.13.0 # ./configure # make # make install Install rTorrent: # cd /install # wget http://vps6.net/src/rtorrent-0.9.0.tar.gz # cd rtorrent-0.9.0 # ./configure --with-xmlrpc-c # make # make install # ldconfig Create required directories: # mkdir /home/seeder1/rtorrent # mkdir /home/seeder1/rtorrent/.session # mkdir /home/seeder1/rtorrent/watch # mkdir /home/seeder1/rtorrent/download Setup .rtorrent.rc file (rTorrent config): # cd ~/ # wget http://vps6.net/src/.rtorrent.rc # cp .rtorrent.rc /home/seeder1/ (Edit the settings in .rtorrent.rc, like max upload/download speed, max connected peers, etc, as needed.) Install rTorrent: # cd /install # wget http://vps6.net/src/rutorrent-3.0.tar.gz # tar xvf rutorrent-3.0.tar.gz # mv rutorrent /var/www # wget http://vps6.net/src/plugins-3.0.tar.gz # tar xvf plugins-3.0.tar.gz # mv plugins /var/www/rutorrent # rm -rf /var/www/rutorrent/plugins/darkpal # chown -R www-data:www-data /var/www/rutorrent Secure /rutorrent: # a2enmod ssl # a2enmod auth_digest # a2enmod scgi # openssl req $@ -new -x509 -days 365 -nodes -out /etc/apache2/apache.pem -keyout /etc/apache2/apache.pem # chmod 600 /etc/apache2/apache.pem # htdigest -c /etc/apache2/passwords seedbox seeder1 (Enter a password of your choice when prompted, you will use this to log in to the ruTorrent web UI.) # cd /etc/apache2/sites-available/ # rm -rf default # wget http://vps6.net/src/default # a2ensite default-ssl # /etc/init.d/apache2 reload Install screen: # apt-get install screen Start rTorrent in a detached shell using screen: # screen -fa -d -m rtorrent (To start rtorrent automatically when the VPS is booted, add the above command to /etc/rc.local) You can now access ruTorrent at http://xx.xx.xx.xx/rutorrent/ (replace xx.xx with your server's IP address). You should be greeted with a login prompt, where the username is "seeder1" and the password is the one you set above in the "secure /rutorrent" section. .. and there you go
-
Hi, This short guide will show you howto setup a VPN server in Debian with ONE network card. 1. Install the required packages apt-get install pptpd dnsmasq 2. Configure the IP range assigned to clients by running: pico /etc/pptpd.conf localip 10.0.0.1-99 remoteip 10.0.0.100-199,10.0.0.245 Using this config the clients are assigned any IP address between and including 10.0.0.100 and 10.0.0.199 3. Create a user allowed to connect by running: pico /etc/ppp/chap-secrets * * Passwords are not encrypted. This allows the a user with the username: user1 and the password: secretpassword to login from any ip address. 4. Enable IP forward at startup to allow the VPN clients to connect to the server's local network by running: pico /etc/sysctl.conf net.ipv4.ip_forward=1 Also run this command to activate the IP forward instantly: echo 1 > /proc/sys/net/ipv4/ip_forward 5. Create a routing rule to allow the VPN clients to route network traffic through the server. iptables -t nat -A POSTROUTING -o eth0 -j MASQUERADE 6. Add DNS configuration to your setup by running: pico /etc/ppp/options Change: ms-dns 10.0.0.1 ms-dns 8.8.8.8 7. Create a virtual network interface for 10.0.0.1 pico /etc/network/interfaces Add this: auto eth0:0 iface eth0:0 inet static address 10.0.0.1 netmask 255.255.255.0 Now.. reboot and enjoy VPN! Note(s): 1) On Ubuntu server, i had to create a "startup" script with the line below in order to enable data routing. iptables -t nat -A POSTROUTING -o eth0 -j MASQUERADE
-
Hi, My little Dell D430 running OSX Lion 10.7.5 is limited to 2gb of memory - hence why i keep a constant eye on what i spend resources on. So, i decided to take all 3 services out for a spin and have a look at their memory usage. All 3 clients is setup with the same amount of files - synced and idle - further more - i rebooted the machine after it had finished sync and let it run idle for and hour or two. Memory stats: Skydrive: 84,4mb gDrive: 96,6mb Dropbox: 53,5mb What is worth to notice is that Dropbox and gDrive remained stable - while skydrive was slowing leaking memory.. i asume its some bug MS needs to straithen out. How is it working for you ?
-
I'll like to thank Jan Suomi for finding this one: Its a neat little php script for parsing a URL and splitting into a array: <?php function parse_query($var) { /** * Use this function to parse out the query array element from * the output of parse_url(). */ $var = parse_url($var, PHP_URL_QUERY); $var = html_entity_decode($var); $var = explode('&', $var); $arr = array(); foreach($var as $val) { $x = explode('=', $val); $arr[$x[0]] = $x[1]; } unset($val, $x, $var); return $arr; } $url = "http://somefunny.url.com/click?z=26&a=761"; print_r(parse_query($url)); ?>
-
Here is a neat little javascript function to load a remote CSS or Javascript file remotely: <script> function loadjscssfile(filename, filetype) { if (filetype=="js") { var fileref=document.createElement('script') fileref.setAttribute("type","text/javascript") fileref.setAttribute("src", filename) } else if (filetype=="css") { var fileref=document.createElement("link") fileref.setAttribute("rel", "stylesheet") fileref.setAttribute("type", "text/css") fileref.setAttribute("href", filename) } if (typeof fileref!="undefined") { document.getElementsByTagName("head")[0].appendChild(fileref); } } </script>
-
I just got a new laptop – the latest version of the Samsung Series 9. The C Drive has 2 3.7GB files on it – the pagefile.sys and the hiberfil.sys. Removing pagefile.sys is relatively straightforward as it’s a standard feature of Windows. However, removing the hiberfil.sys on the Samsung Series 9 was more difficult. This is because it has firmware which does not support hibernation. As such, the computer can’t make any changes to the hibernation settings by default. The standard way to disable hibernation is to run an elevated command prompt and type powercfg -h off. This turns off hibernation and deletes the file. However, this gave me the error: “Hibernation failed with the following error: The request is not supported. The following items are preventing hibernation on this system. The system firmware does not support hibernationâ€. Bit of a catch 22 – you can’t delete it because you can’t turn it off, because it’s not supported. However, I was able to disable hibernation and therefore remove the hiberfil.sys via the registry editor (found as option 3 here). Open the start menu and type regedit in the search box then hit enter. In regedit, navigate to: HKEY_LOCAL_MACHINE\SYSTEM\CurrentControlSet\Control\Power Double click ‘HibernateEnabled’ and change the value data to 0. Click OK, close regedit and restart to apply the changes. Hey presto, the hiberfil.sys is removed from the Samsung Series 9!
-
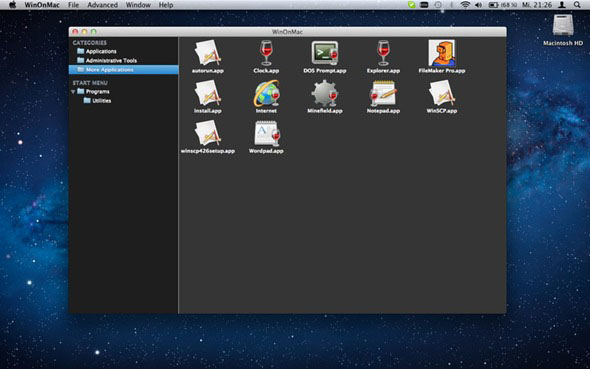
Want to be able to run Windows applications on Mac OS X without a virtual machine? Apple computer users have used virtual machines programs such as Parallels Desktop and VMWare Fusion to run Windows on their machines for ages now. Apple even implemented a feature called Bootcamp so that Mac users can install Windows on a second partition of their storage drive and boot up to it as a second operating system. But, what if you want to run Windows’ .exe programs directly from your Mac operating system? This has been impossible until now. In the Mac App Store, you can download an application called WinOnX. This application doesn’t require you to have any instance of Windows on your computer. Instead, you can download .exe (executable) applications to run directly from this program virtually. So in simpler words: you can run Windows applications on your Mac computer without Windows installed. Here’s how: Download WinOnX from the Mac App Store. It will cost you $4.99. After downloading WinOnX, find a .exe program that you wish to run, for example, Mozilla Firefox for Windows and download it. Once it downloads, you can double-click it to run it like you could with any .app application on your Mac computer. WinOnX will run you through installing and using the Windows application like you would on Windows, only on your Mac instead. Running Firefox for Windows on your Mac will yield this look: This option will cost you some money, but it uses a lot less disk space for Mac users. If you have a solid state drive like me, you may select this option instead of dual booting in order to save storage drive space. Redmond Pie recommends that you just buy a new PC to install Windows programs on, because Mac is beautiful on its own. Name: WinOnX Price: $4.99 Version: 1.0.1 Developer: Hisham El-Emam – NES Software Editor’s Rating:  3/5 Alternatively, you can try the free application: WineBottler.

-
Hi Mate, Are you testing this on a laptop or a stationary?
-
The bootCache error is not the error, thats just a normal message.. the problem is what comes afterwards.. and i think that is the issue... could you boot with: -x -v
-
1. Dont install 10.8, since you have not QE/CI support (accelrated graphics), ML will suck extra much.. go for Lion or SL 2. seems you need IOATAFamily.kext to fix the "Waiting for root device" Get it from here: IOATAFamily.kext.zip
-
did you install Lion or Mountain Lion ?
-
when you are in chameleon you can enter text as a option... type: -v and hit enter - that will boot in verbose mode so that you can see what errors etc. you are getting
-
6400-nvidia should be supported: http://www.osxlatitude.com/edp/compatibility/ .. if not. then you can help us make it so. And yes, EDP supports ML allready: http://www.osxlatitude.com/edp/bootpack/