Hervé
-
Posts
10077 -
Joined
-
Last visited
-
Days Won
569
Content Type
Profiles
Articles, News and Tips
Forums
Everything posted by Hervé
-
That setup suggestion with a SKL setup + dummy framebuffer id then a SKL framebuffer + screen sharing/VNC then OCLP really is most complicated when you can directly opt for a KLB framebuffer + a faked KBL GPU id from the onset. All details have been available for some time in old threads such as this one or this one; in other words, the exact same graphics settings that are to be used since Ventura which dropped official support for SKL graphics. All details available here. In a nutshell, simply use a KBL laptop setup.
-

AR5B22: How to get it working in High Sierra?
Hervé replied to Lost-Entrepreneur439's topic in Wireless & Bluetooth
Not all computers are worthy Hackintoshes... -
AR5B22: How to get it working in High Sierra?
Hervé replied to Lost-Entrepreneur439's topic in Wireless & Bluetooth
These cards were always best avoided. https://osxlatitude.com/forums/topic/11138-inventory-of-supportedunsupported-wireless-cards-2-sierra-ventura-beyond -
[Solved] Thinkpad x390: HDMI output not working
Hervé replied to pawan2joy's topic in Lenovo systems
You inject property: disable-external-gpu Does your Thinkpad have a dGPU? If so, HDMI may be wired to it. -
Mounty: problem mounting NTFS partitions as writable in Sequoia 15.1
Hervé replied to karahanzorbey's topic in The Archive
https://mounty.app/#FAQs Have you tried contacting the tool's developer or reading the posted comments? I would also suggest that you check if the necessary driver got installed properly and not blocked by Gatekeeper. See our Sequoia beta 3 thread in the archive. You may need to upload a modified profile.
-
[Solved] Thinkpad x390: HDMI output not working
Hervé replied to pawan2joy's topic in Lenovo systems
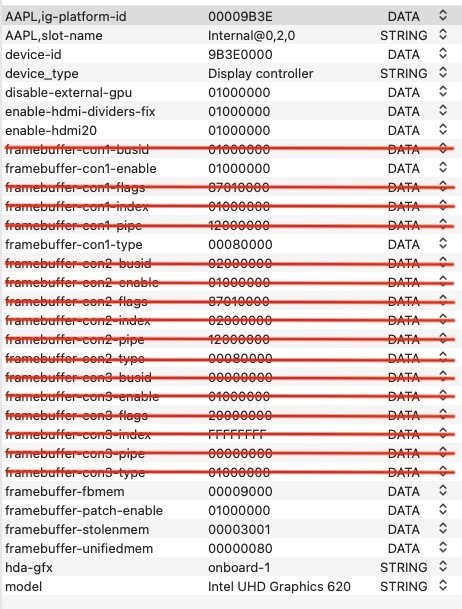
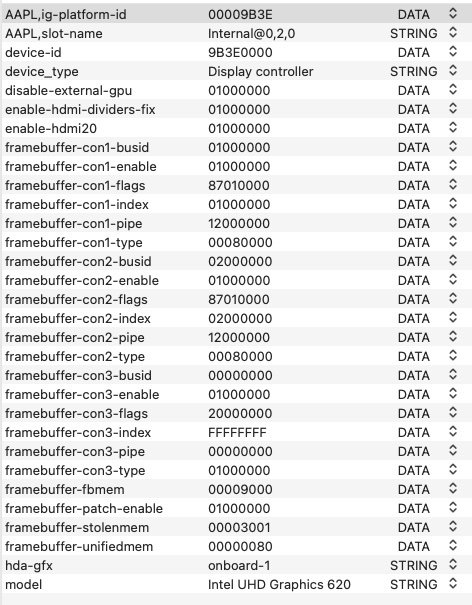
Sorry but I don't understand what you're saying about HDMI. IOReg shows that you most certainly did remove all the unnecessary stuff from your config but no external screen attached to con1 or con2. Were you trying to say that your laptop froze or crashed when you plugged in an HDMI cable/screen? If so, try and patch con1's pipe as follows: framebuffer-con1-pipe 12000000 DATA Re: camera not working, you probably need to remap your USB ports after changing SMBIOS. -
I would personally never claim that that every manufacturer provided VGA in the manner you state and they certainly did not convert VGA to something else internally: it's the other way round: digital to analog conversion of the signal. Dell (and obviously some others) have indeed done so from a DP output. If it were the case in your Acer desktop, you'd already have VGA output. But you don't, so... As I said, you could try and bypass AGDP but you may also experiment with various patches of your 1st and/or 3rd connector knowing that port 0 is always LVDS/eDP but "standard" ports 5, 6 and 7 (i.e. connectors with indexes 1, 2 and 3) are used for other types. Of course, you can create your own connectors through various combinations of indexes and BusId. You use KBL FB 0x59120000 in which you simply patch con1/port6 to HDMI type: ID: 59120000, STOLEN: 38 MB, FBMEM: 0 bytes, VRAM: 1536 MB, Flags: 0x0000110B TOTAL STOLEN: 39 MB, TOTAL CURSOR: 1 MB (1572864 bytes), MAX STOLEN: 115 MB, MAX OVERALL: 116 MB (122171392 bytes) Model name: Intel HD Graphics KBL CRB Camellia: CamelliaDisabled (0), Freq: 1388 Hz, FreqMax: 1388 Hz Mobile: 0, PipeCount: 3, PortCount: 3, FBMemoryCount: 3 [1] busId: 0x05, pipe: 9, type: 0x00000400, flags: 0x00000187 - ConnectorDP [2] busId: 0x04, pipe: 10, type: 0x00000400, flags: 0x00000187 - ConnectorDP [3] busId: 0x06, pipe: 10, type: 0x00000400, flags: 0x00000187 - ConnectorDP 01050900 00040000 87010000 02040A00 00040000 87010000 03060A00 00040000 87010000 To give you a practical example, as described in my initial Ventura beta early findings thread, I use KBL mobile FB 0x5916000 on my SKL Latitude E7270 laptop and just patch con1/port6 to HDMI type in order to obtain HDMI audio. ID: 59160000, STOLEN: 34 MB, FBMEM: 0 bytes, VRAM: 1536 MB, Flags: 0x00000B0B TOTAL STOLEN: 35 MB, TOTAL CURSOR: 1 MB (1572864 bytes), MAX STOLEN: 103 MB, MAX OVERALL: 104 MB (109588480 bytes) Model name: Intel HD Graphics KBL CRB Camellia: CamelliaDisabled (0), Freq: 1388 Hz, FreqMax: 1388 Hz Mobile: 1, PipeCount: 3, PortCount: 3, FBMemoryCount: 3 [0] busId: 0x00, pipe: 8, type: 0x00000002, flags: 0x00000098 - ConnectorLVDS [1] busId: 0x05, pipe: 9, type: 0x00000400, flags: 0x00000187 - ConnectorDP [2] busId: 0x04, pipe: 10, type: 0x00000800, flags: 0x00000187 - ConnectorHDMI 00000800 02000000 98000000 01050900 00040000 87010000 02040A00 00080000 87010000 KBL FB 0x591B0000 is the default one for laptops, according to the WEG user manual: ID: 591B0000, STOLEN: 38 MB, FBMEM: 21 MB, VRAM: 1536 MB, Flags: 0x0000130B TOTAL STOLEN: 39 MB, TOTAL CURSOR: 1 MB (1572864 bytes), MAX STOLEN: 136 MB, MAX OVERALL: 137 MB (144191488 bytes) Model name: Intel HD Graphics KBL CRB Camellia: CamelliaDisabled (0), Freq: 1388 Hz, FreqMax: 1388 Hz Mobile: 1, PipeCount: 3, PortCount: 3, FBMemoryCount: 3 [0] busId: 0x00, pipe: 8, type: 0x00000002, flags: 0x00000098 - ConnectorLVDS [2] busId: 0x04, pipe: 10, type: 0x00000800, flags: 0x00000187 - ConnectorHDMI [3] busId: 0x06, pipe: 10, type: 0x00000400, flags: 0x00000187 - ConnectorDP 00000800 02000000 98000000 02040A00 00080000 87010000 03060A00 00040000 87010000 but, if I use it, I get no HDMI output unless I patch con1 to index 1, BusId 5 and pipe 9. DP output works with either port 6 or 7.
-
I'm surprised such questions still arise today. There's been no native or official support for VGA output off Intel iGPUs in Apple Mac operating system for years. Last Intel iGPUs on which framebuffer patches applied to obtain VGA output was Sandy Bridge HD3000 (and, from memory, Ivy Bridge HD4000 up to Lion or very early versions of ML). Your reasoning when booting in VESA mode is incorrect, your information and understanding being wrong on the matter. (Accelerated) VGA output just happens to work on HD4400 laptops and on some later laptops but it does so OOB and IO consultation then shows the port attached to a connector natively listed as a DP output. I guess it's possibly some signal conversion. This being said, afaik, you will find no patch to get VGA working off the iGPU of your KBL desktop, i.e. If it does not work OOB, It won't work at all. I don't follow your rationale for a 4th connector when you can simply patch the 1st or 3rd one (i.e. con0 or con2) to modify them, whether the mod relates to the type, BusId, index, etc. A 4th connector would be of absolute no use re: VGA output and would not make no difference at all. It would only be useful if you actually had 4 supported video outputs and wanted to use them all. This would require you to patch your selected framebuffer accordingly (see our SNB/HD3000 patching guide for reference). Happy to be proven wrong on the VGA patch after more than 10 years of course but if it is multi-screen with HDMI and VGA monitors you're after, get a cheap AMD card like an RX560 for instance (VGA/DP/HDMI outputs being all supported). Or if you have other ports such as DVI, DP or even a 2nd HDMI output, use an active adapter to attach to your VGA screen. One thing you could try though, because I just remembered it fixed an issue I had with DVI output on my Haswell laptop when I had it, is to disable/bypass AGDP checking. Patch is detailed in my old Haswell iGPU patching guide.
-
Compaq Presario SR5310F: White square after verbose on Lion
Hervé replied to Lost-Entrepreneur439's topic in The Archive
https://osxlatitude.com/forums/topic/8238-supportedunsupported-gpus-graphics-cards https://osxlatitude.com/forums/topic/11160-useful-links-for-lists-of-best-graphics-cards-2024 https://dortania.github.io/GPU-Buyers-Guide/legacy-gpus/legacy-nvidia.html https://dortania.github.io/GPU-Buyers-Guide/legacy-gpus/legacy-amd.html Get a good old GeForce G210 and you'll be good to go. -
Compaq Presario SR5310F: White square after verbose on Lion
Hervé replied to Lost-Entrepreneur439's topic in The Archive
I'd say the bootpack is totally inadequate for old Lion. I suggest/recommend you look up old threads with bootpacks for old and obsolete GMA950 computers. I doubt lilu & its PlugIns are of any use in Lion for old GMA950 graphics. SSDT-EC, that's for Catalina & later... Lion needs replacement of AppleACPIPlatform kext by that of Snow Leopard's origin or you'll get a KP. I expect you'll also need the patched AppleRTC kext and you may need the patch Intel (GMA) framebuffer kext to fix a brightness issue that used to affect most GMA950 Hacks. Lion need to boot in 32bit kernel mode or you won't have graphics acceleration but you know that and did setup OC in i386 kernel mode. I'd forget OpenCore and use good old Chameleon with myHack tool to make your USB installer. You're the one who published a version that was modified to run on macOS versions. Put an old AMD HD2000/3000/4000/5000/6000 series or nVidia Tesla series PCIe graphics card in this old desktop and you should be able to run OS X El Capitan. You may not do much with El Capitan but you sure won't do anything with Lion which is totally deprecated/obsolete. -
[Solved] Thinkpad x390: HDMI output not working
Hervé replied to pawan2joy's topic in Lenovo systems
IOReg with HDMI plugged in please. I take it you do reset NVRAM when you reboot after changing your config, right? -
[Solved] Thinkpad x390: HDMI output not working
Hervé replied to pawan2joy's topic in Lenovo systems
Then you may want to retry without the fbmem/stolenmem injections. You never know, your laptop may be set with 64MB or more of DVMT. Do that with a USB key as you don't want to break your Hack. -
[Solved] Thinkpad x390: HDMI output not working
Hervé replied to pawan2joy's topic in Lenovo systems
Again, I recommend you remove all that crap you've got for the connectors and stick to the 2 lines I posted above. At this stage, your HDMI screen does not even appear in IOReg which can't be a surprise. For the rest, it would appear you followed the Dortania recommendations, at least as far as the OC configs concerned.
-
[Solved] Thinkpad x390: HDMI output not working
Hervé replied to pawan2joy's topic in Lenovo systems
The graphics properties you inject look overly complicated to me; I'd be surprised if you need more than a third of them. You've opted for CFL framebuffer 0x3E9B0000: ID: 3E9B0000, STOLEN: 57 MB, FBMEM: 0 bytes, VRAM: 1536 MB, Flags: 0x0000130B TOTAL STOLEN: 58 MB, TOTAL CURSOR: 1 MB (1572864 bytes), MAX STOLEN: 172 MB, MAX OVERALL: 173 MB (181940224 bytes) Model name: Intel HD Graphics CFL CRB Camellia: CamelliaDisabled (0), Freq: 0 Hz, FreqMax: 0 Hz Mobile: 1, PipeCount: 3, PortCount: 3, FBMemoryCount: 3 [0] busId: 0x00, pipe: 8, type: 0x00000002, flags: 0x00000098 - ConnectorLVDS [1] busId: 0x05, pipe: 9, type: 0x00000400, flags: 0x00000187 - ConnectorDP [2] busId: 0x04, pipe: 10, type: 0x00000400, flags: 0x00000187 - ConnectorDP 00000800 02000000 98000000 01050900 00040000 87010000 02040A00 00040000 87010000 It's not the recommended framebuffer for laptops, the default (recommended?) one in the WEG user manual being 0x3EA50009: ID: 3EA50009, STOLEN: 57 MB, FBMEM: 0 bytes, VRAM: 1536 MB, Flags: 0x00830B0A TOTAL STOLEN: 58 MB, TOTAL CURSOR: 1 MB (1572864 bytes), MAX STOLEN: 172 MB, MAX OVERALL: 173 MB (181940224 bytes) Model name: Intel HD Graphics CFL CRB Camellia: CamelliaV3 (3), Freq: 0 Hz, FreqMax: 0 Hz Mobile: 1, PipeCount: 3, PortCount: 3, FBMemoryCount: 3 [0] busId: 0x00, pipe: 8, type: 0x00000002, flags: 0x00000098 - ConnectorLVDS [1] busId: 0x05, pipe: 9, type: 0x00000400, flags: 0x000001C7 - ConnectorDP [2] busId: 0x04, pipe: 10, type: 0x00000400, flags: 0x000001C7 - ConnectorDP 00000800 02000000 98000000 01050900 00040000 C7010000 02040A00 00040000 C7010000 Maybe you can explain why: you opted for framebuffer 3E9B0000 you patch con1 in such a way you patch con2 in such a way you inject con3 properties in a framebuffer that has no such connector (and in which you do not even add this connector hence nothing in IOReg!) Personally, I'd have just changed connector con1 type to HDMI: framebuffer-con1-enable framebuffer-con1-type 00080000 so I recommend you start by removing all the non-sense you currently have for con1, con2 and con3. Note that injecting properties that bear the save values as the native ones is completely useless; though it does no harm of course, other than complicate a lot more your configuration. You also need to remove boot arg -igfxsklaskbl from your NVRAM settings; that's completely inadequate. It's for Skylake laptops and for an older version of macOS under very specific conditions. A total non-sense on your 10th gen (CML?) platform with UHD620 iGPU. It would be useful if you could specify the exact model of i7 CPU fitted in your ThinkPad x390. And if you have doubt about the connector linked to the HDMI output, please take an IOReg when your HDMI screen is connected to your laptop.
-
Updated for macOS Sequoia.
-
[Solved] Support for CSR8510 A10 bluetooth USB dongle in Sequoia?
Hervé replied to karahanzorbey's topic in Other
Did it work OOB or with an add-on driver in Sonoma? -
Compaq Presario 2500 - supported in OS X?
Hervé replied to Lost-Entrepreneur439's topic in The Archive
Answers available in our Hardware Technical Information section. Do search the forum/consult these sections before posting. https://osxlatitude.com/forums/topic/2998-platforms-compatibility-requirements-for-os-xmacos https://osxlatitude.com/forums/topic/8238-supportedunsupported-gpus-graphics-cards Not really worth the effort and time you'll have to put in it but if you really want to try and install one of those totally obsolete OS X versions (with which you won't do much) on your P4 dinosaur, the best you can hope for is Leopard. Don't expect much support if you require assistance, Tiger and Leopard are just too old and you'll have trouble finding people who know about it now. I very much doubt that your 22 years old AGP Rage6 ATI Radeon 345M will be supported but you never know... You can always check the device ids of the oldest supported ATI/AMD platforms in the relevant drivers of Leopard combo update to begin with. I expect it would be old ATIRadeon.kext. Your GPU id should be 1002:4337. You may also consult everymac.com and look for very ancient pre-Intel Apple Mac computers that may have been fitted with GPUs of that generation/family/architecture and the latest OS X version that supports them (probably Tiger 10.4.11) but know that the oldest 2006 Intel MacBook/MacBook Pro/iMac were fitted with Intel GMA950 and ATI X1600 GPUs. -
Dell Latitude 5290: screen resolution issue with USB-c output
Hervé replied to pulleyluke's topic in 5000 Series
Sorry that injecting EDID value did not work. You could also try experimenting with a different KBL frame buffer; like 0x59160000 or 0x591b0000. -
Dell Latitude 5290: screen resolution issue with USB-c output
Hervé replied to pulleyluke's topic in 5000 Series
Yes, that's what I was expecting. Your graphics config looks spot on. If you inspect the screen's EDID information, you will notice that the reported data differs between HDMI output and USB-c Dock output: HDMI: <00 ff ff ff ff ff ff 00 05 e3 78 27 d7 00 00 00 09 1b 01 03 80 3c 22 78 2a a5 95 a6 56 50 a0 26 0d 50 54 bf ef 00 d1 c0 b3 00 95 00 81 80 81 40 81 c0 01 01 01 01 56 5e 00 a0 a0 a0 29 50 30 20 35 00 55 50 21 00 00 1e 00 00 00 fd 00 32 4c 1e 63 1e 00 0a 20 20 20 20 20 20 00 00 00 fc 00 32 37 37 38 58 0a 20 20 20 20 20 20 20 00 00 00 ff 00 47 4a 4c 48 33 48 41 30 30 30 32 31 35 01 fc 02 03 1e f1 4b 10 1f 05 14 04 13 03 12 02 11 01 23 09 07 07 83 01 00 00 65 03 0c 00 10 00 02 3a 80 18 71 38 2d 40 58 2c 45 00 55 50 21 00 00 1e 01 1d 00 72 51 d0 1e 20 6e 28 55 00 55 50 21 00 00 1e 8c 0a d0 8a 20 e0 2d 10 10 3e 96 00 55 50 21 00 00 18 8c 0a d0 90 20 40 31 20 0c 40 55 00 55 50 21 00 00 18 00 00 00 00 00 00 00 00 00 00 00 00 00 00 00 00 00 00 00 00 00 00 00 00 00 6d> Dock (both): <00 ff ff ff ff ff ff 00 05 e3 90 27 64 1f 00 00 34 1c 01 04 a5 3c 22 78 3a 48 15 a7 56 52 9c 27 0f 50 54 bf ef 00 d1 c0 b3 00 95 00 81 80 81 40 81 c0 01 01 01 01 56 5e 00 a0 a0 a0 29 50 30 20 35 00 55 50 21 00 00 1e 00 00 00 fd 00 32 4c 1e 63 1e 01 0a 20 20 20 20 20 20 00 00 00 fc 00 51 32 37 39 30 0a 20 20 20 20 20 20 20 00 00 00 ff 00 47 51 4d 4a 43 48 41 30 30 38 30 33 36 01 9a 02 03 1e f1 4b 01 03 05 14 04 13 1f 12 02 11 90 23 09 07 07 83 01 00 00 65 03 0c 00 10 00 02 3a 80 18 71 38 2d 40 58 2c 45 00 55 50 21 00 00 1e 01 1d 00 72 51 d0 1e 20 6e 28 55 00 55 50 21 00 00 1e 8c 0a d0 8a 20 e0 2d 10 10 3e 96 00 55 50 21 00 00 18 8c 0a d0 90 20 40 31 20 0c 40 55 00 55 50 21 00 00 18 f0 3c 00 d0 51 a0 35 50 60 88 3a 00 55 50 21 00 00 1c 00 00 00 00 00 00 00 77> I would suggest you try and inject the HDMI EDID value as additional property in your graphics configuration. Target AAPL02,override-no-connect since this external screen should be 2nd display out of FB@2 and specify the EDID value as DATA type without any space between the bytes. Refer to the Whatevergreen user manual if need be. Can't remember if the AAPL0x unit digit must match the connector's number. You'll be able to check that out in IOReg after reboot (under FB@2->display->AppleDisplay). Can't be AAPL00 for sure as that would be your built-in screen. You may also try to patch connector con2 to HDMI type as per connector con1 though I'm not convinced this will take effect and change anything. -
Dell Latitude 5290: screen resolution issue with USB-c output
Hervé replied to pulleyluke's topic in 5000 Series
'tempted to say it's a likely EDID issue but you opted to post screenshots of your IOREg rather the IOReg themselves as asked. -
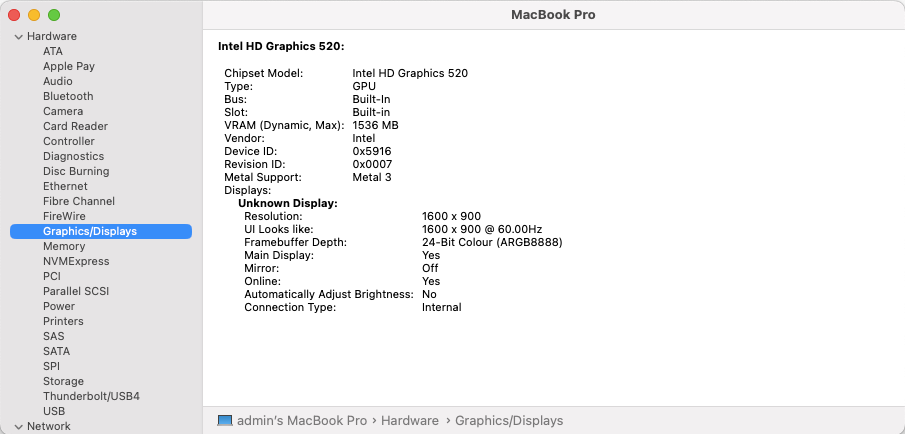
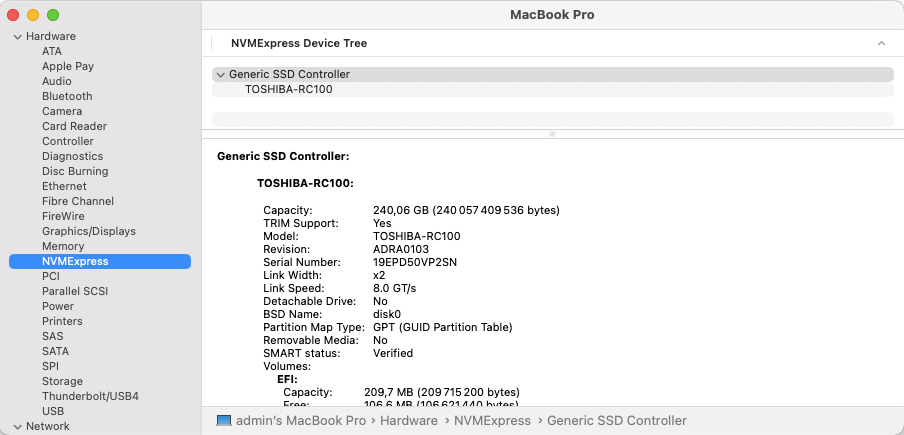
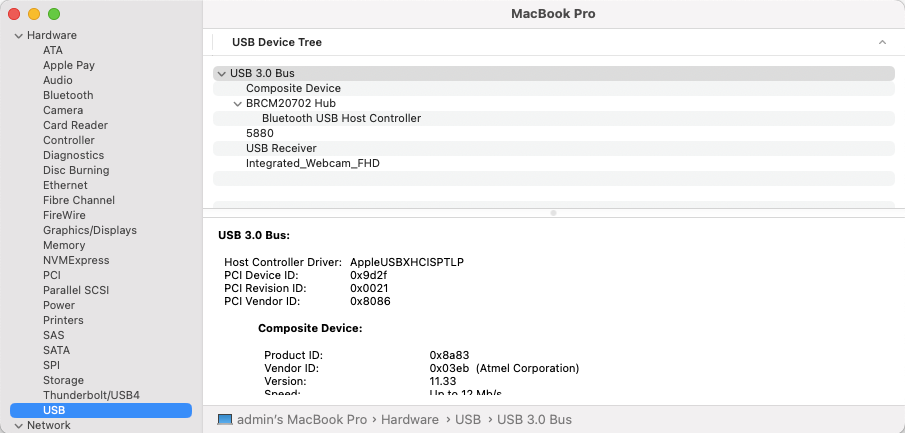
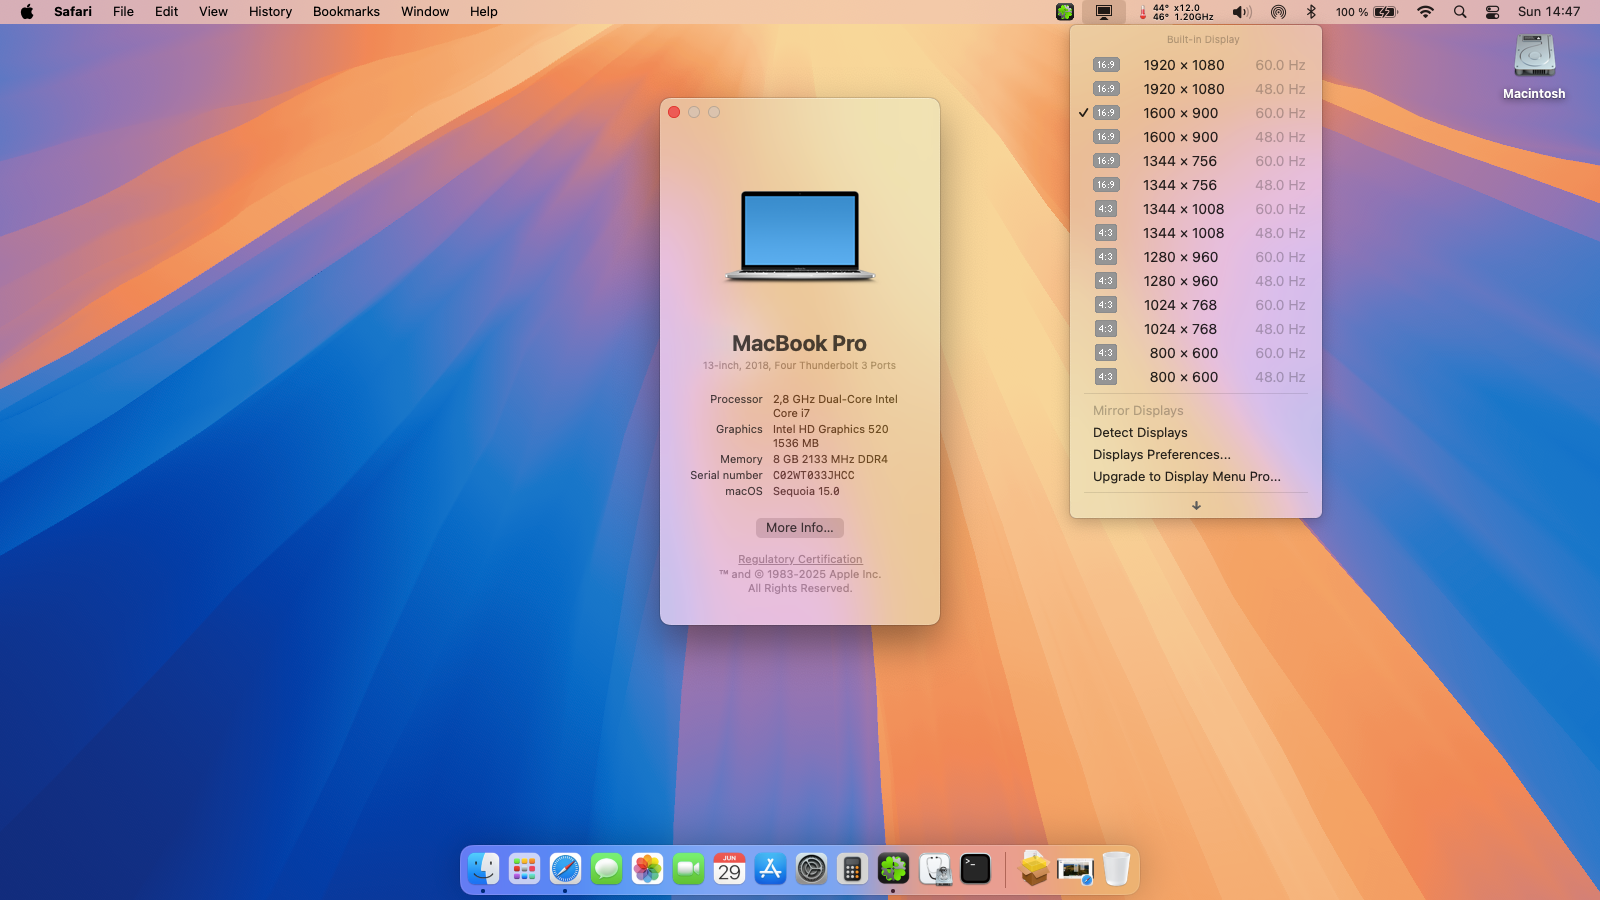
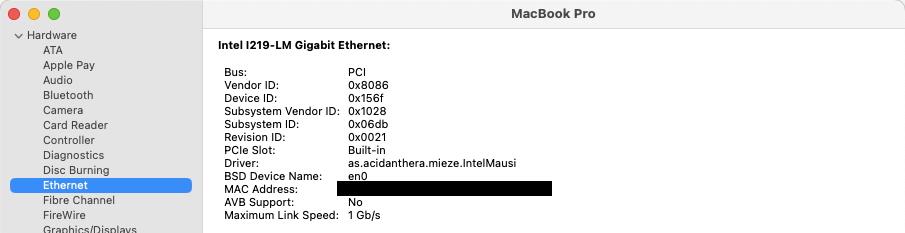
Target macOS release: Sequoia 15.x This is a Clover-based installation using the well-known/well documented vanilla method detailed below: Working: full QE/CI with HD520 graphics (with KBL layout 0x59160000, KBL faked id 0x5916, MBP15,2 SMBIOS and Lilu kext v1.6.8 + Whatevergreen kext v1.6.7 or later) HDMI output OOB but built-in LCD goes off on 1st cable connection. With WEG boot arg igfxonln=1, LCD picture is recovered after closing then re-opening the LID and HDMI is on at 1st boot & after wake mDP output OOB touchscreen with USB HID fix (patch of IOHIDFamily to fake single-user mode) due to Apple dropping support for old USB hardware full audio, including jack microphone input and headset output (with AppleALC kext & layout-id 11) HDMI audio (with KBL con1 connector-type patch) built-in Gigabit Ethernet (with IntelMausiEthernet kext) full CPU power management, including Turbo boost to 3.4GHz (with PlugIn type settings) sleep: Ok through Apple menu->Sleep, lid closure, power button, Fn-Insert and energy savings settings with hibernation mode set to 0 (sleep to RAM) and /var/vm/sleepimage file deleted. wake: Ok through lid opening and power button wireless & bluetooth with any compatible card/USB dongle and necessary patching (OCLP) battery management and monitoring (with ACPIBatteryManager kext) SD card reader (with 1Revenger1's RealtekCardReader kext) integrated webcam OOB keyboard backlight control OOB (for backlit models) audio volume control through Fn-F1/Fn-F2/Fn-F3 brightness control through Fn-F11/Fn-F12 touchpad basic features, incl. buttons (with Rehabman's modified VoodooPS2Controller kext; it has a Sequoia-specific VoodooInput Plugin) USB3.0 ports (with Hackintool's generated SSDT_USBX & SSDT_UIAC patched tables or USBPorts kext) Not Working: N/A Not tested: SmartCard reader With regards to Skylake/HD 520 graphics, same principles apply as for macOS Sonoma but make sure to update Lilu & PlugIns to latest versions: use of Kaby Lake framebuffer 0x59160000 (0x591B0000 may also be used but requires further graphics connectors patching) fake Kaby Lake HD620 iGPU id 0x5916 use Lilu v1.6.8 and Whatevergreen v1.6.7 minimum 1) 15.x USB installer creation Using a USB key of 16GB minimum, create a Sequoia USB installer through the following Terminal command: sudo <path>/Install\ macOS\ Sequoia.app/Contents/Resources/createinstallmedia --volume /Volumes/<USB key> where: <path> = location of Sequoia installation package (eg: /Applications if freshly downloaded) <USB key> = name of formatted USB volume (eg: USB_16GB) The process will take several minutes. Once completed: install Clover bootloader on the USB installer with the following customised settings: Clover for UEFI booting only Install Clover in the ESP UEFI Drivers Recommended drivers FSInject SMCHelper Human Interface Devices (optional) Ps2MouseDxe UsbMouseDxe FileSystem Drivers ApfsDriverLoader Memory fix drivers OpenRuntime Additional Drivers (optional) NvmExpressDxe PartitionDxe Themes (optional) BootLoaderChooser (optional) CloverConfigPlistValidator (optional) Install Clover Preference Pane (optional) you may use Clover version r5159 or later as attached below Clover_r5159.pkg.zip once Clover is installed, launch Clover Configurator app and mount the freshly created EFI partition of the USB installer (attached version supports BlockSkywalk kext patch) Clover Configurator.zip add the (unzipped) HFSPlus driver attached below to the EFI/CLOVER/drivers/UEFI folder HFSPlus.efi.zip open this EFI partition and transfer/copy the files & folders from the Latitude E7270 Sequoia Clover pack below to the EFI/CLOVER folder Clover_Bootpack_E7270_Sequoia.zip if support for legacy Broadcom wifi is required, download the latest OCLP app from its GitHub repo and save the package at the root of the USB installer. It'll be required to recover wifi support. 2) 15.x installation boot the Sequoia USB installer at the Clover main menu, select the "Install macOS Sequoia" partition (but don't press [ENTER]) press [SPACE], select -v verbose option in the menu, then choose to boot with the selected options proceed with installation, creating & formatting the target Sequoia installation through Disk Utility as/if required on 1st reboot, boot off the USB installer and select the freshly created "macOS install from <target Sequoia partition>" repeat this until this partition is no longer offered and only the target Sequoia partition is left to boot reboot the target Sequoia partition via your USB installer 3) Post-installation tuning once the target Sequoia partition has booted, complete the 1st boot configuration tuning once at the desktop, install Clover bootloader on the Sequoia partition/disk with the customised settings listed above once Clover is installed, launch Clover Configurator app and mount the freshly created EFI partition of the Sequoia partition/disk open this EFI partition and transfer the files & folders from the above Latitude E7270 Sequoia Clover pack to the EFI/Clover folder you may then reboot and verify that Sequoia boots off your disk through Clover at that stage, the E7270 will be running Sequoia without support for legacy Broadcom wifi 4) Adding support for legacy Broadcom wifi launch Clover Configurator app and mount the EFI partition of the Sequoia partition/disk add the kexts from the Legacy_Broadcom_Wifi pack below to the EFI/Clover/kexts/15 folder alongside the existing kexts. Legacy_Broadcom_Support_Pack.zip open up the Clover config in Clover Configurator and: check/enable the BlockSkywalk kernel & kext patch add -amfipassbeta boot arg add revpatch=sbvmm boot arg (to gain OTA updates) save the configuration reboot then install and launch the OCLP app proceed with root patching which should automatically detect that wireless networking requires patching after another reboot, Wifi off the legacy Broadcom cards will be fully functional again if in doubt, check this thread for detailed guidance
-
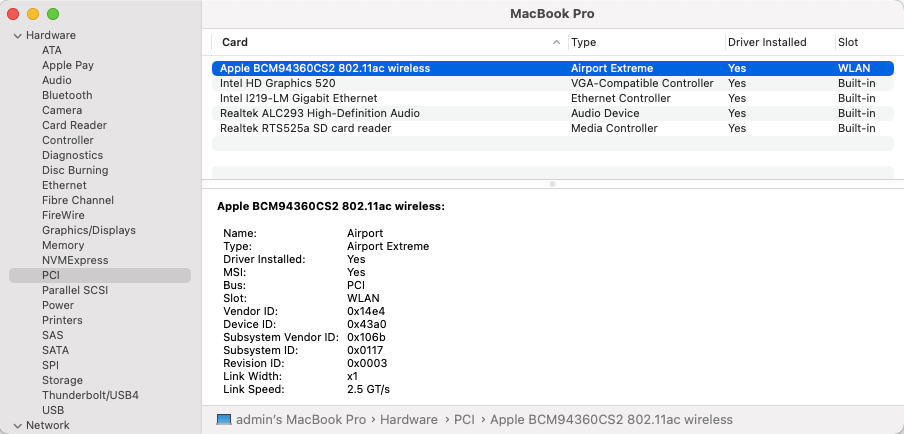
Sonoma dropped support for all remaining Broadcom "legacy" cards that were supported up to Ventura, this including those based on BCM4360 chipset family. See our 2023 home page articles + Articles/News/Tech/Our Picks threads + Wireless cards inventory about this. https://osxlatitude.com/forums/topic/18228-macos-sonoma-140-beta-1-early-feedback-and-findings https://osxlatitude.com/forums/topic/19519-macos-sonoma-is-out https://osxlatitude.com/forums/topic/20369-support-for-broadcom-wireless-cards-in-sonoma-later-clover-and-opencore https://osxlatitude.com/forums/topic/19730-wifi-in-sonomasequoia-patching-for-legacy-broadcom-wireless-cards/ https://osxlatitude.com/forums/topic/11138-inventory-of-supportedunsupported-wireless-cards-2-sierra-ventura-beyond Forum offers a search facility in top right corner, don't hesitate to use it before posting as stated in our posted rules. Thank you.
-
Dell Latitude 5290: screen resolution issue with USB-c output
Hervé replied to pulleyluke's topic in 5000 Series
Seems more to be an issue with the USB-c output. Post an IOReg with Dock plugged in and screen set to 1080p + screen set to 1440p. -
Above procedure is good for Sequoia too.
-
Released Sep. 16th, 2024. Version 15.0, build 24A335 (same as RC published Sep. 10th). Sequoia drops official support for Amber Lake MacBook Air8,1/8,2 thereby raising the minimum MacBook Air platform to final 2020 Ice Lake-based MBA9,1. The rest of the supported platforms remain identical to Sonoma. Support for Kaby Lake graphics remain provided with all KBL kexts still present so good news to all owners of Skylake laptops who will all be able to run Sequoia with full acceleration through the SKL graphics patch required since Ventura. For other iGPUs, patches are available through OCLP tool to regain graphics acceleration. Officially supported Intel platforms are now limited to : iMac19,x (8th gen. Coffee Lake) iMac20,x (10th gen. Comet Lake) iMacPro1,1 (Skylake Xeon) MacBookPro15,x (8th gen. Coffee Lake) MacBookPro16,x (9th gen. Coffee Lake and 10th gen Ice Lake) MacBookAir9,1 (10th gen. Ice Lake) Macmini8,1 (8th gen Coffee Lake) MacPro7,1 (Cacade Lake) With Sequoia, Apple introduced artificial intelligence features that are only available to Apple Silicon models. Intel platforms are not compatible with these. NB: macOS Monterey is now officially unsupported. View full article