Lego
-
Posts
66 -
Joined
-
Last visited
-
Days Won
2
Content Type
Profiles
Articles, News and Tips
Forums
Everything posted by Lego
-
Awesome, thank you!
-
@Akerbeltz14 About your Latitude 7280 guide posted here, it's giving me errors when I extract and download your EFI files. Do you think you're able to reupload them on Google Drive or something? I have a 7280 that I want to install macOS on. It's giving me a invalid error when I try to unzip both EFI files on Mac and Windows. Thank you for building an EFI for this.
-
I was also having the exact same issues on OC and Clover with my Dell Latitude E5470. I tried different version without success.
-
Hello, I'm back to Hackintoshing my ThinkPad P50 and with all the help from Jake Lo, I was able to have macOS Monterey with OC 0.7.5! I was able to also improve the battery life. This newer OC file also work inconjunction with macOS BS as well! I'll be uploading the OC file along with the WIFI kext that works in macOS Monterey. You will still need to use the bluetooth kext files posted above in order for it to fully work. EFI.zip AirportItlwm_Monterey.kext.zip
-
Hello all, I'd like to share that I was able to successfully install Catalina with Clover and Big Sur with OC! Thanks to Jake Lo, I was able to install both of these versions of macOS without any issues! Both OC and Clover will be posted below. Having this awesome machine being such a cool hackintosh really shows the potential of this machine! For the Kext files, put them in EFI/OC/Kexts. This is for Big Sur. The EFI.zip file is the one that is meant for Catalina. Big Sur P50 2.zip AirportItlwm.kext.zip Intel Bluetooth.zip EFI.zip You are going to want to use the same Intel Bluetooth Kext files for Clover but use the IO80211Family.kext that'll be posted. For that, those file will be stored in EFI/Clover/Kexts/Other.
-
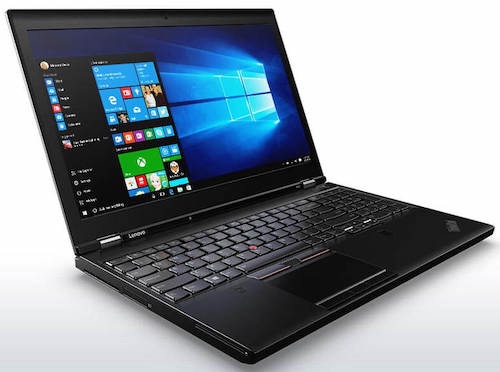
Hello all fellow Hackintoshers, In this guide, I'll be hackintoshing a Lenovo ThinkPad P50 Mobile-Workstation. From its time period, it's one of the better built systems that has an inner magnesium-alloy inside. I think that this particular workstation is a step above some of its competitors from 2016 and also, for me, was a better choice for a few reasons: Intel Core i7-6700hq or up to an Intel Xeon E3-1505m CPU with ECC memory. Up to 120hz (optional) 1920x1080p display IPS or a 4k UHD 3840x2160 IPS display Up 64gb DDR4 2133MHz RAM Up to 2 SATA SSD's or 2 NVME SSD's and 1 SATA SSD (HDD OR SSD) Fully supported trackpad (mac-like trackpad) Intel 8260ngw WIFI and Bluetooth supported (Airdrop, etc..) Hot swappable battery (6 cell, 90wh) So, the current specs of my machine are as follows: 1. Intel Quad-Core Intel Core i7-6700HQ 2.6GHz-3.5GHz with a TDP of 45 watts with 6MB of L3 cache 2. 32GB 2133MHz of DDR4 RAM 3. 512GB NVME Samsung OEM from Lenovo (OEM Lenovo Windows 10 Install) 4. 1TB 5400RPM WD Mechanical Drive (Currently macOS Catalina 10.15.7) 5. Intel WIFI/Bluetooth 7260NGW combo card 6. 1920x1080P IPS 60Hz display As you can see, this Hackintosh from 2016 is still capable up to 10.15.7 macOS Catalina. My machine is running 10.4.6 macOS Mojave. I will note that with the Clover EFI being posted, I'm not sure if it'll have everything working under Catalina, but mostly everything works under macOS Mojave. Now, with the specs out of the way, let's dig into this Hackintosh guide: 1/ BIOS Configuration: In order to have a working and bootable macOS USB, we need to change some setting in the Lenovo BIOS. To do that, press the F1 key to enter the BIOS setup. The settings that need to are UEFI support and CSM support to no. To access those settings, go under the boot section, set the boot mode to UEFI only boot and change the CSM support to no. Also, make the Mac drive (HDD/SSD) as the main boot drive. I did change other settings but ended up causing a kernel panick. Now, with the setting out of the way, time to install macOS. 2/ Creating the macOS Mojave USB: For me this was the easiest step as I already had the USB premade on a drive but I will paste the command that I used into this guide. In order to make this Hackintosh 99%, you will either need a Mac. In order to make the bootable USB disk, open up Terminal and copy + paste this command: sudo /Applications/Install\ macOS\ Mojave.app/Contents/Resources/createinstallmedia --volume /Volumes/MyVolume Once the USB command is then copied into Terminal, you'll want to wait 10-15 minutes, or however long it'll take depending on the USB drive. Once that is done, let's move onto the next step. 3/ Putting the EFI folder into the EFI partition of the USB: Now, this step is quite simple. All you want to do is mount the EFI partition using a program called ESP Mounter Pro. Once mounted, then simply copy and paste the Clover EFI folder into the EFI partition of the USB drive. Once that is done, now it's time to boot, change some settings in the BIOS and install macOS Mojave. 4/ Installing macOS Mojave: For me, to get a fully bootable Clover setup took me a long time to get working with all of the stuff that I wanted to have working. To boot the macOS USB drive, press F12 to have access to the boot menu. Once done, use the arrow key to select the USB drive (mine was a SanDisk 128gb Ultra drive), and boot to the Clover menu then into the installer. From here, go to disk utility, erase your HDD or SSD, then install Mojave. Once that's done, the actual time to install macOS will take anything from 16-30 minutes, depending on your HDD or SSD drive. After the install, setup the OS like a real Mac and then, we'll make the HDD/SSD bootable. 5/ Making the HDD/SSD bootable: Making this bootable is pretty much the same as making the USB bootable. Use ESP Mounter Pro to mount the EFI partition of the HDD/SSD. Once EFI is mounted, reboot and enjoy a fully working "BlackBook Pro!" In conclusion, I really like this laptop as it has a fantastic keyboard and great storage options. For me, running macOS Mojave on a WD Black HDD is not the worst of experience. I find it quite fast and stable but only time will tell. I will try to have this guide kept open if there's any issues that occur. Other than that, happy Hackintoshing your Lenovo ThinkPad P50 Mobile-Workstation! I want to give credits to Jake Lo for helping me create a working EFI folder and making my system bootable. Latest Lenovo P50 BP.zip You want to the Intel Bluetooth and WIFI kexts into EFI/Clover/KextsOther. I wouldn't modify the actual kext files that are installed with macOS unless you've got experience. IO80211Family.kext.zip Intel Bluetooth.zip

-
Well, I was able to get Clover working but, I can't boot with ACPI files for some reason. Here is the only working Clover guide that I could follow that: https://github.com/Errrneist/Hackintosh-Thinkpad-P50 I CLOVER.zip
-
I really don't have any experience with OC.
-
Hello, I had just received a Lenovo P50 and I want to install macOS on it using the Clover Boot-loader. However, after trying some guides and building my own EFI, I've come across a Kernel Panick. After the KP, it'll reboot into windows. I really want to Hackintosh this laptop but I have had no success on doing so. Is there a proper guide for my laptop and the specs as follows: I7-6700hq Intel HD 530/NVIDIA m1000m 32gb 2133mhz DDR4 RAM 512gb NVME SSD 1TB HDD Intel 8260 WIFI and Bluetooth I tried building my own EFI multiple times but come across the same error. I hope that there's a working EFI for my system.
-
Oh well. Maybe I will later get something with a better touchpad. I hope that there's support soon for this particular touchpad
-
My only gestures that work with my touchpad are basic cursor movement, scrolling and maybe tap to drag. Will those files give me full gesture support? @Jake Lo: I tried booting with a separate USB drive but I get an error: OC: Failed to load configuration! I was actually able to boot with your files but it still won't see my trackpad under System Preferences. No new gestures. Should I use big sur to get better touchpad support?
-
Hello, I have a dell latitude 7280 that's running macOS Catalina, Clover v5119 and also with an i2C HID touchpad. Since I know that it's an i2C touchpad, I cannot figure out if it's an ALPS or Synaptic touchpad. I tried doing verbose mode to see what type of touchpad I have. I really would like to get full support for my touchpad. Although, I have tried a few links to see what kext to use but there's to many out there. For the touchpad, I have Voodooi2C, Voodooi2CHID, and voodooPS2controller in my kext folder. Some of the links that I have tried to use are: Since someone was able to get this to work with a Dell Latitude E7270, is there something similar that can be done with my machine? I really want to use this as my main MBP since my MacBook Pro is from 2012 and won't be able to run BS. If I can't get this to work, I can always use it without. Also, my buttons somehow work with the kext files that I am using. I hope this can be solved. Dell Latitude 7280 EFI.zip
-
Mojave on the Precision m6700 - Need some help with sleep and Nvidia GPU
Lego replied to katana9x99's topic in The Archive
I actually might be able to help with a better EFI for Mojave that I have created myself. It's made from a few EFI folders but all tweaked into one. I'll post it to see if it'll work for you. @katana9x99PS: I also have watched your YouTube video with your m6700 and the GTX 980m. Credits for you making such an awesome laptop even better! EFI.zip -
@Zia-Ur-Rehman, did you ever get macOS working on your m4800
-
You are very welcome. Sorry, I just deleted the bootpack. I reuploaded it just in case if needed You might want to combine the bootpack with the EFI as the bootpack has updated kexts and working config.plist. Also, with the EFI, clover might not be the most up to date. BOOT.zip
-
Dell M6700 FINAL Catalina Clover.zip
-
Try this, the kexts, config and the kexts that I used are attached Dell M6700.zip
-
Sure Give me one minute
-
I don't know how to that exactly That is my first time doing an upload to google drive
-
I don't know if mine is or not I might have to boot with a live version of linux but I don't know the terminal command in order to find out about my display connection. My guess that I have the LVDS connection as I have graphics acceleration on both NVIDIA and Intel graphics
-
Let me know what your progress is. I am using 10.15.6
-
Try this EFI, you are going to want to disable Optimus or remove the ssdt-3.aml in EFI/CLOVER/ACPI/PATCHED. https://drive.google.com/file/d/1ANa_PxqEGR97jjJVIOD_yq_ZZ-ymk3EP/view It was to big to upload onto the OSXLatitude server but I did it in Google drive What OS X/macOS are you using on your m4800? For the best compatibility, I have Catalina working right now. My NVIDIA card, Quadro K3000M, works in Catalina but your NVIDIA card might vary Also, the switchable doesn't keep disabling it for me as I have the bigger 17 inch IvyBridge version, M6700. Maybe I do have the EDP screen but also it could just luck.That EFI took a lot of tweaking as it's based off my specs but I can maybe build you an EFI for your rig.
-
I hope that goes well
-
I do know from my experience that the HP Pro Books and Elite books are some of the easiest hacks out there. Chris1111 has done a lot of work creating the Pro Book installer, which he did update to work with BS and OC. What Open Core method did you use? Just did a quick google search and that is one very popular Hack-Book. That is why I really like HP.
-
@Jake Lo, I still get those graphics glitched and my NVIDIA card is still seeing being seen under graphics setting in System Information Plus, my trackpad is still not working