-
Posts
10069 -
Joined
-
Last visited
-
Days Won
569
Content Type
Profiles
Articles, News and Tips
Forums
Everything posted by Hervé
-
You have the dual GPU model so I think HDMI is only supported through the nVidia GPU. You appear to run on the HD4000 iGPU. Bear in mind that Optimus technology is not supported on Hackintosh (because Apple use their own proprietary chip for dual GPU). On HD4000-only models, HDMI display output works OOB (but HDMI audio needs Capri framebuffer patching). If you can run on the nVidia GPU only, HDMI display output may work too. You can maybe run only on nVidia GPU if you enable Optimus in BIOS but then you might lose built-in LCD...
-

Kernel Panic 6430u (i7-3687u HD4000 1600x900) on Sierra
Hervé replied to antrieb's topic in The Archive
Why don't you try to boot your USB installer without cache? -
Why did you opt for MacMini5,1 SMBIOS which is a Sandy Bridge platform (Core i5-2xxxM with HD3000 graphics) when you have a C2D platform with nVidia GeForce G210? I'd say that iMac10,1 SMBIOS would be much better (Core2Duo E7x00 with nVidia graphics). Give that a try. Could you post a zipped copy of your Clover EFI folder?
-
Having swapped motherboards, you effectively have a D430 that happens to be in a D420 casing... Since it's a tad misleading and only likely to cause confusion, claiming or stating to run MLPF'ed ML 10.8.5 on a D420 is best avoided; as such, the title of your thread was renamed and I would invite you to do the same for your video title. Indeed, it's because of the EDP gradual decay (lack of developers and interest oblige) that I started to post full packs that do not rely on the tool. It would seem the VoodooHDA kext you're using that's not fat binary (i.e. 32+64bit compiled) but 64bit-only. The version included in the pack I posted is v2.8.1 and that's fat binary. You can easily check the architecture of your kext with lipo Terminal command. For instance: lipo -info /Extra/Extensions/VoodooHDA.kext/Contents/MacOS/VoodooHDA If it's fat-binary, the command will return something like: Architectures in the fat file: <file name> are: x86_64 i386 If it's 64bit-only, the command will return something like: Non-fat file: <file name> is architecture: x86_64 ` As a test, I've just rebuilt my D430 ML cache and do not have those VoodooHDA-related error messages. Use the version included in the pack... NB: I don't know if it's just the poor quality of the video but you don't appear to run ML with graphics acceleration on that D430. Make sure you (re)configure 32bit kernel mode in the Chameleon o.c.B.plist. I'm not going to bother updating any of those old MLPF threads but the best way to run ML on those platforms with natively-unsupported GPUs is to start with a vanilla 64bit installation (w/o graphics acceleration of course), followed by all ML updates, including the security ones. Once all updates have been installed, proceed with MLPF conversion in order to run the systems in 32bit kernel mode with graphics acceleration.
-
I believe Jake has mentioned everything that could be looked at: 1) make sure LAN is not disabled 2) try enabling and/or disabling Legacy ROM option
-
Then you have a problem with your BIOS settings...
-
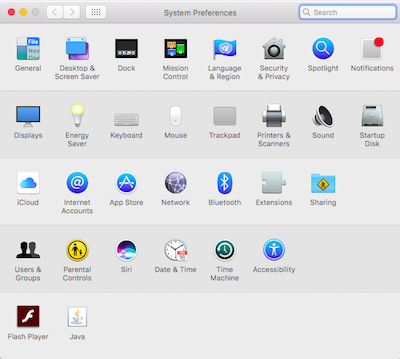
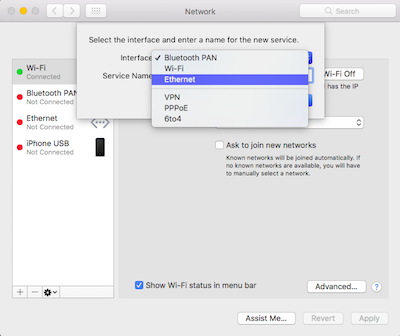
Go to System Preferences then Network... If there's no Ethernet listed, click on + button at bottom left corner and select Ethernet as interface to add.
-

E7270: Screen turning on and off and flicking when turning back on
Hervé replied to reddpen's topic in The Archive
Erm... 0x03 = 0x3 ! -
It should make no difference whether PXE is enabled or not (it's used to boot OS from LAN) but I never keep PXE on. The Mausi kext is clearly loaded, therefore check your Network Preference Panel. If the Ethernet still isn't there, you should now be able to manually add it.
-
Then install it manually: copy the kext to /Library/Extensions repair permissions and rebuild your cache: sudo chmod -Rf 755 /L*/E* sudo chown -Rf 0:0 /L*/E* sudo touch -f /L*/E* sudo kextcache -Boot -U / If you obtain an error message "....77", repeat the touch + kextcache commands.
-
http://www.insanelymac.com/forum/topic/304235-intelmausiethernetkext-for-intel-onboard-lan/ https://github.com/Mieze/IntelMausiEthernet
-

[SOLVED] Dell E6220 (Mavericks): wifi/bluetooth/audio issues
Hervé replied to osxrookie's topic in The Archive
Apple removed the built-in facility to have a Display icon on the Finder's bar (that's what the "menu line" is called) when Mountain Lion was introduced back in 2012. If you wish such a tool, you can refer to this old thread on the matter (I personally still recommend (and use) Display Menu app today)… Do think of using the forum Search facility. Re: HDMI audio, make sure to use: patched AppleHDA patched SNB framebuffer Everything is already available here. -
You've not bothered to apply any of the changes suggested in post #7.
-

[SOLVED] Dell E6220 (Mavericks): wifi/bluetooth/audio issues
Hervé replied to osxrookie's topic in The Archive
"I can not activate the the Monitor icon on home screen"... Sorry, I don't understand; what do you mean? -

Kernel Panic 6430u (i7-3687u HD4000 1600x900) on Sierra
Hervé replied to antrieb's topic in The Archive
Seems Ok. You say you're booting off an external USB disk. Did you try to boot with the internal HDD removed? -

Kernel Panic 6430u (i7-3687u HD4000 1600x900) on Sierra
Hervé replied to antrieb's topic in The Archive
Well, those offending kexts sure aren't in the cache or list of kexts to cache; otherwise, they would be listed in the warning about invalid signature. On that basis, we have to conclude that they are injected by Clover through the EFI/Clover/kexts/10.12 or EFI/Clover/kexts/Other folder. There can be no other explanation. 'might be a good idea to post a zipped copy of your full EFI folder... -

Kernel Panic 6430u (i7-3687u HD4000 1600x900) on Sierra
Hervé replied to antrieb's topic in The Archive
From Terminal, type the following commands. 1) to remove prelinked kernel (it should auto re-generate): sudo rm -f /System/Library/PrelinkedKernels/prelinkedkernel 2) to remove kext cache: sudo rm -Rf /System/Library/Caches/com.apple.kext.caches/* 2) to rebuild cache + prelinked kernel: sudo touch -f /S*/L*/E* sudo touch -f /L*/E* sudo kextcache -Boot -U / (or: sudo kextcache -system-prelinked-kernel) If you get an error message "... 77", re-type the touch + kextcache commands. Ignore any message "... 17". -

Kernel Panic 6430u (i7-3687u HD4000 1600x900) on Sierra
Hervé replied to antrieb's topic in The Archive
Then the offending kexts are still cached. Try and manually delete cache folders + prelinked kernel, then rebuild the cache. -

Kernel Panic 6430u (i7-3687u HD4000 1600x900) on Sierra
Hervé replied to antrieb's topic in The Archive
If you've rebuilt your cache and there are still traces of the offending kexts, try and locate them on the disk. From Terminal, type: sudo find / -name NullCPUPowerManagement.kext -print 2>/dev/null and repeat this for the VoodooPS2Controller kext. One question: this EFI folder you're looking at, is at at the root of your Sierra partition or in the mounted EFI partition? Make sure to look in the right place... -
@OliverZ: Apple has no native support for mobile Haswell iGPU; that's why all laptops based on mobile HD4200/HD4400/HD4600 iGPU must fake desktop HD4600 model (id 8086:0412). Of course, you could try MBP11,1 or MBP11,2 SMBIOS, but I had no graphics issue using MBA6,2 on my mobile HD4600-based E6440.
-
...and the AGPM settings you used would be?
-
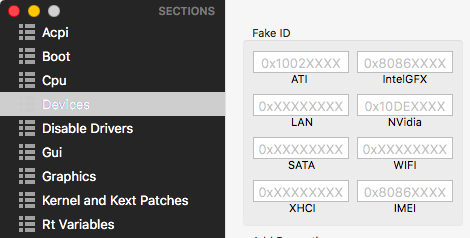
When you fake desktop HD4600, I believe it's 0x80860412, not 0x04128086... Use latest CloverConfigurator and there'll be no doubts.
-

Kernel Panic 6430u (i7-3687u HD4000 1600x900) on Sierra
Hervé replied to antrieb's topic in The Archive
No, you also need to rebuild your cache, otherwise it's as if the kexts were still present. Open up Terminal and use the following commands once kexts have been deleted: sudo touch -f /L*/E* sudo touch -f /S*/L*/E* sudo kextcache -Boot -U / If you use Clover, make sure the kexts are not in the EFI/Clover/kexts/10.12 or Other folder. -

[SOLVED] Dell E6220 (Mavericks): wifi/bluetooth/audio issues
Hervé replied to osxrookie's topic in The Archive
-
Great! Would be useful for other users if you could provide the settings you used (Mac model, PCI ids, thresholds) and the various GPU core/Memory frequency steps you noticed... 162/???? MHz 202/1620 MHz 405/???? MHz 666/3010 MHz


