
Leaderboard


Popular Content
Showing content with the highest reputation on 11/15/20 in all areas
-
You would be able to do both but I'm pretty sure an unsupported SMBIOS will not let you upgrade from within the macOS version you currently run. I made a fresh installation over my old Mojave build with -no_compat_check boot arg and that upgraded the old installation Ok (all apps and data kept as before). No reformatting or deletion of the Mojave partition before of course! I'll post a detailed guide tomorrow but in a nutshell: made the Big Sur USB installer with usual createinstallmedia command line and followed Dortania's guide for Ivy Bridge laptop to the letter erased all data from USB key's EFI partition and copied the default OC 0.6.3 EFI folder there copied existing DSDT + CPU power management SSDT to the ACPI folder and all existing add-on kexts to kexts folder copied sample config file to OC folder and opened it with ProperTree did a clean snpashot to prefill the config, then adjusted it as per dortania's guidance booted the Big Sur installer and went ahead with the installation Note that it'll take some time (about 1hr) and will require 4 reboots to complete. Edit: E6230 guide now updated for Big Sur.2 points
-
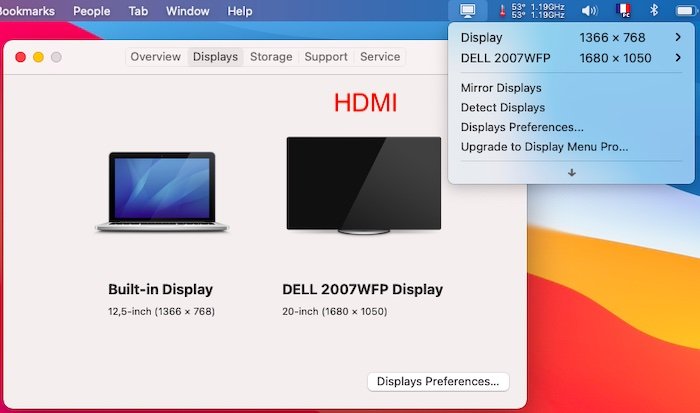
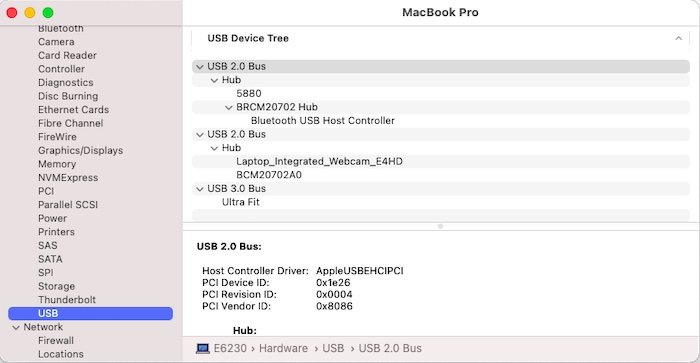
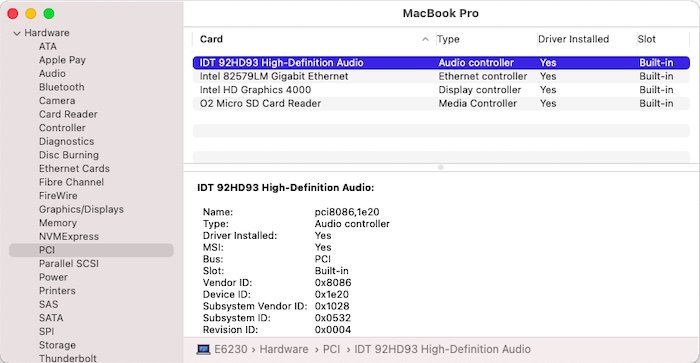
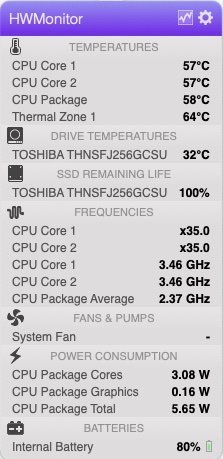
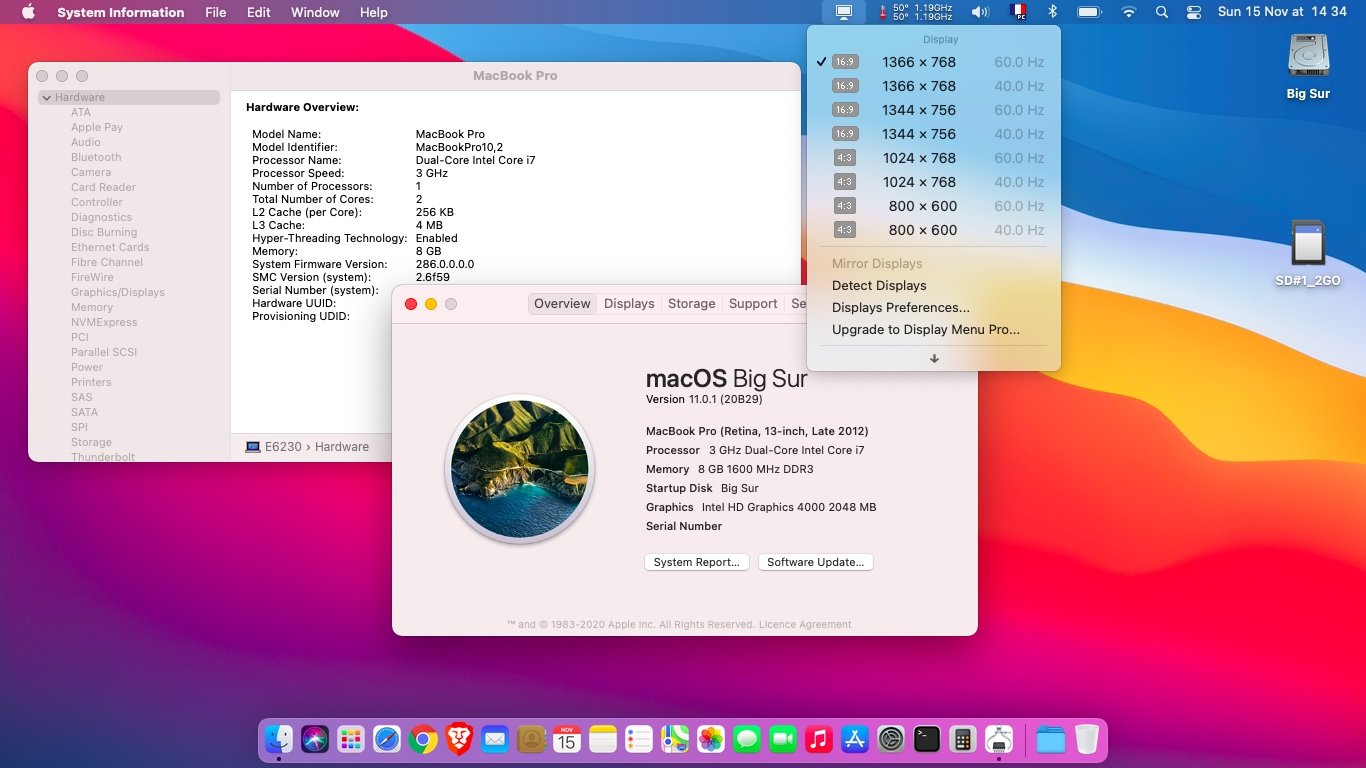
Ok, just got got Big Sur 11.0.1 (20B29) installed on the E6230 with OC 0.6.3. So far all appears to run Ok. Full acceleration on HD4000. Kept the MBP10,2 SMBIOS with -no_compat_check boot arg.
 2 points
 -
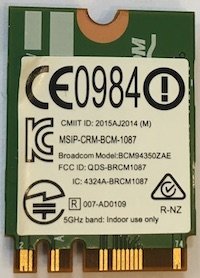
Last update: 6th Jan 2020 Questions around this Broadcom BCM4350 chipset (in particular the Dell DW1820A) have resurfaced again so I digged into the matter since most people reported it did not work. Outside the model fitted to Apple MacBooks (subsystem id 106b:0131, rev. 05), Wikidevi lists a few cards cards for this chipset, including: Dell DW1820A (several models with different part numbers) Foxconn T77H649.00 (Lenovo part number 00JT494) Lite-on WCBN808B (Lenovo part number 00JT493) All those cards carry PCI id 14e4:43a3 and normally offer high speed 802.11ac wireless + Bluetooth 4.1 services. Broadcom BCM4350 chipset is supported since Yosemite 10.10 and its hardware id is listed in the Info.plist file of IO80211Family's PlugIn kext AirPortBrcm4360 up to macOS Sierra 10.12, then AirPortBrcmNIC since macOS High Sierra 10.13: <key>Broadcom 802.11 PCI</key> <dict> <key>CFBundleIdentifier</key> <string>com.apple.driver.AirPort.BrcmNIC</string> <key>IOClass</key> <string>AirPort_BrcmNIC</string> <key>IOMatchCategory</key> <string>IODefaultMatchCategory</string> <key>IONameMatch</key> <array> <string>pci14e4,43ba</string> <string>pci14e4,43a3</string> <string>pci14e4,43a0</string> </array> <key>IOProbeScore</key> <integer>1241</integer> <key>IOProviderClass</key> <string>IOPCIDevice</string> <key>TruePowerOff</key> <true/> </dict> - - - - - - - - - - Edit: 06 Jan 2020 Removed the warning about DW1820/BCM4350 cards following tests confirming that disabling ASPM does fix the stability issues previously encountered by most users.1 point
-
Hi. Although I experienced this problem too, unfortunately the trackpad didn't work for me either, so I started to delete the kexts that I haven't used during the clover so far and watched when a change happens. When I realized the mistake, I could only laugh at it! : D Solution: Delete "SMCDellSensors.kext" from "config.plist / Kernel" and it will work!1 point
-
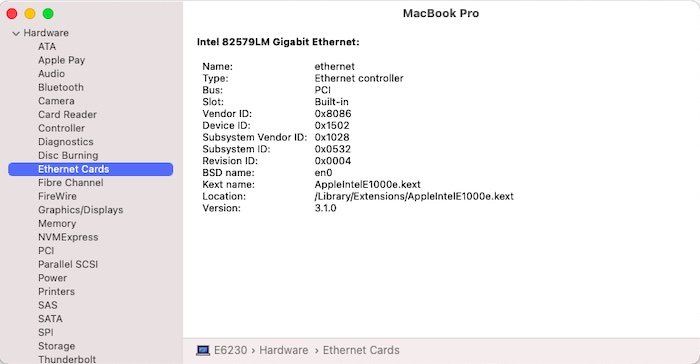
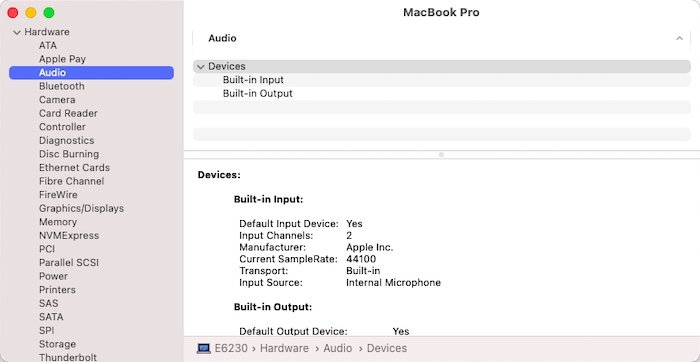
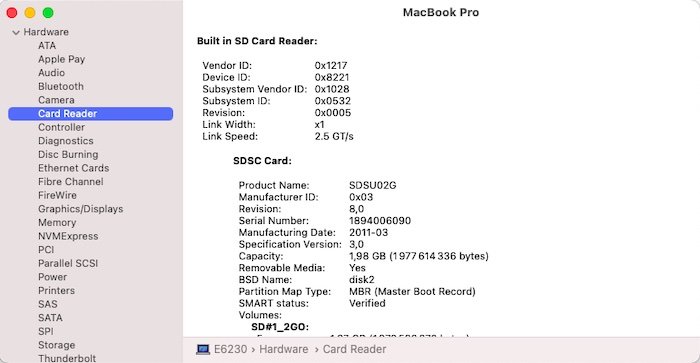
/!\ Refreshed Jan 2023 /!\ Target macOS release: Big Sur 11.x This is a Clover-based installation using the standard vanilla method detailed below: Working: full graphics acceleration on Intel HD4000 graphics (with Lilu v1.6.x + WEG v1.6.x) multi-display with HDMI OOB audio, including jack microphone input and headset output (with AppleALC v1.6.x & layout 12 + CodecCommander v2.7.x) HDMI audio (with Capri Framebuffer properties injection) built-in GigEthernet LAN connection (with AppleIntelE1000e v3.1.0 or latest IntelMausiEthernet kext) wireless and bluetooth with any compatible card integrated webcam (OOB) full CPU power management, including Turbo boost (with CPU-specific generated ssdt) sleep (Lid, Energy Saver settings, Apple menu, Fn-F1, PWR button) & wake (Lid, PWR button) battery management (with ACPIBatteryManager v1.90.1) SD card reader (with DSDT patch or property injection, for compatibility with Apple's default card reader) keyboard (with Dr Hurt's VoodooPS2Controller R6 + DSDT patch for brightness control) touchpad including tap-to-click (with Dr Hurt's VoodooPS2Controller R6) left combo eSATA/USB2.0 + right USB3.0 ports (with Hackintool's generated USBPorts; optional FakePCIID kexts for multiplexing) ExpressCard slot OOB Not working: VGA output unsupported Not tested: SmartCard reader fingerprint scanner GeekBench v4.4.x (64bit) results: 1) 11.x USB installer creation Using a USB key of 16GB minimum, create a Big Sur USB installer through the following Terminal command: sudo <path>/Install\ macOS\ Big\ Sur.app/Contents/Resources/createinstallmedia --volume /Volumes/<USB key> where: <path> = location of Big Sur installation package (eg: /Applications if freshly downloaded) <USB key> = name of formatted USB volume (eg: USB_16GB) The process will take several minutes. Once completed: install Clover boot loader on the USB installer with the following customised settings: Clover for UEFI booting only Install Clover in the ESP UEFI drivers Recommended drivers FSInject SMCHelper Human Interface Devices (optional) PS2MouseDxe USBMouseDxe FileSystem Drivers ApfsDriverLoader Memory fix drivers OpenRuntime Additional Drivers (optional) PartitionDxe Themes (optional) Install Clover Preference Pane (optional) you may use version r5144 attached below Clover_r5144.pkg.zip once Clover is installed, launch Clover Configurator app and mount the freshly created EFI partition of the USB installer Clover Configurator.zip add the (unzipped) HFSPlus driver attached below to the EFI/CLOVER/drivers/UEFI folder HFSPlus.efi.zip open the EFI partition and transfer the files and folders from the Latitude E6230 Big Sur Clover pack below to the EFI/CLOVER folder Clover_Pack_E6230_BigSur.zip /!\ If your E6230 is fitted with a different CPU than the i7-3540M, please remove the Power Management SSDT of the pack until you replace it by one applicable to your model (whether an existing SSDT or your own generated one) in the post-install phase. 2) 11.x installation boot the Big Sur USB installer at the Clover main menu, go to the "Options->configs" menu and select the "config_MBP11,1" config file. This is required to install (and later update as/when required) Big Sur on a supported Mac model. Press [ESC] twice to return to Clover main menu. at the Clover main menu, select the "Install macOS Big Sur" partition and press [ENTER] at Big Sur main installation screen, select Disk Utility to create & format APFS the target Big Sur disk/partition/volume. Note that installation won't work if target disk/partition/volume is formatted HFS+ exit DU and return to Big Sur main installation screen, then proceed with installation the installation process will reboot a temporary macOS installer partition to complete the installation. repeat this until the temporary partition is replaced by a final <Big Sur partition name> on Preboot entry. Each time, reboot via your USB installer and make sure to select the "config_MBP11,1" config file. when the partition <Big Sur partition name> on Preboot is displayed at Clover main menu, no need to call on the "config_MBP11,1" config file, the default one will do (MBP10,2 SMBIOS + -no_compat_check boot arg). 3) Post-installation tuning Once the finalised Big Sur installation has booted, complete the 1st boot configuration tuning Once at the desktop, mount the EFI partition of your Big Sur disk Copy the EFI folder of the E6230 Big Sur Clover pack to the mounted EFI partition You may then modify your SMBIOS info using Clover Configurator app and ensure you have unique numbers or unique combination of numbers (MLB, ROM, SystemSerialNumber and SystemUUID). Please note that, with MBP10,2 SMBIOS, Big Sur will not offer any updates because it'll be running on an unsupported platform. You'll only get updated offered if you boot with the MBP11,1 config file, MacBookPro11,1 being a supported model.
1 point
-
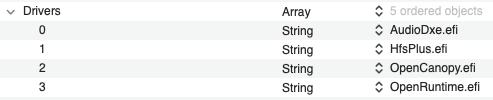
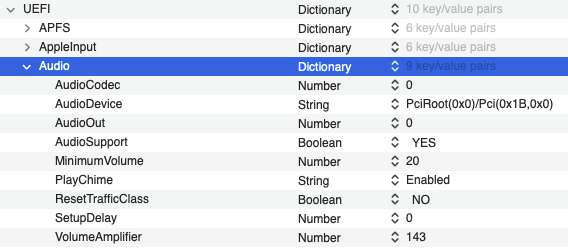
OpenCore Working: HD 4400 Full QE/CI DP/HDMI Video / Audio Webcam Sleep / Wake USB 2.0 / 3.0 ( not tested for speed) Speakers / Headphone SD Card Reader Fn+Up and Down Arrow for Brightness Control Audio control buttons Installation: Download macOS Monterey / Big Sur / Catalina app Format a 16GB USB drive (GUID / Extended (Journaled)) Create USB Installer with createinstallmedia command Download attached folder and rename as EFI Mount EFI partition and add EFI folder Configure BIOS setting according to guide Boot with USB installer Complete installation Post Installation: Mount EFI partition of newly installed drive and copy EFI folder over Update / Change in Config.plist under PlatformID->Generic (use genSMBIOS or Hackintool.app) MLB, ROM, SystemSerialNumber and SystemUUID Download alc_fix_BS.zip Open terminal and run the following commands: sudo spctl --master-disable cd ~/Downloads/alc_fix sudo ./install Note: Replace Config.plist with Config-IntelWifi.plist if you have an Intel combo card Boot Chime: I don't really care for it, but for those that like to have it, here's what you need. 1) AudioDxe.efi in /EFI/OC/Drivers; make sure it's added in Config file under UEFI/Drivers 2) OCEFIAudio_VoiceOver_Boot.wav in /EFI/OC/Resources/Audio //attached below OCEFIAudio_VoiceOver_Boot.wav.zip 3) In config file under UEFI->Audio, set the following settings That's it, reboot and you should hear a loud chime when you boot to the OC Picker! Updated to 0.8.3 - Supports Monterey 12.5.1 - to enable chime during boot, change in config file under UEFI/Audio >AudioSupport = Yes >PlayChime = Enabled Updated to 0.8.0 - to support Monterey 12.4 - to enable chime during boot, change in config file under UEFI/Audio >AudioSupport = Yes >PlayChime = Enabled Updated to 0.7.8 - Supports Montery 12.2.1 and Big Sur Updated to 0.7.4 If you're upgrading from older OC version, you might have to delete OpenCore from BIOS Boot Option and create a new one pointing to /EFI/OC/OpenCore.efi I've include 3 different versions of kexts for touchpad, disable / enable one that works for your system in the Config file Tested on MacOS 11.6 and 12.2.1 E7440_OC_0.8.4.zipE7440_OC_0.8.0.zip E7440_OC_0.7.8.zip E7440_OC_0.7.4.zip E7440_OC_0.6.9.zip E7440_OC_0.6.6.zip E7440_OC_0.6.3.zip HeliPort.app.zip alc_fix_BS.zip
1 point
-
It's long been reported and stated that unless you stick to BIOS at or below version A12, you'll get glitchy or corrupt graphics; culprit is Capri framebuffer 0x01660003's default memory size being set to 16MB. Once it is reduced to 8MB, graphics problems disappear. This can be done through binary patching on the Capri framebuffer kext itself or through property injection, which is what you ought to do with OC: framebuffer-patch-enable 1 NUMBER framebuffer-fbmem 00008000 DATA With regards to the patched tables and kexts, I meant those from your previous (or current) installation, be it Mojave or Catalina; basically, you re-use the same stuff.1 point
-
This is the folder with the config.plist updated. EFI HP840G3_BigSur_Beta4 solved Wifi Bth.rar1 point
-
This is for an ASUS ROG Strix Z390-I Gaming mini atx box... I have been able to get Beta 3 (not Beta 4?!?!?) to install using the attached OC EFI configuration. BUT Safari crashes upon launch, even with a bare bones Admin user. Not sure why Beta 4 does not install. Not sure why Safari crashes upon launch. Can someone examine this OC EFI folder and point me in the right direction. EFI.zip1 point
-
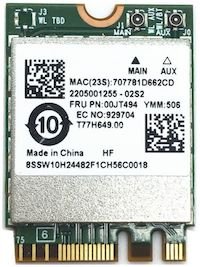
Last Update: 6th Jan 2020 Foxconn T77H649.00: Ok Foxconn T77H649.00 appears mostly offered with Lenovo laptops and carries Lenovo FRU (i.e. part #) 00JT494. The cards carries the usual Broadcom PCI id 14e4:43a3 and subsystem id 17aa:075a. - - - - - - - - - - Edit: 06 Jan 2020 This Foxconn T77H649 works perfectly with ASPM disabled through bootloader property injection under the associated device address: Key = pci-aspm-default | Value = 0 | Type = NUMBER ASPM disabling appears mandatory with this card to avoid CPU overloading and system freeze after a few minutes.
1 point
-
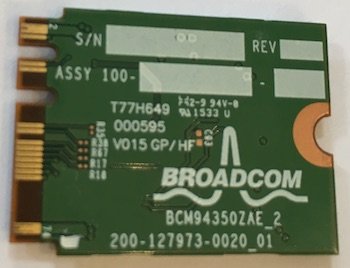
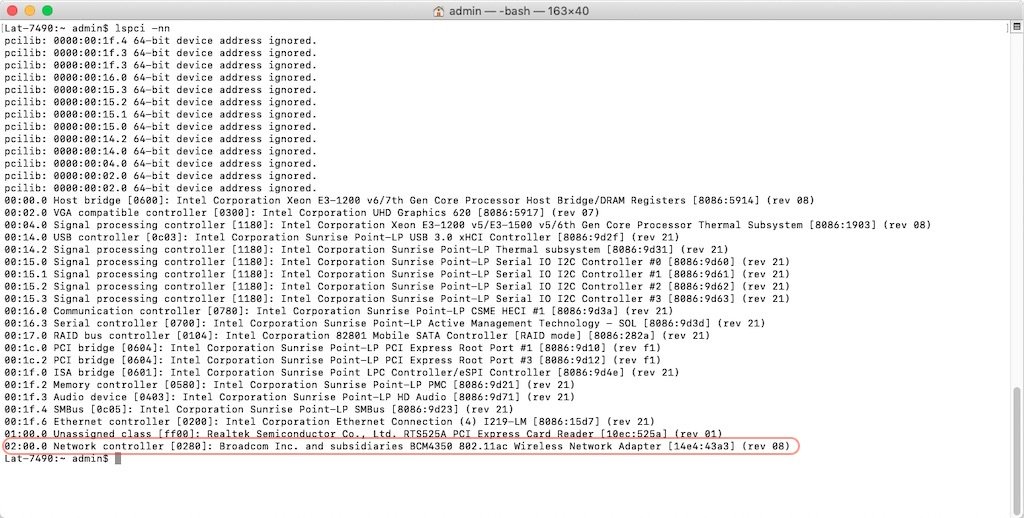
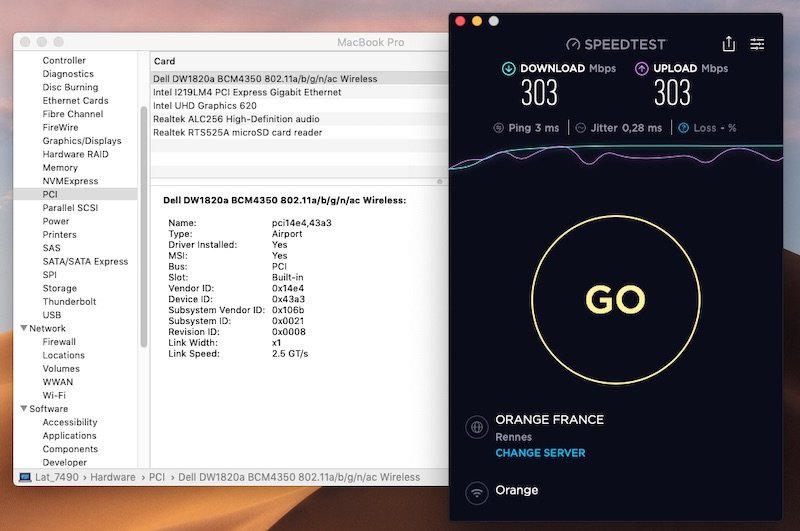
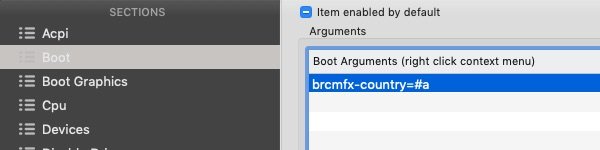
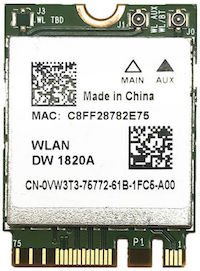
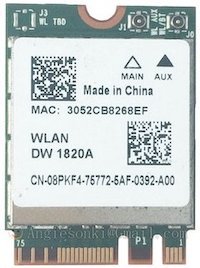
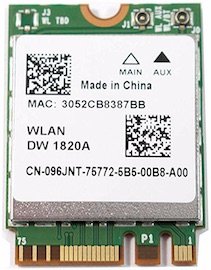
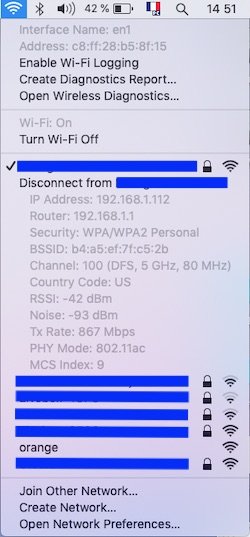
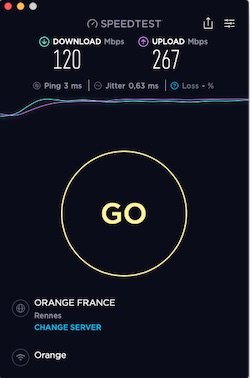
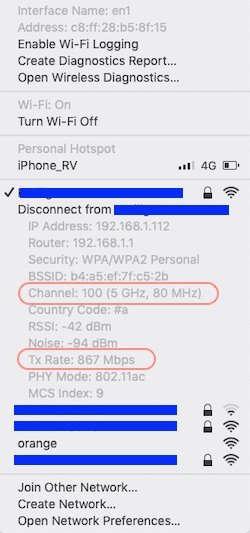
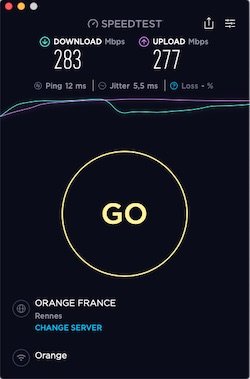
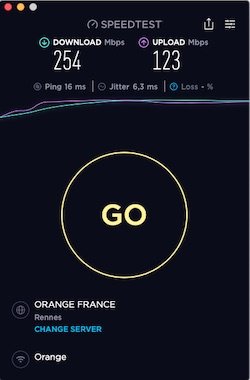
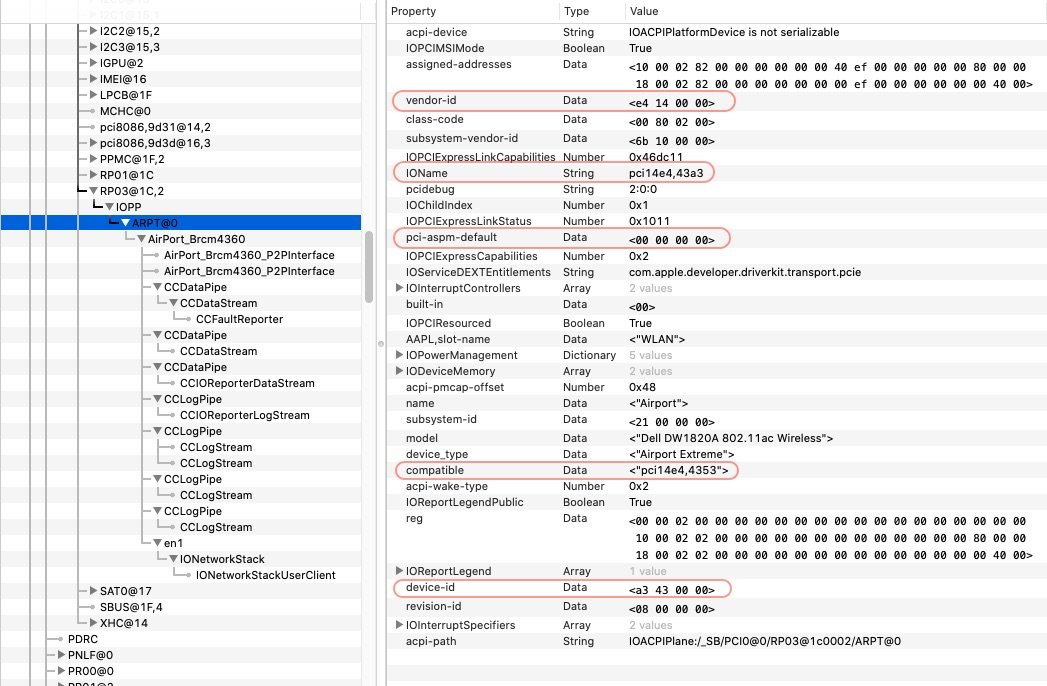
Last update: 28th Jan 2020 Dell DW1820A: Ok Ok Ok DW1820A is a pretty good combo card providing 2.4/5GHz 802.11ac wireless at 867Mbps + Bluetooth 4.1. As stated at Wikidevi, there appears to be a few different models of the card. Whilst they all carry the same Broadcom id 14e4:43a3, they each carry a different subsystem id/part #: 1028:0021 (part # CN-0VW3T3) -> 100% Ok with ASPM disabled (originally tested 100% Ok on my Latitude 7490 without ASPM tuning) 1028:0021 (part # CN-096JNT) -> 100% Ok with APSM disabled 1028:0022 (part # CN-096JNT) -> 100% Ok with APSM disabled 1028:0023 (part # CN-0VW3T3) -> 100% Ok with APSM disabled 1028:0023 (part # CN-08PKF4) -> 100% Ok with APSM disabled I acquired a Dell DW1820A a few months ago and was able to play with that card on a Latitude 7490 laptop (fitted with an M.2 2230 Key A+E WLAN slot) that I targeted for Mojave. The model I received was CN-0VW3T3. Before it was later established that not all DW1820A were equal, I purchased a 2nd one and, as it turned out to be, was lucky to receive another 0VW3T3 model. /!\ The 1st thing I want to report is that I encountered difficulties booting my Mojave USB installer and installing macOS with the card plugged in. I had to disable wireless in BIOS to be able to install Mojave. Once it was installed, booting Mojave with wireless enabled in BIOS would cause quite severe lag and performance degradation once at the desktop, as if the card just clogged up CPU ressources. This was because I had not applied any particular tuning for the card and, of course, this was resolved once I implemented the necessary fix detailed below. /!\ Searching through the Web for that DW1820A/BCM4350, I came accross a few forum posts/threads that mentionned: rolling back the Yosemite IO80211Family kext to get the card to work, although with instability and regular KPs removing AirPortBrcmNIC plugin kext from IO80211Family kext, patching AirPortBrcm4360 plugin kext with the id of the DW1820A and installing AirportBrcmFixup kext with a couple of parameters (Credits to Hugotai, cf. his post @Voldemort's place, 2nd Dec 2018) Whilst I did not really contemplate doing the 1st thing, I did envisage the 2nd one and started to look at the differences between Yosemite's version of IO80211Family kext and Mojave's. The main difference I had already noticed was that device id 14e4:43a3 was handled by AirPortBrcm4360 up to Sierra 10.12 and by AirPortBrcmNIC since High Sierra 10.13. Further reading and experimenting showed me that AirPortBrcmNIC kext was the root cause of the problem. Building on Hugotai's success, I seeked to work out an easier solution to bypassing AirPortBrcmNIC kext that would not require kext removal and Info.plist patching but, instead, something that could be implemented through hardware properties injection, either through DSDT/SSDT patching or bootloader (Clover or OpenCore) configuration. Once Hugotai's solution was verified and confirmed, I worked out the following Clover-based solution (because that's what I was using) for HighSierra/Mojave: identify the IOReg/ACPI device to which the DW1820A card is attached (use IORegistryExplorer app to that effect). Eg: RP0n@xx,yy->PXSX@0. in the absence of individual ACPI device entry under the PCI bridge for the card, select "FixAirport" ACPI Fix in Clover. That'll create a device "ARPT" @0 under the bridge and that's what you'll inject properties to. This may also require to select "AddDTGP" ACPI Clover fix if your DSDT does not possess any DTGP method. If running with Clover, use Clover Configurator app to that effect. inject the following properties either in DSDT or through bootloader config (latter recommended): compatibility of the card with Broadcom chips 14e4:4353 or 14e4:4331 that are handled by IO80211Family's PlugIn kext AirPortBrcm4360 ASPM disabling (required for most cards to avoid CPU clogging and system freeze) optionally, add SysProfiler's cosmetic info such as PCIe Slot, card's make and model, etc. and that's it ! Nothing to do to IO80211Family kext or its PlugIns which all remain untouched/unmodified/full vanilla in /S/L/E. It really could not be simpler... NB: if your card's country code absolutely requires to be changed, say for full 5GHz/80MHz operations, add the following steps: install AirportBrcmFixup kext in /L/E + repair permissions + rebuild your cache or inject it through Clover's EFI/CLOVER/kexts/Other add boot argument brcmfx-country=XX (where XX is the target value, eg: US, FR, #a, etc.) to the Boot section of your Clover config but, beware, I found that using AirportBrcmFixup (v1.1.9 at time of writing) with country code other than default's US setting of the card impacted my wireless performance (fluctuating and reduced RX/TX rate). For instance, with country code set to FR (for France), I would not connect at 80MHz on my 5GHz Wireless network, only at 40MHz which resulted in a local wireless connection limited to 400Mbps (vs. 867Mbps) and reduced my overall Internet RX rate by about 60% and TX rate by about 10%: with country code set to #a (to get full 80MHz connection), I could not obtain DFS channel mode to my local router and I noticed fluctuating/unstable RX/TX rates: without AirportBrmfixup, my wireless connection runs solid at 867Mbps and SpeedTest returns a solid TX and RX rates at 300Mbps (i.e. the maximum speed of my Internet connection). Properties injection through DSDT: On my laptop, the DW1820A was found attached to device RP03.PXSX located at IO address 0x001C0002, i.e. 1C,2. The DSDT patch required to inject properties could look like this (devices names will differ from one computer to another of course!): Device (RP03) // PCIe Root Bridge { name (_ADR, 0x001C0002) [...] [...] [...] Device (PXSX) // DW1820A card attached to this device (FixAirport Clover ACPI fix required if such device is missing) { Name (_ADR, Zero) [...] [...] [...] Method (_DSM, 4, NotSerialized) // _DSM: Device-Specific Method { If (LEqual (Arg2, Zero)) { Return (Buffer (One) { 0x03 }) } Return (Package () { "AAPL,slot-name", // Optional Buffer () { "WLAN" }, "device_type", // Optional Buffer () { "Airport Extreme" }, "name", // Optional Buffer () { "Airport" }, "model", // Optional Buffer () { "Dell DW1820A 802.11ac wireless" }, "compatible", // Mandatory Buffer () { "pci14e4,4353" // Declares compatibility with BCM43224; "pci14e4:4331" for BCM94331 may also be used }, "pci-aspm-default", // Mandatory for most cards Buffer (One) { 0x00 // Disables ASPM for PCIe device } }) } } } Properties injection through bootloader config: An easier alternative is to inject those properties in bootloader config (for Clover via Clover Configurator app for instance). This can be done within the Devices properties section by injecting the desired properties in the Properties sub-section: In the left part, add the PCIe address of the targeted device in the form PciRoot(0x0)/Pci(<root device address>)/Pci(<actual device address>) In the right part, add the above properties in single lines and with the right types (String, Data, Number) For instance, in the case of my laptop booting with Clover, the target device will be PciRoot (0x0)/Pci(0x1C,0x02)/Pci(0x0,0x0) for PCI0@0->RP03@1C,2->PXSX@0. Then, properties will be injected as lines of keys of 3 x possible types: strings, hex data blocks or numbers. For instance, to declare compatibility with 14e4:4353, the line will consist of Property Key set to compatible, Key Value set to pci14e4,4353 and Key Type set to STRING. The complete properties injection will be: Device = PciRoot(0x0)/Pci(0x1c,0x02)/Pci(0x0,0x0) Key = compatible | Value = pci14e4,4353 | Type = STRING Key = pci-aspm-default | Value = 0 | Type = NUMBER Key = AAPL,slot-name | Value = WLAN | Type = STRING (optional) Key = device_type | Value = Airport Extreme | Type = STRING (optional) Key = name | Value = Airport | Type = STRING (optional) Key = model | Value = Dell DW1820 (BCM4350) 802.11ac wireless | Type = STRING (optional) Once the device properties are injected in bootloader config or DSDT, there's nothing left to do but reboot the computer. The DW1820A card will then be fully active and able to connect to 2.4/5GHz networks at full speed. Results: On the Bluetooth side, once the usual Broadcom firmware patching kexts are installed (eg: Rehabman's BrcmFirmwareRepo + BrcmPatchRAM2 for instance), the BT4.1 module will be fully operational and capable of supporting AirDrop and Handoff! Links: Clover Configurator app Rehabman's Broadcom Firmware patching kexts Acidanthera AirportBrcmFixup kext - - - - - - - - - - Edit: 06 Jan 2020 Updated with freshly found ASPM disabling property injection that fixes all outstanding stability issues. DW1820A #096JNT and Foxconn T77H649 now tested 100% Ok. DW1820A #08PKF4 should be just the same. - - - - - - - - - - Edit: 28 Jan 2020 Finally got to test a DW1820A #08PKF4 and it's also 100% Ok with ASPM disabled.
1 point
.jpg.5dd7e0d443cb43319db0b88f75a62e84.jpg)

.jpg.32ba5f6dc9e64893e73203ee3153d34f.jpg)


This leaderboard is set to London/GMT+01:00