
Leaderboard


Popular Content
Showing content with the highest reputation since 07/10/25 in Posts
-
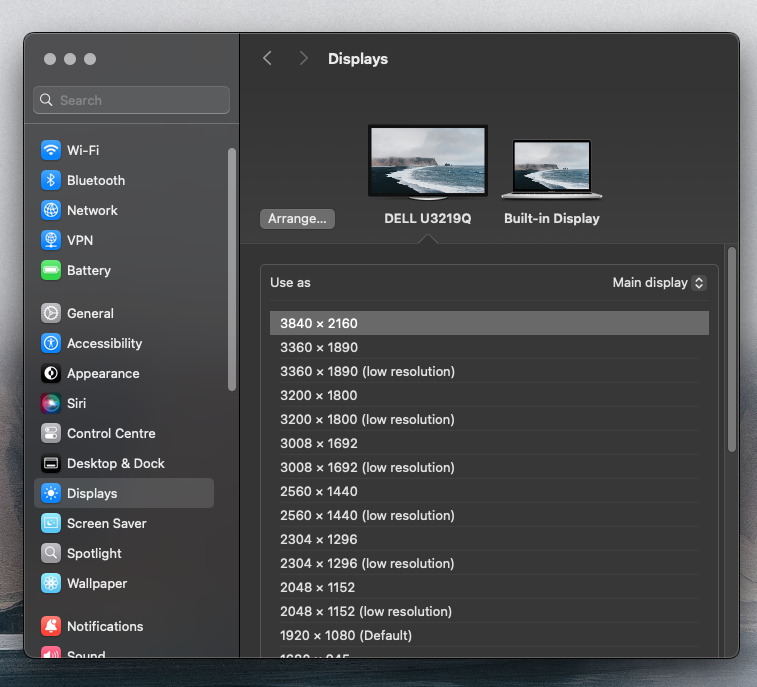
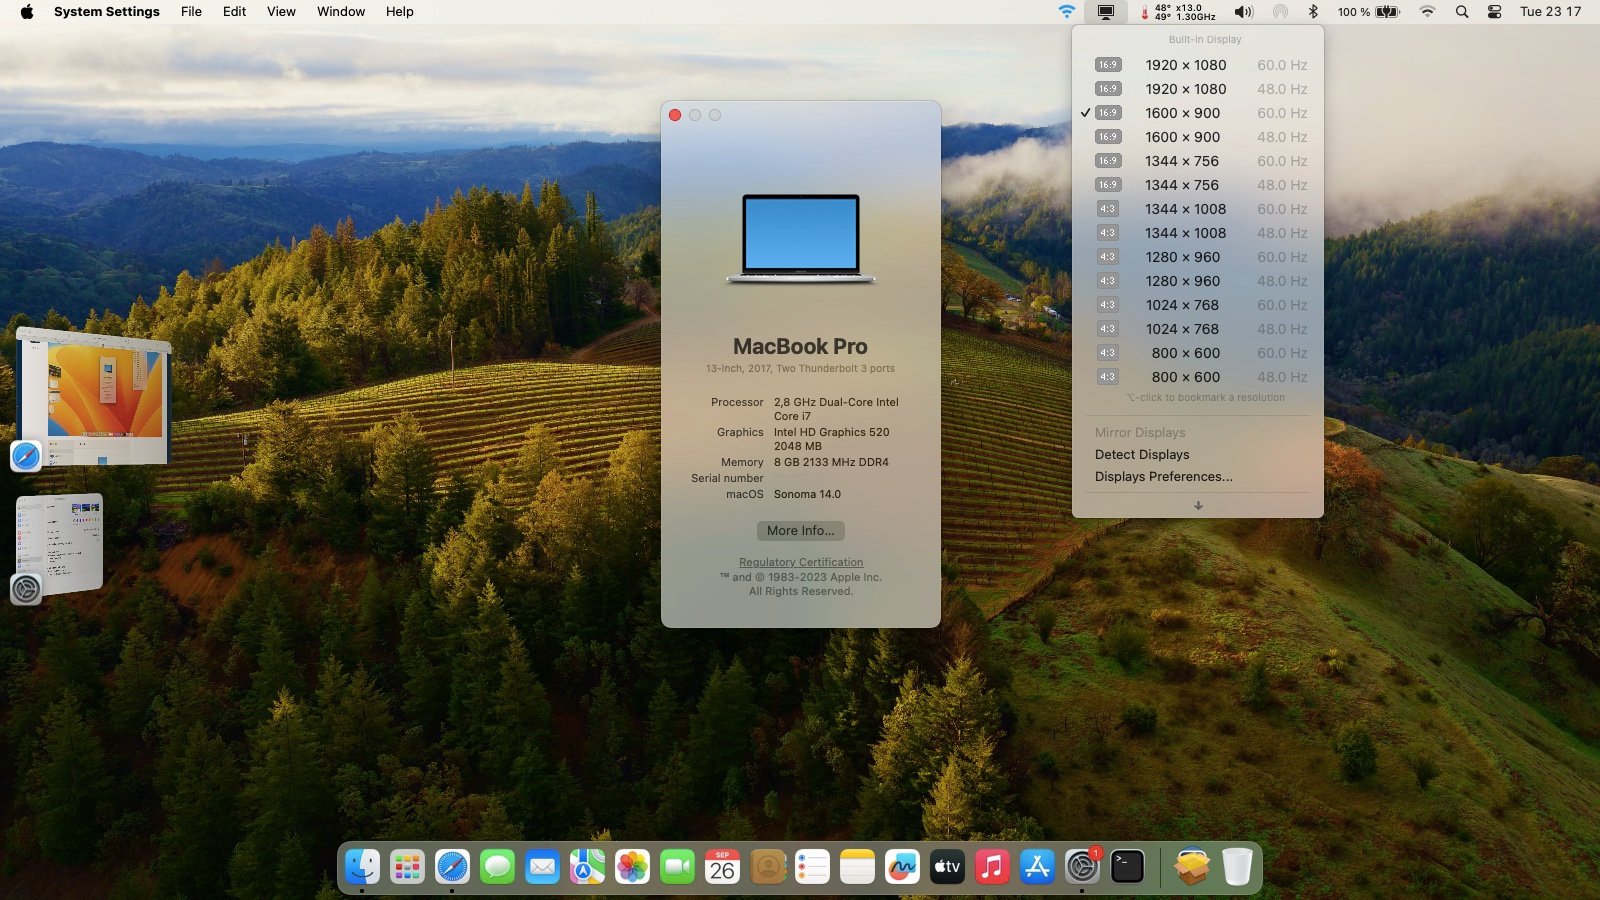
Just wanted to follow up on this and give you a big thank you Herve for your advice - and you were absolutely right that 64MB is required. I've been surviving with a lower resolution, but thought "enough is enough" and a week ago bought a programmer (£5 from Amazon) and then carefully followed the steps here: https://github.com/tylernguyen/x1c6-hackintosh/blob/main/docs/BIOS/modding-the-BIOS.md I had Macronix BIOS but the normal instructions worked absolutely fine, just another command-line argument to add. Was extremely nervous doing this! Rebooted into BIOS and the Advanced menu was visible. So, upped the video memory to 64MB and with few other changes I've now got glorious 4K from my X1 Carbon Gen 5 using the DisplayPort over USB-C. One cable!
 2 points
 -
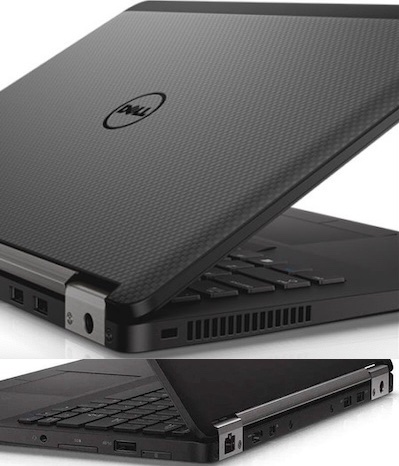
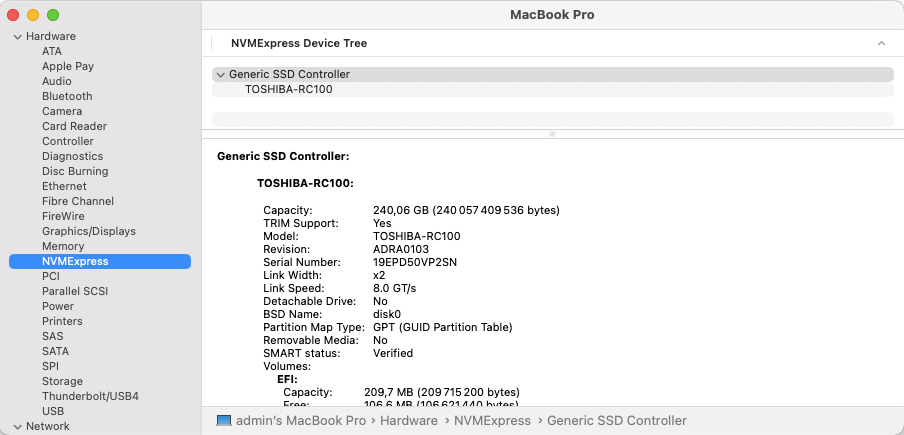
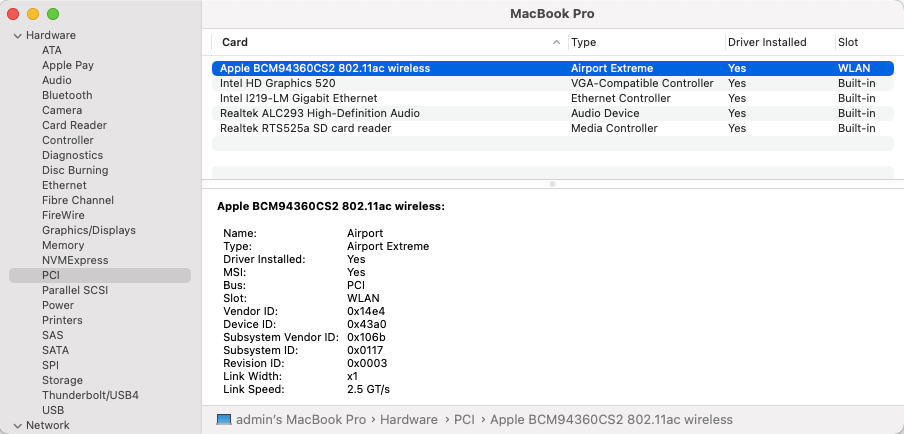
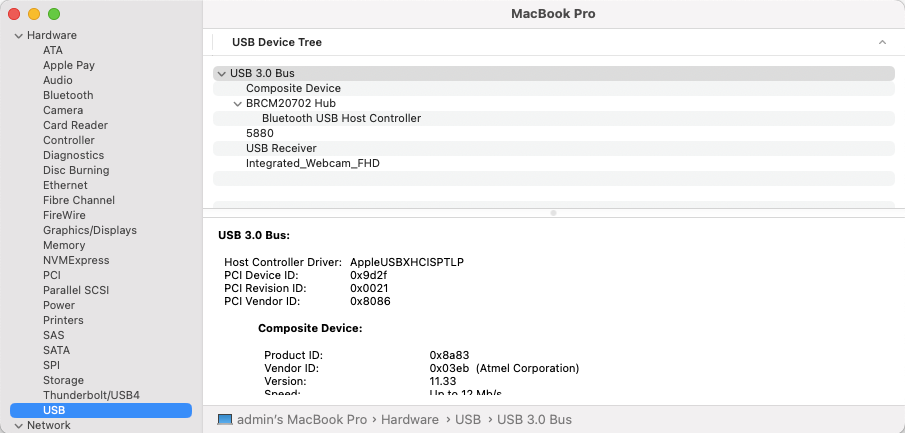
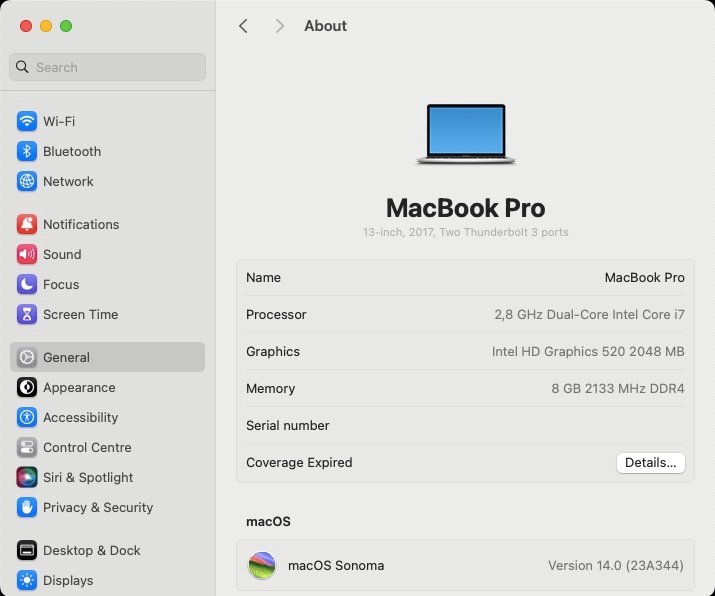
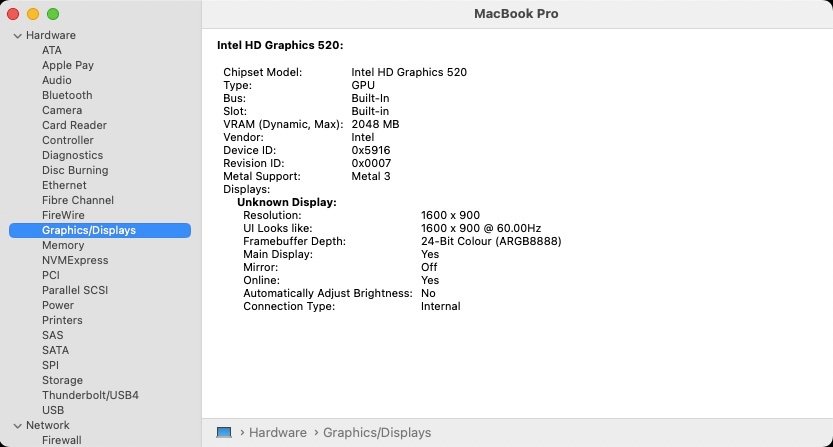
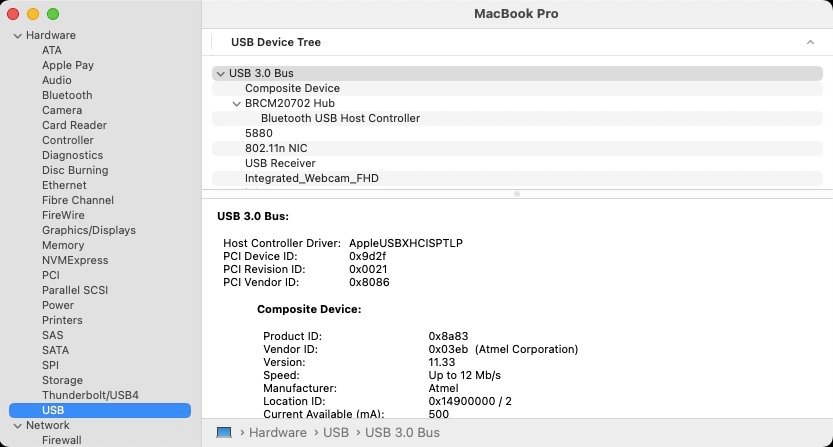
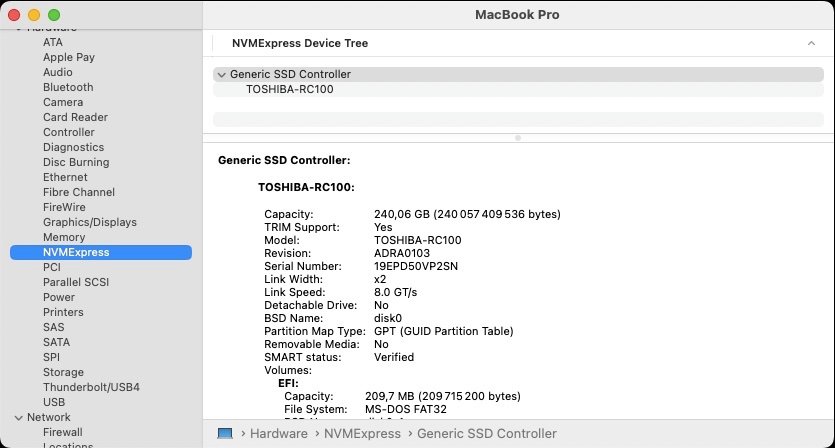
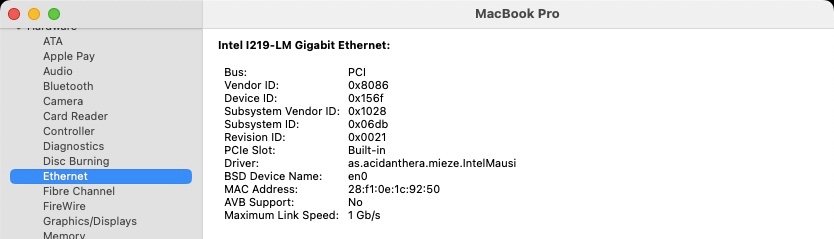
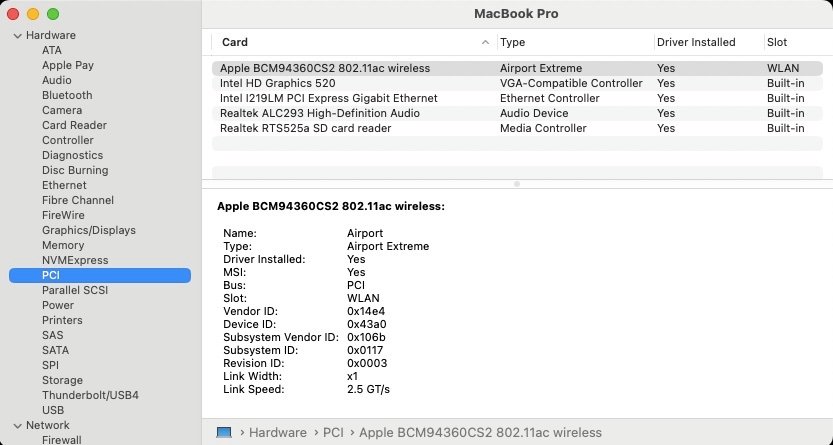
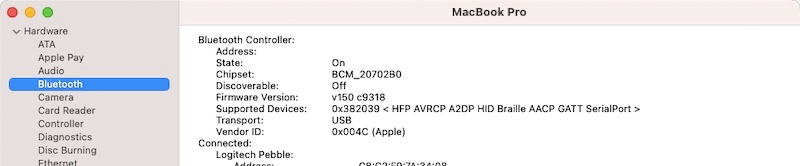
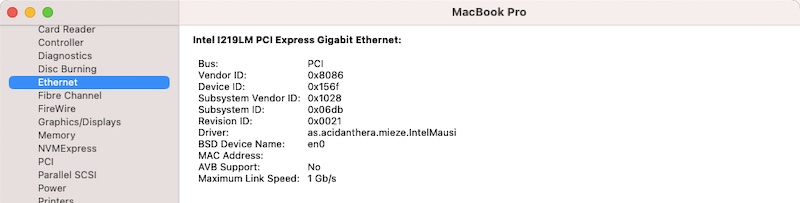
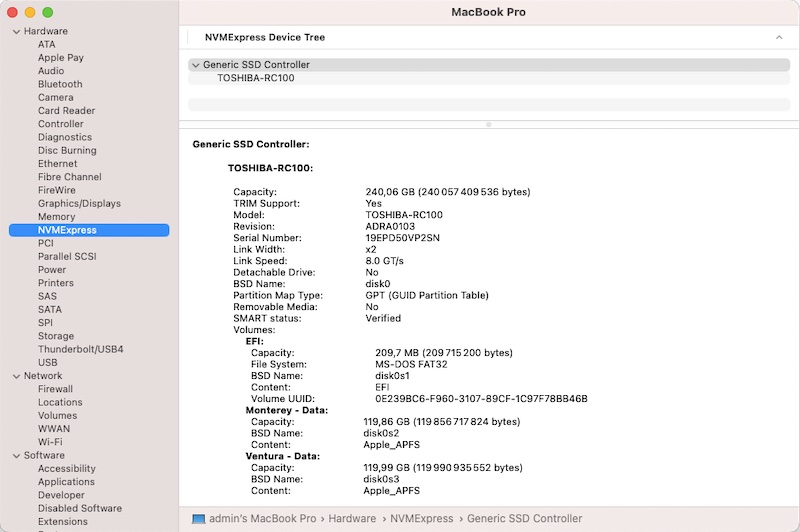
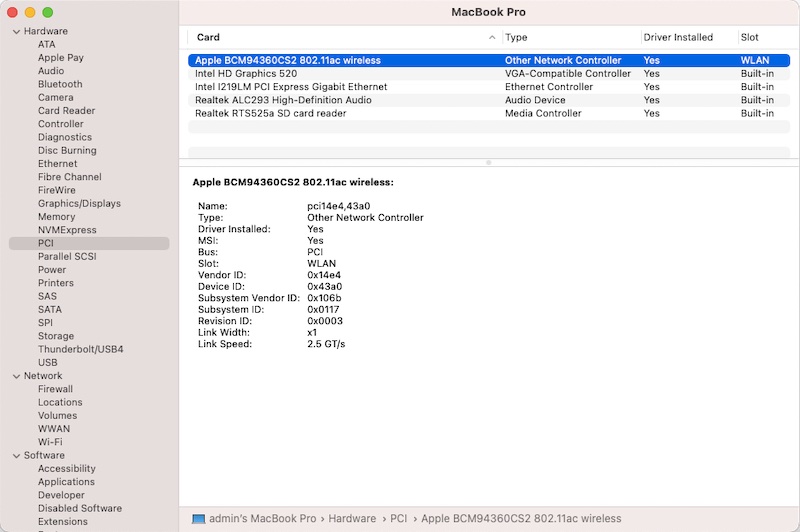
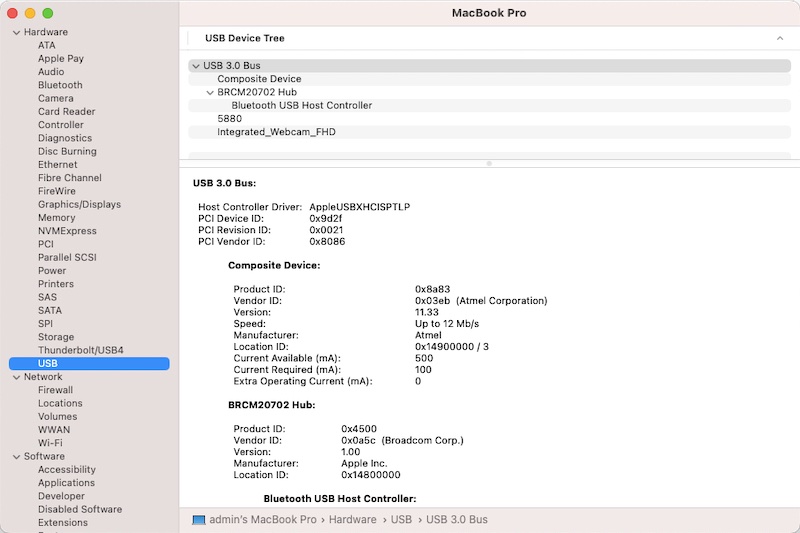
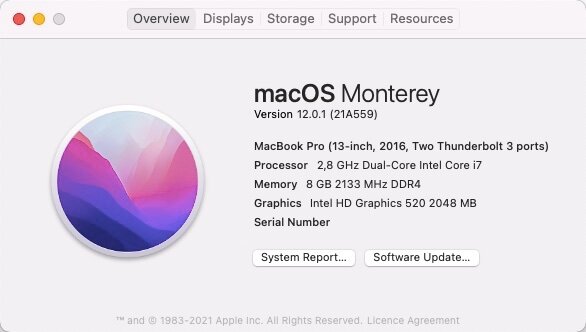
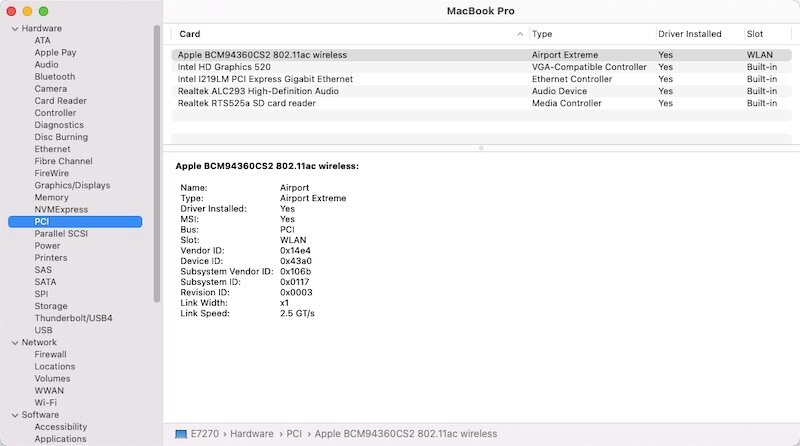
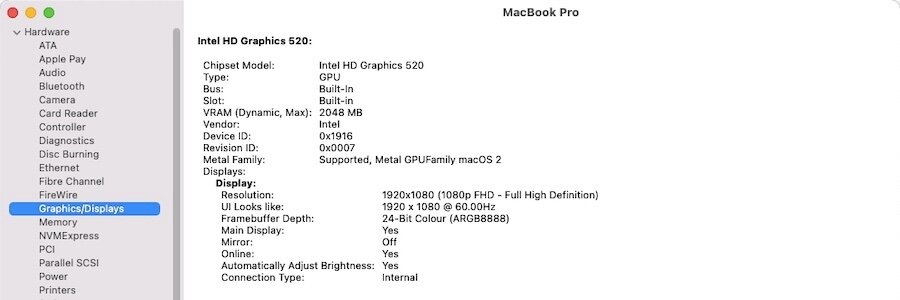
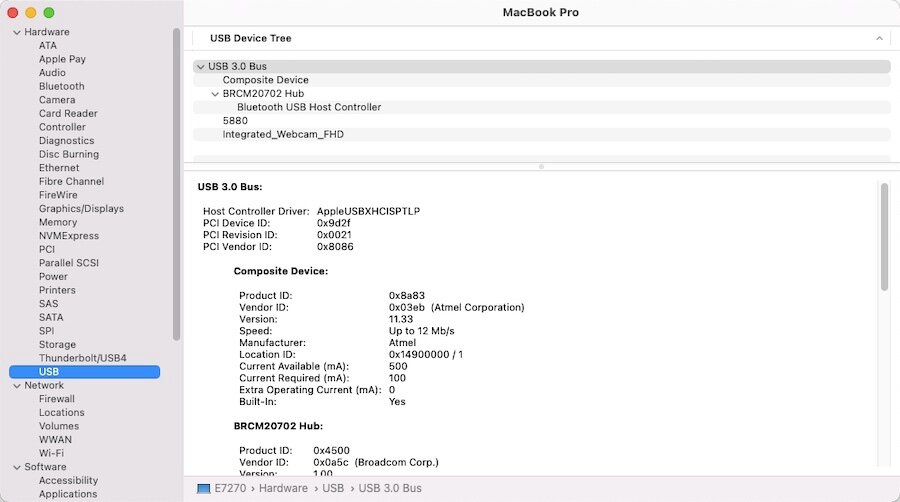
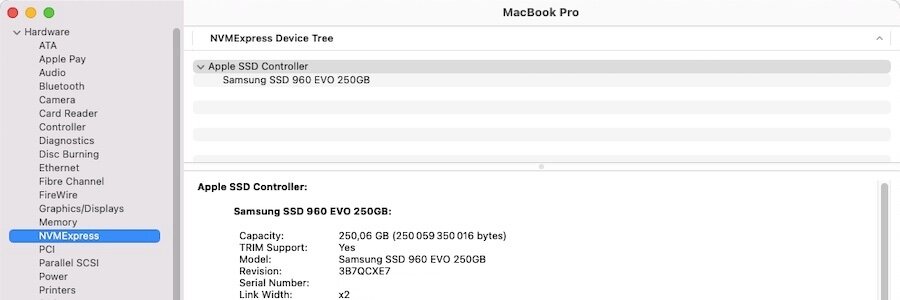
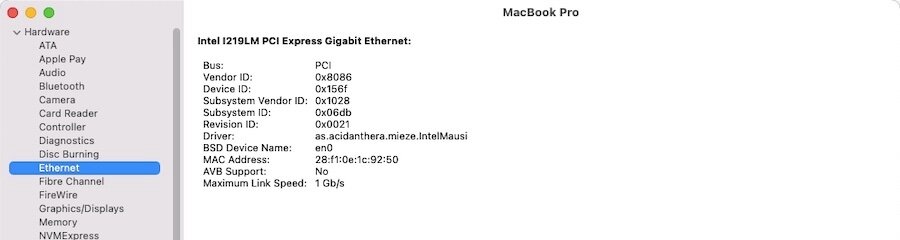
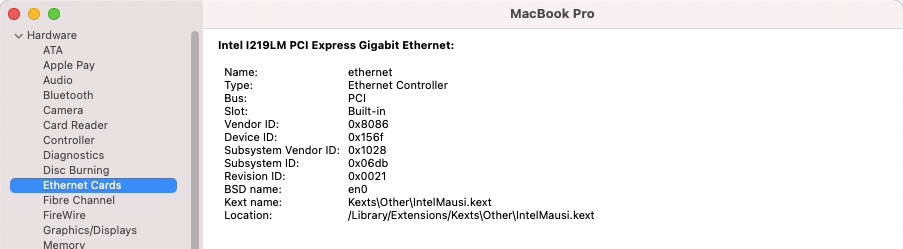
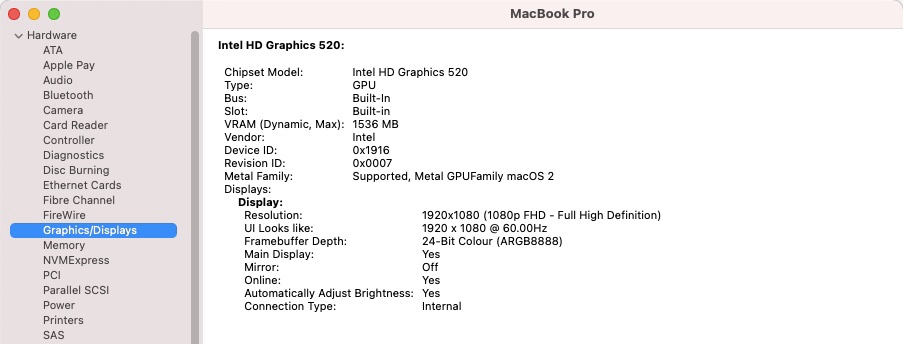
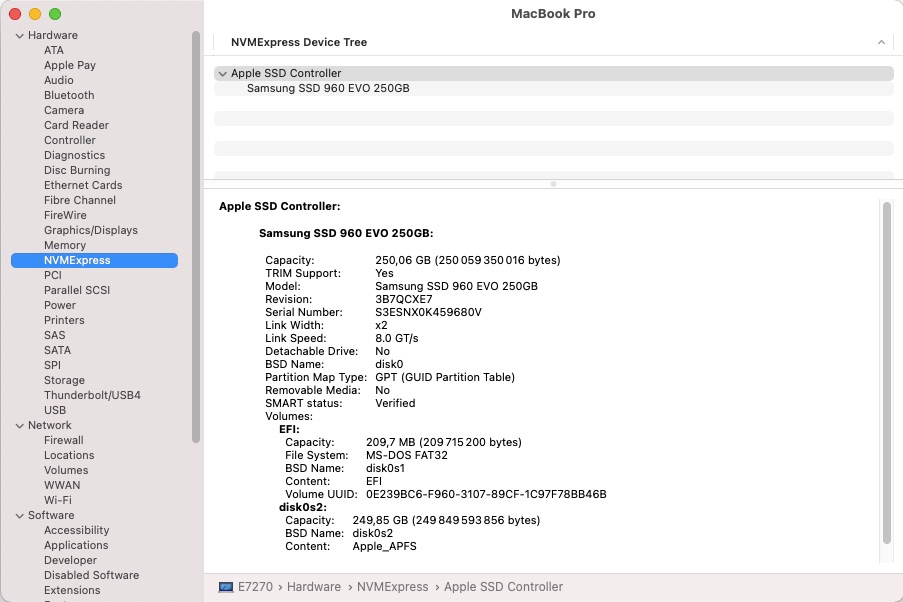
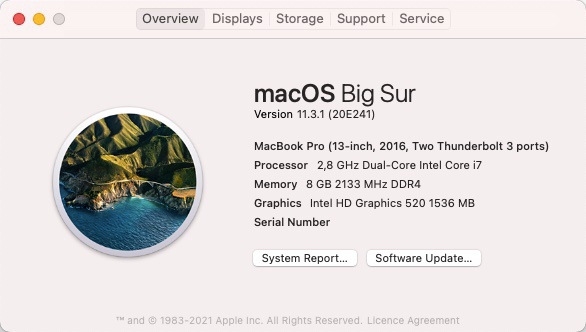
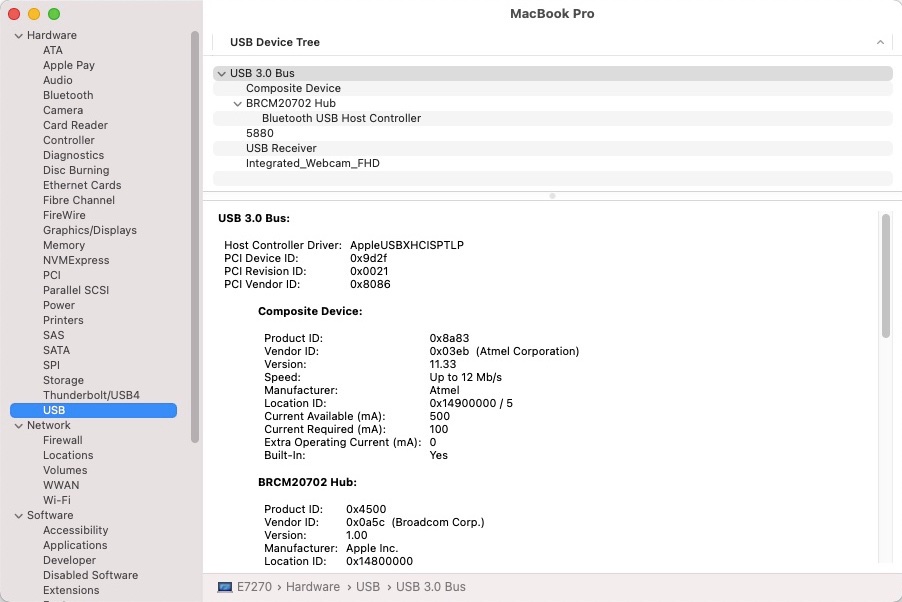
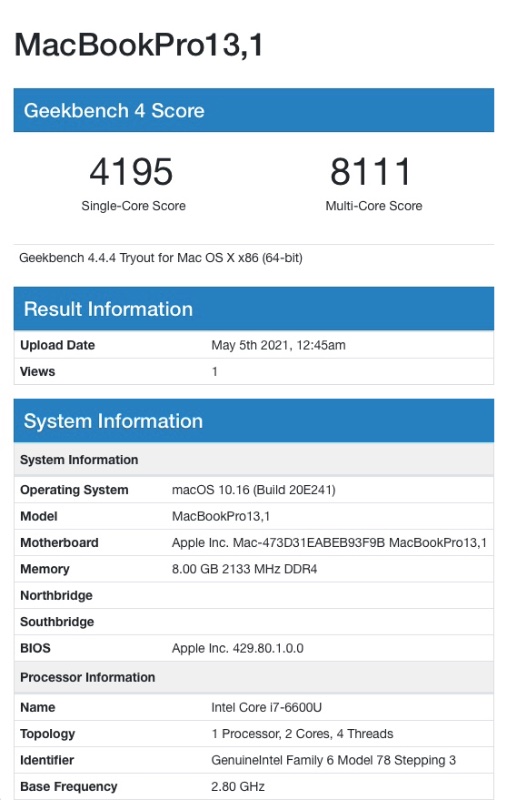
Last update: 06 Feb 2023 Specifications: BIOS 1.28.3 1.29.4 1.30.3 1.31.3 1.32.4 1.33.3 1.34.3 1.35.3 1.36.3 (with SATA disk mode set to AHCI mode) Intel 100 Series chipset (Sunrise Point-LP) Intel dual-core Skylake i7-6600U 2.60GHz CPU (TDP Up 2.8GHz, Turbo boost to 3.2GHz (2 cores) or 3.4GHz (1 core)) Integrated Intel HD520 graphics (300MHz/1050MHz) (PCI ven id 0x8086, dev id 0x1916) Internal-USB Atmel MaxTouch 12.5" 1920x1080 FHD IPS touchscreen (PCI ven id 0x03eb, dev id 0x8a83) 8GB DDR4-2133P RAM Intel I219LM Gigabit Ethernet (PCI ven id 0x8086, dev id 0x156f) Whatever M.2 SATA or (compatible) NVME SSD that may be fitted (I used a 256GB Samsung 960 EVO then a 240GB Toshiba RC100) Whatever M.2 2230 wireless card that may be fitted (I initially replaced my original Intel card by a BCM4350-based DW1820a then an Apple BCM94360CS2) Realtek ALC293 (ALC3235) High Def audio (PCI ven id 0x10ec, dev id 0x0293) Realtek RTS525a SD card reader (PCI ven id 0x10ec, dev id 0x525a) Internal-USB Surplus Innovation Technology HD webcam (PCI ven id 0x1bcf, dev id 0x28bd) Alps Alpine V8 TouchPad (model w/o Touchscreen may have V7 Touchpad) 3 x USB 3.0 ports (1 x with power share) 1 x mini DisplayPort 1 x HDMI v1.4 1 x headset/microphone combo jack port 1 x internal M.2 2280 slot (key M, 2 x PCIe 3.0 lanes) for SATA/NVME SSD 1 x internal M.2 2230 WLAN slot (key A/E) 1 x internal M.2 3042 WWAN slot (key B, 1 x PCIe 3.0 lane) NB: WWAN slot supports M.2 2242 NVME SSDs (eg: Toshiba RC100) which are directly bootable; performance obviously limited due to single PCIe channel. SSD detection can be unreliable at laptop's power-on/reset. Latitude E7270 can boot from SD card. E7270:~ admin$ lspci -nn 00:00.0 Host bridge [0600]: Intel Corporation Xeon E3-1200 v5/E3-1500 v5/6th Gen Core Processor Host Bridge/DRAM Registers [8086:1904] (rev 08) 00:02.0 VGA compatible controller [0300]: Intel Corporation Skylake GT2 [HD Graphics 520] [8086:1916] (rev 07) 00:04.0 Signal processing controller [1180]: Intel Corporation Xeon E3-1200 v5/E3-1500 v5/6th Gen Core Processor Thermal Subsystem [8086:1903] (rev 08) 00:14.0 USB controller [0c03]: Intel Corporation Sunrise Point-LP USB 3.0 xHCI Controller [8086:9d2f] (rev 21) 00:14.2 Signal processing controller [1180]: Intel Corporation Sunrise Point-LP Thermal subsystem [8086:9d31] (rev 21) 00:16.0 Communication controller [0780]: Intel Corporation Sunrise Point-LP CSME HECI #1 [8086:9d3a] (rev 21) 00:16.3 Serial controller [0700]: Intel Corporation Sunrise Point-LP Active Management Technology - SOL [8086:9d3d] (rev 21) 00:17.0 SATA controller [0106]: Intel Corporation Sunrise Point-LP SATA Controller [AHCI mode] [8086:9d03] (rev 21) 00:1c.0 PCI bridge [0604]: Intel Corporation Sunrise Point-LP PCI Express Root Port #3 [8086:9d12] (rev f1) 00:1c.4 PCI bridge [0604]: Intel Corporation Sunrise Point-LP PCI Express Root Port #5 [8086:9d14] (rev f1) 00:1d.0 PCI bridge [0604]: Intel Corporation Sunrise Point-LP PCI Express Root Port #9 [8086:9d18] (rev f1) 00:1d.2 PCI bridge [0604]: Intel Corporation Sunrise Point-LP PCI Express Root Port #11 [8086:9d1a] (rev f1) 00:1f.0 ISA bridge [0601]: Intel Corporation Sunrise Point-LP LPC Controller [8086:9d48] (rev 21) 00:1f.2 Memory controller [0580]: Intel Corporation Sunrise Point-LP PMC [8086:9d21] (rev 21) 00:1f.3 Audio device [0403]: Intel Corporation Sunrise Point-LP HD Audio [8086:9d70] (rev 21) 00:1f.4 SMBus [0c05]: Intel Corporation Sunrise Point-LP SMBus [8086:9d23] (rev 21) 00:1f.6 Ethernet controller [0200]: Intel Corporation Ethernet Connection I219-LM [8086:156f] (rev 21) 01:00.0 Non-Volatile memory controller [0108]: Toshiba Corporation BG3 NVMe SSD Controller [1179:0113] (rev 01) 02:00.0 Network controller [0280]: Broadcom Inc. and subsidiaries BCM4350 802.11ac Wireless Network Adapter [14e4:43a3] (rev 08) 03:00.0 Non-Volatile memory controller [0108]: Samsung Electronics Co Ltd NVMe SSD Controller SM961/PM961/SM963 [144d:a804] 04:00.0 Unassigned class [ff00]: Realtek Semiconductor Co., Ltd. RTS525A PCI Express Card Reader [10ec:525a] (rev 01) E7270:~ admin$ For recommended BIOS settings, see here. For proper 4K output, patching BIOS to set DVMT pre-allocated memory to 64MB or 96MB is mandatory. Boot a USB key with ModGrubShell installed on it as explained here and set variable 0x432 to 0x02 or 0x3: setup_var 0x432 0x3 exit Default value is 0x1 for 32MB (0x2 is 64MB, 0x03 is 96MB). Once the change is applied, no need to inject patched Framebuffer memory settings (fbmem/stolenmem) as properties in your bootloader's config. Bear in mind that this DVMT adjustment can be removed by resetting BIOS to default settings.
1 point
-
Released Sep. 15th, 2025. Version 26.0, build 25A354. Tahoe is the last version for Intel platforms and marks the end of the long road for Hackintosh computers as we've known it since 2006. It drops official support for all 8th gen. platforms + 9th gen. 2019 Coffee Lake MacBook Pro15,x and, somehow surprisingly, for 2020 Ice Lake-based MacBook Air9,1. This leaves final support for only a handful of 9th gen. and 10th gen. platforms. This being said, support for Kaby Lake graphics survives, all KBL kexts remaining present, so good news to all owners of Skylake laptops who will all be able to run Tahoe with full acceleration through the SKL graphics patch that's been available since Ventura. For other older iGPUs, patches should hopefully remain available through OCLP tool (once updated and released) to regain graphics acceleration. Officially supported Intel platforms are now limited to : 2020 iMac20,x (10th gen. Comet Lake) 2019/2020 MacBookPro16,x (9th gen. Coffee Lake and 10th gen. Ice Lake) 2019 MacPro7,1 (Cascade Lake) NB: macOS Ventura is now unsupported. View full article1 point
-
Here is my Sonoma OC EFI folder for the Dell E5490 Touchscreen: https://e.pcloud.link/publink/show?code=XZrBsOZCxcafEpoW0HeBU5RfpktD4lEfM6k EFI Dell Latitude 5490 Touch OC 1.05 Sonoma.zip Currently running macOS 14.7.81 point
-
Released August 18th, 2025. Build 25A5346a. Available through OTA updates. Same Clover bootpack as for beta 1 to beta 6.1 point
-
https://github.com/MSzturc/ThinkpadAssistant/releases1 point
-
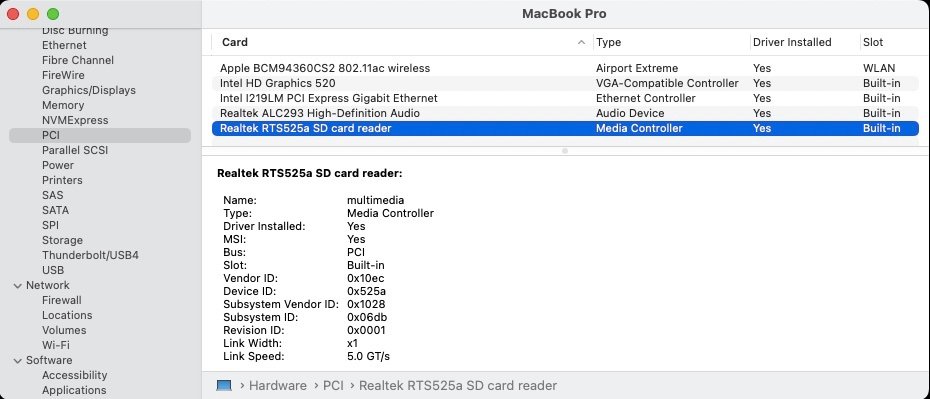
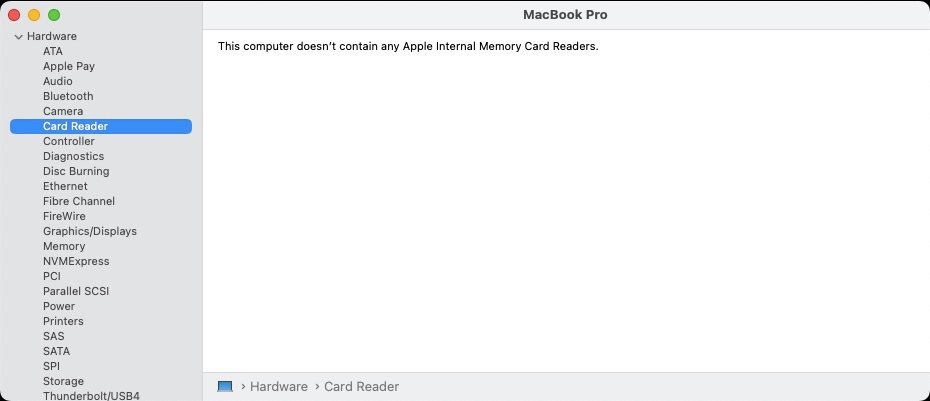
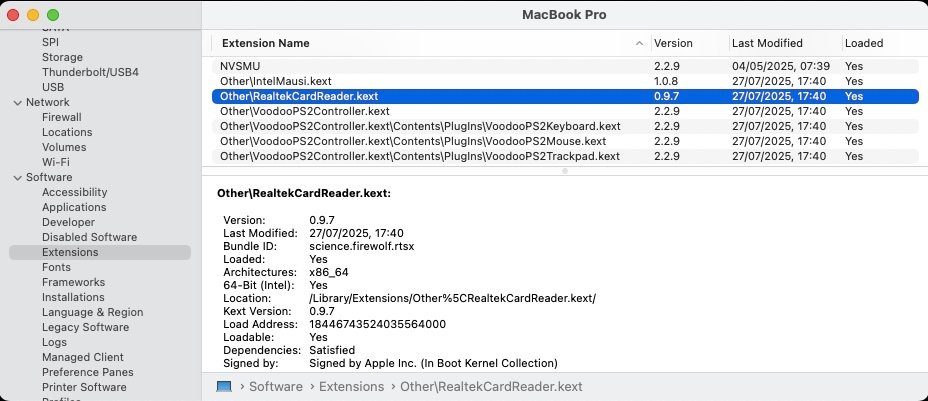
Indeed, I only inject RTS525a properties for cosmetic reasons so that the device gets listed in SysInfo->PCI. It's Firewall's kext that makes it work. RealtekCardReaderFriend is of no use to me as it does not make the RTS525a appear listed as an Apple Card reader. I would not worry too much about the "unassigned class" in Hackintool; I have the same yet the card reader is fully functional, it's just the tool that does not recognise the device type within macOS. Re: Fn keys, all the useful ones natively work (audio, keyboard light, sleep) except the screen brightness keys for which I inject an ACPI patch for Dell laptops. It's been documented several times on the forum. Of course, it applies to Dell machines, not Lenovo...
1 point
-
Hi; I've no experience with RTS5227 but I've had a couple of laptop, including my current Dell Latitude E7270, with the Realtek RTS525a model. All I use is Firewall's RealtekCardReader kext v0.9.7 (without its associated friend). The card reader is only ever functional after a 1st sleep. I suppose an ACPI patch would fix this but I never bothered to debug the wake process to identify what's done at ACPI level for the device compared to what's done (and not done) at 1st boot. I don't use it much so it's never really been a problem. I inject properties in my bootloader's config so my RTS525a card reader is listed in SysInfo->PCI section but, indeed, nothing in the SysInfo->Card Reader section. It's something I could not care less about. Still works perfectly in Sequoia (and Tahoe beta for that matter).
1 point
-
Try these kexts, I forked the repository and made them compatible with newer OS, the original versions are stuck in Ventura https://github.com/Baio1977/GenericCardReaderFriend https://github.com/Baio1977/RealtekCardReaderFriend It needs https://github.com/Baio1977/RealtekCardReader1 point
-
Not an installation guide... Thread moved to the support section where it belongs.1 point
-
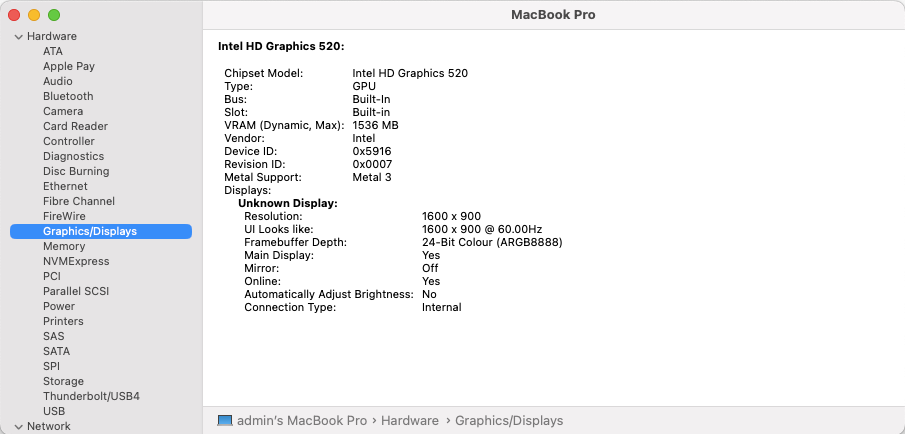
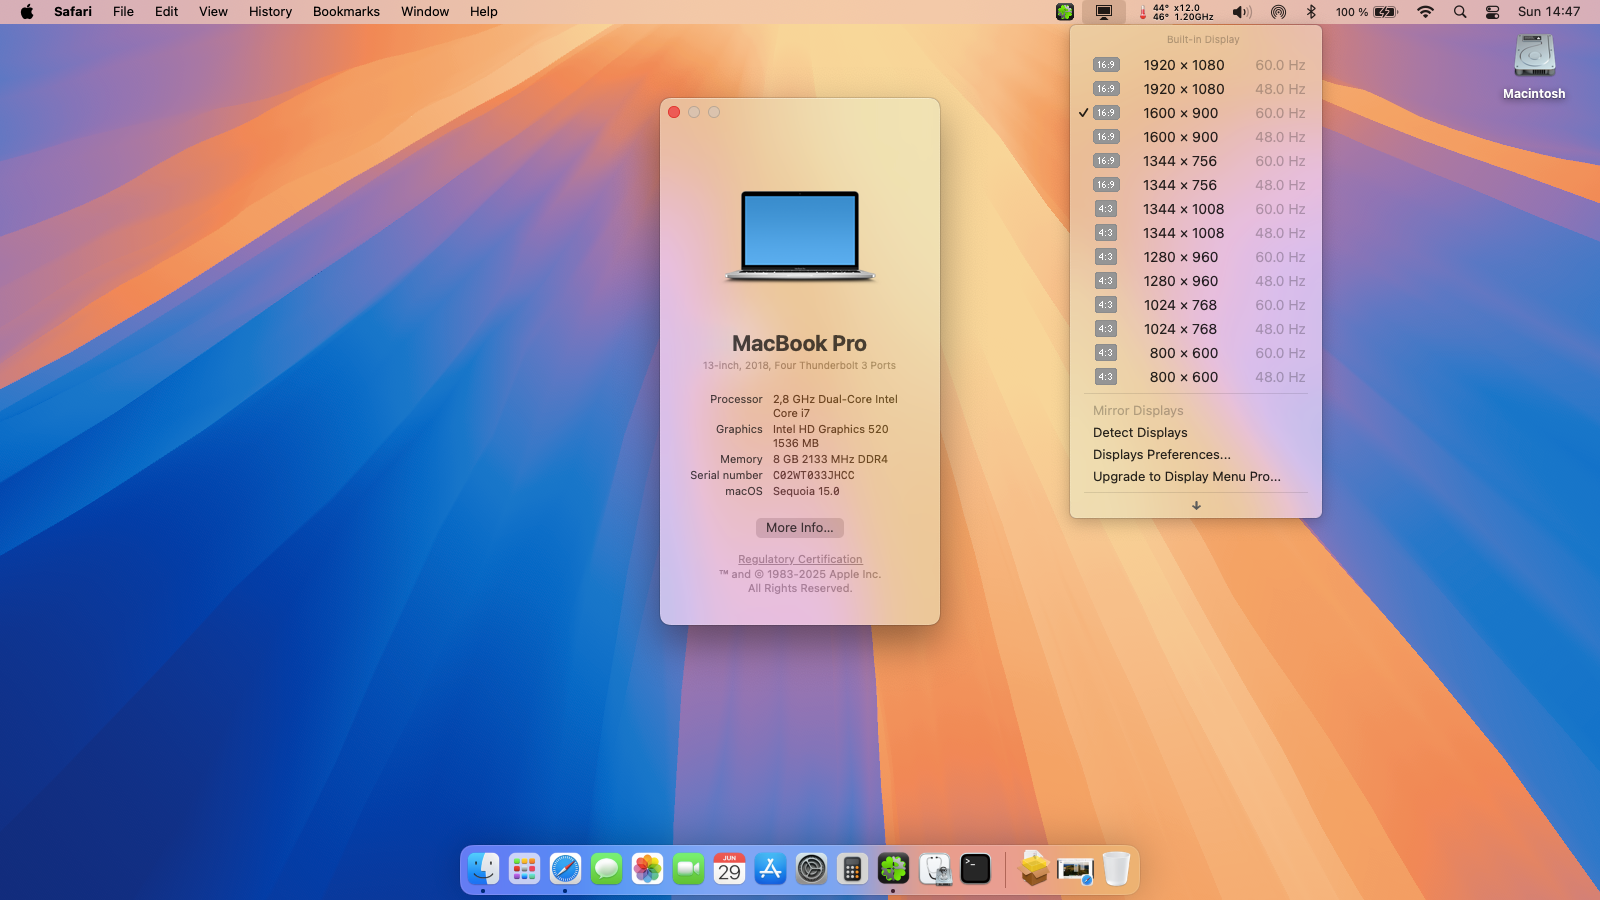
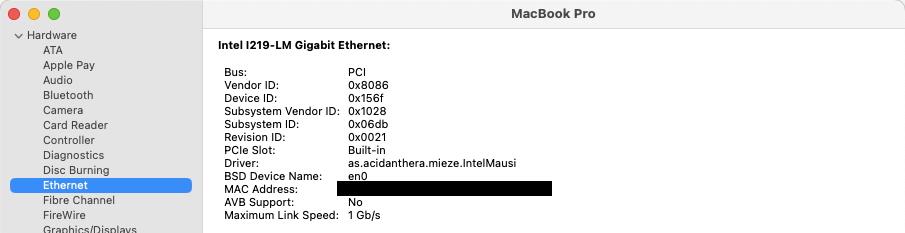
Target macOS release: Sequoia 15.x This is a Clover-based installation using the well-known/well documented vanilla method detailed below: Working: full QE/CI with HD520 graphics (with KBL layout 0x59160000, KBL faked id 0x5916, MBP15,2 SMBIOS and Lilu kext v1.6.8 + Whatevergreen kext v1.6.7 or later) HDMI output OOB but built-in LCD goes off on 1st cable connection. With WEG boot arg igfxonln=1, LCD picture is recovered after closing then re-opening the LID and HDMI is on at 1st boot & after wake mDP output OOB touchscreen with USB HID fix (patch of IOHIDFamily to fake single-user mode) due to Apple dropping support for old USB hardware full audio, including jack microphone input and headset output (with AppleALC kext & layout-id 11) HDMI audio (with KBL con1 connector-type patch) built-in Gigabit Ethernet (with IntelMausiEthernet kext) full CPU power management, including Turbo boost to 3.4GHz (with PlugIn type settings) sleep: Ok through Apple menu->Sleep, lid closure, power button, Fn-Insert and energy savings settings with hibernation mode set to 0 (sleep to RAM) and /var/vm/sleepimage file deleted. wake: Ok through lid opening and power button wireless & bluetooth with any compatible card/USB dongle and necessary patching (OCLP) battery management and monitoring (with ACPIBatteryManager kext) SD card reader (with 1Revenger1's RealtekCardReader kext) integrated webcam OOB keyboard backlight control OOB (for backlit models) audio volume control through Fn-F1/Fn-F2/Fn-F3 brightness control through Fn-F11/Fn-F12 touchpad basic features, incl. buttons (with Rehabman's modified VoodooPS2Controller kext; it has a Sequoia-specific VoodooInput Plugin) USB3.0 ports (with Hackintool's generated SSDT_USBX & SSDT_UIAC patched tables or USBPorts kext) Not Working: N/A Not tested: SmartCard reader With regards to Skylake/HD 520 graphics, same principles apply as for macOS Sonoma but make sure to update Lilu & PlugIns to latest versions: use of Kaby Lake framebuffer 0x59160000 (0x591B0000 may also be used but requires further graphics connectors patching) fake Kaby Lake HD620 iGPU id 0x5916 use Lilu v1.6.8 and Whatevergreen v1.6.7 minimum 1) 15.x USB installer creation Using a USB key of 16GB minimum, create a Sequoia USB installer through the following Terminal command: sudo <path>/Install\ macOS\ Sequoia.app/Contents/Resources/createinstallmedia --volume /Volumes/<USB key> where: <path> = location of Sequoia installation package (eg: /Applications if freshly downloaded) <USB key> = name of formatted USB volume (eg: USB_16GB) The process will take several minutes. Once completed: install Clover bootloader on the USB installer with the following customised settings: Clover for UEFI booting only Install Clover in the ESP UEFI Drivers Recommended drivers FSInject SMCHelper Human Interface Devices (optional) Ps2MouseDxe UsbMouseDxe FileSystem Drivers ApfsDriverLoader Memory fix drivers OpenRuntime Additional Drivers (optional) NvmExpressDxe PartitionDxe Themes (optional) BootLoaderChooser (optional) CloverConfigPlistValidator (optional) Install Clover Preference Pane (optional) you may use Clover version r5159 or later as attached below Clover_r5159.pkg.zip once Clover is installed, launch Clover Configurator app and mount the freshly created EFI partition of the USB installer (attached version supports BlockSkywalk kext patch) Clover Configurator.zip add the (unzipped) HFSPlus driver attached below to the EFI/CLOVER/drivers/UEFI folder HFSPlus.efi.zip open this EFI partition and transfer/copy the files & folders from the Latitude E7270 Sequoia Clover pack below to the EFI/CLOVER folder Clover_Bootpack_E7270_Sequoia.zip if support for legacy Broadcom wifi is required, download the latest OCLP app from its GitHub repo and save the package at the root of the USB installer. It'll be required to recover wifi support. 2) 15.x installation boot the Sequoia USB installer at the Clover main menu, select the "Install macOS Sequoia" partition (but don't press [ENTER]) press [SPACE], select -v verbose option in the menu, then choose to boot with the selected options proceed with installation, creating & formatting the target Sequoia installation through Disk Utility as/if required on 1st reboot, boot off the USB installer and select the freshly created "macOS install from <target Sequoia partition>" repeat this until this partition is no longer offered and only the target Sequoia partition is left to boot reboot the target Sequoia partition via your USB installer 3) Post-installation tuning once the target Sequoia partition has booted, complete the 1st boot configuration tuning once at the desktop, install Clover bootloader on the Sequoia partition/disk with the customised settings listed above once Clover is installed, launch Clover Configurator app and mount the freshly created EFI partition of the Sequoia partition/disk open this EFI partition and transfer the files & folders from the above Latitude E7270 Sequoia Clover pack to the EFI/Clover folder you may then reboot and verify that Sequoia boots off your disk through Clover at that stage, the E7270 will be running Sequoia without support for legacy Broadcom wifi 4) Adding support for legacy Broadcom wifi launch Clover Configurator app and mount the EFI partition of the Sequoia partition/disk add the kexts from the Legacy_Broadcom_Wifi pack below to the EFI/Clover/kexts/15 folder alongside the existing kexts. Legacy_Broadcom_Support_Pack.zip open up the Clover config in Clover Configurator and: check/enable the BlockSkywalk kernel & kext patch add -amfipassbeta boot arg add revpatch=sbvmm boot arg (to gain OTA updates) save the configuration reboot then install and launch the OCLP app proceed with root patching which should automatically detect that wireless networking requires patching after another reboot, Wifi off the legacy Broadcom cards will be fully functional again if in doubt, check this thread for detailed guidance
1 point
-
Simply apply your patch under the condition of booting/running Mac OS X/OS X/macOS, i.e.: If (_OSI ("Darwin")) { // your patch here } or If (_OSI ("Darwin")) { // your patch here } Else { // original ACPI code }1 point
-
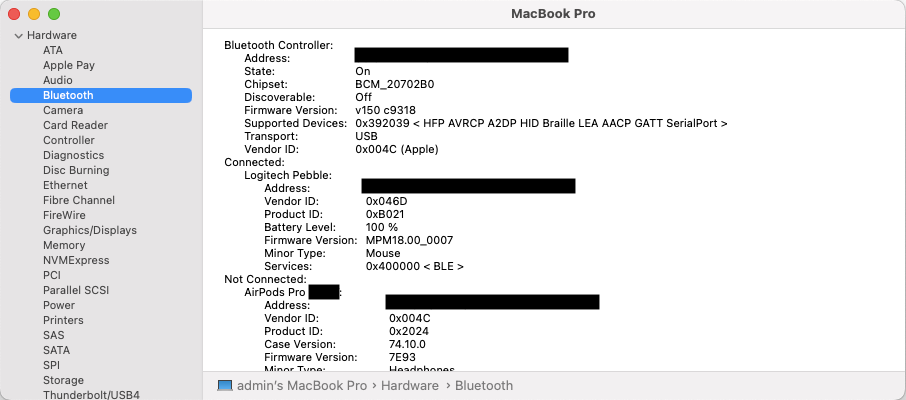
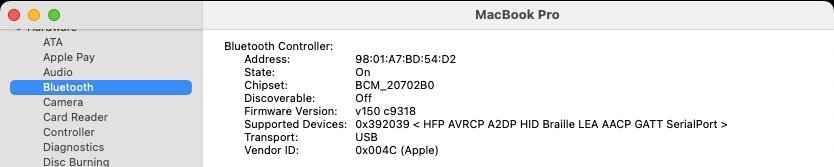
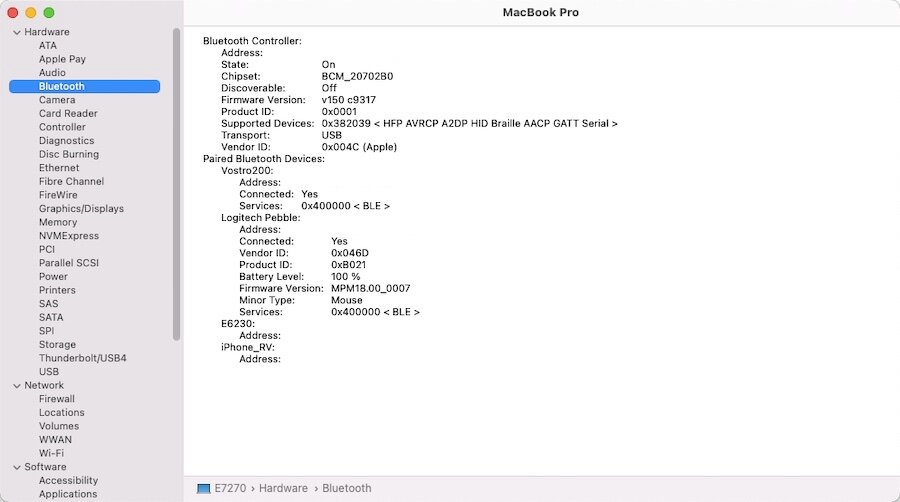
Revisited all bootpacks to replace the SSDT-GPRW patched ACPI table. I added a test applicable to all ACPI devices RPxx, specifically RP05@1C (i.e. WLAN port), to fix an intermittent loss of Bluetooth on wake, requiring Bluetooth to be switched off and on at macOS level (PrefPane or Finder's bar icon) to recover services. This fix applies to combo Wifi/Bluetooth M.2 cards fitted to the WLAN slot. If (LEqual (0x69, Arg0)) { Return (Package (0x02) { 0x69, Zero }) }1 point
-
Target macOS release: Sonoma 14.x This is a Clover-based installation using the well-known/well documented vanilla method detailed below: Working: full QE/CI with HD520 graphics (with KBL layout 0x59160000, KBL faked id 0x5916, MBP15,2 SMBIOS and Whatevergreen kext v1.6.6 or later) HDMI output OOB but built-in LCD goes off on 1st cable connection. With WEG boot arg igfxonln=1, LCD picture is recovered after closing then re-opening the LID and HDMI is on at 1st boot & after wake mDP output OOB touchscreen with USB HID fix (patch of IOHIDFamily to fake single-user mode) due to Apple dropping support for old USB hardware full audio, including jack microphone input and headset output (with AppleALC kext & layout-id 11) HDMI audio (with KBL con1 connector-type patch) built-in Gigabit Ethernet (with IntelMausiEthernet kext) full CPU power management, including Turbo boost to 3.4GHz (with PlugIn type settings) sleep: Ok through Apple menu->Sleep, lid closure, power button, Fn-Insert and energy savings settings with hibernation mode set to 0 (sleep to RAM) and /var/vm/sleepimage file deleted. wake: Ok through lid opening and power button wireless & bluetooth with any compatible card/USB dongle (see footer note) battery management and monitoring (with ACPIBatteryManager kext) SD card reader (with 1Revenger1's RealtekCardReader kext) integrated webcam OOB keyboard backlight control OOB (for backlit models) audio volume control through Fn-F1/Fn-F2/Fn-F3 brightness control through Fn-F11/Fn-F12 touchpad basic features, incl. buttons (with Rehabman's VoodooPS2Controller kext) but not recognised in PrefPane USB3.0 ports (with Hackintool's generated USBPorts kext) Not Working: N/A Not tested: SmartCard reader macOS Sonoma not natively supporting platforms older than Amber Lake/Coffee Lake/UHD6x0, it cannot be natively installed and cannot natively run on the Skylake/HD520 Latitude E7270 as used to be the case for earlier versions of the OS up to Monterey. This can however be easily achieved by implementing the following settings which allow keeping a full vanilla installation without calling on add-on patches that would install older kexts, frameworks or other necessary files: use of Kaby Lake framebuffer 0x59160000 (0x591B0000 may also be used but requires further graphics connectors patching) fake Kaby Lake HD620 iGPU id 0x5916 use Coffee Lake platform SMBIOS MacBookPro15,2 use Whatevergreen v1.6.6/v1.6.7 minimum 1) 14.x USB installer creation Using a USB key of 16GB minimum, create a Sonoma USB installer through the following Terminal command: sudo <path>/Install\ macOS\ Sonoma.app/Contents/Resources/createinstallmedia --volume /Volumes/<USB key> where: <path> = location of Sonoma installation package (eg: /Applications if freshly downloaded) <USB key> = name of formatted USB volume (eg: USB_16GB) The process will take several minutes. Once completed: install Clover bootloader on the USB installer with the following customised settings: Clover for UEFI booting only Install Clover in the ESP UEFI Drivers Recommended drivers FSInject SMCHelper Human Interface Devices (optional) Ps2MouseDxe UsbMouseDxe FileSystem Drivers ApfsDriverLoader Memory fix drivers OpenRuntime Additional Drivers (optional) NvmExpressDxe PartitionDxe Themes (optional) BootLoaderChooser (optional) CloverConfigPlistValidator (optional) Install Clover Preference Pane (optional) you may use Clover version r5157 or later as attached below (version r5148 minimum but no support for legacy wireless cards before r5157) Clover_r5157.pkg.zip once Clover is installed, launch Clover Configurator app and mount the freshly created EFI partition of the USB installer (attached version supports BlockSkywalk kext patch) Clover Configurator.zip add the (unzipped) HFSPlus driver attached below to the EFI/CLOVER/drivers/UEFI folder HFSPlus.efi.zip open this EFI partition and transfer/copy the files & folders from the Latitude E7270 Sonoma Clover pack below to the EFI/CLOVER folder Clover_Pack_E7270_Sonoma.zip Clover_Pack_E7270_Sonoma_#2.zip Clover_Pack_E7270_Sonoma_#3.zip Clover_Pack_E7270_Sonoma_#4.zip 2) 14.x installation boot the Sonoma USB installer at the Clover main menu, select the "Install macOS Sonoma" partition (but don't press [ENTER]) press [SPACE], select -v verbose option in the menu, then choose to boot with the selected options proceed with installation, creating & formatting the target Sonoma installation through Disk Utility as/if required on 1st reboot, boot off the USB installer and select the freshly created "macOS install from <target Sonoma partition>" repeat this until this partition is no longer offered and only the target Sonoma partition is left to boot reboot the target Sonoma partition via your USB installer 3) Post-installation tuning once the target Sonoma partition has booted, complete the 1st boot configuration tuning once at the desktop, install Clover bootloader on the Sonoma partition/disk with the customised settings listed above once Clover is installed, launch Clover Configurator app and mount the freshly created EFI partition of the Sonoma partition/disk open this EFI partition and transfer the files & folders from the above Latitude E7270 Sonoma Clover pack to the EFI/Clover folder you may then reboot and verify that Sonoma boots off your disk through Clover For wifi & Bluetooth, you may use any compatible add-on USB dongle. If you opt for a legacy BCM5350, BCM4360 or BCM43602 wireless card, you'll need to apply OCLP root patches and ensure you boot with Clover r5157 or later (or with OpenCore of course) in order to bypass vanilla IOSkywalkFamily kext and inject replacement IOSkywalkFamily+ IO80211FamilyLegacy kexts. The Clover config attached to the revised bootpack available above already contains the enabled BlockSkywalk kext patch to that effect and the replacement kexts to inject are provided in the kexts folder. Upon launching the OCLP patcher, you should be immediately asked to apply the relevant wireless root patches. See this thread for full details of the process. Edit: 17 Jan 2024 replaced older Clover version r5153 with version r5157 that supports BlockSkywalk kext patch (required to support legacy wireless cards officially dropped in Sonoma) revised bootpack with: modified SSDT-GPRW patched ACPI table to fix intermittent loss of Bluetooth on wake. modified Clover config to enable BlockSkywalk kext patch and add -amfi_get_out_of_my_way=1 boot arg added replacement IOSkywalkFamily + older IO80211FamilyLegacy kexts to kexts/Other folder for injection (required to support legacy wireless cards officially dropped in Sonoma) Edit: 10 Mar 2024 revised bootpack #3 with new versions for wireless kexts required for Sonoma 14.4. Edit: 6 Apr 2024 revised bootpack #4 with cleanup of SSDT tables.
1 point
-
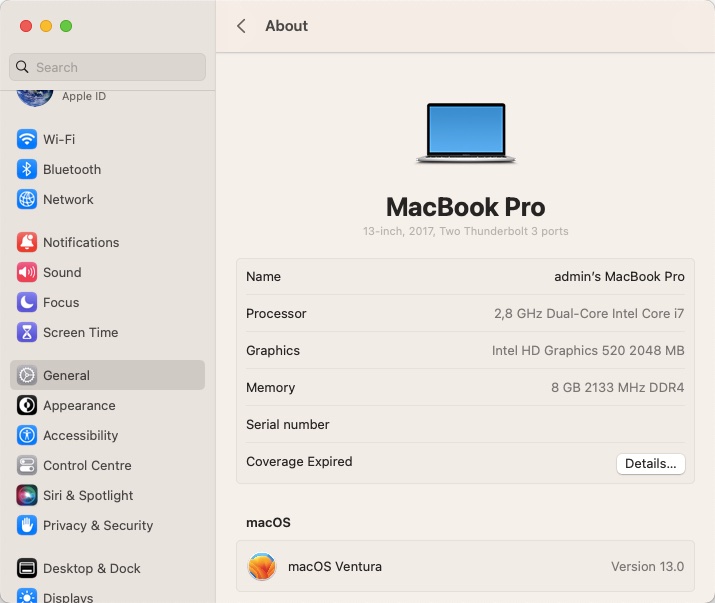
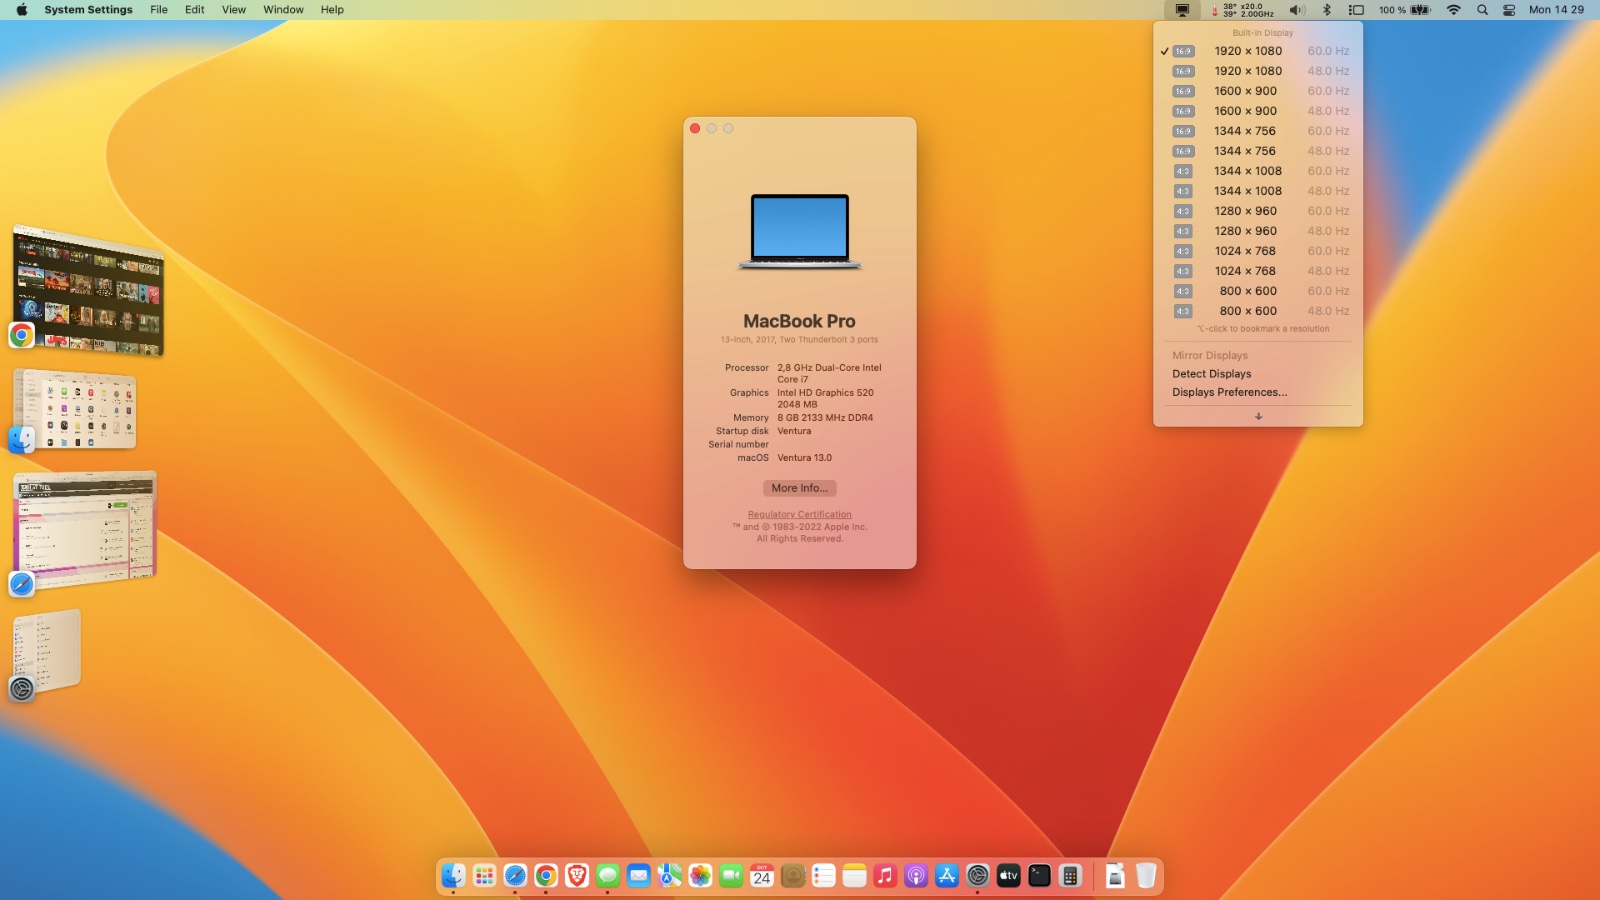
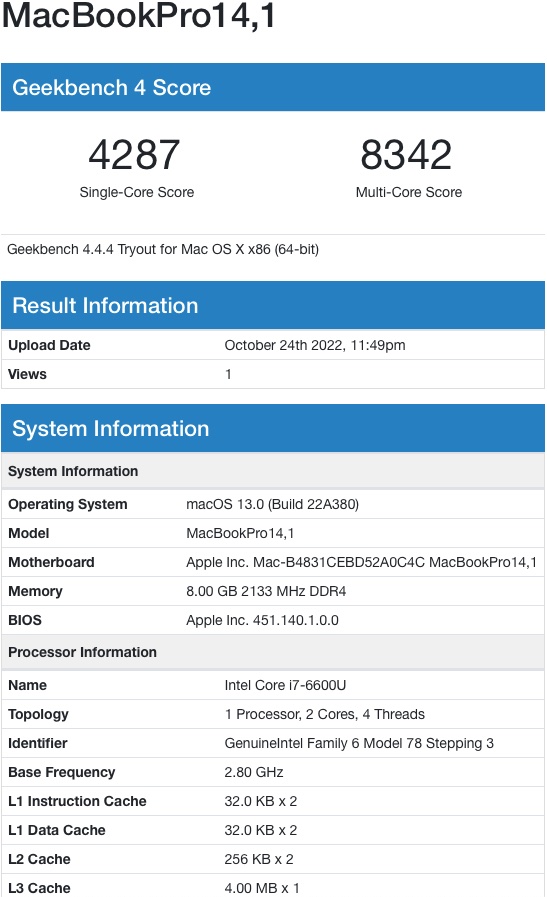
Target macOS release: Ventura 13.x This is a Clover-based installation using the well-known/well documented vanilla method detailed below: Working: full QE/CI with HD520 graphics (with KBL layout 0x59160000, KBL faked id 0x5916, MBP14,1 SMBIOS and Whatevergreen kext v1.6.1 or later) HDMI output OOB but built-in LCD goes off on 1st cable connection. With WEG boot arg igfxonln=1, LCD picture is recovered after closing then re-opening the LID and HDMI is on at 1st boot & after wake mDP output OOB touchscreen with USB HID fix (patch of IOHIDFamily to fake single-user mode) due to Apple dropping support for old USB hardware full audio, including jack microphone input and headset output (with AppleALC kext & layout-id 11) HDMI audio (with KBL con1 connector-type patch) built-in Gigabit Ethernet (with IntelMausiEthernet kext) full CPU power management, including Turbo boost to 3.4GHz (with PlugIn type settings) sleep: Ok through Apple menu->Sleep, lid closure, power button, Fn-Insert and energy savings settings with hibernation mode set to 0 (sleep to RAM) and /var/vm/sleepimage file deleted. wake: Ok through lid opening and power button wireless & bluetooth with any compatible card/USB dongle battery management and monitoring (with ACPIBatteryManager kext) SD card reader (with 1Revenger1's RealtekCardReader kext) integrated webcam OOB keyboard backlight control OOB (for backlit models) audio volume control through Fn-F1/Fn-F2/Fn-F3 brightness control through Fn-F11/Fn-F12 touchpad basic features, incl. buttons (with Rehabman's VoodooPS2Controller kext) but not recognised in PrefPane USB3.0 ports (with USBInjectAll kext or Hackintool's generated SSDTs or USBPorts kext) Stage Manager Continuity Camera Not Working: N/A Not tested: SmartCard reader GeekBench v4.4.4 (64bit) gives the following rating: macOS Ventura not natively supporting platforms older than Kaby Lake/HD6x0, it cannot be natively installed and cannot natively run on the Skylake/HD520 Latitude E7270 as used to be the case for earlier versions of the OS. This can however be easily achieved by implementing the following settings which allow keeping a full vanilla installation without calling on add-on patches that would install older kexts, frameworks or other necessary files: use of Kaby Lake framebuffer 0x59160000 (0x591B0000 may also be used but requires further graphics connectors patching) fake Kaby Lake HD620 iGPU id 0x5916 use Kaby Lake platform SMBIOS MacBookPro14,1 use Whatevergreen v1.6.1 minimum to properly support use/fake KBL graphics on Skylake platforms 1) 13.x USB installer creation Using a USB key of 16GB minimum, create a Ventura USB installer through the following Terminal command: sudo <path>/Install\ macOS\ Ventura.app/Contents/Resources/createinstallmedia --volume /Volumes/<USB key> where: <path> = location of Ventura installation package (eg: /Applications if freshly downloaded) <USB key> = name of formatted USB volume (eg: USB_16GB) The process will take several minutes. Once completed: install Clover bootloader on the USB installer with the following customised settings: Clover for UEFI booting only Install Clover in the ESP UEFI Drivers Recommended drivers FSInject SMCHelper Human Interface Devices (optional) Ps2MouseDxe UsbMouseDxe FileSystem Drivers ApfsDriverLoader Memory fix drivers OpenRuntime Additional Drivers (optional) NvmExpressDxe PartitionDxe Themes (optional) BootLoaderChooser (optional) CloverConfigPlistValidator (optional) Install Clover Preference Pane (optional) you must use Clover version r5148 minimum as attached below: Clover_r5148.pkg.zip once Clover is installed, launch Clover Configurator app and mount the freshly created EFI partition of the USB installer Clover Configurator.zip add the (unzipped) HFSPlus driver attached below to the EFI/CLOVER/drivers/UEFI folder HFSPlus.efi.zip open this EFI partition and transfer/copy the files & folders from the Latitude E7270 Ventura Clover pack below to the EFI/CLOVER folder Clover_Pack_E7270_Ventura.zip 2) 13.x installation boot the Ventura USB installer at the Clover main menu, select the "Install macOS Ventura" partition (but don't press [ENTER]) press [SPACE], select -v verbose option in the menu, then choose to boot with the selected options proceed with installation, creating & formatting the target Ventura installation through Disk Utility as/if required on 1st reboot, boot off the USB installer and select the freshly created "macOS install from <target Ventura partition>" repeat this until this partition is no longer offered and only the target Ventura partition is left to boot reboot the target Ventura partition via your USB installer 3) Post-installation tuning once the target Ventura partition has booted, complete the 1st boot configuration tuning once at the desktop, install Clover bootloader on the Ventura partition/disk with the customised settings listed above once Clover is installed, launch Clover Configurator app and mount the freshly created EFI partition of the Ventura partition/disk open this EFI partition and transfer the files & folders from the above Latitude E7270 Ventura Clover pack to the EFI/Clover folder you may then reboot and verify that Ventura boots off your disk through Clover Please note that: Clover config of the pack contains HDMI-audio KBL framebuffer patch. Clover config of the pack contains disabled settings for DW1820A wireless card. Enable or remove as appropriate. Booter quirk SyncRuntimePermissions must be removed for Ventura. Edit: 17 Jan 2024 revised bootpack with modified SSDT-GPRW patched ACPI table to fix intermittent loss of Bluetooth on wake.
1 point
-
Target macOS release: Monterey 12.x This is a Clover-based installation using the well-known/well documented vanilla method detailed below: Working: full QE/CI with HD520 graphics (with SKL layout 0x19160000) HDMI output OOB but built-in LCD goes off on 1st cable connection. With WEG boot arg igfxonln=1, LCD picture is recovered after closing then re-opening the LID and HDMI is on at 1st boot & after wake mDP output OOB touchscreen with USB HID fix (patch of IOHIDFamily to fake single-user mode) due to Apple dropping support for old USB hardware full audio, including jack microphone input and headset output (with AppleALC kext & layout-id 11) HDMI audio (with SKL con1 connector-type patch) built-in Gigabit Ethernet (with IntelMausiEthernet kext) full CPU power management, including Turbo boost to 3.4GHz (with PlugIn type settings) sleep: Ok through Apple menu->Sleep, lid closure, power button, Fn-Insert and energy savings settings with hibernation mode set to 0 (sleep to RAM) and /var/vm/sleepimage file deleted. wake: Ok through lid opening and power button wireless & bluetooth with any compatible card/USB dongle battery management and monitoring (with ACPIBatteryManager kext) SD card reader (with 1Revenger1's RealtekCardReader kext) integrated webcam OOB keyboard backlight control OOB (for backlit models) audio volume control through Fn-F1/Fn-F2/Fn-F3 brightness control through Fn-F11/Fn-F12 touchpad basic features, incl. buttons (with Rehabman's VoodooPS2Controller kext) but not recognised in PrefPane USB3.0 ports (with USBInjectAll kext or Hackintool's generated SSDTs or USBPorts kext) Not Working: N/A Not tested: SmartCard reader GeekBench v4.4.4 (64bit) gives the following rating: 1) 12.x USB installer creation Using a USB key of 16GB minimum, create a Monterey USB installer through the following Terminal command: sudo <path>/Install\ macOS\ Monterey.app/Contents/Resources/createinstallmedia --volume /Volumes/<USB key> where: <path> = location of Monterey installation package (eg: /Applications if freshly downloaded) <USB key> = name of formatted USB volume (eg: USB_16GB) The process will take several minutes. Once completed: install Clover bootloader on the USB installer with the following customised settings: Clover for UEFI booting only Install Clover in the ESP UEFI Drivers Recommended drivers FSInject SMCHelper Human Interface Devices (optional) Ps2MouseDxe UsbMouseDxe FileSystem Drivers ApfsDriverLoader Memory fix drivers OpenRuntime Additional Drivers (optional) NvmExpressDxe PartitionDxe Themes (optional) BootLoaderChooser (optional) CloverConfigPlistValidator (optional) Install Clover Preference Pane (optional) you may use version r5141 attached below: Clover_r5141.pkg.zip once Clover is installed, launch Clover Configurator app and mount the freshly created EFI partition of the USB installer Clover Configurator.zip add the (unzipped) HFSPlus driver attached below to the EFI/CLOVER/drivers/UEFI folder HFSPlus.efi.zip open this EFI partition and transfer/copy the files & folders from the Latitude E7270 Monterey Clover pack below to the EFI/CLOVER folder Clover_Pack_E7270_Monterey.zip 2) 12.x installation boot the Monterey USB installer at the Clover main menu, select the "Install macOS Monterey" partition (but don't press [ENTER]) press [SPACE], select -v verbose option in the menu, then choose to boot with the selected options proceed with installation, creating & formatting the target Monterey installation through Disk Utility as/if required on 1st reboot, boot off the USB installer and select the freshly created "macOS install from <target Monterey partition>" repeat this until this partition is no longer offered and only the target Monterey partition is left to boot reboot the target Monterey partition via your USB installer 3) Post-installation tuning once the target Monterey partition has booted, complete the 1st boot configuration tuning once at the desktop, install Clover bootloader on the Monterey partition/disk with the customised settings listed above once Clover is installed, launch Clover Configurator app and mount the freshly created EFI partition of the Monterey partition/disk open this EFI partition and transfer the files & folders from the above Latitude E7270 Monterey Clover pack to the EFI/Clover folder you may then reboot and verify that Monterey boots off your disk through Clover Please note that: Clover config of the pack contains HDMI-audio SKL framebuffer patch. Clover config of the pack contains disabled settings for DW1820A wireless card. Enable or remove as appropriate. Edit: 22 Dec 2021 touchscreen working after adding the USB HID fix for Big Sur and later. See details right below. Edit: 17 Jan 2024 revised bootpack with modified SSDT-GPRW patched ACPI table to fix intermittent loss of Bluetooth on wake.
1 point
-
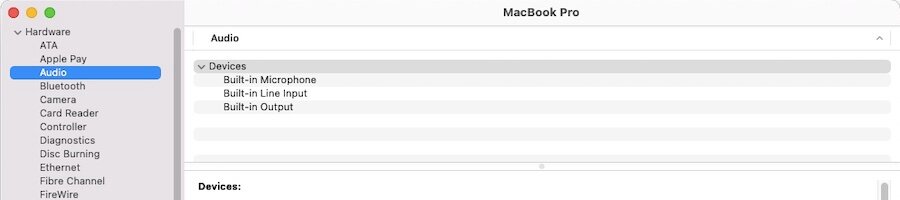
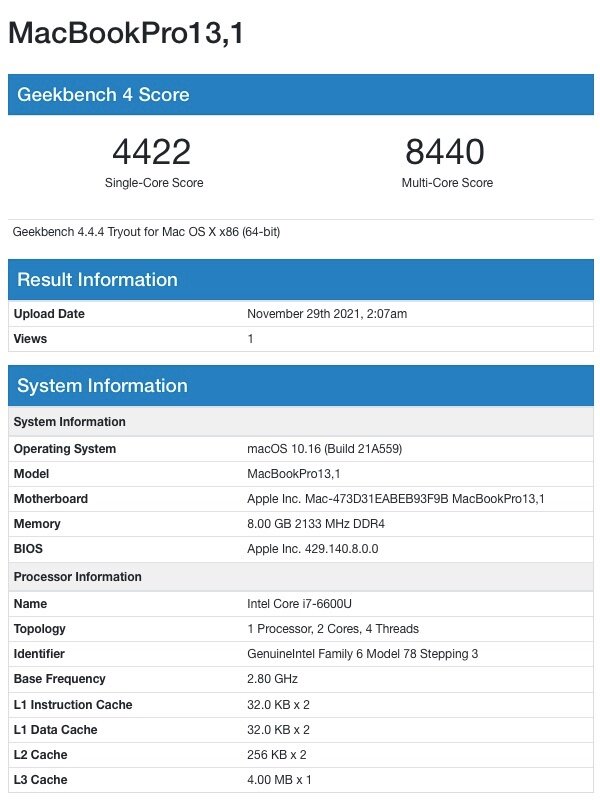
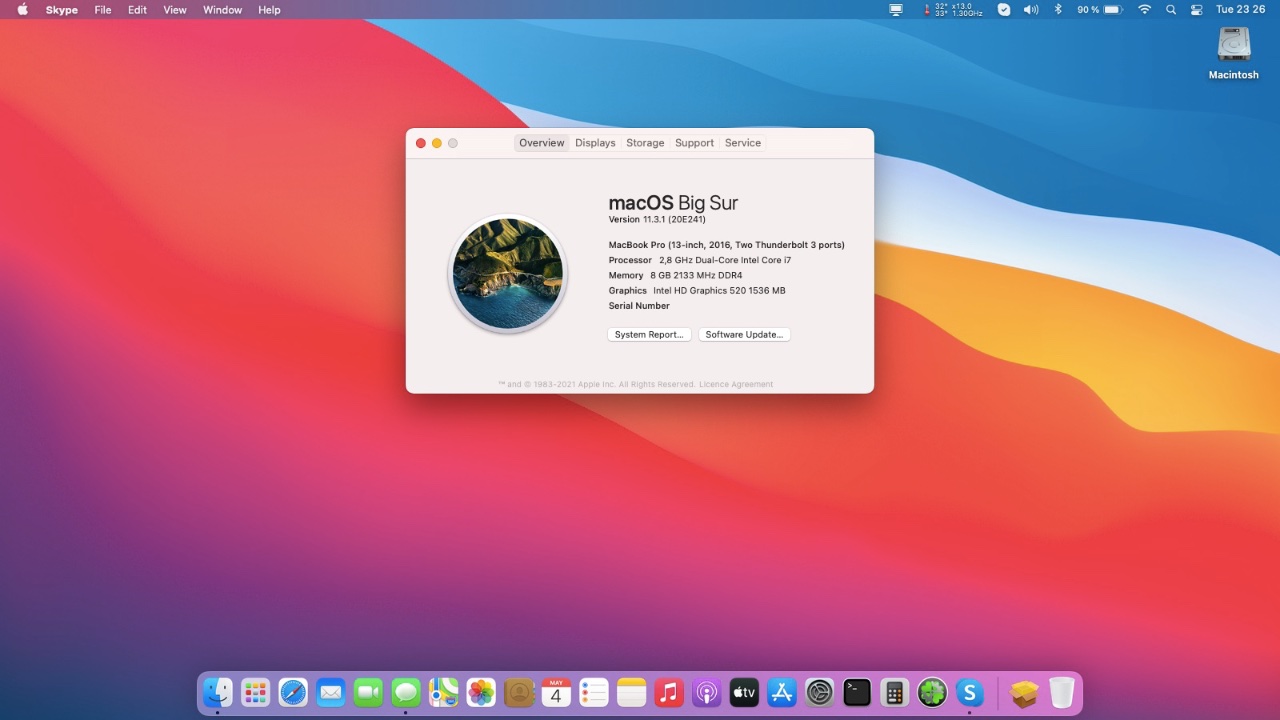
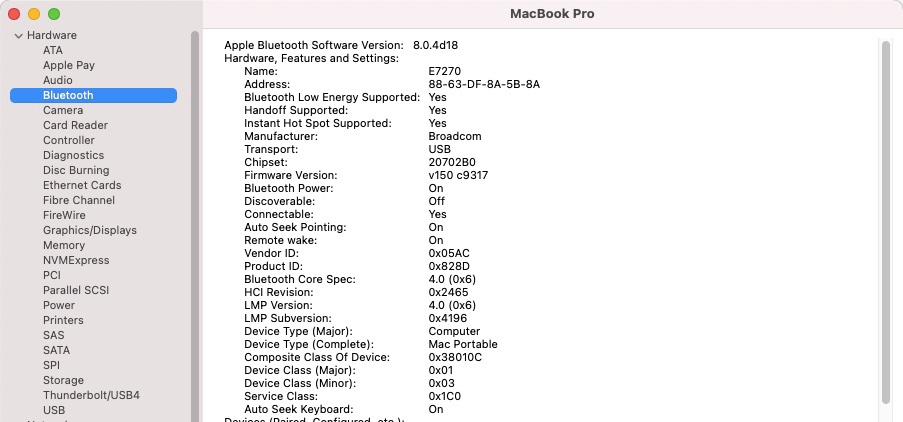
Target macOS release: Big Sur 11.x This is a Clover-based installation using the well-known/well documented vanilla method detailed below: Working: full QE/CI with HD520 graphics (with SKL layout 0x19160000) HDMI output OOB but built-in LCD goes off on 1st cable connection. With WEG boot arg igfxonln=1, LCD picture is recovered after closing then re-opening the LID and HDMI is on at 1st boot & after wake mDP output OOB touchscreen with USB HID fix (patch of IOHIDFamily to fake single-user mode) due to Apple dropping support for old USB hardware full audio, including jack microphone input and headset output (with AppleALC kext & layout-id 11) HDMI audio (with SKL con1 connector-type patch) built-in Gigabit Ethernet (with IntelMausiEthernet kext) full CPU power management, including Turbo boost to 3.4GHz (with PlugIn type settings) sleep: Ok through Apple menu->Sleep, lid closure, power button, Fn-Insert and energy savings settings with hibernation mode set to 0 (sleep to RAM) and /var/vm/sleepimage file deleted. wake: Ok through lid opening and power button wireless & bluetooth with any compatible card/USB dongle battery management and monitoring (with ACPIBatteryManager kext) SD card reader (with Cholonan's Sineteck-rtsx kext) integrated webcam OOB keyboard backlight control OOB (for backlit models) audio volume control through Fn-F1/Fn-F2/Fn-F3 brightness control through Fn-F11/Fn-F12 touchpad basic features, incl. buttons (with Rehabman's VoodooPS2Controller kext) but not recognised in PrefPane USB3.0 ports (with USBInjectAll or Hackintool's generated SSDTs or USBPorts kext) Not Working: N/A Not tested: SmartCard reader GeekBench v4.4.4 (64bit) gives the following rating: 1) 11.x USB installer creation Using a USB key of 16GB minimum, create a Big Sur USB installer through the following Terminal command: sudo <path>/Install\ macOS\ Big\ Sur.app/Contents/Resources/createinstallmedia --volume /Volumes/<USB key> where: <path> = location of Big Sur installation package (eg: /Applications if freshly downloaded) <USB key> = name of formatted USB volume (eg: USB_16GB) The process will take several minutes. Once completed: install Clover bootloader on the USB installer with the following customised settings: Clover for UEFI booting only Install Clover in the ESP UEFI Drivers Recommended drivers FSInject SMCHelper Human Interface Devices (optional) Ps2MouseDxe UsbMouseDxe FileSystem Drivers ApfsDriverLoader Memory fix drivers OpenRuntime Additional Drivers (optional) NvmExpressDxe PartitionDxe Themes (optional) Install Clover Preference Pane (optional) you may use version r5133 attached below: Clover_r5133.pkg.zip once Clover is installed, launch Clover Configurator app and mount the freshly created EFI partition of the USB installer Clover Configurator.zip add the (unzipped) HFSPlus driver attached below to the EFI/CLOVER/drivers/UEFI folder HFSPlus.efi.zip open this EFI partition and transfer/copy the files & folders from the Latitude E7270 Big Sur Clover pack below to the EFI/CLOVER folder Clover_Pack_E7270_BigSur.zip 2) 11.x installation boot the Big Sur USB installer at the Clover main menu, select the "Install macOS Big Sur" partition (but don't press [ENTER]) press [SPACE], select -v verbose option in the menu, then choose to boot with the selected options proceed with installation, creating & formatting the target Big Sur installation through Disk Utility as/if required on 1st reboot, boot off the USB installer and select the freshly created "macOS install from <target Big Sur partition>" repeat this until this partition is no longer offered and only the target Big Sur partition is left to boot reboot the target Big Sur partition via your USB installer 3) Post-installation tuning once the target Big Sur partition has booted, complete the 1st boot configuration tuning once at the desktop, install Clover bootloader on the Big Sur partition/disk with the customised settings listed above once Clover is installed, launch Clover Configurator app and mount the freshly created EFI partition of the Big Sur partition/disk open this EFI partition and transfer the files & folders from the above Latitude E7270 Big Sur Clover pack to the EFI/Clover folder you may then reboot and verify that Big Sur boots off your disk through Clover Please note that: Clover config of the pack contains HDMI-audio SKL framebuffer patch. Clover config of the pack contains disabled settings for DW1820A wireless card. Enable or remove as appropriate. Edit: 22 Dec 2021 touchscreen working after adding the USB HID fix for Big Sur and later. See details below, after Monterey guide. Edit: 17 Jan 2024 revised bootpack with modified SSDT-GPRW patched ACPI table to fix intermittent loss of Bluetooth on wake.
1 point


This leaderboard is set to London/GMT+01:00