Hervé
-
Posts
10069 -
Joined
-
Last visited
-
Days Won
569
Content Type
Profiles
Articles, News and Tips
Forums
Everything posted by Hervé
-
I understand that Ventura may now be installed and run with possible graphics acceleration on Haswell platforms with HD4200/HD4400/HD4600/... with the patches available in latest pre-release/alpha version of OCLP. Look it up.
- 1 reply
-
- 1
-

-
Released Sept. 9th, 2022. Build 22A5242f. Ok on my Skylake/HD520 Latitude E7270 with exact same/unmodified Clover r5148 setup previously used for 13.0 beta 3 to 6. Everything working as before.

-
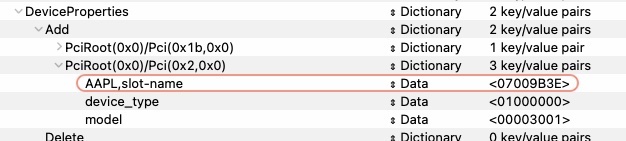
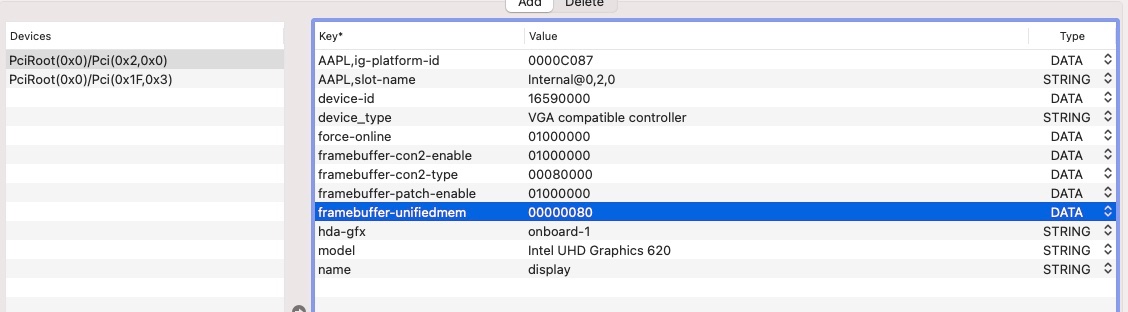
@donjave You made a significant mistake in your revised config when attempting to inject iGPU properties under iGPU device at PciRoot(0x0/Pci(0x2,0x0): You replaced: AAPL,ig-platform-id by: AAPL,slot-name Oups! Former (expressed as an hexadecimal, i.e. DATA value) refers to the desired target graphics framebuffer and is essential -not to say mandatory- in most cases, latter (expressed as a text, i.e. STRING value) is more of a cosmetic parameter to specify the PCIe slot and is entirely optional. You need to fix this little mistake. You should be Ok with an HDMI to VGA adapter as long as it's an active one; HDMI being digital and VGA analog, you require signal conversion. But I guess it's Ok if you're already obtaining your verbose output on screen.
-
Make sure you perform a Reset NVRAM operation from the OC Picker after you modify your OC config; it's necessary to take the changes into account.
-
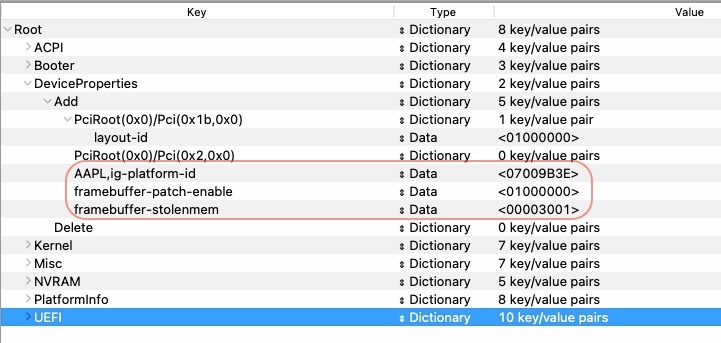
Hi, being stuck at the stage you mentioned usually means that graphics are not initialising. Not surprising given that you do not inject any properties against your iGPU, something that's required: This because you simply placed the iGPU properties injection at the wrong place in your OpenCore config file: Once you correct this by properly placing your properties under the iGPU device, i.e. under PciRoot(0x0)/Pci(0x2,0x0) just like the layout-id injection under HDEF (audio) device at PciRoot(0x0)/Pci(0x1b,0x0), your system should be able to initialise graphics and complete its boot process. NB: 1st screenshot shows your config opened in OCC (OpenCore Configurator) app, 2nd one shows your config opened in ProperTree app.
-
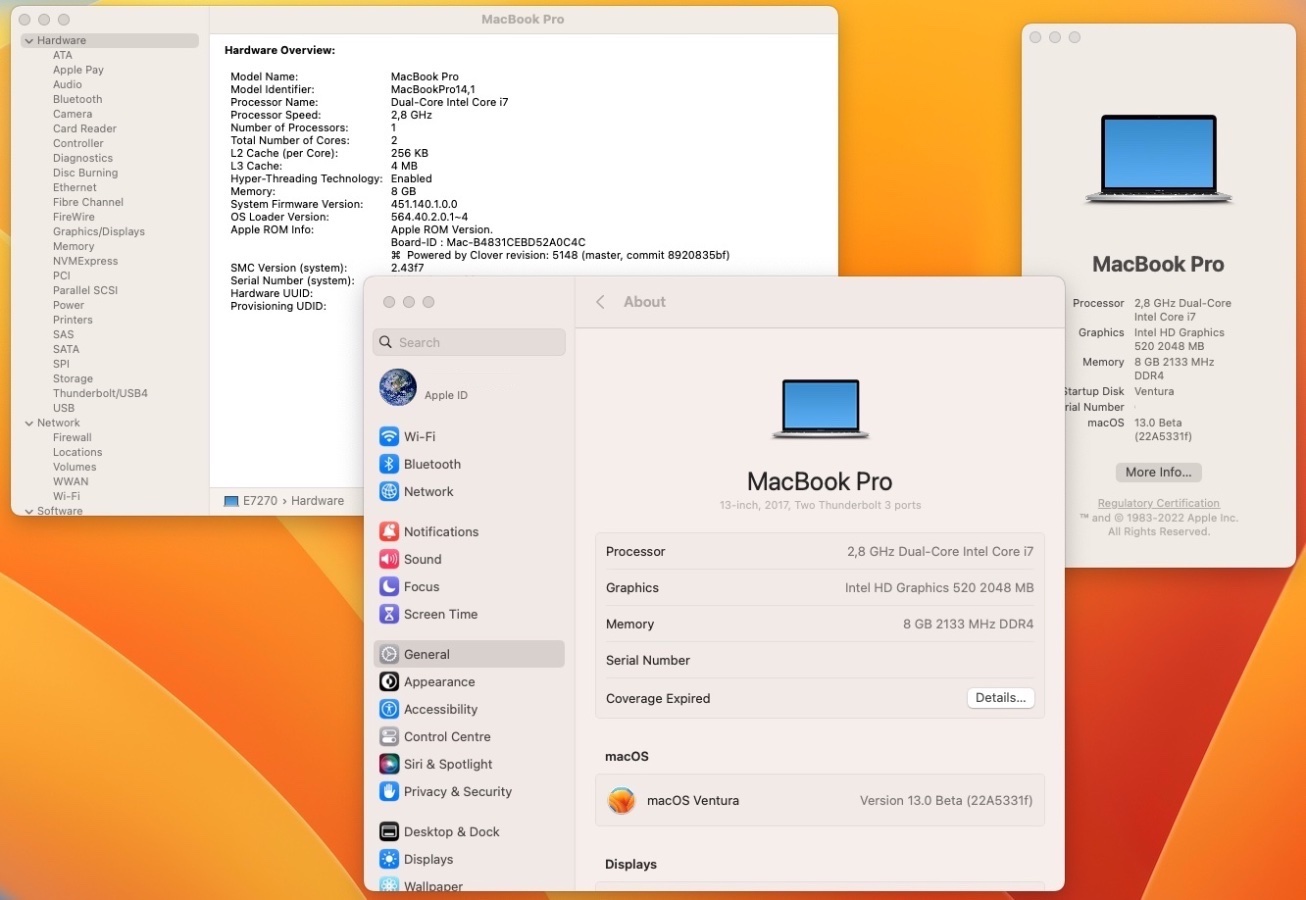
Released Aug 25th, 2022. Build 22A5331f. Ok on my Skylake/HD520 Latitude E7270 with exact same/unmodified Clover r5148 setup previously used for 13.0 beta 3, 4 & 5. Everything working as before.
-
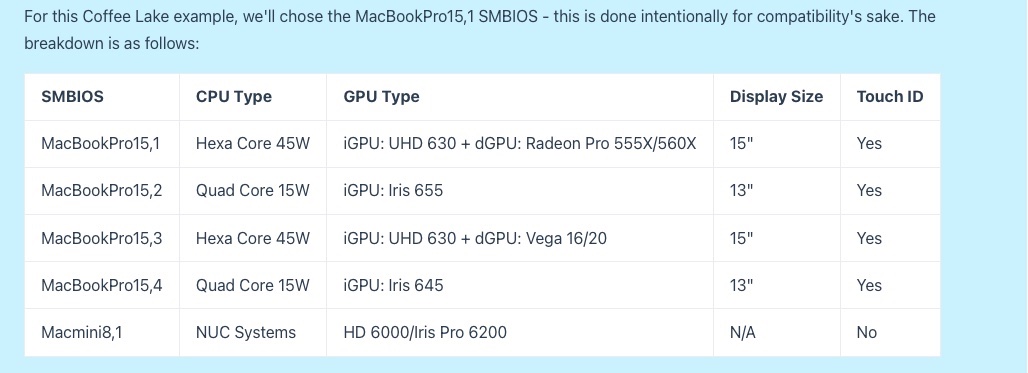
MBP15,1 or MBP16,1 probably makes no difference, as long as it registers properly with the SMBIOS fix.
-
It's Coffee Lake Refresh (not Plus) but it should make not difference since the CFL framebuffer remains 0x3EA50009 for UHD 630, granted that the Dortania guidance advocates MBP16,x. Remember that mid-2019 15" MacBookPro15,1 were actually 9th gen Coffee Lake Refresh (same for mid-2019 15" MacBookPro15,3), including this one fitted with 6-core i7-9750H. MacBookPro16,1/3/4 models are late-2019 16" Coffee Lake Refresh models. You still need to fix your SMBIOS corruption... Have you done this?
-
IOReg extract shows corrupt SMBIOS model "MacBookPro16,", something typical on some Dell laptops that requires a fix/patch. This can affect video output of course. You still use to MBP16,x SMBIOS when all documentation state you should be using MBP15,x SMBIOS. Any reason you refuse to use MBP15,x?
-
No option in BIOS that would disable the HDMI port?
-

Dell Latitude 5401: unable to install macOS Monterey
Hervé replied to 28weekslater's topic in 5000 Series
Did you consult the Dortania Anti-Hackintosh buyers guide as suggested above?
-
No need to update OC to v0.8.3 to update Monterey to 12.5.1 afaik. Your current version should do just fine. This being said, one best learns by his mistakes and doing the work for you is not only lazy but discouraged. If you really want to update Opencore, make sure you make backup of your EFI partition/folder on a USB key and test that key to boot Monterey before proceeding with updating OC. Or vice-versa. You're already aware of the various threads at Insanelymac, that will be your base lines.
-
No support by PM, use the forum!
-
Why do you inject iGPU device id 0x3EA5? Yours is natively support so no need for that property which can be removed. As I said, remove all connector patching to begin with and experiment with different SMBIOS instead, starting with MBP15,x. By default framebuffer settings, I mean the obvious: the parameters that comedy default with the selected framebuffer, i.e. no patching through property injection. Bascially, at this stage, all you should have is this: AAPL,ig-platform-id 0900A53E DATA
-
And the HDMI output in question is that of an HDMI port on the laptop, not of an HDMI adapter connected to a USB-c, right? 9th gen. Coffee Lake i7-9850H is fitted with UHD630 iGPU carrying id 0x3E9B; that's natively supported in all recent macOS versions. As stated in the Whatevergreen User Manual, you should be using CFL framebuffer 0x3EA50009. ID: 3EA50009, STOLEN: 57 MB, FBMEM: 0 bytes, VRAM: 1536 MB, Flags: 0x00830B0A TOTAL STOLEN: 58 MB, TOTAL CURSOR: 1 MB (1572864 bytes), MAX STOLEN: 172 MB, MAX OVERALL: 173 MB (181940224 bytes) Model name: Intel HD Graphics CFL CRB Camellia: CamelliaV3 (3), Freq: 0 Hz, FreqMax: 0 Hz Mobile: 1, PipeCount: 3, PortCount: 3, FBMemoryCount: 3 [0] busId: 0x00, pipe: 8, type: 0x00000002, flags: 0x00000098 - ConnectorLVDS [1] busId: 0x05, pipe: 9, type: 0x00000400, flags: 0x000001C7 - ConnectorDP [2] busId: 0x04, pipe: 10, type: 0x00000400, flags: 0x000001C7 - ConnectorDP 00000800 02000000 98000000 01050900 00040000 C7010000 02040A00 00040000 C7010000 Having set DVMT to 64MB in BIOS, you no longer need to patch FBmem ans StolenMem any more, indeed. HDMI output usually registers against connector con1. I would have kept the index unmodified... And you only need to patch the connector type (to 00080000) to gain HDMI audio. The video output should still work with default DP type. Try with the default framebuffer settings (i.e no connector patching) and experiment with other SMBIOS like MBP15,x/MBP16,x for instance.
-
Unlike 4K, HDMI output is unrelated to DVMT. It's a simple matter of output ports, i.e. connectors. According to your IOReg, your laptop has no discrete GPU, correct?
-
As expected, VRAM shows 2GB (or 2048MB) because your config includes a patch that does so: If you want to revert to default 1536MB, just remove the patch. There will be no support for your fingerprint scanner; that kind of hardware accessory has not been supported in OS X/macOS for about 10 years. Intel Wireless &Bluetooth: make sure you use the relevant version of itlwm driver; Bluetooth may not work. See the ITLWM site/repo. Audio: make sure you've tried the various layout-id listed for your ALC294 codec at AppleALC wiki Keyboard/touchpad: you'll have to identify the exact hardware components you have (eg: ALPS, Elan, etc.), then use the relevant drivers
-
[Solved] BCM4360: not working after upgrade to Monterey 12.3.1
Hervé replied to Stiker87's topic in The Archive
Then your setup must be incorrect or the card defective. That card works 100% OOB up to current macOS version. Do post a zipped copy of your OpenCore EFI folder. -
[Solved] BCM4360: not working after upgrade to Monterey 12.3.1
Hervé replied to Stiker87's topic in The Archive
What kind of BCM4360 card are do you have in your E7450? An Apple BCM94360xxxx of some sort? A Fenvi BCM94360NG? Those do not require any add-on kexts for wireless or Bluetooth so if you have any of those Broadcom firmware patching kexts, make sure to get rid of them (delete them from your EFI folder and your OC config). If you have an other model, please specify. -
Dell Latitude 5401: unable to install macOS Monterey
Hervé replied to 28weekslater's topic in 5000 Series
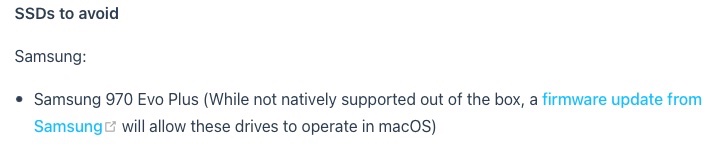
Thank for posting your specs; always most useful (to to say mandatory), especially in your particular case! You have a Micron 2200S NVME SSD. This model is not compatible with macOS (cf. the Dortania Anti-Hackintosh buyers guide) and you may have noticed the Kernel Panic on IONVMeFamily driver; there's no fix or workaround, you'll have to replace that SSD by a fully supported model if you want to install and run macOS on your laptop. -
Lookup the stuff available in our Guides section. There's at least a guide for the 15" Precision 7510 which should be pretty similar to your 17" model.
-
Welcome to OSXL. Don't hesitate to post requests for assistance in the relevant section.
-
I've no idea what you're doing or what you're talking about with programs for AMD and programs for Intel. I think you're completely off track here, most likely not knowing what you need to do and/or what you're doing. If you use OpenCore, follow the Dortania Guidance, at least read it. Or you may simply use OpenCore Configurator app or Clover Configurator app, go to the PlatformInfo or SMBIOS tab, select your target SMBIOS model and click on the Generate buttons a few times to regenerate random numbers. Copy/paste those numbers in your existing config on the relevant Hack and you'll be good to go after an NVRAM reset and a reboot. As simple as that. We've a dedicated thread on this very matter for years in our FAQ section, may be you should consult it too... At least next time you have a query.
-
It should be obvious that if you re-use the same EFI on several Hacks, you should change the serial numbers so that you use a unique one on each of them. Think of it like the postman trying to deliver mail in a street where several physically identical houses have the same number! Just plain common sense, really.
-
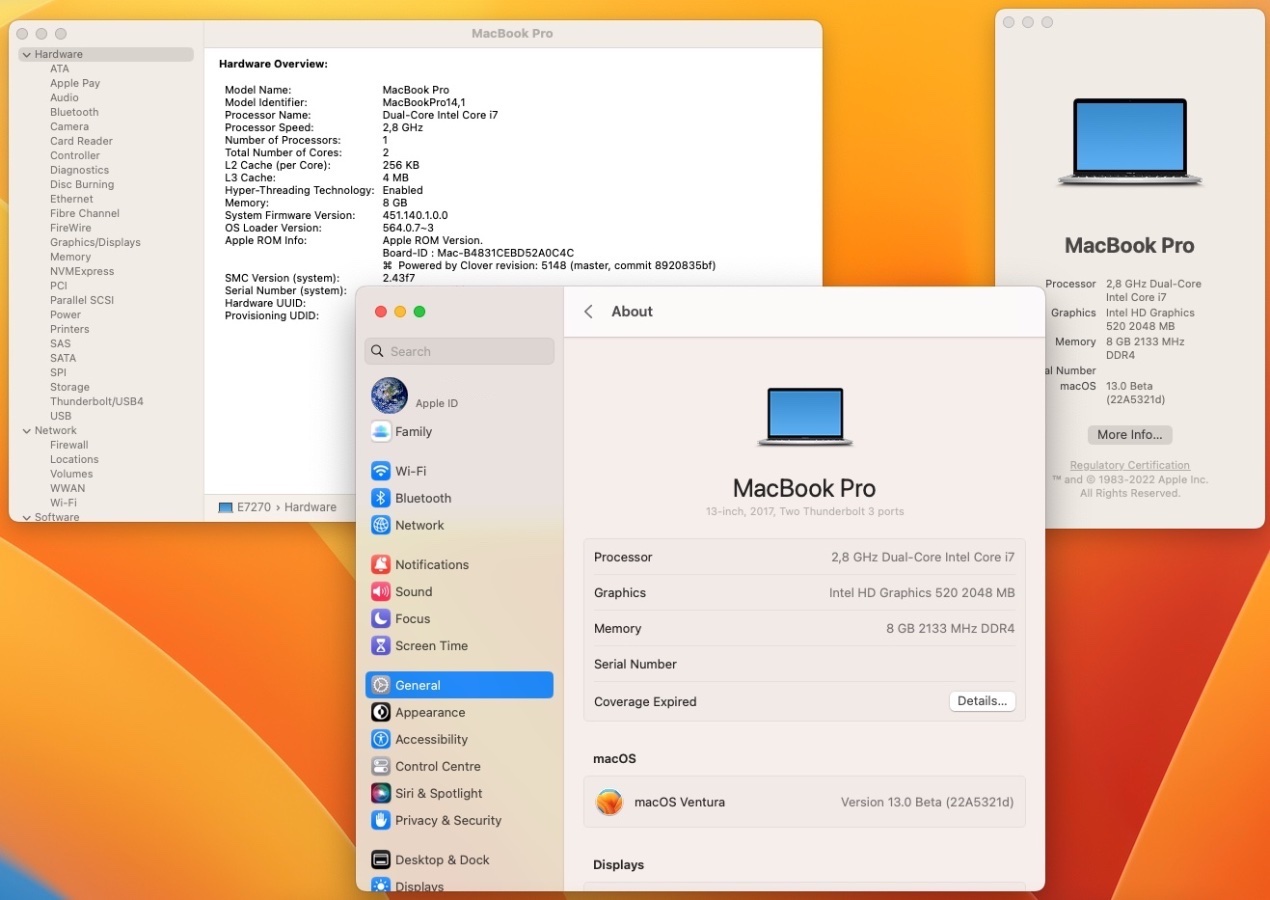
Released Aug 8th, 2022. Build 22A5321d. Ok on my Skylake/HD520 Latitude E7270 with exact same/unmodified Clover r5148 setup previously used for 13.0 beta 3 & 4. Everything working as before.