Search the Community
Showing results for tags 'ASUS'.
-
Credits: Big Thanks to EMlyDinEsH!!! Without his Help, this all isn't possible! IF POSSIBLE PLEASE MAKE A DONATION to EMlyDinEsH!!! Paypal: GUIDE: ================== Credits: Big Thanks to EMlyDinEsH!!! Without his Help, this all wasn't possible! Mirone for Patched AppleHDA! RehabMan for the Haswell Patch and all his Work in the Kext Drivers! The Clover Team!! For that awesome Bootloader! And all others Asus UX301LA Specs: CPU: i7-4558U (2 x 2,8 + 2HT) (Haswell-ULT) (Cache: L1=128KB L2=512KB L3=4MB) GPU: Intel Iris 5100 (Dev=0A2E Ven=8086) RAM: DDR3L-1600 (2x Elpida 4GB / Onboard) Chipset: Intel Lynx Point-LP / HM87 / ICH8(m) Audio: Intel HD (ALC282) SSD: 2x Sandisk X110(SD6) 128GB (M.2/NGFF) Touchpad: Elan V6 (Firmware: 6758151) SD Reader: (Update soon) Wifi: Intel 7260+BT4.0 AC (M.2/NGFF) Bluetooth: Intel 7260+BT4.0 AC (M.2/NGFF) USB: Lynx Point-LP USB xHCI HC Camera: HD WebCam (Ven=1BCF Dev=2987) Touchscreen: Atmel maXTouch Digitizer (Ven=3EB Dev=8A0C)Features: smbios-2.7, dmi-2.7, vsyscall32 Bios Features: pci upgrade shadowing cdboot bootselect socketedrom edd int13floppy1200 int17printer acpi usb smartbattery biosbootspecification uefi BIOS: UX301LAA.204 (09/11/2013) (AMI) Working/Not Working: Audio: (ALC282) Working with Patched AppleHDA HDMI/DisplayPort Audio: Working! USB: Working OTB with Issues. Better: GenericUSB3 Touchpad: Working with: ElanTouchpad Graphics: Working with patched DSDT (Duallink+All Ports Working) Sleep: Working! But after Wake you need to wait 5-10 Secounds! Backlight Keys: Working with patched DSDT & AsusNBFNKeys Backlight Display: Working with Patched DSDT Battery: Working with: ACPIBattery and Patched DSDT SD Reader: Working very good OTB (But no entry in Systemprofiler) HD WebCam: Working OTB (But doesnt turns off after you used it) Touchscreen: Working with Touch-Base drivers! KeyboardFN Keys: Working with AsusFNKeys HiDPI: Doesn't Work on 10.9 (With DisplayOverride) (2560x1440 on 13'3) Wifi: Not working and never will be! You need to change the module! But it's in the NGFF/M.2 Format, there is nothing other out now! Bluetooth: Working! But you can't turn it off! It's working, but always on! (...In Progress...) What do you need? 1. Make a new MacOSX Install "USB-Thumb Drive" ---> You need a OSX Computer or VMware OSX or something with OSX for this Step! ---> You need a "Clean Vanilla OSX Install Drive"!!!! ---> Do not use unifail, or something else! Make it with DiskMakerX or CommandLine! ---> After you successful created your OSX Install Drive, Download Clover! ---> Install Clover to your "OSX Install Drive"! -------> Change Destination --> OSX Install Drive! -------> Customize > Tick only: ----------> "Install for UEFI booting only" / Drivers64UEFI > "EmuvariableUEFI-64" & "OsxAptioFixDrv-64" ----------> Select only this and nothing else! Click Install! ------> Now there should be a new Drive, called "EFI". Open it! ------> Download this Files: ------> NullEthernet, ACPIBatteryManager, FakeSMC, ACPIBacklight, GenericUSB3, ------> EAPDFix, AsusNBFnKeys, ApplePS2ElanTouchpad, AppleHDA, HFSPlus, DSDT.aml ------> Put all that files in a Folder, you need them Later again! ------> Now open again your "EFI" Partition on your "OSX Thumb Drive" ------> Put this files: NullEthernet, ACPIBatteryManager, FakeSMC, ACPIBacklight, GenericUSB3, ------> EAPDFix, AsusNBFnKeys, ApplePS2ElanTouchpad ------> Into: /EFI/CLOVER/kexts (All the files are .kext files) ------> Put DSDT.aml into: /EFI/CLOVER/ACPI/patched ------> Put HFSPlus.efi into: /EFI/CLOVER/drivers64UEFI ------> Delete VboxHFS.efi from: /EFI/CLOVER/drivers64UEFI ------> Download Config.plist and put it to: /EFI/CLOVER 2. You are ready to Install! Start the computer, go in BIOS Settings, ---> Load default settings! ---> VT-d ---> Disable it! ---> Add a new Entry for CLOVERX64.Efi (From the OSX Install Thumb Drive) ---> Change your RAID to AHCI! (OSX doesn't Support intel Raid) ---> Disable "Secure Boot" or Just delete the KEYs! 3. Now Start your OSX Install... Don't need to explain this Step ----> If you get a reboot, and OSX Install doesn't start, you have 2 Solutions: ----> 1. You need to patch the Kernel on the OSX Install Drive (and Later on the installed OSX) ----> 2. You can patch you BIOS with PMpatch! (You can destroy your Laptop!) ----> Solution 1 is Safe, but you need to do this after every OSX Update... ----> Solution 2 is forever, you need to patch this only on BIOS Updates... 4. Now you have Installed OSX! Go & Buy a USB-Wifi Dongle, or use the Lan-Adapter included! ----> Now you need to download Clover again. Install it now on your HDD, click Customize: ----------> "Install for UEFI booting only" / Drivers64UEFI > "EmuvariableUEFI-64" & "OsxAptioFixDrv-64" ----------> "Install RC Scripts for Selected Partition" ----------> Select only this and nothing else! Click Install! ----> Now download Kext Utility and install with Kext Utility only this kexts: ------> NullEthernet, ACPIBatteryManager, ACPIBacklight, GenericUSB3, ------> EAPDFix, AsusNBFnKeys, ApplePS2ElanTouchpad, AppleHDA ----> Download FakeSMC from Sourceforge, install it (Customize -> Check if everything is ticked) ----> Put the HFSPlus to /EFI/CLOVER/drivers64UEFI (And Delete VboxHFS.efi in that folder) ----> Download ssdtPrGen.sh run it in Terminal: --------> "sudo chmod +x ./ssdtPrGen.sh" and "sudo ./ssdtPrGen.sh" --------> now you have on your Desktop a file called "ssdt_pr.aml" (You need only this file) --------> Rename ssdt_pr.aml to SSDT.aml! ----> Put DSDT.aml & SSDT.aml to /EFI/CLOVER/ACPI/patched ----> Customize your Config.plist or leave it how it is and put it to: --------> /EFI/CLOVER 5. You are Ready! You can Reboot and Enjoy your new Mac ----> Read how to Customize everything... ----> ApplePS2ElanTouchpad, AsusNBFnKeys (Have much options...) ----> Clover have much options you can change with config.plist... ----> Search yourself, how to optimize some things Last Update: 25.01.2014 Downloads on GitHub: https://github.com/Ramalama2/UX301_DSDT I have Attached all the necessary files. They are from (25.01.2014) ======================== Original MacBook/iMac Tables: MacBookPro11,1 Firmware Update (MBP111.0138.B03 (EFI 1.3)) MacBookPro11,2 Firmware Update (MBP112.0138.B02 (EFI 1.2)) MacBookAir6,2 Firmware Update (MBA61.0099.B04 (EFI 2.7)) iMac14,1 Firmware Update (IM141.0118.B00 (EFI 2.1)) iMac14.2 Firmware Update (IM142.0118.B00 (EFI 2.1)) You can Download them on GitHub: https://github.com/Ramalama2/UX301_DSDT If you have requests for other Apple Tables, just post, and i upload them! I can upload other Tables from other Laptops/PC's as well! Just request them! Cheers Ux301LA.zip
-
Hi, i have a Problem, i've got everything working, except for the Intel 7260 ac wifi m.2 Card. The Problem is, i have an Asus UX301LA, This Notebook has only the NGFF (m.2) socket for the wifi Card!... I cant replace it, since there is no broadcomm wifi Cards for the m.2 socket... If anyone has any suggestions, im open to them 1. I would, if i could, replace them. 2. I dont think there are, but if there are any Drivers, will be nice too Cheers EDIT: Bluetooth 4.0 is working with this card!
-
Hey everyone, I have an Asus K56cb i'm trying to put Mountain Lion on. Full specs here: http://www.asus.com/Notebooks_Ultrabooks/K56CB/ I've done a lot of research it seems like all the hardware will work in my laptop with the proper kexts and i've ordered an Atheros AR5B91. but i've found two different approaches for my laptop. I'm not sure which one is best. this: https://osxlatitude.com/index.php?/topic/2676-asus-k46ca-k46cm-k56ca-k56cm-tutorial-mountain-lion-1082/ or this: http://ukrainianiphone.com/forum/index.php?showtopic=24683 (Google translated needed unless you speak Russian/Ukrainian) Thanks for the help !
-
Hello everyone, this is my first time on this forum and it's pretty interesting how thinghs work around. To tell the truth I've never tried/experienced Hackintosh, so sorry for being noob. This is my Laptop specs, it seems that the cpu and gpu are pretty close/same with the new Macbook Pro 2013 2.0 GHz (i7-4750HQ) quad-core Intel Core i7 Crystalwell with 6 MB on-chip L3 cache(15") + Nvidia GeForce GT 750M with 2 GB GDDR5 memory. (15", 2.3GHz) Model: Asus n550JV - 15.6 inch Full HD (1920*1080) Ram: 8 GB LDDR3 - 1600 Mhz (Kingston) Cpu: Intel I7-4700HQ Haswell Gpu: Nvidia Geforce GT 750m (4GB) HD: 1 TB (5200 rpm) (yeah I know, slow like hell) More detailed info see in attachment. Update1: I made a bootable usb with myHack 3.3 + changed kernel with custom one 10.9 Ivy Bridge-E & Lapic Fix Kernel (http://www.osx86.net/files/file/3606-109-ivy-bridge-e-lapic-fix-kernel/) I have succeeded to boot in USB but unfortunately I got stuck at Pthread support aborts when sync kernel primitives misused Update2: Made a new Bootable Usb using Clover together with the custom kernel + moded efi files. Installation started and succeeded. BUT everytime I try to boot OS X, I keep rebooting after something like "uuid loading ....................................................................++++++++++++++" So could someone please help me? Is it because my Smbios is wrong? And if it is, what should I do to get a good working one? UPDATE 3: Succesfully booted in Mac Os X 10.9 ;D - Wifi & bluetooth doesn't work. (bluetooth works rarely (20 % chance it works)) - Sound also doesn't work but it's fixable by moding with kexts etc. ( haven't connected with internet so is it possible that it will after connection 1* time?) (fixed sound) - About, finder, configuration, wallpaper, live wallpaper, mounting all works perfectly. - It's performing truth to be told butter smooth, and I booted with all cores (4). But it's working whole time on max speed (2.4 ghz) so that needs to be fixed or at least limited to +- 2 ghz so it would use less power & make less heat. - Battery stats could not be seen (0% whole time) (fixed with patched kext) - sleep doesn't work. - shutdown, restart works - Tried iMessage and App store, worked fine without internet (lol). That's it, can't think or find another thingh to mention. GUIDE for OS X 10.9 on Asus n550JV (note this may not be detailed/complete enough to succeed): - First make a usb stick with restore from OS X Mavericks (search google, it's almost same everywhere ) - Then make a clover bootable stick using Clover v2: https://mega.co.nz/#!csACCYwI!Cx-GC02... guide: - Follow everything in that youtube vid exactly, because it could turnout differently if you don't - Use these modded EFI files and overwrite/merge with EFI partition of usb (credit goes to my russian friend amocc for his amazing work): https://docs.google.com/file/d/0BxmvHU43bIiQS3hTTHNFem1iVnc/edit?usp=sharing amocc's profile: http://www.osx86.net/user/508444-amokk/ Another discussion on forum: http://www.insanelymac.com/forum/topic/292368-laptop-reboots-after-root-device-uuid-is/page-3?do=findComment&comment=1959561 - Reboot system with usb plugged, check if USB LEGACY is on. And get in bios/efi or whatever and change boot priority for example UEFI: CLOVER boot should be the first one to boot. - Clover bootloader will show up, go to Mac Os installer (or what it is called) and press space than go to without caches and press enter. - Installer will show up, make a Mac Os Extended Journaled partition by going to Utilities than Disk Utility. - Instal, REBOOT back to Installer (trust me). IMPORTANT: Launch Terminal and give these command (change YOUR_Partition!): cp /mach_kernel "/Volumes/YOUR_Partition/mach_kernel" ++++++++++++++++ THEN RENAME mach_kernel to mac_kernel --> mv mach_kernel mac_kernel ++++++++++++++++OR goto your folder of EFI bootloader(EFI-> CLOVER -> Config.plist) and change mac_kernel to mach_kernel - Reboot into OS X (not installer) using without caches. - After configuring your system with username, password you'll appear on desktop. - Now you'll need to use different kexts to fix several issues: For audio go to this link: http://www.projectosx.com/forum/index.php?showtopic=355 Use the latest one, I used VoodooHDA_v284.zip Than you should edit info.plist in VoodooHDA.kekst ... ___ Will continue guide... ShortSysInfoAsusN550JV.txt
-
I have an ASUS X55A laptop. I would like to run Mavericks, but I'll settle for Mountain Lion if necessary. I just can't find the proper DSDT for my PC. I've been trying with different kext configurations all week, but I just can't get it right. Does anybody know where to find it, or anybody feel like making one? I'm working on it, but this would be my first time and I'm sure I won't do it right. Any help is appreciated.
-
Specifications: Processor : Intel® Core i7-2630QM Processor (6M Cache, up to 2.90 GHz) Graphics Processor(GPU) : Intel® HD Graphics 3000 & NVIDIA® Optimus GeForce GT 540M Chipset : Intel® HM65 Express Chipset Hard disk : Seagate 500GB 7200rpm HDD RAM : 4GB DDR3 1333 MHz SDRAM Wifi : Atheros AR9285 802.11b/g/n Wireless Network Adapter (Atheros AR5B195 Combo) Bluetooth : Atheros AR3011 Bluetooth V3.0+HS (Atheros AR5B195 Combo) Ethernet : Atheros AR8151 PCI-E Gigabit Ethernet Controller Audio : Realtek® High Definition Audio ALC269VB USB 3.0 : FrescoLogic USB 3.0 xHCI Controller Touchpad : Elantech Touchpad v2 Hardware Webcam : USB2.0 UVC 2M WebCam Card reader : 3 -in-1 card reader ( SD/ MS/ MMC) Alcor Controller Monitor : Samsung LTN173KT01000 [17.3 LCD] 1600x900 Optical Drive : HL-DT-ST DVDRAM GT33N Battery : 6Cells 5200 mAh 56 Whrs Interface : 1 x Microphone-in jack 1 x Headphone-out jack 1 x VGA port/Mini D-sub 15-pin for external monitor 1 x USB 3.0 port(s) 3 x USB 2.0 port(s) 1 x RJ45 LAN Jack for LAN insert 1 x HDMI Working: Graphics with QE/CI on Intel HD3000 GPU Audio with VoodooHDA WiFi Bluetooth Ethernet USB2.0 and USB3.0 VGA and HDMI (With Audio) Webcam Card reader Optical Drive Battery Elan Touchpad with multi touch Sleep, Processor P&C-States with Native power management Fn Hotkeys Not working: Nvidia Optimus GT540M Graphics Switching Unknown: None Issues: None For Installation: Follow the Steps in the link below, starting with Pre installation, Installation and Post Installation: http://www.osxlatitude.com/edp/documentation/
-
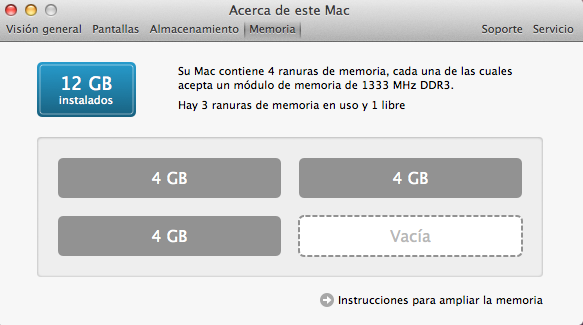
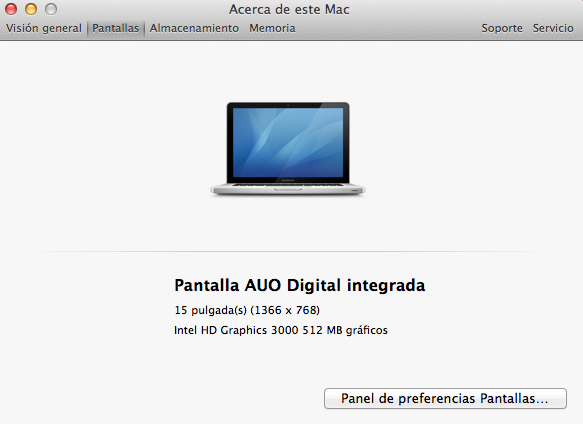
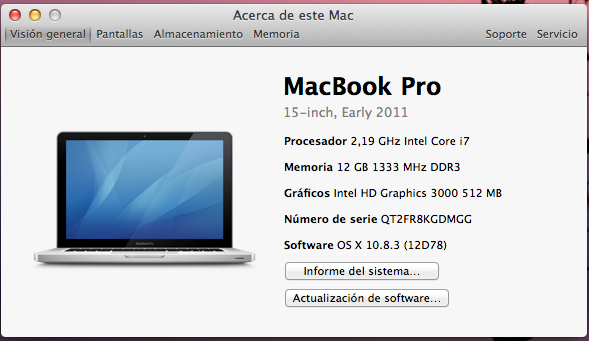
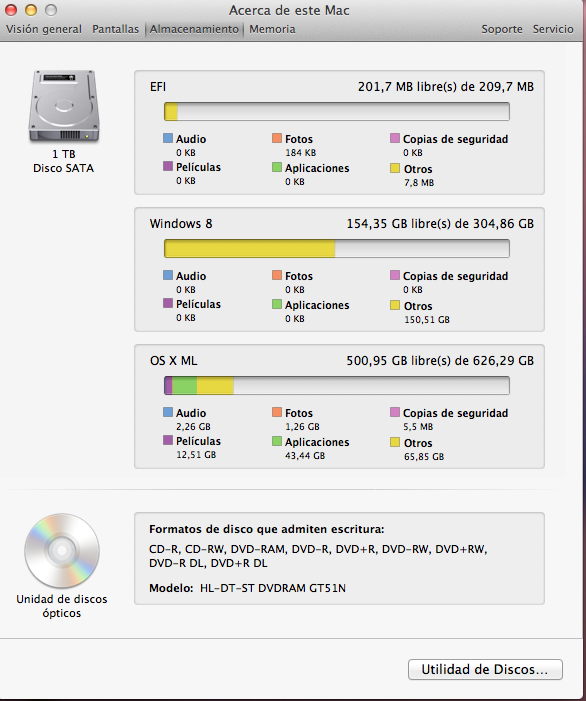
There is my N53sm under 10.8.3 Display: 15.6-inch LED-backlit Full HD display (1366 x 768) Processor: 2nd generation Intel Core i7-2670QM processor (2.2 GHz with Turbo Boost 2.0 up to 3.1 GHz) Chipset: Intel HM65 Graphics: NVIDIA GeForce GT 630M graphics with 2GB DDR3 VRAM and NVIDIA Optimus Technology and Intel HD Graphics 3000 (1366x768x32) WLAN: 802.11 b/g/n (@ 2.4GHz) , Bluetooth v2.1 LAN: 10/100/1000 Mbps Ethernet Memory: 12GB DDR3 SDRAM, 4 x SODIMM socket (expandable to 16GB) Storage: 1TB 5200RPM hard drive Optical Drive: Super Multi DVD drive Camera: 2.0 Megapixel with security lens cover Speakers: Built-in speakers with SonicMaster Technology Microphone: Digital Array Microphone Card Reader: 1x 8-in- card reader (MMC/SD/Mini-SD/XD/Memory Stick/MS Pro/MS Duo/MS-Pro-Duo) Input / Output:1x Headphone-out jack, 1x Microphone-in jack, 1x VGA port, 1x RJ45 LAN Jack for LAN insert, 2x USB 2.0 ports, 1x USB 3.0 port, 1x HDMI port What's works ? Intel HD Graphics 3000 (1366x768x32) Realtek ALC269 Audio (Thanks to Dinesh) Atheros AR9285 Wireless Atheros or Broadcam Bluetooth Battery Management Elan Multitouch Ps/2 Trackpad Card Reader Usb 2.0/ 3.0 Realtek 8xxx Ethernet Sleep/Wake/Reboot working Fn Hotkeys (Function Key ) Super Multi DVD drive Webcam ( with iGlasses.app) Not Work: NVIDIA GeForce GT630M HDMI audio ********************************************************** Kexts.zip EXTRA.zip

-
I'm bringing this over from the thread I created in tonycrapx86 is hopes that I could perfect the details that still aren't working. Here and hope it's a good starting point. You're going to need to get the appstore Mountain Lion app and at least an 8Gb USB. Processor: i7 740QM Graphics: Nvidia GTX460M What's working: Graphics - Full acceleration. Wifi Trackpad with 2 finger scroll Keyboard Audio Fn keys Bluetooth Webcam What isn't working: Sleep Shutdown stays at black screen Keyboard Backlight Microphone Multiple monitors only work when connected before at boot time. Installation: Follow the unifail guide When it comes to booting the USB drive, use the kernel flag PCIRootUID=0 Let the installation complete and reboot from the USB drive again with PCIRootUID=0 Follow the setup until you reach the desktop. At this point open the terminal and type in the following without quotation marks: "defaults write com.apple.Finder AppleShowAllFiles TRUE" "Killall Finder" Open your USB and pass the Extra folder to your Desktop, open that Extra folder and in the boot.plist edit PCIRootUID from 1 to 0. Then place this extra folder in the root directory of your partition. If you can't find it, go to the menu bar Finder->Preferences and select to check the checkbox that says "Hard Disks", this should put your partitions on your desktop. Unzip the Installation kit and run the chameleon installer. After the installation try boot from hard drive. If you fail, boot from the USB again with PCIRootUID=0 and recheck your steps. If you successfully booted back in to lion. Run the kext utility in the installation kit folder and drag the kexts from the installation kit on to the Kext Utility Window. I recommend Trying to install one by one if anything goes wrong. After this, reboot and you should have all the working stuff. Open the AppStore and install the update to 10.8.1, it shouldn't affect anything and you should reboot without an issue. TIP: The best way to do tests is to have 2 partitions and use Carbon Copy Cloner to make a bootable backup. I'd appreciate if anyone else can help me with the what isn't working yet. UPDATE ON KEYBOARD BACKLIGHT: It turns out that if I boot in to Linux, restart and boot in to ML, backlight keyboard is working, however if I turn the backlight off I can't turn it on again except by repeating this process. 10.8.2 G73JW Kit.zip
-
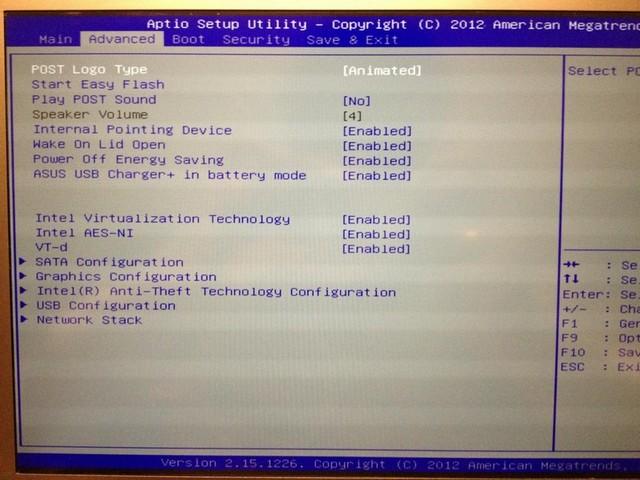
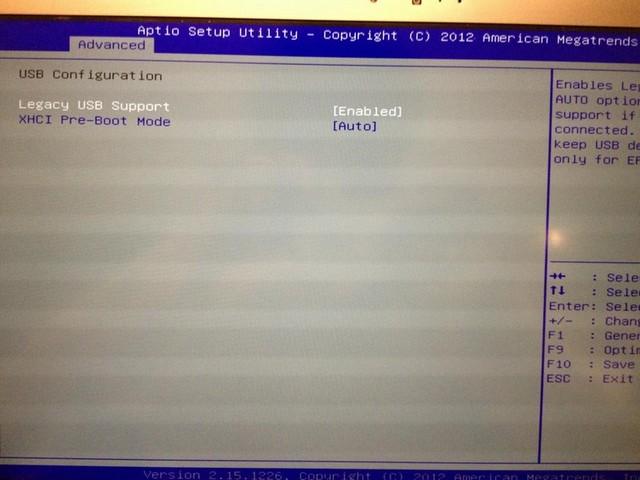
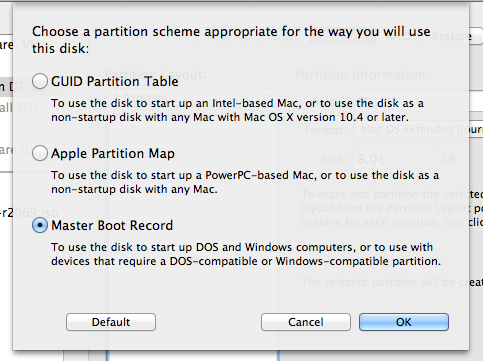
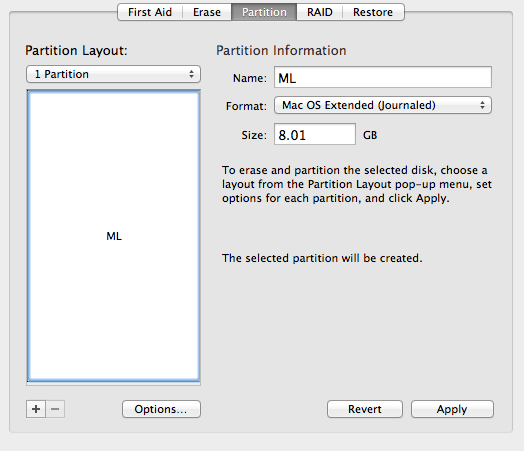
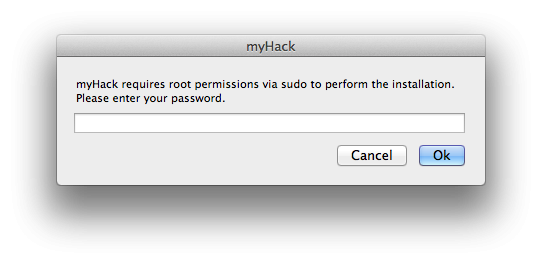
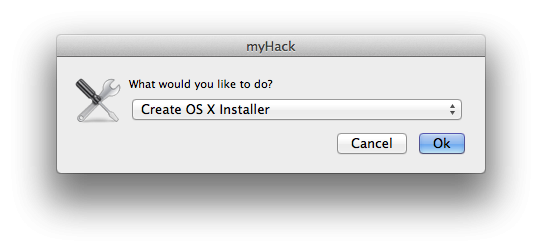
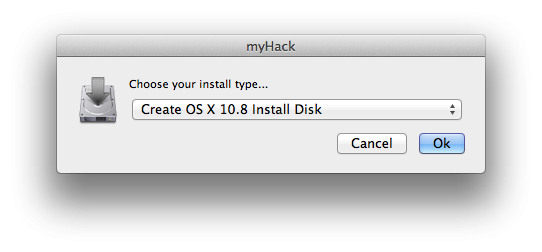
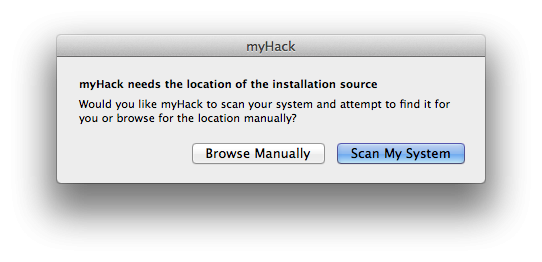
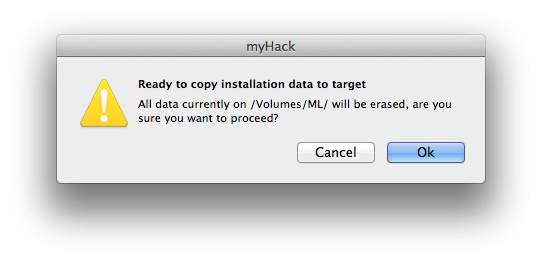
BIOS To get into the BIOS, press F2 at the Asus logo screen. Make sure you make the necessary edits. I have attached pictures with the necessary changes. This is found under "SATA Configuration". Make sure you set the "SATA Mode" to "AHC"I. This is found under "Graphics Configuration". Make sure that you set "DVMT Pre-Allocated" to "64M". This is found under "USB Configuration". "Legacy USB Support" should be enabled and "XHCI Pre-Boot" should be "Disable" (You have to do this to Newer models of the UX32VD have a "Launch CSM" and "Secure Boot" option. If you have one of these newer models, you will need to disable "Secure Boot" (it is found under "Boot" tab). You will then need to enable "Launch CSM" (under the "Advanced" tab). USB Installer To make the USB Installer you will need: Access to OS X MyHack 8GB USB Mountain Lion or Lion from the Mac App Store First, you will need to make the USB installer. You will be using MyHack, there are very clear concise instructions here. I also have attached pictures to make things easier for you. Open up Disk Utility and let's partition it so that it can be use MyHack. Note: *YOU WILL LOSE ALL DATA WHEN YOU PARTITION!* Apply the settings like so: Next let's open up MyHack, when it launches you will be asked for the root password. Type in the root password and a dialog similar to this will appear: Choose "Create OSX Installer", then click OK. Then you will be asked to choose which version of OSX you want to use, choose: 10.9 for Mavericks 10.8 for Mountain Lion 10.7 for Lion 10.6 does not support Ivy Bridge (DO NOT USE SNOW LEOPARD) Then you will be asked to choose where to create the installer. MyHack automatically lists all legible drives, just choose your USB from earlier. Next, it will ask you to choose the InstallESD.dmg or "Install OSX xxxx.app" Click on "Scan My System", and MyHack will automatically list all the possible files. Just choose the InstallESD.dmg found in "Install OSX xxx.app/Contents/SharedSupport/". You are all set for the time being. In couple of minutes, MyHack will ask you to confirm that you want to create the installer on the USB. Click on "Ok" and just wait for MyHack to be finished. Once MyHack has created the USB, download the DSDT I have attached and move it to /Extra/ on the USB. This will enable you launch the USB with no problems. Installation Plug in your USB installer into your UX32VD. Press ESC at the Asus logo screen. Choose the modded USB. Note: Once bootloader loads up (you'll see an image of an apple on a USB), select your USB (use your arrow keys) then type "-x" then press enter. Post-Installation This guide is a work a progress. Extra.zip
-
hello rufabf, regarding your guide, can you send your dsdt
-
Specifications: Processor : Intel® Core i3-2330M Processor (3M Cache, 2.20 GHz) Graphics Processor(GPU) : Intel® HD Graphics 3000 & NVIDIA® Optimus GeForce® GT 520MX Chipset : Intel® HM65 Express Chipset Hard disk : Hitachi 640GB 5400rpm HDD RAM : 6GB DDR3 1333 MHz SDRAM Wifi : Atheros AR9285 802.11b/g/n Wireless Network Adapter (Atheros AR5B195 Combo) Bluetooth : Atheros AR3011 Bluetooth V3.0+HS (Atheros AR5B195 Combo) Ethernet : Realtek RTL8168/8111 PCI-E Gigabit Ethernet Adapter Audio : Realtek® High Definition Audio ALC269VB USB 3.0 : ASMedia ASM1042 USB 3.0 xHCI Controller Touchpad : Elan Touchpad v3 Hardware Webcam : Asus VGA Webcam (Alcor Micro, Corp) Card reader : Realtek USB2.0 Card reader (PID: 0x0139) Monitor : LG Philips LP156WH2-TLAA WXGA 15.6 16:9 HD1366x768 Optical Drive : Matshita DVD Writer Battery : 6Cells 5200 mAh 56 Whrs Interface : 1 x Microphone-in jack 1 x Headphone-out jack 1 x VGA port/Mini D-sub 15-pin for external monitor 1 x USB 3.0 port(s) 2 x USB 2.0 port(s) 1 x RJ45 LAN Jack for LAN insert 1 x HDMI Working: Graphics with QE/CI on Intel HD3000 GPU Audio with AppleHDA WiFi Bluetooth Ethernet USB2.0 and USB3.0 VGA and HDMI (With Audio) Webcam (Using CamTwist App) Optical Drive Battery Elan Touchpad with Multi touch Sleep, Processor P&C-States with Native power management Fn Hotkeys Not working: Nvidia Optimus GT520MX Realtek USB2.0 Card Reader Unknown: None Issues: None For Installation: Follow the Steps in the link below, starting with Pre installation, Installation and Post Installation: http://www.osxlatitude.com/edp/documentation/