Search the Community
Showing results for tags 'Mountain Lion'.
Found 17 results
-
hello rufabf, regarding your guide, can you send your dsdt
-
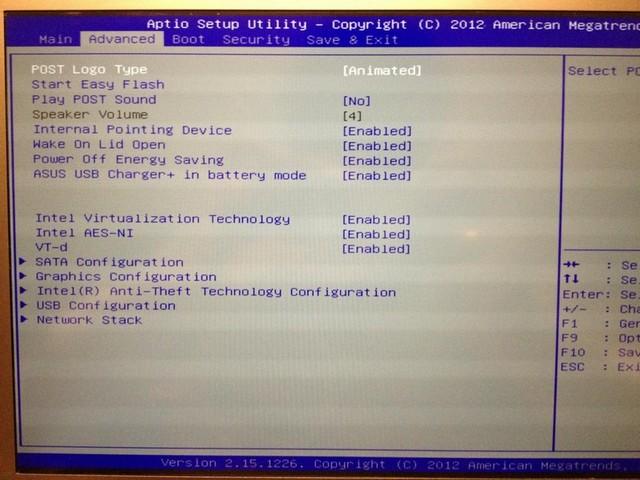
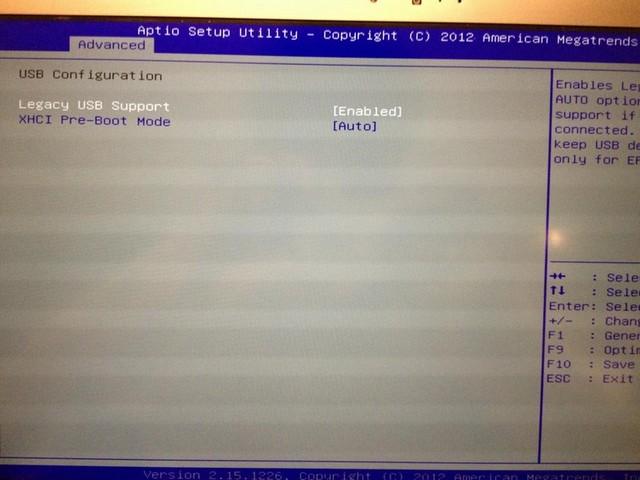
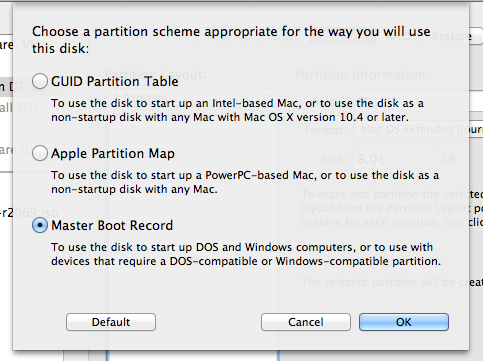
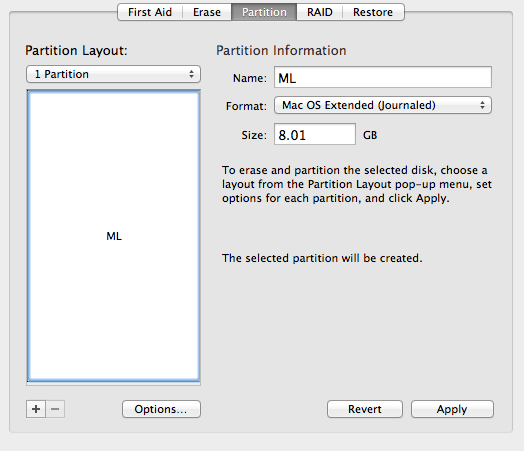
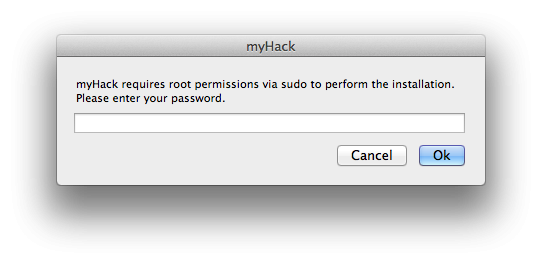
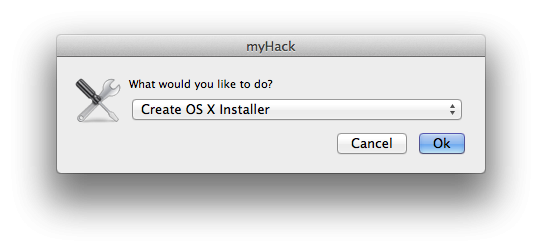
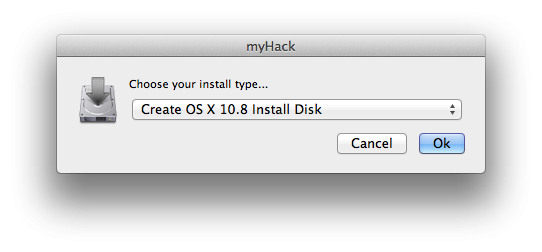
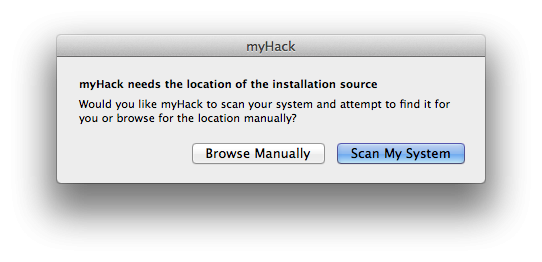
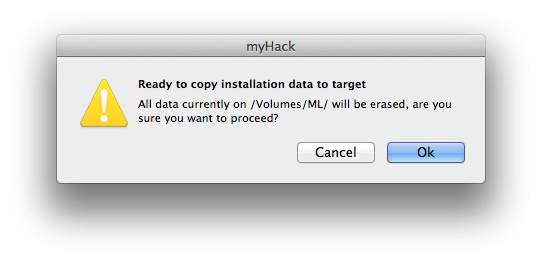
BIOS To get into the BIOS, press F2 at the Asus logo screen. Make sure you make the necessary edits. I have attached pictures with the necessary changes. This is found under "SATA Configuration". Make sure you set the "SATA Mode" to "AHC"I. This is found under "Graphics Configuration". Make sure that you set "DVMT Pre-Allocated" to "64M". This is found under "USB Configuration". "Legacy USB Support" should be enabled and "XHCI Pre-Boot" should be "Disable" (You have to do this to Newer models of the UX32VD have a "Launch CSM" and "Secure Boot" option. If you have one of these newer models, you will need to disable "Secure Boot" (it is found under "Boot" tab). You will then need to enable "Launch CSM" (under the "Advanced" tab). USB Installer To make the USB Installer you will need: Access to OS X MyHack 8GB USB Mountain Lion or Lion from the Mac App Store First, you will need to make the USB installer. You will be using MyHack, there are very clear concise instructions here. I also have attached pictures to make things easier for you. Open up Disk Utility and let's partition it so that it can be use MyHack. Note: *YOU WILL LOSE ALL DATA WHEN YOU PARTITION!* Apply the settings like so: Next let's open up MyHack, when it launches you will be asked for the root password. Type in the root password and a dialog similar to this will appear: Choose "Create OSX Installer", then click OK. Then you will be asked to choose which version of OSX you want to use, choose: 10.9 for Mavericks 10.8 for Mountain Lion 10.7 for Lion 10.6 does not support Ivy Bridge (DO NOT USE SNOW LEOPARD) Then you will be asked to choose where to create the installer. MyHack automatically lists all legible drives, just choose your USB from earlier. Next, it will ask you to choose the InstallESD.dmg or "Install OSX xxxx.app" Click on "Scan My System", and MyHack will automatically list all the possible files. Just choose the InstallESD.dmg found in "Install OSX xxx.app/Contents/SharedSupport/". You are all set for the time being. In couple of minutes, MyHack will ask you to confirm that you want to create the installer on the USB. Click on "Ok" and just wait for MyHack to be finished. Once MyHack has created the USB, download the DSDT I have attached and move it to /Extra/ on the USB. This will enable you launch the USB with no problems. Installation Plug in your USB installer into your UX32VD. Press ESC at the Asus logo screen. Choose the modded USB. Note: Once bootloader loads up (you'll see an image of an apple on a USB), select your USB (use your arrow keys) then type "-x" then press enter. Post-Installation This guide is a work a progress. Extra.zip

-
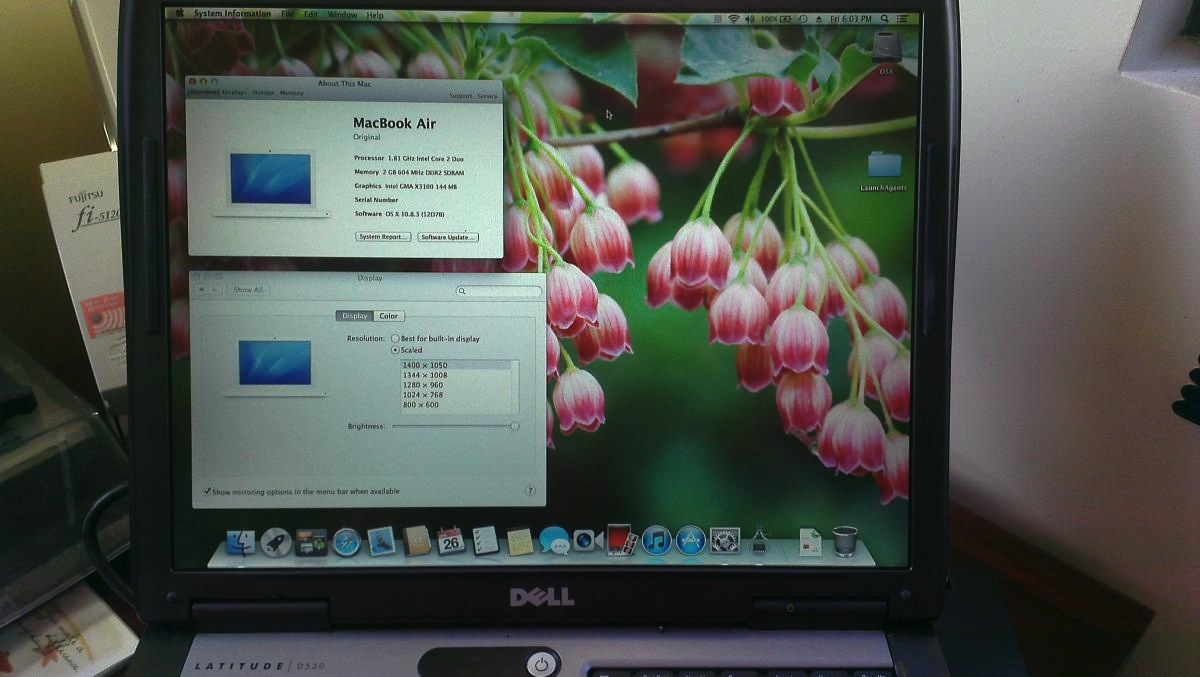
I take no credit for this guide. Hervé and the folks at MacRumors did all the heavy lifting. All I did was do some testing and tweaking to get all their hard work and research working on the Dell Latitude D530. What follows is a result of everyone's efforts... This guide applies to the D530 1400x1050 models. This guide was made with purchased copy of ML 10.8.0. It was not tested with purchased copies of ML 10.8.1, 10.8.2 or 10.8.3. The attached bootpack was made out of the D630 nVidia ML bootpack and the DSDT file was just replaced with a modified DSDT file taken from the D630 X3100 HiRes boot pack. Extra_D530_ML.zip This guide assumes you're using a blank HDD, partitioned and formated GUID or MBR partitioned HDD. Also, have an external USB mouse or keyboard available. At some point during these steps, the built-in trackpad or keyboard may not work and you might need to plug in external devices to proceed to the next step. Phase 1: initial ML installation in mainstream 64bit kernel mode with unsupported graphics make the usual myHack USB installer (ML 10.8.0), using the attached bootpack. boot myHack installer and install ML 10.8.0, pointing to the /Extra folder of the installer media when prompted for the boot pack (do not choose generic). reboot into ML and complete 1st boot setup. you're now in ML 10.8.0 with default graphics at 1024x768 and without graphics acceleration. If you have not already done so, remove your myHack USB installer and put it aside. install combo update 10.8.3 (your wireless may not be supported at that stage, so use Ethernet port or install appropriate Wifi kext). the combo update might fail. This is normal. Before rebooting, run myHack and choose myFix -> Quick reboot into ML 10.8.3, still with default graphics and without acceleration. Phase 2: MLPostFactor download MLPostFactor off the Net create a new small partition on your HDD (8 to 16GB) or insert and erase your myHack USB installer (or any other available external media). following MLPF instructions to the letter, run MLPostFactor and create an ML installer on the freshly created spare HDD partition or freshly erased USB key. Select the "ML 10.8.0->10.8.2" case and run the app. If you've purchased and downloaded ML 10.8.3, select that version instead. upon completion, create a folder called "Extra" at the root of that installer media and copy DSDT table + SMBIOS & Cham boot plist files there. be prepared with a USB mouse and keyboard ready. The MLPostFactor that you just created may not have the appropriate kexts for the D530 trackpad or built-in keyboard. reboot off your initial ML disk/partition, interrupt the boot process at the Chameleon delay bar and select this newly created ML installer partition/disk with options & flag: DSDT=/Extra/<dsdt filename> arch=i386 -f once installer is loaded, do not actually proceed with any installation (it would not be bootable). Go to "Utilities" in the menu bar and select MLPostFactor. when MLPostFactor app kicks in, click "Continue" until you're offered to select a destination volume. in the list available under the HDD icon, select your previously-made ML 10.8.3 installation, check the "10.8.3" case and click "Install MLPostFactor". upon completion, click "Quit MLPostFactor", quit installation program and reboot ML 10.8.3 with flag and boot option: "-f arch=i386". You will now have full QE/CI ! you may notice that not all of your devices such as trackpad, battery meter, wireless, etc. may be present or working. launch myHack and run myFix. Choose the quick version. open up Chameleon wizard and go to the boot plist. Check "Ignore Boot Cache (-f)" case and "32-bit (i386)" case. They're required from now on. Reboot and everything should be working, including full QE/CI! Sleep should also work, but if not launch terminal and type "sudo pmset hibernate mode 0" That's it, enjoy ML on your previously unsupported D530 X3100.
-
Last update: 03 Jan 2024 This guide applies to the Core2Duo D430 models. This guide was initially made with a MyHack-based installation of ML 10.8.0 + subsequent updates to ML 10.8.3/10.8.4/10.8.5. The bootpack was made out of the D630 nVidia ML bootpack where the DSDT table was replaced by the table from D430 Dual Core Lion bootpack, appropriate kexts removed and/or added and Chameleon plists replaced. EDIT - 20Aug 2014: ------------------------- Bootpack edited following report of missing Broadcom LAN kext. Pack is now fully loaded with all necessary kexts, modules and plists and no post-install EDP is really required for hardware fine tuning. Includes tuned Kozlek's FakeSMC + SMBIOS for native CPU SpeedStep. Extra D430 ML.zip This guide assumes you're using a blank HDD, partitioned and formated GUID. No tests done on MBR partitioned HDD, so don't ask about it, try it for yourself and report back if appropriate. Read the MacRumors guide thoroughly and follow it to the letter as far as creating the installer is concerned. Remember that it is not our hack and we do not support it. http://forums.macrumors.com/showthread.php?t=1325709 You need a legit copy of ML, i.e. the Install Mountain Lion.app application, otherwise forget it. The tool requires you to copy it to your Applications folder. It won't work if all you have is the InstallESD.dmg image. In June 2021, Apple finally made Mountain Lion freely available. A link to download the application package is available here. Phase 1: initial ML installation in mainstream 64bit kernel mode with unsupported graphics make the usual myHack USB installer for ML 10.8, using the attached LoRes or HiRes bootpack. myHack v3.3.1 is recommended. It's available here. boot the myHack USB installer and install ML 10.8, pointing to the /Extra folder of the installer media when prompted for the bootpack (do not choose generic). reboot into ML through your USB installer and complete 1st boot setup. you're now in ML 10.8 with default graphics at 1024x768 and without graphics acceleration. If you have not already done so, remove your myHack USB installer and put it aside. install recommended version of Chameleon (r2468) or Enoch (r2839) bootloader on your disk. They're available here. install latest update or combo update for ML 10.8.5 and all security updates for 10.8.5 (your wireless may not be supported at that stage, so use Ethernet port or install appropriate Wifi kext). reboot into latest version of ML 10.8.5, still with default graphics and without acceleration. Phase 2: MLPostFactor download MLPostFactor from here (original links posted in 2013 at MacRumors are dead since 2015). create a new small partition on your HDD (8 to 16GB) or insert and erase your myHack USB installer (or any other available external media). following MLPF instructions to the letter, run MLPostFactor and create an ML installer on the freshly created spare HDD partition or freshly erased USB key. Select the appropriate ML version that meets your installation and run the app, knowing that version 10.8.4 is to be selected for ML 10.8.5. upon completion, create a folder called Extra at the root of that installer media and copy DSDT table + SMBIOS & Chameleon boot plist files there. if you have a Bluetooth module, turn off your wireless services with the side switch (or laptop will look for a BT keyboard at next step and you'd need to hook up a USB keyboard). reboot off your initial ML disk/partition, interrupt the boot process at the Chameleon delay bar and select this newly created ML installer partition/disk with options & flag DSDT=/Extra/DSDT.aml arch=i386 -f. once installer is loaded, do not actually proceed with any installation (it would not be bootable). Go to Utilities in the menu bar and select MLPostFactor. when MLPostFactor app kicks in, click Continue until you're offered to select a destination volume. in the list available under the HDD icon, select your previously-made ML 10.8 installation, check the relevant 10.8.x case (select 10.8.4 for ML 10.8.5) and click Install MLPostFactor. upon completion, click Quit MLPostFactor, quit installation program and reboot ML 10.8 with flag and boot option -f arch=i386. If you switched off wireless services, turn the switch back on before the reboot. You will now have full QE/CI ! open up the Chameleon boot plist file in /Extra folder with TextEditor and add boot arg arch=i386 to ensure your system boots in 32bit kernel mode. If you have Chameleon Wizard app, use that to open up the boot plist and tick the 32-bit (i386) option, then save the file. open up Terminal and type sudo kextcache -system-prelinked-kernel -a i386 to rebuild the 32bit-mode cache; this will remove the need to boot with -f flag. For ML 10.8.5, edit file /System/Library/CoreServices/SystemVersion.plist to replace version number from 10.8.4 to 10.8.5. That's it, enjoy ML on your previously unsupported D620 GMA950. Remember that this hack is quite aggressive in the way it reverts to DP1 files and older graphics drivers (GMA950 kexts, OpenGL libraries), so you may find that things do not work. Again, don't ask for support here, go to the authors at MacRumors.
-
 Hi This is my notebook: http://www.asus.com/Notebooks_Ultrabooks/N56DP/specifications/ Asus N56DP A10 4600M 2.3Ghz 4GB Ram AMD Radeon HD 7730M & AMD Radeon HD 7660G 500GB HDD USB 3.0 And a installed windows 7 on it. I used myHack 3.3.1 and Mountain Lion 10.8.3 and made a bootable USB. Every thing is ok and i can see installation with GraphicsEnabler=No flag. I want to install OS X on a partition, without losing any data and without format whole Hard Disk and without installing windows 7 again. Now, i format a partition to HFS+ type. What should i do now?
-
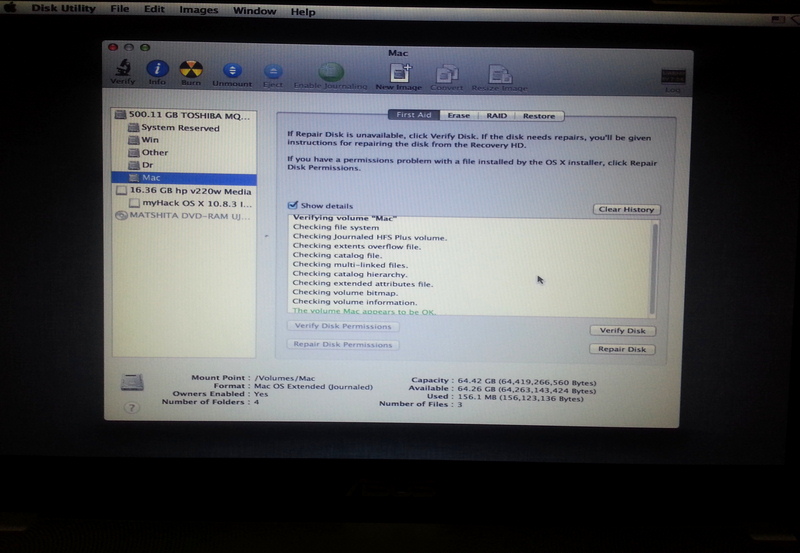
Hello OSXLatitude forumers, I almost hackintosh a Dell Latitude D630 Here are my installation method : 1: Make the USB installer by using MLPostfactor and Mountain Lion App 10.8.3 2: Install bootloader to the USB installer 3: Take kext from bootpack provided here and replaced it with the default in the installer 4: Change SATA from ATA to AHCI 5: Boot with the bootflag -v 6: Successfully booted, directly go to Disk Utility and format my HDD 7: Go to installation, selected the drive, and the install process begin 8: Freeze at 19 minutes left! I have done this process many time. When install, it WILL freeze at 19minutes left. I left the laptop for 8 hourse, still hang. What should i do? Also, usually I can move the cursor. But when it freeze, I cant move the cursor and the progressbar of the installation didnt move at all. Stuck forever What the fix guys?
-
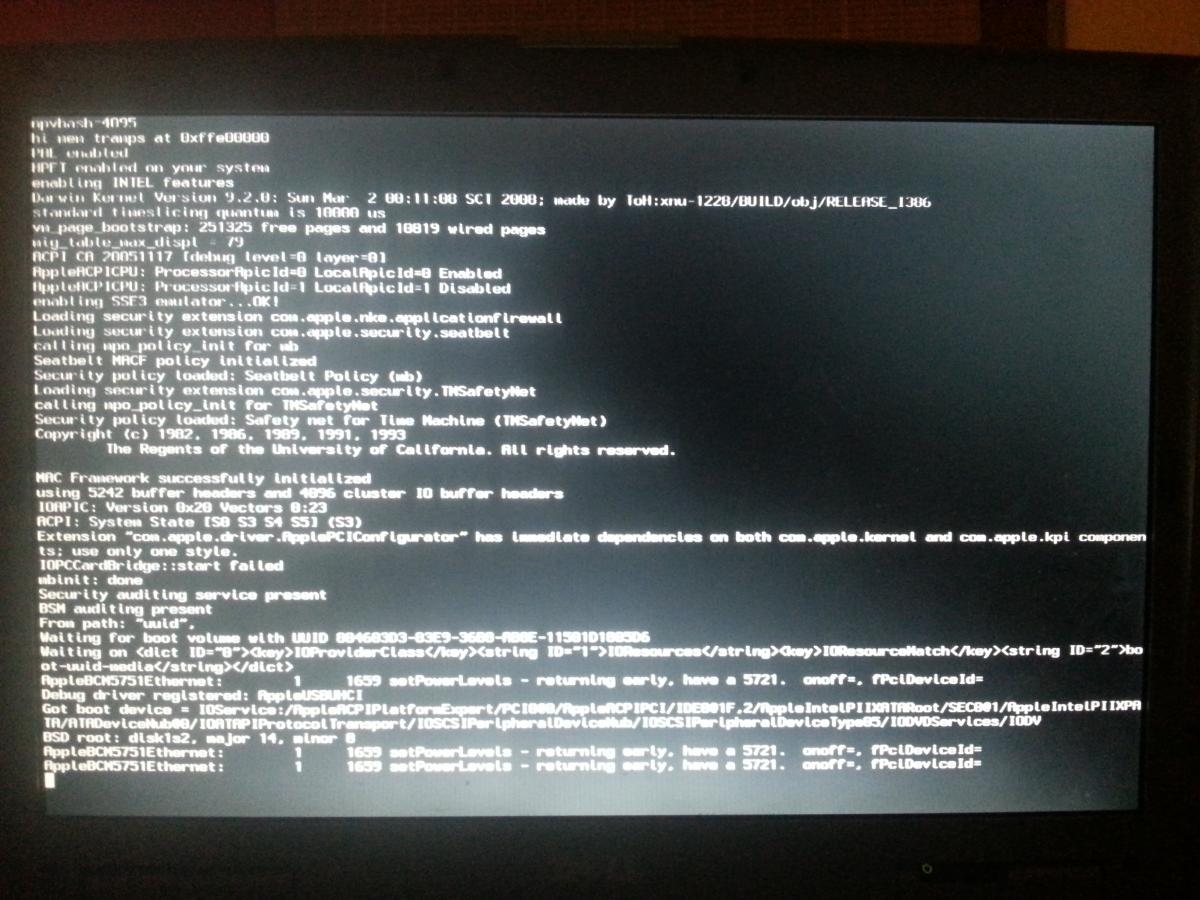
Hi there, I got a Dell Precision M 70: CPU: Pentium M Dothan 2.13GHz FSB 533MHz Motherboard: chipset Intel 915 PM with 2 gig Ram Graphics: NVIDIA Quadro FX Go1400 with 512MB Audio: Sigmatel 9751 Broadcom NetXtreme 57XX Gigabit Lan (does not work on Mac OS X, IP address is 0.0.0.0) Broadcom BCM1450 DWI wireless adapter, instead of the original Intel Wireless 2200BG adapter, since no Internet access was possible with it. The only restriction by the Broadcom 1450 is that it only works with a Wep encryption. I´m running an Mac OS X 10.5.2 on it, which I got (about 5 years ago) from a friend via USB drive and CarbonCopyCloner, because Kalyway 10.5.2 Install hung up after 1 min caused by the BCM5751E Ethernet: " 1659 setPowerLevels - returning early have a 5721onoff = fPciDeviceceld =" while a DVD iFail 10.5.5 installs Leopard, but then kernel panics while booting. We blessed the system in the terminal by means of a bootefi folder from the network in which all the relevant files / folders - usr - standalone - i386 - boot with the files boot0 , boot_V8 , boot1h , boot1u , bootefi , cdboot , chain0 and folders guid and mbr were included by the following instructions: - Easy installation --- For Single-Booting systems --- Copy the folder "bootefi" and all included files/folders to the root directory of either a USB Thumb drive, or a USB hard drive, click on the Utilities menu and select "Terminal". Then enter the following commands: sudo -s (then enter your root password) cd /Volumes/usbvolname/bootefi where usbvolname is the volume name of the USB Thumb drive, USB hard drive, or second internal drive where the "bootefi" folder was copied to. ./bootefi.sh installvolumename where installvolumename is the volume name of the drive that OS X was installed to. The installvolumename should be surrounded by double quotes. Example: ./bootefi.sh "MacHD" or ./bootefi.sh "Macintosh HD" I have the M 70 dug out again after a long time of abstinence, but now the hdd is causing problems ... pending sectors etc , so I have the current system 10.5.2 cloned via CCC to a new hard disk. Unfortunately, the above method doesn´t work any more, it hang up by a blinking cursor L However, since iTunes is on version 9, Firefox on version 2 and Safari on 3.1, so they are no longer state of the art. I can´t receive for example e-mails , etc updates are not availible cause I would need to have 10.6.8 installed to do so. Therefore I would rather prefer to change to something more up to date like Snow Leopard 10.6.8, or if it is possible even Lion or Mountain Lion. Has anyone ever attempt that on an ol ' M 70? What do I have to care for ? Does anyone have any instructions for me? Thank you for answering please excuse my bad English Cheers
-
I have an ASUS X55A laptop. I would like to run Mavericks, but I'll settle for Mountain Lion if necessary. I just can't find the proper DSDT for my PC. I've been trying with different kext configurations all week, but I just can't get it right. Does anybody know where to find it, or anybody feel like making one? I'm working on it, but this would be my first time and I'm sure I won't do it right. Any help is appreciated.
-
When I go to install using OSinstall.mpkg it says "The Installer could not install the software because there was no software found to install." Help me please. Dell D830 Nvidia Graphics 4 gigs ram
-
Having a working Mountain Lion 10.8.4 on my d620, i wonder if i can straight update to 10.8.5. Obviously I've used MLPostFactor, any advice ?
-
 I've got 10.8.4 almost fully working on an OptiPlex 960T (mini tower) except for wake from sleep. Does anyone have it working on an OptiPlex 760 or 960 and/or will help me by telling me your method and/or edit the OptiPlex 960 DSDT to get it working?
 -
Hey all, I have once succesfully installed Mountain Lion on a Dell e6400 using MyHack. I recently saw an EDP for the Probook 5330m and tried it out yesterday. I got OS X to install, but after installation and removing the USB stick it wont start up. I get black screen saying to install an OS on the machine. When I try to enter the bios I can only do some scans for memory and hdd. When i insert the USB in, the machine will boot up into OS X. Does anybody know what the problem is here? some specs of the lappie: Core i5-2520M 4G ram apperantly a HD3000 integrated card I know have ubuntu installed. Is there a way that I can check the brand of the wifi and bluetooth cards using linux? thx
-
 First, unfortunately, I've downloaded yesterday "OS X Mountain Lion Installer" and it is a 10.8.4 version. then, I've used myHack to burn an USB stick with adding Extra_D620i_LoRes_ML. after installation, i had the warning saying installation failed however restarting in Mountain Lion is OK. except two important thinks : - no ethernet detected ; - no audio input/output. Then, i can't use PostFactor. Here is my '/Extra' folder : d620:~ yt$ ls -l /Extra total 64 -rwxrwxrwx 1 root wheel 21045 28 jan 03:23 DSDT.aml drwxrwxrwx 14 root wheel 476 16 jui 02:07 Extensions drwxrwxrwx 5 root wheel 170 15 jui 23:35 RemovedExtensions drwxrwxrwx 3 root wheel 102 15 avr 11:31 Themes -rwxrwxrwx 1 root wheel 907 16 jui 01:33 org.chameleon.Boot.plist -rwxrwxrwx 1 root wheel 843 28 jan 03:23 smbios.plist Here is my '/Extra/Extensions' folder : d620:~ yt$ ls -l /Extra/Extensions total 0 drwxr-xr-x 3 root wheel 102 15 avr 11:31 AppleACPIPS2Nub.kext drwxr-xr-x 3 root wheel 102 15 avr 11:31 AppleACPIPlatform.kext drwxr-xr-x 3 root wheel 102 28 jan 03:23 AppleBCM5751Ethernet.kext drwxr-xr-x 4 root wheel 136 24 mar 13:08 AppleIntelIntegratedFramebuffer.kext drwxr-xr-x 3 root wheel 102 15 avr 11:31 ApplePS2Controller.kext drwxr-xr-x 3 root wheel 102 15 avr 11:31 FakeSMC.kext drwxr-xr-x 3 root wheel 102 20 fév 15:02 IONetworkingFamily.kext drwxr-xr-x 3 root wheel 102 15 avr 11:31 OSvKernDSPLib.kext drwxr-xr-x 3 root wheel 102 15 avr 11:31 Patched_10.7_AppleRTC.kext drwxr-xr-x 3 root wheel 102 15 avr 11:31 VoodooTSCSync.kext drwxr-xr-x 3 root wheel 102 18 aoû 2009 lspcidrv.kext notice I've added manually "IONetworkingFamily.kext" and ran myHack/fix afterwards, nothing more. i thing it is encouraging, then i need to know the kexts i dove have to install to get, at first, ethernet. Other datas : Dell Wireless 1395 : Nom: pci8086,4222 Type: Airport Gestionnaire installé: Non MSI: Non Bus: PCI Logement: PCI Slot 2 Identifiant du fournisseur: 0x8086 Identifiant du périphérique: 0x4222 Identifiant du fournisseur du sous-système: 0x8086 Identifiant du sous-système: 0x1021 Identifiant de révision: 0x0002 Largeur du câble: x1 Vitesse de la liaison: 2.5 GT/s GMA 950 : Nom: display Type: Contrôleur du moniteur Gestionnaire installé: Oui MSI: Non Bus: PCI Logement: Built in Identifiant du fournisseur: 0x8086 Identifiant du périphérique: 0x27a2 Identifiant du fournisseur du sous-système: 0x1028 Identifiant du sous-système: 0x01c2 Identifiant de révision: 0x0003 Version du système: OS X 10.8.4 (12E55) Version du noyau: Darwin 12.4.0 Volume de démarrage: HD Mode de démarrage: Normal Nom de l’ordinateur: d620 Nom de l’utilisateur: Yvon Thoraval (yt) Mémoire virtuelle sécurisée: activée Temps depuis le démarrage: 31 minutes
 -
Last update: 03 Jan 2024 This guide applies to LoRes WXGA (1280x800) and possibly HiRes WXUGA (1920x1200) models. This guide was initially made with a MyHack-based installation of ML 10.8.0 + subsequent updates to ML 10.8.3/10.8.4/10.8.5. The bootpack was made out of the D630 nVidia ML bootpack where the DSDT table was just replaced by the table from D830 GMA X3100 Lion bootpack (LoRes). If you have a HiRes model, just replace the DSDT with HiRes version to try it out. Extra_D830_LoRes_ML.zip This guide assumes you're using a blank HDD, partitioned and formated GUID. No tests done on MBR partitioned HDD, so don't ask about it, try it for yourself and report back if appropriate. Read the MacRumors guide thoroughly and follow it to the letter as far as creating the installer is concerned. Remember that it is not our hack and we do not support it. http://forums.macrumors.com/showthread.php?t=1325709 You need a legit copy of ML, i.e. the Install Mountain Lion.app application, otherwise forget it. The tool requires you to copy it to your Applications folder. It won't work if all you have is the InstallESD.dmg image. In June 2021, Apple finally made Mountain Lion freely available. A link to download the application package is available here. Phase 1: initial ML installation in mainstream 64bit kernel mode with unsupported graphics make the usual myHack USB installer for ML 10.8, using the attached LoRes or HiRes bootpack. myHack v3.3.1 recommended. It's available here. boot the myHack USB installer and install ML 10.8, pointing to the /Extra folder of the installer media when prompted for the boot pack (do not choose generic). reboot into ML and complete 1st boot setup. you're now in ML 10.8 with default graphics at 1024x768 and without graphics acceleration. If you have not already done so, remove your myHack USB installer and put it aside. install recommended version of Chameleon (r2468) or Enoch (r2839) bootloader on your disk. They're available here. install latest update or combo update for ML 10.8.5 and all security updates for 10.8.5 (your wireless may not be supported at that stage, so use Ethernet port or install appropriate Wifi kext). reboot into latest version of ML 10.8.5, still with default graphics and without acceleration. Phase 2: MLPostFactor download MLPostFactor from here (original links posted in 2013 at MacRumors are dead since 2015). create a new small partition on your HDD (8 to 16GB) or insert and erase your myHack USB installer (or any other available external media). following MLPF instructions to the letter, run MLPostFactor and create an ML installer on the freshly created spare HDD partition or freshly erased USB key. Select the appropriate ML version that meets your installation and run the app, knowing that version 10.8.4 is to be selected for ML 10.8.5. upon completion, create a folder called Extra at the root of that installer media and copy DSDT table + SMBIOS & Chameleon boot plist files there. if you have a Bluetooth module, turn off your wireless services with the side switch (or laptop will look for a BT keyboard at next step and you'd need to hook up a USB keyboard). reboot off your initial ML disk/partition, interrupt the boot process at the Chameleon delay bar and select this newly created ML installer partition/disk with options & flag DSDT=/Extra/DSDT.aml arch=i386 -f. once installer is loaded, do not actually proceed with any installation (it would not be bootable). Go to Utilities in the menu bar and select MLPostFactor. when MLPostFactor app kicks in, click Continue until you're offered to select a destination volume. in the list available under the HDD icon, select your previously-made ML 10.8 installation, check the relevant 10.8.x case (select 10.8.4 for ML 10.8.5) and click Install MLPostFactor. upon completion, click Quit MLPostFactor, quit installation program and reboot ML 10.8 with flag and boot option -f arch=i386. If you switched off wireless services, turn the switch back on before the reboot. You will now have full QE/CI ! open up the Chameleon boot plist file in /Extra folder with TextEditor and add boot arg arch=i386 to ensure your system boots in 32bit kernel mode. If you have Chameleon Wizard app, use that to open up the boot plist and tick the 32-bit (i386) option, then save the file. open up Terminal and type sudo kextcache -system-prelinked-kernel -a i386 to rebuild the 32bit-mode cache; this will remove the need to boot with -f flag. For ML 10.8.5, edit file /System/Library/CoreServices/SystemVersion.plist to replace version number from 10.8.4 to 10.8.5. That's it, enjoy ML on your previously unsupported D830 X3100. Remember that this hack is quite aggressive in the way it reverts to DP1 files and older graphics drivers (GMA kexts, OpenGL libraries), so you may find that things do not work. Again, no support for MLPF here. NB: Details of issues related to ML vanilla files that are re-instated by 10.8.5 security updates are kept in the D430 MLPF guide. They should no longer apply since ML went out of support and no further updates published.
-
Last update: 03 Jan 2024 This guide applies to Core2Duo D620 nVidia models. This guide was initially made with a MyHack-based installation of ML 10.8.0 + subsequent updates to ML 10.8.3/10.8.4/10.8.5. The bootpack was made out of the D630 nVidia ML bootpack where the DSDT table was replaced by the table from the D620 nVidia Lion bootpack, appropriate kexts removed and/or added and plists replaced. Extra D620n ML.zip This guide assumes you're using a blank HDD, partitioned and formated GUID. No tests done on MBR partitioned HDD, so don't ask about it, try it for yourself and report back if appropriate. Read the MacRumors guide thoroughly and follow it to the letter as far as creating the installer is concerned. Remember that it is not our hack and we do not support it. http://forums.macrumors.com/showthread.php?t=1325709 You need a legit copy of ML, i.e. the Install Mountain Lion.app application, otherwise forget it. The tool requires you to copy it to your Applications folder. It won't work if all you have is the InstallESD.dmg image. In June 2021, Apple finally made Mountain Lion freely available. A link to download the application package is available here. Phase 1: initial ML installation in mainstream 64bit kernel mode with unsupported graphics make the usual myHack USB installer for ML 10.8, using the attached bootpack. myHack v3.3.1 is recommended. It's available here. boot the myHack USB installer and install ML 10.8, pointing to the /Extra folder of the installer media when prompted for the boot pack (do not choose generic). reboot into ML with "-x" flag (or ML won't boot) through your USB installer and complete 1st boot setup. you're now in ML 10.8 with default graphics at 1024x768 and without graphics acceleration. If you have not already done so, remove your myHack USB installer and put it aside. install recommended version of Chameleon (r2468) or Enoch (r2839) bootloader on your disk. They're available here. install latest update or combo update for ML 10.8.5 and all security updates for 10.8.5 (your wireless may not be supported at that stage, so use Ethernet port). at that stage, ML 10.8 is unbootable, no matter what, so don't reboot yet! Phase 2: MLPostFactor download MLPostFactor from here (original links posted in 2013 at MacRumors are dead since 2015). create a new small partition on your HDD (8 to 16GB) or insert and erase your myHack USB installer (or any other available external media). following MLPF instructions to the letter, run MLPostFactor and create an ML installer on the freshly created spare HDD partition or freshly erased USB key. Select the appropriate ML version that meets your installation and run the app, knowing that version 10.8.4 is to be selected for ML 10.8.5. upon completion, create a folder called Extra at the root of that installer media and copy DSDT table + SMBIOS & Chameleon boot plist files there. if you have a Bluetooth module, turn off your wireless services with the side switch (or laptop will look for a BT keyboard at next step and you'd need to hook up a USB keyboard). reboot off your initial ML disk/partition, interrupt the boot process at the Chameleon delay bar and select this newly created ML installer partition/disk with options & flag DSDT=/Extra/DSDT.aml arch=i386 -f. once installer is loaded, do not actually proceed with any installation (it would not be bootable). Go to Utilities in the menu bar and select MLPostFactor. when MLPostFactor app kicks in, click Continue until you're offered to select a destination volume. in the list available under the HDD icon, select your previously-made ML 10.8 installation, check the relevant 10.8.x case (select 10.8.4 for ML 10.8.5) and click Install MLPostFactor. upon completion, click Quit MLPostFactor, quit installation program and reboot ML 10.8 with flag and boot option -f arch=i386. If you switched off wireless services, turn the switch back on before the reboot. You will now have full QE/CI ! open up the Chameleon boot plist file in /Extra folder with TextEditor and add boot arg arch=i386 to ensure your system boots in 32bit kernel mode. If you have Chameleon Wizard app, use that to open up the boot plist and tick the 32-bit (i386) option, then save the file. open up Terminal and type sudo kextcache -system-prelinked-kernel -a i386 to rebuild the 32bit-mode cache; this will remove the need to boot with -f flag. For ML 10.8.5, edit file /System/Library/CoreServices/SystemVersion.plist to replace version number from 10.8.4 to 10.8.5. That's it, enjoy ML on your previously unsupported D620 nVidia. Remember that this hack is quite aggressive in the way it reverts to DP1 files and older graphics drivers (nVidia NV40 kexts, OpenGL libraries), so you may find that things do not work. Again, no support for MLPF here. NB: Details of issues related to ML vanilla files that are re-instated by 10.8.5 security updates are kept in the D430 MLPF guide. They should no longer apply since ML went out of support and no further updates published.
-
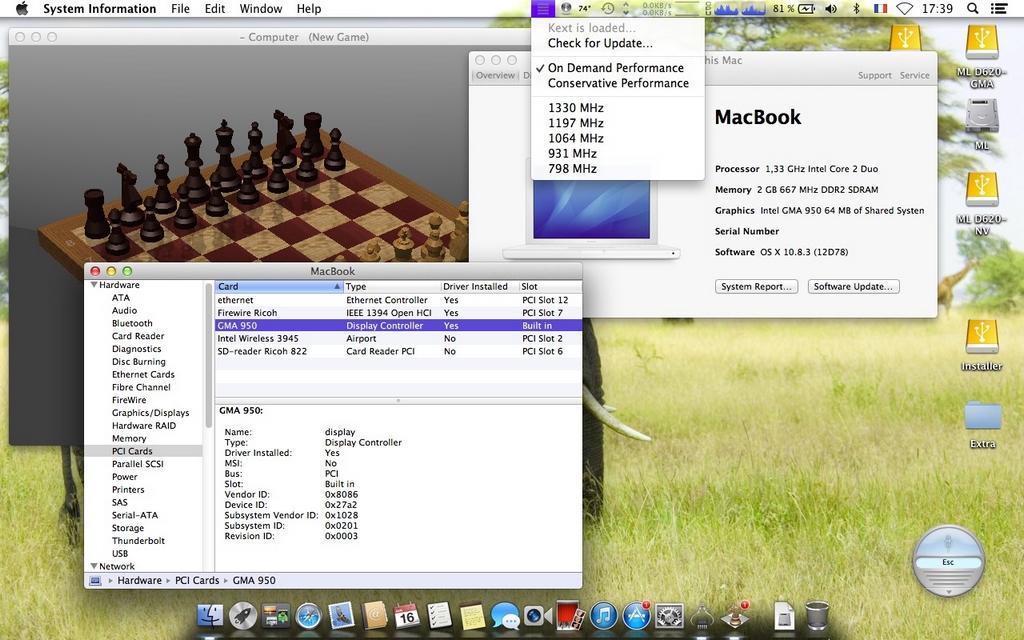
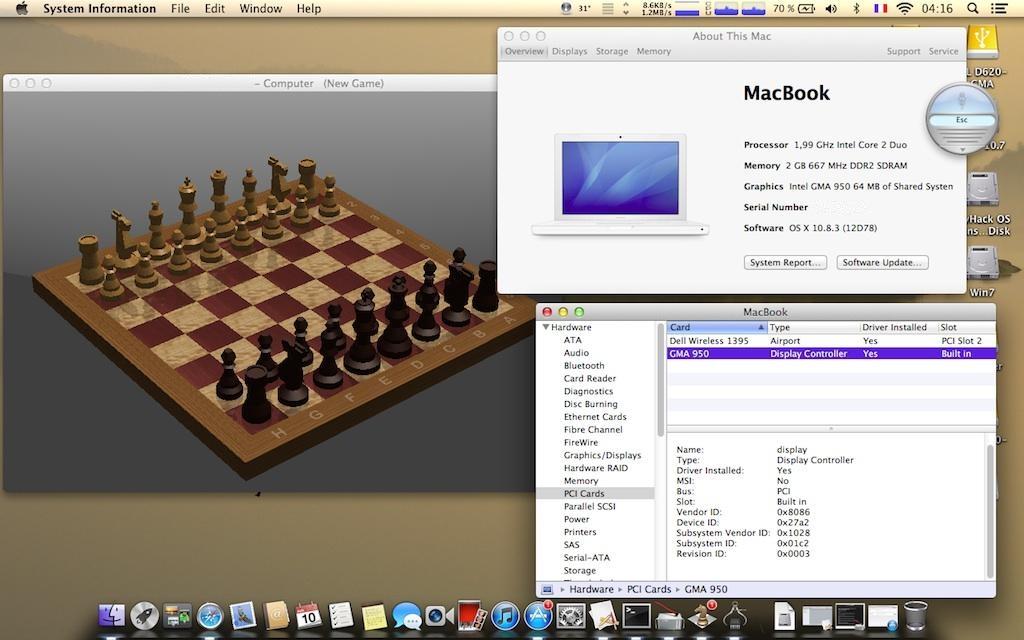
Last update: 03 Jan 2024 This guide applies to Core2Duo LoRes WXGA (1280x800) and HiRes WXGA+ (1440x900) models. This guide was initially made with a MyHack-based installation of ML 10.8.0 + subsequent updates to ML 10.8.3/10.8.4/10.8.5. The bootpacks were made out of the D630 nVidia ML bootpack where the DSDT table was replaced by the table from D620 GMA950 Lion bootpacks (LoRes or HiRes), appropriate kexts removed and/or added and plists replaced. Extra_D620i_LoRes_ML.zip Extra_D620i_HiRes_ML.zip This guide assumes you're using a blank HDD, partitioned and formated GUID. No tests done on MBR partitioned HDD, so don't ask about it, try it for yourself and report back if appropriate. Read the MacRumors guide thoroughly and follow it to the letter as far as creating the installer is concerned. Remember that it is not our hack and we do not support it. http://forums.macrumors.com/showthread.php?t=1325709 You need a legit copy of ML, i.e. the Install Mountain Lion.app application, otherwise forget it. The tool requires you to copy it to your Applications folder. It won't work if all you have is the InstallESD.dmg image. In June 2021, Apple finally made Mountain Lion freely available. A link to download the application package is available here. Phase 1: initial ML installation in mainstream 64bit kernel mode with unsupported graphics make the usual myHack USB installer for ML 10.8, using the attached LoRes or HiRes bootpack. myHack v3.3.1 is recommended. It's available here. boot the myHack USB installer and install ML 10.8, pointing to the /Extra folder of the installer media when prompted for the bootpack (do not choose generic). reboot into ML through your USB installer and complete 1st boot setup. you're now in ML 10.8 with default graphics at 1024x768 and without graphics acceleration. If you have not already done so, remove your myHack USB installer and put it aside. install recommended version of Chameleon (r2468) or Enoch (r2839) bootloader on your disk. They're available here. install latest update or combo update for ML 10.8.5 and all security updates for 10.8.5 (your wireless may not be supported at that stage, so use Ethernet port or install appropriate Wifi kext). reboot into latest version of ML 10.8.5, still with default graphics and without acceleration. Phase 2: MLPostFactor download MLPostFactor from here (original links posted in 2013 at MacRumors are dead since 2015). create a new small partition on your HDD (8 to 16GB) or insert and erase your myHack USB installer (or any other available external media). following MLPF instructions to the letter, run MLPostFactor and create an ML installer on the freshly created spare HDD partition or freshly erased USB key. Select the appropriate ML version that meets your installation and run the app, knowing that version 10.8.4 is to be selected for ML 10.8.5. upon completion, create a folder called Extra at the root of that installer media and copy DSDT table + SMBIOS & Chameleon boot plist files there. if you have a Bluetooth module, turn off your wireless services with the side switch (or laptop will look for a BT keyboard at next step and you'd need to hook up a USB keyboard). reboot off your initial ML disk/partition, interrupt the boot process at the Chameleon delay bar and select this newly created ML installer partition/disk with options & flag DSDT=/Extra/DSDT.aml arch=i386 -f. once installer is loaded, do not actually proceed with any installation (it would not be bootable). Go to Utilities in the menu bar and select MLPostFactor. when MLPostFactor app kicks in, click Continue until you're offered to select a destination volume. in the list available under the HDD icon, select your previously-made ML 10.8 installation, check the relevant 10.8.x case (select 10.8.4 for ML 10.8.5) and click Install MLPostFactor. upon completion, click Quit MLPostFactor, quit installation program and reboot ML 10.8 with flag and boot option -f arch=i386. If you switched off wireless services, turn the switch back on before the reboot. You will now have full QE/CI ! open up the Chameleon boot plist file in /Extra folder with TextEditor and add boot arg arch=i386 to ensure your system boots in 32bit kernel mode. If you have Chameleon Wizard app, use that to open up the boot plist and tick the 32-bit (i386) option, then save the file. open up Terminal and type sudo kextcache -system-prelinked-kernel -a i386 to rebuild the 32bit-mode cache; this will remove the need to boot with -f flag. For ML 10.8.5, edit file /System/Library/CoreServices/SystemVersion.plist to replace version number from 10.8.4 to 10.8.5. That's it, enjoy ML on your previously unsupported D620 GMA950. Remember that this hack is quite aggressive in the way it reverts to DP1 files and older graphics drivers (GMA950 kexts, OpenGL libraries), so you may find that things do not work. Again, no support for MLPF here. NB: Details of issues related to ML vanilla files that are re-instated by 10.8.5 security updates are kept in the D430 MLPF guide. They should no longer apply since ML went out of support and no further updates published.
-
- 1
-

-
- mountain lion
- d620
- (and 2 more)
-
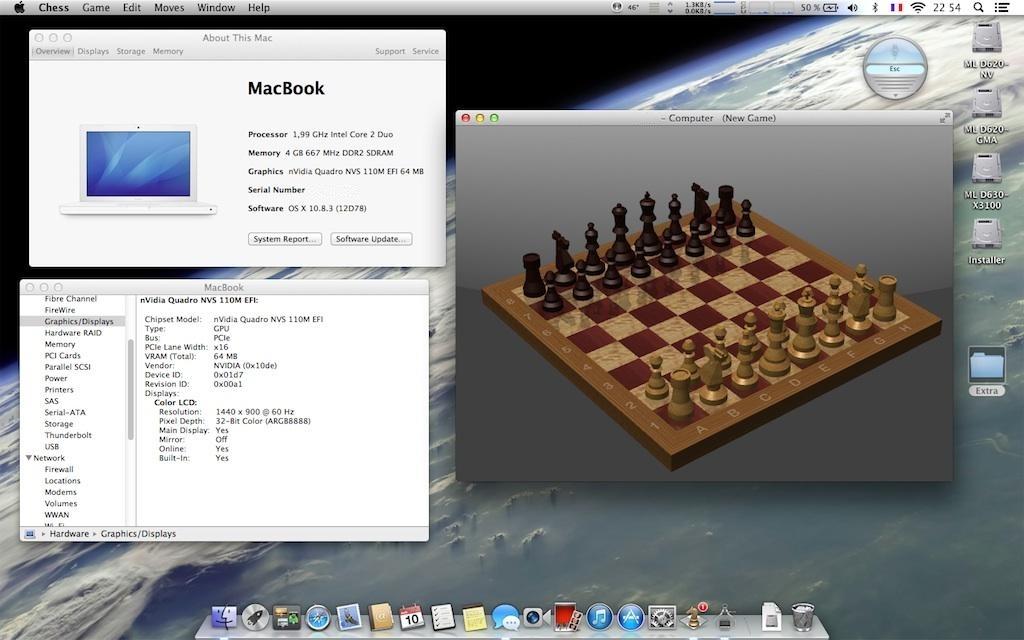
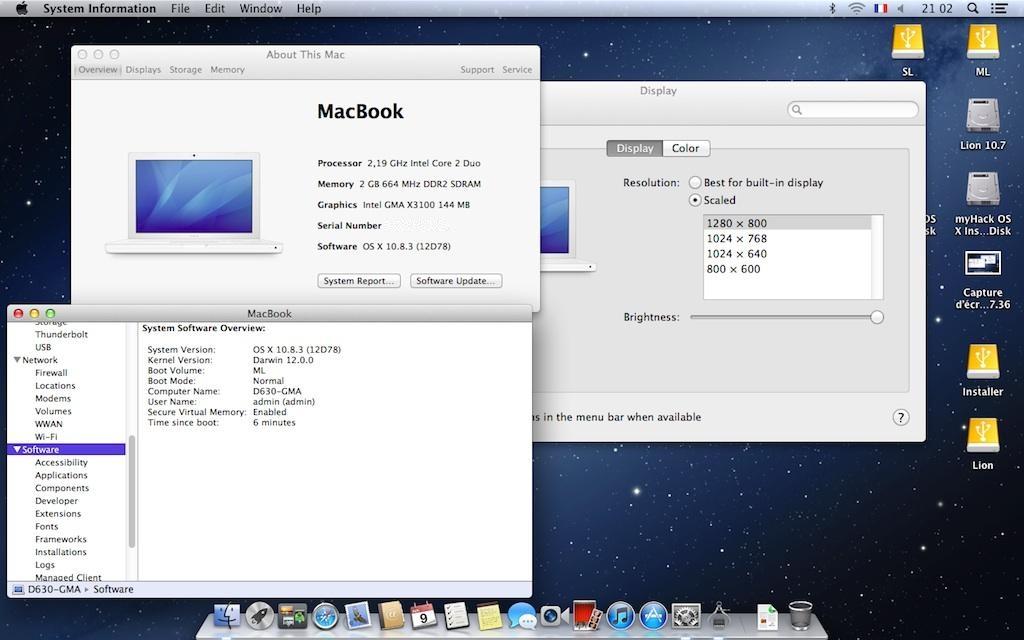
Last update: 03 Jan 2024 This guide applies to LoRes WXGA (1280x800) and HiRes WXGA+ (1440x900) models. This guide was initially made with a MyHack-based installation of ML 10.8.0 + subsequent updates to ML 10.8.3/10.8.4/10.8.5. The bootpacks were made out of the D630 nVidia ML bootpack where the DSDT table was just replaced by the table from D630 GMA X3100 Lion bootpacks (LoRes or HiRes). Extra_D630_LoRes_ML.zip Extra_D630_HiRes_ML.zip This guide assumes you're using a blank HDD, partitioned and formated GUID. No tests done on MBR partitioned HDD, so don't ask about it, try it for yourself and report back if appropriate. Read the MacRumors guide thoroughly and follow it to the letter as far as creating the installer is concerned. Remember that it is not our hack and we do not support it. http://forums.macrumors.com/showthread.php?t=1325709 You need a legit copy of ML, i.e. the Install Mountain Lion.app application, otherwise forget it. The tool requires you to copy it to your Applications folder. It won't work if all you have is the InstallESD.dmg image. In June 2021, Apple finally made Mountain Lion freely available. A link to download the application package is available here. Phase 1: initial ML installation in mainstream 64bit kernel mode with unsupported graphics make the usual myHack USB installer for ML 10.8, using the attached LoRes or HiRes bootpack. myHack v3.3.1 is recommended. It's available here. boot the myHack USB installer and install ML 10.8, pointing to the /Extra folder of the installer media when prompted for the bootpack (do not choose generic). reboot into ML through your USB installer and complete 1st boot setup. you're now in ML 10.8 with default graphics at 1024x768 and without graphics acceleration. If you have not already done so, remove your myHack USB installer and put it aside. install recommended version of Chameleon (r2468) or Enoch (r2839) bootloader on your disk. They're available here. install latest update or combo update for ML 10.8 (your wireless may not be supported at that stage, so use Ethernet port or install appropriate Wifi kext). reboot into latest version of ML, still with default graphics and without acceleration. Phase 2: MLPostFactor download MLPostFactor from here (original links posted in 2013 at MacRumors are dead since 2015). create a new small partition on your HDD (8 to 16GB) or insert and erase your myHack USB installer (or any other available external media). following MLPF instructions to the letter, run MLPostFactor and create an ML installer on the freshly created spare HDD partition or freshly erased USB key. Select the appropriate ML version that meets your installation and run the app, knowing that version 10.8.4 is to be selected for ML 10.8.5. upon completion, create a folder called Extra at the root of that installer media and copy DSDT table + SMBIOS & Chameleon boot plist files there. if you have a Bluetooth module, turn off your wireless services with the side switch (or laptop will look for a BT keyboard at next step and you'd need to hook up a USB keyboard). reboot off your initial ML disk/partition, interrupt the boot process at the Chameleon delay bar and select this newly created ML installer partition/disk with options & flag DSDT=/Extra/DSDT.aml arch=i386 -f. once installer is loaded, do not actually proceed with any installation (it would not be bootable). Go to Utilities in the menu bar and select MLPostFactor. when MLPostFactor app kicks in, click Continue until you're offered to select a destination volume. in the list available under the HDD icon, select your previously-made ML 10.8 installation, check the relevant 10.8.x case (select 10.8.4 for ML 10.8.5) and click Install MLPostFactor. upon completion, click Quit MLPostFactor, quit installation program and reboot ML 10.8 with flag and boot option -f arch=i386. If you switched off wireless services, turn the switch back on before the reboot. You will now have full QE/CI ! open up the Chameleon boot plist file in /Extra folder with TextEditor and add boot arg arch=i386 to ensure your system boots in 32bit kernel mode. If you have Chameleon Wizard app, use that to open up the boot plist and tick the 32-bit (i386) option, then save the file. open up Terminal and type sudo kextcache -system-prelinked-kernel -a i386 to rebuild the 32bit-mode cache; this will remove the need to boot with -f flag. For ML 10.8.5, edit file /System/Library/CoreServices/SystemVersion.plist to replace version number from 10.8.4 to 10.8.5. That's it, enjoy ML on your previously unsupported D630 X3100. Remember that this hack is quite aggressive in the way it reverts to DP1 files and older graphics drivers (GMA kexts, OpenGL libraries), so you may find that things do not work. Again, don't ask for support here, go to the authors at MacRumors. NB: Details of issues related to ML vanilla files that are re-instated by 10.8.5 security updates are kept in the D430 MLPF guide. They should no longer apply since ML went out of support and no further updates published.