Search the Community
Showing results for tags 'lion'.
Found 18 results
-
I've recently acquired a dell latitude d430 and I've seen where people can install lion (10.7.5) on it. I've found no good tutorial on how to do so and I'm wondering if anyone can give some pointers. I'm willing to go down to snow leopard if need at least to 10.6.7. Any help is greatly appreciated
-
Hi, I've used the installation guide here: http://www.osxlatitude.com/edp/documentation/on my latitude d420 however once it boots and starts the loading process it hangs on the grey apply screen with OSX LATITUDE logo on. Trying with OS X Lion. I also could not find a bootpack for a d420 so tried with a d620. If anyone could help with this installation that would be great thank you.
-
Hi, apologies if this is repeated elsewhere and I haven't seen the answer. Created a few OSX PCs before so understand the basics. Have D830 with Intel Crestline so installing Lion using the guide here with USB. Get to the install screen and Disk utility doesn't see the hard drive (Chameleon sees it on boot) I've tried with the original Tosh 80GB SATA drive and an OCZ SSD, neither of them are visible. Yosemite USB installer disk utility sees them but want the graphics support. What kext(s) do I need to load suitable SATA drivers or am I missing something? I was expecting it to work straight away with the Bootpack so stuck for the moment... Thx.
-
 Hello I have successfully installed mac os x 10.8.1 (Update:Now Running 10.8.3 10.8.4) to my laptop but you need to follow my guide to get installing and mostly fully working and if you are smarter and have more knowledge than me, I welcome you to help me getting it fully working to be macbook killer lets get started. 1- you must have bios version 1.07 or lower(because newer version selecting switchable or integrated graphics option removed ). if it happen and you have newer version just download 1.07 and install it and it will downgrade without any problem . 2- make sure to select integreated graphics from bios 3- make bootable USB using this guide(myhack) 4-download my DSDT+SSDT+boot.plist+smbios from attachments. and special thanks to EMlyDinEsH for making DSDT and SSDT for me along with many patched kexts- Dont have DSDT ? click here 5-put it in myhack OS X installer in extra folder 6-tocuhpad driver still in development - I used beta elan tocuhpad v4 kext to get touchpad working during installation - downlaod it from here , touchpad driver is out ! 7- replace kext with the attached one to S/L/E = System/library/extensions and remove nullcpupowermanagement.kext 8- Use legacy USB support from multifail to get blue USB 3.0 ports working with normal USB 3.0 speed, this is the only way worked for me. OR Go to /System/Library/Extensions and right click on IOUSBFAMILY.kext and select Show Package Contents then go to Contents -> Plugins and delete AppleUSBXHCI.kext you will get camera and blue usb 3.0 port to work togethor using this method New= 9-install IONetworking kext for Ethernet and fixing appstore install error that's it install mac and then install updates to 10.8.1 you may get errors during installation but that fine . installing 10.8.2 gave me too much error and panics so that's why I use 10.8.1 Install 10.8.3 combo install 10.8.4 comob and after finish replace only this kext(AppleACPIPlatform.kext) from 10.8.1 or use my kext from the attachment. + Install patched AppleHDA . Also added new DSDT with HDMI working with new boot.plist And dont forgot to donate for EMlyDinEsH CONTACT HIM AT HIS EMAIL: [email protected] some pictures: buy one from ebay sorry for bad English- its not my mother language Also I need some guy from the crew to add my files to EDP. I tried so many times but submit button not working, My EDP files now included check them here patched kexts.zip Extra file with DSDT and boot.plist for HDMI .zip AppleACPIPlatform.kext.zip IONetworkingFamily.kext.zip
-
 Gents, Simply a stunning attack vector - when getting your Dell Latitude D630 Lappy, 'up-up-and-away' on OS X! Brilliant work, (and hat's off to all), for putting together such an amazing resource - across a well laid out, and beautifully presented 'Site. OK, having a red-hot-go at getting a Dell D630 Intel x3100 'Low Res', (read 1280x800), airborne on Lion v10.7(.5) (The '.5' is in brackets - due to my probable misinterpretation of the specific steps required to get from a fresh install of v10.7.2, up to v10.7.5) Here's what's happening right now; Upon booting via 'Boot Verbose' within Chameleon, tonnes of progression - until hitting the skids at 'Still waiting for root device'... How I got here; (and due to the obvious 'Uber-N00b-ality' of me, myself and I - I have listed every single exact step that has led to this current knotted-ball-of-string...) - Began by downloading 'myHack v3.3.1' onto my iMac, running Snow Leopard v10.6.8 - Within an Admin Account, placed a verified Lion v10.7.2 'InstallESD.dmg' onto the Desktop - Formatted a 16GB USB Stick as directed, ran myHack v3.3.1 and wrapped up the creation of the USB Installer, using the correct and already unzipped Bootpack for my Low-Res D630 - Configured my D630's BIOS Settings, (version A19), as directed - Booted from the newly minted OS X v10.7.2 USB Installer, and managed to progress to the 'Choose Langauge' prompt found within the OS X Installer - Selected Disk Utility from the Menu Bar and formatted the internal 80GB SATA HDD of the D630, as a 'Mac OS Extended (Journaled)' HDD, committing to the Erase with a write of zeros across the 'Drive, just to be safe-and-sure - Upon format completion, just to double-down with extra safety, selected Partition / 1 Partition / and within the 'Options' ensured that 'GUID Partition Table' was selected - Suitably convinced I now had a 'clean-tight-and-tidy' HDD, I then let the USB Installer off-of-the-chain and the installation of 10.7.2 went off without a hitch - As directed at the 'Generic Kexts' prompt, I successfully chose 'Use My Own' and located the appropriate 'Extra Folder' created by the initially downloaded and unzipped Bootpack file from Step 3, above - I hit 'yes' to every prompt regarding any extensions of concern, and once resolved - commenced to reboot from the internal 80GB HDD This is when the first issue arose... I couldn't get to the Create Account / Registration Process, unless I chose 'Boot Ignore Caches' from within Chameleon. Nevertheless, once this boot option was selected, I was able to complete the Create Account step, and proceed straight into a fresh, clean and new, Lion Desktop. By this point, I was feeling very, VERY impressed - at just how far the Hackintosh Community - as a collective - had made this entire process to this point, so easy for me. I really did feel as though I was standing on the shoulders of unquestioned greatness! Next move, obviously straight into EDP. - I configured my new Lion environment's Ethernet for all-systems-go, and immediately downloaded the 'Install_EDP_v6.zip' file - onto my new Lion Desktop - As directed, double-clicked on the unzipped 'Install EDP' icon and entered my sudo password at the prompt waiting within the Terminal Window - Without any hesitation, the installation concluded and with a selection of immediate launch, a fresh window opened - revealing the minty-lushness of the beautiful work put together by all of you Gurus, otherwise known as EDPv6. Simply breath-taking, gorgeous work. Stunning visuals, amazing layout - incredible vision! However, this is where the real problems began... - Instructions made it clear to 'refresh' the model database within EDP, so before anything else I updated via the 'Config Button' and chose 'Download EDP Updates' - Once complete, I then headed back to the 'EDP Button' and hit the 'Build from model database', but the list refused to reveal ANY systems at all, within the drop-down list - I re-attempted a 'Download EDP Updates', but still no joy within the drop-down for selecting ANY system at all... Attacking the Forums, I discovered a few others were having the same issues - EDP v5/6 refusing to populate the drop-down. Within this Topic - https://osxlatitude.com/index.php?/topic/7126-cannot-download-bootpack-d630-x3100-low-res-missing/?hl=d630i_lores_10.7.5_tuned_pack&do=findComment&comment=42126 - somebody was having the same problem as me, and somebody else, gave the option of downloading the files for my D630, that EDP needed as a 'Ready-to-Go-Pack' So, needless to say - I grabbed the same Pack as well. Upon downloading it, I noted that it said that it was for v10.7.5 - not v10.7.2 - and this is where everything starting to go all-fuzzy-and-wild... Indecision, turmoil, uncertainty - what to do? You guessed it - because I was in a new Lion v10.7.2 Desktop - (and not v10.7.5) - I stupidly moved the 'MacOSXUpdCombo10.7.5.dmg' over - and applied it. Now that the UpdateCombo for v10.7.5 has had it way with this installation, at the Chameleon boot-loader - immaterial of whether I choose 'Boot Ignore Caches' or not - there's simply no more OS X Login Prompt for me... Selecting 'Boot verbose' instead - as stated at the beginning / at the top - progresses until 'Still waiting for root device'... So, there it is - I haven't managed to locate a solution within the Forums - so Help(?), and go easy on an Uber-N00b! Thanks in advance.
 -
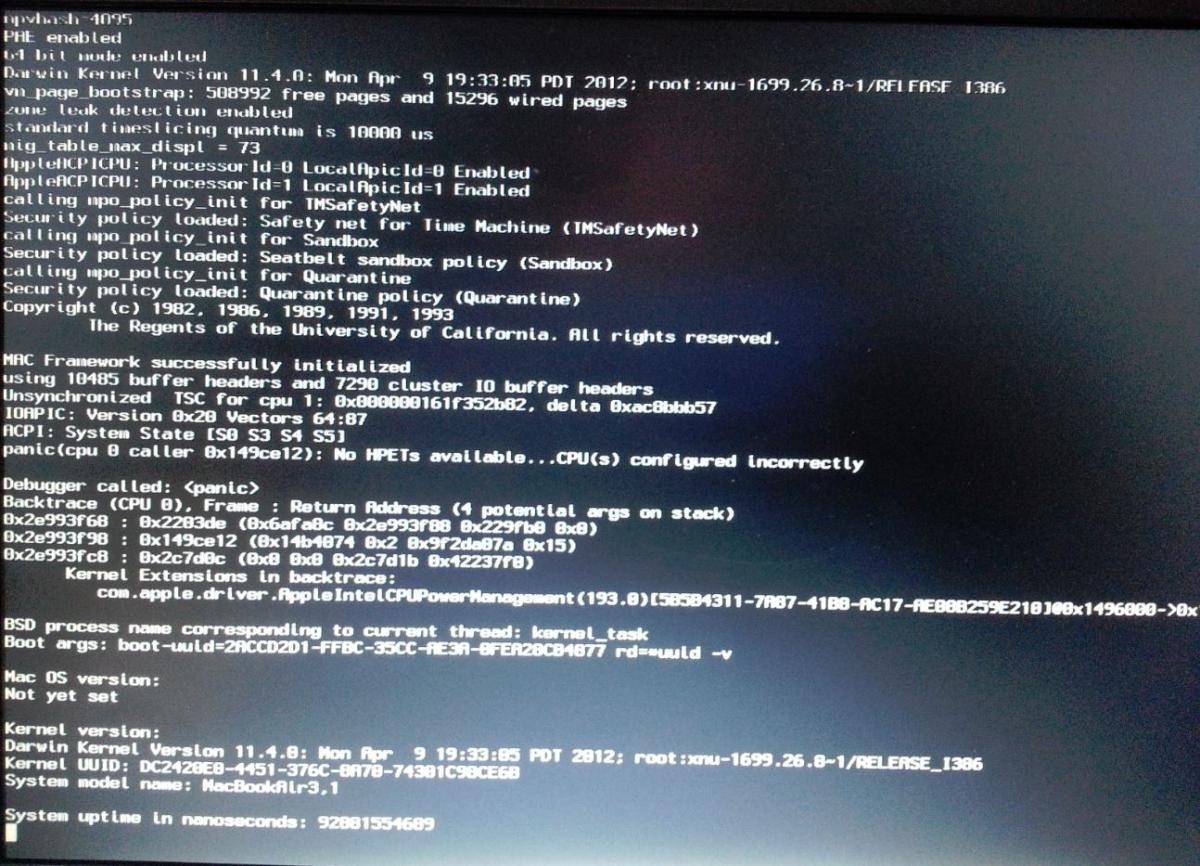
Hello OSXlatitude community- Newbie here. Got a cheap D430 from a craiglist - Found your site and decided to try it out as my first Mac (physical). After 2 weeks of frustration, not getting anywhere so hope someone else there can help! Issue- Cannot get to initial setup screen Steps I followed 1. Configured my bios per https://osxlatitude.com/index.php?/topic/2036-bios-settings-d430/ 2. downloaded myhack 3.3.1 3. downloaded bootback for 10.7 (confirmed my bios shows cpu is intel core duo) http://www.osxlatitude.com/packs/Dell/Dell_Latitude_D4x0-lion.zip 4. Created boot usb using the above along with OSX 10.7.5 image (also tried 10.7.4, 10.7.2 and 10.7) 5. Replaced /extra folder with the contents from bootpack 6. Installed OSX using usb stick, selected to install extra from "my own" and selected the extra folder on USB stick 7. rebooted, but got kernel panic screen 8. tried replacing extra folder with one I found in this thread and re-ran myhack / reapplied extra https://osxlatitude.com/index.php?/topic/2843-d430-kernel-panic-because-kexts-fail-to-load/?hl=%2Bd430+%2Bkernel+%2Bpanic 9. reboot, getting this screen. (just stays there forever) 10. It does boot to setup screen if I use safe option (-x), but then network/mouse/kb is not found. Any help would be appreciated.
-
OS X 10.7.3 is working well on Dell Inspiron 6400. Everything works except sleep. I could not test sleep as my power button is broken and I use the MediaDirect button to start my laptop. I have not used any DSDT or injection. I have not had a single KP so far. Please note that upgrading to 10.7.5 and above will break the OS, it will boot to a blank screen. if you patch the AppleIntegratedFrameBuffer.kext, it will panic as the patched version is not supported beyond 10.7.4. To get it to work on 10.7.4, you need to patch AppleACPIPlatform.kext with the one from Snow leopard 10.6.8 and also patch the AppleIntegratedFrameBuffer.kext. Since I was happy with the performance of 10.7.3, I decided to stay on this version. All the native OS X softwares like Aperture, iWork etc and third party softwares like Adobe products, office for Mac etc. run without any issue. My Inspiron 6400 configuration is as follows: Intel Core2Duo 7200 with 64bit support; Intel ICH7 family chipset optimized by Dell Onboard Intel 945GMA video driver with 64MB shared memory; (1680x1050 full resolution, QE/GL everything works including mirror) : patched with AppleIntegratedFrameBuffer.kext (version 1.4.20.28) 4GB 667Mhz DDR2 RAM, RICOH R5C822 memory card reader (in-built), (works well with patched VooDooSDHC.kext) 2-port UBS 3.0 ASMedia 1042 Express Card in ExpressCard slot; (works with native AppleUSBHub.kext and patched CallDigitUSBxHCI.kext), CallDigitFastO.kext is optional but recommended) 500GB SATA HDD; Onboard Broadcom 440family ethernet; (works with AppleBCM400.kext) Broadcom BCM4322 mini-wifi card, (works Out of the Box, no need for any additional kexts) Sigma Tel Stac9200 onboard Audio Device : (Works with VooDooHDA (version used 2.7.2) Trumobile 350 bluetooth card : (Works OOB) Slot loading CDwriter/DVD ROM I will attach a list of kexts that I have used and also the Extra folder which includes my edited chameleon.plist and smbios.plist. For the patched kexts, you may need to patch with your Dev-id and Ven-id of your hardware. Prerequisite: You need to find a working OS X Snow Leopard machine to create a bootable USB stick of OS X Lion patched with AppleIntegratedFrameBuffer.kext from here. Any windows software like MacDrive to access OS X partiton from windows to edit the Extension folder after fist install. You will need to edit the info.plist of some of the kexts to insert the Ven-id and Dev-id of your hardware for full compatibility. I can post a full tutorial on request. I am multiboot (chameleon, stolen and rebranded)ing with Lion/Linux/Windows 8/Windows 7 and Windows XP from a single drive. Regards OS Lion on Inspiron 6400.zip
-
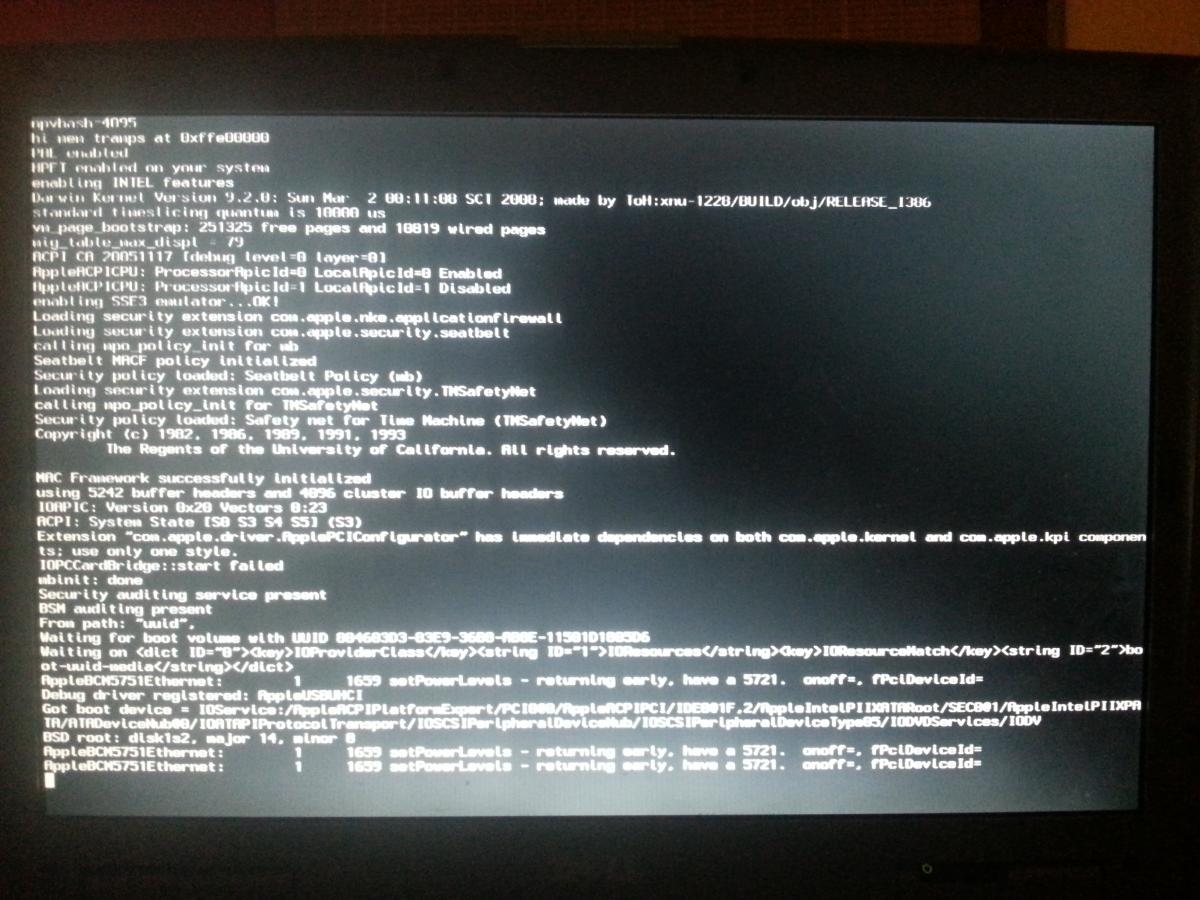
Hi there, I got a Dell Precision M 70: CPU: Pentium M Dothan 2.13GHz FSB 533MHz Motherboard: chipset Intel 915 PM with 2 gig Ram Graphics: NVIDIA Quadro FX Go1400 with 512MB Audio: Sigmatel 9751 Broadcom NetXtreme 57XX Gigabit Lan (does not work on Mac OS X, IP address is 0.0.0.0) Broadcom BCM1450 DWI wireless adapter, instead of the original Intel Wireless 2200BG adapter, since no Internet access was possible with it. The only restriction by the Broadcom 1450 is that it only works with a Wep encryption. I´m running an Mac OS X 10.5.2 on it, which I got (about 5 years ago) from a friend via USB drive and CarbonCopyCloner, because Kalyway 10.5.2 Install hung up after 1 min caused by the BCM5751E Ethernet: " 1659 setPowerLevels - returning early have a 5721onoff = fPciDeviceceld =" while a DVD iFail 10.5.5 installs Leopard, but then kernel panics while booting. We blessed the system in the terminal by means of a bootefi folder from the network in which all the relevant files / folders - usr - standalone - i386 - boot with the files boot0 , boot_V8 , boot1h , boot1u , bootefi , cdboot , chain0 and folders guid and mbr were included by the following instructions: - Easy installation --- For Single-Booting systems --- Copy the folder "bootefi" and all included files/folders to the root directory of either a USB Thumb drive, or a USB hard drive, click on the Utilities menu and select "Terminal". Then enter the following commands: sudo -s (then enter your root password) cd /Volumes/usbvolname/bootefi where usbvolname is the volume name of the USB Thumb drive, USB hard drive, or second internal drive where the "bootefi" folder was copied to. ./bootefi.sh installvolumename where installvolumename is the volume name of the drive that OS X was installed to. The installvolumename should be surrounded by double quotes. Example: ./bootefi.sh "MacHD" or ./bootefi.sh "Macintosh HD" I have the M 70 dug out again after a long time of abstinence, but now the hdd is causing problems ... pending sectors etc , so I have the current system 10.5.2 cloned via CCC to a new hard disk. Unfortunately, the above method doesn´t work any more, it hang up by a blinking cursor L However, since iTunes is on version 9, Firefox on version 2 and Safari on 3.1, so they are no longer state of the art. I can´t receive for example e-mails , etc updates are not availible cause I would need to have 10.6.8 installed to do so. Therefore I would rather prefer to change to something more up to date like Snow Leopard 10.6.8, or if it is possible even Lion or Mountain Lion. Has anyone ever attempt that on an ol ' M 70? What do I have to care for ? Does anyone have any instructions for me? Thank you for answering please excuse my bad English Cheers
-
Hey everyone, I have an Asus K56cb i'm trying to put Mountain Lion on. Full specs here: http://www.asus.com/Notebooks_Ultrabooks/K56CB/ I've done a lot of research it seems like all the hardware will work in my laptop with the proper kexts and i've ordered an Atheros AR5B91. but i've found two different approaches for my laptop. I'm not sure which one is best. this: https://osxlatitude.com/index.php?/topic/2676-asus-k46ca-k46cm-k56ca-k56cm-tutorial-mountain-lion-1082/ or this: http://ukrainianiphone.com/forum/index.php?showtopic=24683 (Google translated needed unless you speak Russian/Ukrainian) Thanks for the help !
-
Hey Guys Have Dell D630 with Lion. Recently updated Lion with Software Updater which resulted in combi update to OS - now says it is at 10.7.5 (11G63) . After it completes the update it immediately reboots and can't come back up because some OS things have changed. Booted with MyHack USB and installed D630 bootpack on OS on hard disk - reboot and system starts up fine using the D630 bootpack Extra. Now run EDP (r762) and select D630 default settings - everything completes normally (see log attached). When I reboot the system it starts to boot up and then hangs just after - ACPI: System State [s0 S3 S4 S5] PFM64 (36 CPU) 0xf10000000, 0xf0000000 [PCI Configuration Begins] D630 is standard NVidia machine with Dell DW1390 Airport Wifi card. Hope you can point me in the right direction. arcaman6 edplog.txt
-
Hello everyone, I have a Dell Inspiron 15 (N5050) with i3 processor. It has IDT 92HD87B1 sound card which probably can be used with VoodooHDA. I would like to run Mac OS X Mavericks 10.9. I am also fine with Mac OS X Mountain Lion 10.8.4 or 10.8.5. It has an Intel HD Graphics 3000 graphics card. I need the WIndows preinstalled on this machine. Will it work with MBR partition? Thanks vgupta
-
Updated 03 october 2013 - Fixed correct links to files - Latest PDF version 2.4 with date 03 october 2013 Updated 02 october 2013 - Celebrating 1 year Mountain Lion tutorial 780 - Added update 10.8.5 steps in the document - Videofix must be done manually - Latest PDF version 2.4 with date 02 october 2013 Updated 16 June 2013 - New Install780.zip with Old VoodooHDA.kext because of audio issues after reboot Updated 08 June 2013 - Added update 10.8.4 steps in the document - Added new zip file Videofix1084.zip for update 10.8.4 - New Install780.zip with new VoodooHDA.kext - Latest PDF version 2.3 with date 08 June 2013 Updated 03 June 2013 - Text changes in Chapters 6.11, 13.2 and 15.7 - Added extra text in chapter 15 about skipping parts, depends on wich ML version you are using - Latest PDF version 2.2 with date 03 June 2013 Updated 19 April 2013 - Added update 10.8.3 steps in the document - Added new zip file Videofix1083.zip for update 10.8.3 - Latest PDF version 2.1 with date 19 April 2013 Updated 27 Februari 2013 - Added version number of PDF Document and date stamp of modification - Latest PDF version 2.0 with date 27 Februari 2013 Updated 18 december 2012 - Some text changes in Chapter 13 about kext utility.app. - Thks goes to Pingu for the changes. Updated 22 october 2012 - fixed correct links to Chapters 11. - Some text changes in Chapter 7,10,11 and 15. - Thks goes to julianarevalo for the changes. Updated 08 october 2012 - fixed correct links to Chapters. - Add Numbers to Chapters. - Some text changes. - New uploaded PDF File. Run OSX Mountain Lion on a Dell Optiplex 780 This tutorial will describe the steps to install Mountain Lion on a Dell Optiplex 780 (this will also works on a 760). The installation goes to the latest update 10.8.5, and when there is a new update i will change the tutorial as soon as possible. If you find any mistakes or have something to improve then please send me a PM and i will update the tutorial. You can also see my configuration on the OSX86 Wiki Project Page. I have also included the PDF file of the guide and the zip files to install Mountain Lion. A special thanks goes to Brian from Tech Erra for using parts of their tutorial. I am from The Netherlands so sorry for my bad English. 1. Credits/Sources Everything OSx86-related is a collaborative effort amongst people who enjoy doing these things, as well as those of us who enjoy tweaking and experimenting with things. Below are a list of sources used to compile this guide: Tech Erra OSX86 Wiki InsanelyMac OSX86.net Forum member Pingu from Germany for helping me out with the text changes. And all other forum members who have posted in my topic and helping out the community. 2. Requirements Here are the requirements: A Dell Optiplex 780 – This is necessary to install mountain lion for this tutorial A copy of Mac OS X – This can be in the form of an existing hackintosh, a virtual machine within Windows or Linux, or even a regular Mac. If you don’t have any of these things, then find someone who can help you out for a while. I prefer using a hackintosh with OSX Lion. Using an already working copy of Mac OS X either in a VM or a native hackintosh install is HIGHLY recommended. A 8GB USB flash drive (or larger) – We’ll be copying the files to the drive appropriately, so make sure that you have a flash drive with enough storage space (8GB or larger). A copy of Mountain Lion 10.8 GM – If you don’t have a Mac Developer Account, then you’ll find torrents of 10.8 around the web. 30-60 minutes of time – Depending on how tech-savvy you are, this may be quick, or it may take a while. An SSD or HDD to install 10.8 to – For me, I used a 160GB partition to install 10.8 to. An PCI Express Video Card – For use with QE and CI Highly recommended. I use a Ati Radeon HD5450 512MB but 1GB or 2GB also works. Boot780.zip – This ZIP file contains everything that you need to get your flash drive properly prepared. Install780.zip – This ZIP file contains everything that you need to get your Dell Optiplex Hardware to work with Mountain Lion OSX. Videofix1083.zip – This ZIP file contains kext files for the videofix in 10.8.3( see chapter 15). Videofix1084.zip – This ZIP file contains kext files for the videofix in 10.8.4( see chapter 16). Note: The files for number 8 Boot780.zip contains the following:FakeSMC.kext NullCPUPowerManagement.kext EliottForceLegacyRTC.kext OSInstall (Not used for my configuration because I use the entire hard disk) OSInstall.mpkg (Not used for my configuration because I use the entire hard disk) Chameleon_2.1svn_r1820_trunk_10.8.pkg ShowHiddenFiles.app Org.Chameleon.Boot.plist The first 3.kext files will fix most kernel panics and bios reset that you might experience while booting. The 2 OSInstall files will allow you to install 10.8 onto an MBR-partitioned drive. Lastly, the Chameleon package is the bootloader that we’ll be using, and has been specifically compiled for use with 10.8. Note: The files for number 9 Install780.zip contains the following: AMDRadeonAccelerator.kext AppelIntelE1000e.kext ATI5000Injector.kext EFIStudio-1.1.app EliottForceLegacyRTC.kext FakeSMC.kext Kext Utility.app NullCPUPowerManagement.kext VoodooHDA.kext Note: The files for number 10 and 11 Videofix1083.zip and Videofix1084.zip contains the following:AMDRadeonAccelerator.kext ATI5000Controller.kext 3. My Specs My installation was successfully done on an Dell Optiplex 780 Desktop computer with the following specs. NOTE: A PCI video card is recommended to use the full potential of OS of Mountain Lion because the on board video card doesn't support QE/CI. Intel Core 2 Duo E7500 @ 2.93GHz 4GB DDR3 1333Mhz RAM Western Digital 160GB HDD ATI RADEON HD5450 512MB Intel WG82567LM onboard network Bluetooth USB Cambridge silicon radio (works OOB) ADI 1984A HDA audio onboard HP W2207h Monitor 1680×1050 display Apple Magic Trackpad 4. Preparing your SSD or HDD for install on a MBR-partitioned drive If you intent to install OSX86 Mountain Lion On the same Hard disk as your windows follow the steps below. For a clean install on a new formatted hard disk go to Chapter 5. If you’re in Windows 7, you can easily make a new partition on an SSD or HDD via the Disk Managementprogram. Start>Run (or Windows key on your keyboard plus R). diskmgmt.msc (press enter after typing that) Find your drive, right-click on it, and go to Shrink Volume. Wait for it to calculate the amount of space you can make your partition, and enter in your amount (for an exact GB amount, multiple your desired amount of GB times 1024, so a 20GB partition would be 20480MB). Let it make your partition. It will show up as unallocated space. Format the new unallocated space as NTFS and give it a label (mine was ML). Done! 5. Formatting your USB drive Start OSX Lion or Snow Leopard to prepare your USB Flash drive Make sure to backup the files that are already on your USB flash drive via Disk Utility in Mac OS X: Extract both zip files (Boot780 and Install780) to your Mac OS x desktop Put USB drive in your Mac Open up Disk Utility. Click on your USB drive in the left sidebar. Click on the Erase tab in the middle. Choose “Mac OS X Extended (Journaled)†as the format, and give your drive a label (like “ML USBâ€). Click on the Erase… button. Done! Leave Disk Utility open, as you’ll need it later. 6. Preparing your USB drive with 10.8 This part is the most time consuming. Using a USB 3.0 flash drive will help things out quite a bit. Mount the DMG for Mountain Lion (will be called Mac OS X Install ESD on your desktop). Show hidden files by running the app ShowHiddenFiles in the folder Boot780 on your desktop. Click on Show Special Files (leave the app ShowHiddenFiles open we need this later). In the folder MAC OS X Install ESD right click on Basesystem.dmg and choose “ open with DiskImageMounter(default) Switch back to Disk Utility. Click on your flash drive in the left sidebar. Click on the Restore button in the middle area. For the source, drag “Mac OS X Base System†from your desktop into the empty Source box. For the destination, drag your USB drive from your desktop into the empty Destination box. Click on “Restore†and type your password. This process will take anywhere from 5 to 10 minutes depending on the speed of your flash drive. When it’s finished, you’ll end up with 2 “Mac OS X Base System†drives on your desktop. Figure out which one is your USB copy (you can right-click > Get Info and use the capacity as an indicator), and rename it to MLINSTALLUSB, after that open it up. Once you’ve opened up MLINSTALLUSB (the one that’s your flash drive), go to /System/Installation. You’ll see a symlink for Packages. Remove it. Create a folder called Packages. Open up a window of the original Mac OS X Install ESD drive and copy everything within Packages to the empty Packages folder on your USB drive. Done! 10.8 is now installed onto your USB drive. Now, we need to modify some of the files on it so that it will properly bootup on a PC. 7. Adding the fixed 10.8 files to the USB drive Now, we need to modify some of the files on your USB drive so that it will properly bootup on your PC. Open the folder “Boot780†on your Mac OS X desktop. Copy 2 .kext files (FakeSMC.kext, NullCPUPowerManagement.kext) to /System/Library/Extensions on your flash drive. NOTE: The 2 OSInstall files will allow you to install 10.8 onto an MBR-partitioned drive, if you install it on the entire hard disk skip step 3 and 4 an go further with step 5. Copy the OSInstall file to /System/Library/PrivateFrameworks/Install.framework/Frameworks/OSInstall.framework/Versions/A/, overwriting the file that’s already there. Copy the OSInstall.mpkg file to /System/Installation/Packages/, overwriting the file that’s already there. Run the Chameleon installation package. Make sure to install this package to your flash drive, and customize the installation so that you have an SMBIOS that best relates to the CPU that’s on your computer (leave the default options checked; just check your SMBIOS imac9.1 for the Dell Optiplex 780). Copy now 3 kext files (FakeSMC.kext, NullCPUPowerManagement.kext, EliottForceLegacyRTC.kext) from folder Boot780 to /extra/extensions on your flash drive we need this for Chapter 11, Booting 10.8! . Copy mach_kernel from the root of the Mac OS X Install ESD volume and paste it into the root of your flash drive. Lastly, copy extracted folders (Boot780 and Install780) which you have extracted earlier from the zip files to the root of your flash drive. You’ll need this in Chapter 11. Eject all mounted drives (this is not necessary) Go to ShowHiddenFiles and click hide special files after that close program. Eject your USB Drive Done ! 8. Bios Settings Dell Optiplex 780 Before we boot from the Dell Optiplex we need to optimize the bios for Mountain Lion. Start your Dell Optiplex and press F2 to get into the Bios. Go to Boot Sequence and choose on the right for USB Device and click the up arrow so that the USB Device is on top, click on apply to make the setting. Go then to Drives - Sata Operation and choose on the right for Raid Autodetect/AHCI click again on apply and choose exit, now the Bios is ready for installing Mountain Lion. 9. Installing 10.8 from your USB drive Time for the fun stuff! We’ll now boot from your USB drive and install 10.8 onto the partition or Hard Drive. Boot from your USB drive. Once in Chameleon, highlight your flash drive and add -v to the end, then push enter. You’ll see a lot of text fly by be patience startup may take a while. Once you get into the installer (assuming your computer didn’t freeze, restart itself, or get a kernel panic), choose your partition or Hard Disk to install 10.8 to. NOTE : when you install it on a partition skip step 5 - 10 see Chapter 4. (If you install Mountain Lion on the entire Hard disk follow the steps below ) In the installer open up Disk Utility. Click on your Hard Drive in the left sidebar. Click on the Erase tab in the middle. Choose “Mac OS X Extended (Journaled)†as the format, and give your drive a label (like “ML OSXâ€). Click on the Erase… button. Done close Disk Utility and go further with the installation process. The installation process will take about 5 to 15 minutes, depending on the speed of both your USB drive and your SSD or HDD. When finished, boot back into your already working copy of Mac OS X. 10. Booting 10.8! Now that everything is finally prepared, you can go ahead and boot into Mountain Lion. Boot from your USB drive again your computer won't still be able to boot from the hard drive. Once in Chameleon, highlight your partition that has 10.8 installed. Add -v to it and push enter. You’ll see a lot of text fly by again be patience startup will take a while. You’ll eventually get to the setup screens for 10.8. Go through that process to setup 10.8. Choose by "How Do You Connect" for "My Computer Does Not Connect to the Internet" we will fix this later in Chapter 13, go further with the installation process. The installation process will take about 25 minutes, depending on the speed of both your USB drive and your SSD or HDD. Done! Proceed to Chapter 11 to install the bootloader to your partition so that you don’t have to rely on using your USB drive to bootup. 11. Installing the bootloader to 10.8Once in 10.8 go to finder – preferences –General and choose in show these items on the desktop for - Hard Disk - External Disk - CD Go also to System Preferences – Security& Privacy click on the lock on the left corner and type your password Choose by “Allow applications downloaded from: for “Anywhere – Allow from anywhere Close system preferences. Copy the folders "Boot780" and "Install780" from your USB Device to your Mac OS X desktop after that open up the Chameleon installation package in folder Boot780, and install Chameleon to your 10.8 partition (while choosing your SMBIOS imac9.1, just like before, This is similar to step 5 in Chapter 7.) . Done! 12. Copy org.chameleon.boot.plist to /extra Starting up Mac OS X for the first time on your Hackintosh can be a very tricky process, which often requires you to set special boot options through the use of boot flags. For those of you who don't know, boot flags are "arguments" (pieces of data that you enter) to change the way that your bootloader runs. The bootloader is the program that boots Mac OS X. Boot flags can set the boot options for Chameleon, and any other boot CD or bootloader for Hackintoshes. Read past the break to learn how to use boot flags. There are two ways to apply a boot flag: either by typing it into the bootloader before starting up Mac OS X, or by typing it into org.Chameleon.boot.plist, the settings file used by the bootloader. See also Chapter Common boot options for Chameleon. I have included a org.Chameleon.Boot.Plist for the Dell Optiplex 780 Open the folder “Boot780.†and copy org.chameleon.Boot.Plist Past org.chameleon.Boot.Plist to /extra on your Hard Disk 13. Install the Kext files for de Dell Optiplex 780 hardwareNow, we need to install some Kext files on your Hard Disk drive so that the hardware will work properly on your PC. Open the folder “Install780†and select the following Kext files - AMDRadeonAccelerator.kext - AppelIntelE1000e.kext - ATI5000Injector.kext - EliottForceLegacyRTC.kext - FakeSMC.kext - NullCPUPowerManagement.kext - VoodooHDA.kext Drag the Kext files (which are mentioned above) over "Kext utility.app" (contained in folder “Install780â€) and release the mouse Type your root password and the Kext files will be installed on your Hard disk. Reboot. Once in 10.8 go to System Preferences – Network There will be a message saying “Network device is detected†Choose apply if you want to use DHCP or give a IP Address if you use static IP. Click apply to make the setting active. 14. Update to 10.8.2Don't update thru Software Update download the combo update here Download from the apple site. Run the 10.8.2 combo update walk thru the steps. After installation there will be a message saying to restart your system DON’T RESTART. We will fix the video after the update, go to folder Install780 on your desktop. Drag the Kext files AMDRadeonAccelerator.kext and ATI5000Injector.kext to Kext Utility and type your password the files will be installed, after install reboot. Now reboot with -v. After Reboot go to about this Mac and check if the version is 10.8.2 The update is finished. 15. Update to 10.8.3 If your "Mac OS X Install ESD" contains already the newest ML Version you don't have to update the system and you can skip step 15.1 to 15.5. To check your current version go to "About this Mac". Don't update thru Software Update download the combo update here Download from the apple site. Unpack the Videofix1083.zip to your desktop. Run the 10.8.3 combo update walk thru the steps. After installation there will be a message saying to restart your system DON’T RESTART. Run the Chameleon installation package. Make sure to install this package to your Hard drive, and customize the installation so that you have an SMBIOS that best relates to the CPU that’s on your computer (leave the default options checked; just check your SMBIOS imac9.1 for the Dell Optiplex 780). We will also fix the video, go to folder Videofix1083 on your desktop. Drag the Kext files AMDRadeonAccelerator.kext and ATI5000Controller.kext from the Videofix1083 directory to Kext Utility (in folder Install780) and type your password the files will be installed, after install reboot. Now reboot with -v. After Reboot go to about this Mac and check if the version is 10.8.3 The update is finished. 16. Update to 10.8.4 If your "Mac OS X Install ESD" contains already the newest ML Version you don't have to update the system and you can skip step 15.1 to 15.5. To check your current version go to "About this Mac". Don't update thru Software Update download the combo update here Download from the apple site. Unpack the Videofix1084.zip to your desktop. Run the 10.8.4 combo update walk thru the steps. After installation there will be a message saying to restart your system DON’T RESTART. Run the Chameleon installation package. Make sure to install this package to your Hard drive, and customize the installation so that you have an SMBIOS that best relates to the CPU that’s on your computer (leave the default options checked; just check your SMBIOS imac9.1 for the Dell Optiplex 780). We will also fix the video, go to folder Videofix1084 on your desktop. Drag the Kext files AMDRadeonAccelerator.kext and ATI5000Controller.kext from the Videofix1084 directory to Kext Utility (in folder Install780) and type your password the files will be installed, after install reboot. Now reboot with -v. After Reboot go to about this Mac and check if the version is 10.8.4 The update is finished. 16. Update to 10.8.5 If your "Mac OS X Install ESD" contains already the newest ML Version you don't have to update the system and you can skip this step. To check your current version go to "About this Mac". Don't update thru Software Update download the combo update here Download from the apple site. Run the 10.8.5 combo update walk thru the steps. After installation there will be a message saying to restart your system DON’T RESTART. Run the Chameleon installation package. Make sure to install this package to your Hard drive, and customize the installation so that you have an SMBIOS that best relates to the CPU that’s on your computer (leave the default options checked; just check your SMBIOS imac9.1 for the Dell Optiplex 780). We will also fix the video, we will do it manually. Copy the Kext files AMDRadeonAccelerator.kext and ATI5000Controller.kext from system/library/extension to your desktop. Go to ATI5000Controller.kext and rightclick and choose Show Package Contents and open info.plist with textedit. Find <key>IOPCIMatch</key> and add your string for HD5450 ( HD5450 1GB the string is 0x68F91002 and for 512MB the string is 0x68E11002) <string>0x68F91002 0x68981002 0x68991002 0x68E01002 0x68E11002 0x68D81002 0x68C01002 0x68C11002 0x68D91002 0x68B81002 0x68B01002 0x68B11002 0x68A01002 0x68A11002 </string> Save and Exit Go to AMDRadeonAccelerator.kext and rightclick and choose Show Package Contents and open info.plist with textedit. 11. Find <key>AMDCedarGraphicsAccelerator</key> and then look for the first <key>IOPCIMatch</key> and add your string for HD5450 ( HD5450 1GB the string is 0x68F91002 and for 512MB the string is 0x68E11002) add <string>0x68F91002 0x68E01002</string> Save and Exit Install both kext files with Kext Utility Now reboot with -v. After Reboot go to about this Mac and check if the version is 10.8.4 The update is finished. 17. App store and iCloud doesn't work If AppStore and iCloud doesn't work follow the steps below. Open up EFI Studio in folder “Install780.†, select Ethernet, select Add Device. On the new window you will see a lot of numbers (Hex String) in the second row. Then clicked write to com.apple.boot.plist. Then go to /Library/Preferences/SystemConfiguration/apple.com.boot.plist and select the new key and string it added. Now you can add the Hex Strings to your org.chameleon.boot.plist(com.apple.boot.plist) see Chapter 12 which should be in root/extra folder. When you add it manually make sure it is in <key>device-properties</key> <string>Your Hex String here</string> arguments after that. Remove all network devices from System Preferences/Network. Delete in library>preferences>system configuration> NetworkInterfaces.plist file. Finally, Reboot. After reboot, go to System Preferences/Network add devices. Click (Ethernet) FIRST!! Then add the other adapters you use to connect to the internet or Bluetooth. Voila. App Store and iCloud now works. 18. If sound doesn’t work The HDMI from the Ati Radeon 5450 doesn’t work properly so we need to change this to Headphone, follow the step below to make sound work. Open System Preferences – Sound – Output – And choose for Headphones.19. Finished! You’ve successfully installed Mountain Lion OSX onto your Dell Optiplex 780. Boot780.zip Install780.zip run os x mountain lion 10.8.pdf Videofix1083.zip Videofix1084.zip
-
I'm trying for hours to get mac os lion orking on my dell D620, but every time i start my lion bootstick which i exactly did how it is said in the guide, the boot progress stops at different points while the boot up. I got the nVidia modell with the Intel® Core™2 Duo Processor T7500 ... please help me... SL worked very well, but now its kind of old so i wanted to try something new thanks
-
Hey guys- using the guide on osxlatitude, i got sleep working! the thing is that whenever i come out of it, my computer mouse just plain shuts down and won't run. Any ideas? I have I d830 intel gfx and the mouse is a ps/2 compatible one made by microsoft (no wonder it doesn't work). anyway, those are my specs and any help would be useful.
-
Hello there. I followed the guide to installing Mac OS X Lion on Dell Latitude D630 and right after loading everything from the Chameleon bootloader, I see a black screen with white writing on it showing a kernal panic: BCM5722D (setupDriver:920): MSI index on 1 panic(cpu 1 caller 0x2ccb0f): Kernal trap at 0x3624703a, type 14=page fault, registers: CR0: 0x8001003b, CR2: 0x00000000, CR3: 0x00100000, CR4: 0x00000660 EAX: 0x00000000, EBX: 0x0000085a, ECX: 0x00000000, EDX: 0x299cdffc CR2: 0x00000000, EBP: 0x2ff6bc58, ESI: 0x05eba800, EDI: 0x00000000 EFL: 0x00010246, EIP: 0x3624703a, CS: 0x00000008, DS: 0x00000010 Error code: 0x00000000 Debugger called: <panic> Backtrace (CPU 1), Frame : Return Address (4 potential args on stack) 0x2ff6ba98 : 0x22032e (0x6abf4c 0x2ff6bab8 0x229ef0 0x0) 0x2ff6bac8 : 0x2ccb0f (0x6b8488 0x3624703a 0xe 0x6b8431) 0x2ff6bb78 : 0x2e2e34 (0x2ff6bba0 0x2ff6bb88 0x2ff6bb98 0x5eba800) 0x2ff6bb98 : 0x3624703a (0xe 0xc0048 0x10 0x18000010) 0x2ff6bc58 : 0x3624861c (0x5eba800 0x0 0x4222 0x18000000) 0x2ff6bce8 : 0x36244e26 (0x5ee7a80 0x299cd000 0x1 0x0) 0x2ff6bd18 : 0x362eb798 (0x4222 0x5ee7a80 0x299cd000 0x1) 0x2ff6bda8 : 0x36296d22 (0x25232000 0x8086 0x4222 0x0) 0x2ff6be08 : 0x3623d828 (0x5dc2c00 0x8086 0x4222 0x0) 0x2ff6bea8 : 0x3623fd98 (0x5dc2c00 0x5dc2c00 0x0 0x5dc2c00) 0x2ff6bec8 : 0x647f1d (0x5dc2c00 0x5bb3e80 0x2ff6bef8 0x6064aa) 0x2ff6bf18 : 0x647c86 (0x5bb3e80 0x5dc2c00 0x5dc0480 0x2fb4d3b0) 0x2ff6bf68 : 0x648a7d (0x5bb3e80 0x5d52f80 0x0 0xffffffff 0x2ff6bf98 : 0x64a8a4 (0x5bb3e80 0x0 0x2ff6bfb8 0x1) 0x2ff6bfc8 : 0x2c5d0c (0x5d4fb90 0x0 0x2c5d1b 0x5ba5000) Kernel Extensions in backtrace: com.apple.driver.AirPortBrcm43224(500.36.11)[081ADA69-2E4E-4EB3-BDA3-1B5233BC5254 ]@0x36230000->0x363a7fff dependency: com.apple.iokit.IO80211Family(400.40)[41868296-83CF-41A4-813C-AB76C81DF1B7 ]@0x36182000 dependency: com.apple.iokit.IONetworkingFamily(2.0)[0D1D5E8F-C35E-4D3B-8A74-6D23BCDE48C6 ]@0x36086000 dependency: com.apple.iokit.IOPCIFamily(2.6.5)[371238D1-CD26-4E59-B860-D5CA04A2FA09 ]@0x2fb4b000 BSD process name corresponding to current thread: kernel_task Boot args: boot-uuid=47347ABD-AF7E-3EFA-9664-5C333F33BB48 rd=*uuid -v -v Mac OS version: Not yet set Kernel version: Darwin Kernel Version 11.0.0: Sat Jun 18 12:57:44 PDT 2011; root:xnu-1699.22.73~1/RELEASE_I386 Kernel UUID: F8596E5D-0966-3091-AA8D-6E11CA68386F System model name: MacBook3,1 System uptime in nanoseconds: 3266526966 Can you please help me? Thank you. P.S. I took a lot of time copying this. Just wanted to let you know .
-
Ok, so I have a Dell Latitude D620 with the nvidia graphics card and I got a copy of Mac Lion from app store Then downloaded the myHack tool. Installed the Lion to the 16 GB flash drive and installed the extras using the myHacks tool. Then I made sure my Bios is all good by looking at the other forum and everything checks out. Booted to USB and it loads the loader fine. When I press enter to continue the boot. it does its loading stuff but when all done it brings me to a black screen and my USB light went off. I been on this for hours.. Any help please would be appreciated. Thanks!
-
I am using 10.6.8 on D630 intel 1440x900 with a dell port replicator and an external monitor. Everything works fine except at random times the UI freezes completely. I had the same problem in Lion as well, on the same machine. I followed the EDP bootpack process to install 10.6.8. There is nothing in the logs but I have observed that this problem happens under certain conditions that I am listing below. Please feel free to add your observations and hopefully someone can pick a pattern and fix it. - It started happening after I installed Quicktime version 10.0. Recording a screencast in Quicktime is one of the surest way of triggering a UI freeze. - Editing large movies in iMovie'11 version 9.0 build 1073 can also trigger a freeze but not as often a recording in Quicktime does. - Viewing a content heavy page in Safari can sometimes trigger a freeze. Common culprit in all of the above is Quicktime so that might be it but I am not sure. If it is working well for you then please let me know what version of Quicktime of iMovie you are using. Thanks
-

Does DVI Port work with SL or Lion on D630 intel 1400x900?
lostvampire posted a topic in The Archive
Does the DVI port work for anyone running Snow Leopard or Lion on Dell D630 laptop in a dock? I can use the VGA port just fine but I cannot use the DVI port for another monitor. I have tried both - 10.6.8 as well as 10.7.5. Is there a fix for this?