Hervé
-
Posts
10071 -
Joined
-
Last visited
-
Days Won
569
Content Type
Profiles
Articles, News and Tips
Forums
Everything posted by Hervé
-
There is absolutely no need to patch the Haswell framebuffer memory size on Haswell mobile HD4x00. The only thing that needs patching is the HDMI connector if HDMI output is to be used (or system will freeze/crash). The other thing that may need patching is the cursor memory size (to be set to 9MB) if glitches are experienced. The correct settings required to obtain graphics acceleration on Haswell laptop with HD4200/4400/4600 graphics are: 1) use of Lilu + Whetvergreen kexts (WEG normally takes care of iGPU ACPI device renaming to IGPU). 2)injection of the following properties against iGPU@2 (i.e. location PciRoot(0x0)/Pci(0x2,0x0) in Device Properties section of the bootloader config): AAPL,ig-platform-id 0600260A DATA device-id 12040000 DATA 3) SMBIOS of MacBookAir6,2 or MacBookPro11,1 This being, said, please post: 1) your full systems hardware specs. Add them in your signature like most of us do, as expected. 2) a zipped copy of the OC or Clover EFI folder you're using. 3) the version of the bootloader you're using. 4) the target macOS version you try to install/run.
-

Dell Precision M6800: HDMI dummy = K4100M on internal display ?
Hervé replied to draskostar's topic in Precision M Series
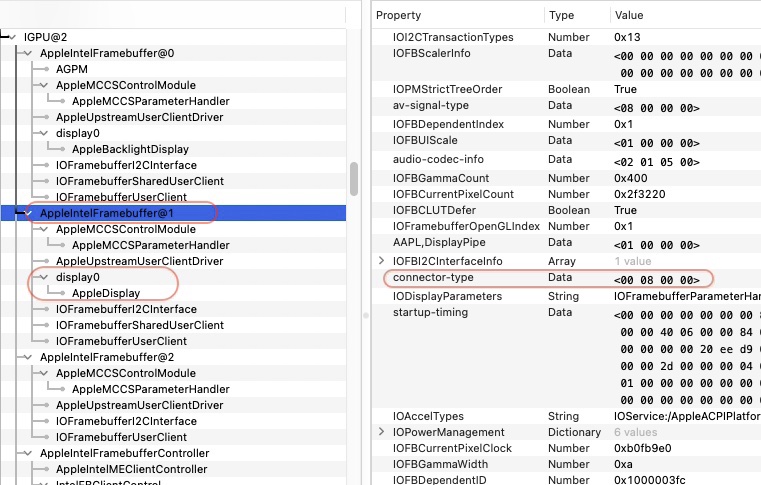
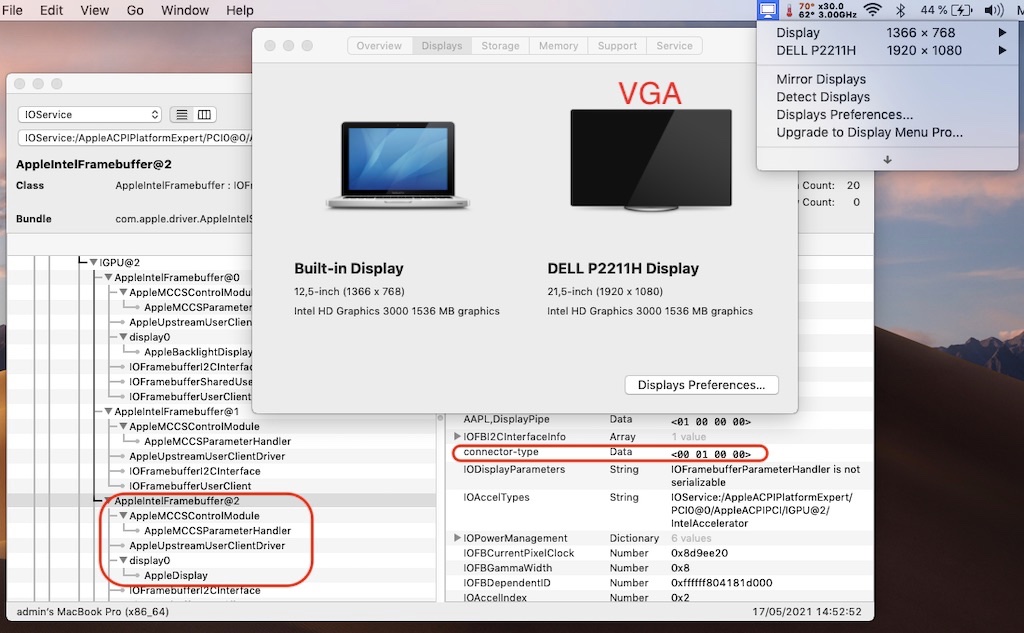
Look under IGPU@2 (HD4600 iGPU) and under GFX0@1 (nVidia dGPU). Again, a built-in LCD registers as AppleBacklightDisplay. External monitors register as AppleDisplay. For iGPUs, connected screens are listed under the various connectors (=output ports) con0/con1/con2/con3 (the various FB@x). For nVidia dGPUs, connected screens are listed under the various connectors (=output ports) A/B/C/D (the various NVDA,Display-A/B/C/D@x). Good thing that the dongle was dead cheap, eh? NB: I noticed you use SMBIOS MBP11,5 rather than MBP11,3. Strange choice given that former is fitted with an AMD dGPU when latter is fitted with an nVidia Kepler dGPU. I'd have opted for the latter. -
Dell Precision M6800: HDMI dummy = K4100M on internal display ?
Hervé replied to draskostar's topic in Precision M Series
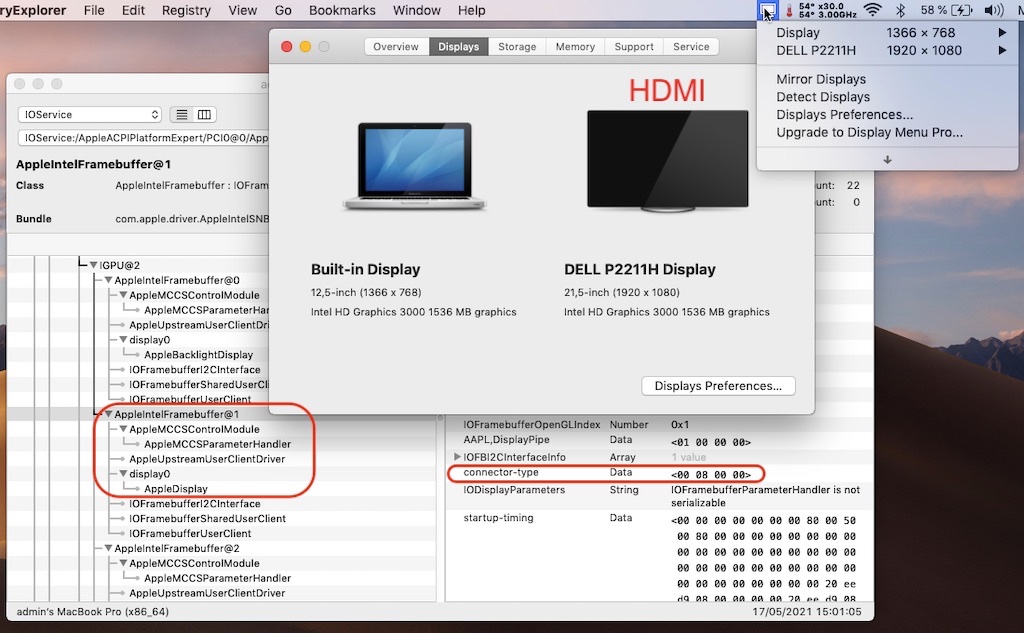
Check your IOReg; built-in LCD registers as an AppleBacklightDisplay... This kind of generic devices are not so much HDMI dummies but display simulators/virtual displays. I don't think it makes your nVidia K4100M prime GPU for the built-in LCD. To me, it's just a temporary cosmetic thingie whilst the virtual display device is connected. You just need to look at what SysInfo->GraphicsDisplays actually shows under the HD4600 iGPU: ain't that the built-in LCD??? What's listed under the nVidia dGPU ? As for display mirroring, remember that it mirrors the built-in LCD on external screens, not the other way round. -
Latitude 3470: No HDMI, no Ethernet, no webcam
Hervé replied to John Fernandes's topic in 3000 Series
Given that the Latitude 3470 is a Skylake platform, what you probably should not do is patch the connector pipe to 0x12 and flags to 87010000 (those are typical Haswell HD4x00 properties), so I would remove the associated properties injection from your OC config, keeping only the connector type patch/property. If Webcam is USB-internal, it will either work OOB or not at all so no-one will be able to help you further on that point. Re: audio, try and experiment by adding CodecCommander kext. You can Google for it or look for it in the various packs of my various guides. -
Latitude 3470: No HDMI, no Ethernet, no webcam
Hervé replied to John Fernandes's topic in 3000 Series
IOReg shows external monitor connected to con1 (as is the norm), not con2, and the connector-type is already set to HDMI type 00080000. Therefore all looks Ok on that front.
-
Precision 5510: degraded performance when running on mains
Hervé replied to Mac Unnamed's topic in The Archive
I've compared your DSDT with that of my Skylake E7270 and it's the same ACPI code throughout for AC and BATx devices. Try and adjust your OC config as follows: disable GPRW renaming disable SSDT-GPRW.aml -
So you know what to do then...
-
What's the exact model? It could be one of those unsupported ones. Also try the NVMEFix kext, you never know. https://dortania.github.io/Anti-Hackintosh-Buyers-Guide/Storage.html
-
SSDT-XOSI is unrelated; keep it. That table's purpose is to set OSYS to the highest possible Windows version equivalent and ensure things such as USB3 is enabled on older systems or that brightness keys will work.
-
Precision 5510: degraded performance when running on mains
Hervé replied to Mac Unnamed's topic in The Archive
Can you extract your DSDT with maciASL and post it? You run latest BIOS 1.16.1 of March 2021 when Jake ran with BIOS 1.15.0 when he posted his guide back in February. Out of interest, I'd try to downgrade BIOS, you never know... But, Jake may tune in on the matter and he'll be able to assist you a lot better given that I've no such laptop whilst he does. -
Ok, so Comet Lake platform with Intel UHD Graphics for 10th gen CPUs, i.e. UHD 620, not HD 520 which is a Skylake iGPU. Of course, you need to enable WhateverGreen to obtain graphics acceleration; don't disable it. Which version of OC are you using? Remove/disable XhciPortLimit quirk, that'll cause problems. I recommend you follow the Dortania's guidance for CML/UHD620 laptops as you're clearly missing some essential settings in your config. For instance, if you do inject the correct graphics framebuffer layout, you're not injecting fake id 0x3E9B as is expected. https://dortania.github.io/OpenCore-Install-Guide/config-laptop.plist/coffee-lake-plus.html
-
Tap to click isn't usually enabled by default. It can be enabled in the TrackPad PrefPane, if such PrefPane is offered to you of course. Many systems with I2C TrackPads do not get the TrackPad properly recognised as such.
-
Precision 5510: degraded performance when running on mains
Hervé replied to Mac Unnamed's topic in The Archive
Sounds more like some ACPI tuning is required around the battery and/or AC devices. Is it the pack from this guide? Skylake i5-6440HQ runs @2.60GHz with Turbo boost up to 3.50GHz, depending on core usage: 3.50GHz (1 core), 3.30GHz (2 cores), 3.10GHz (3 and 4 cores). -
Please post your system's specs; ideally add them in signature as expected.
-
Hi and welcome. All good things come to an end and so will Hackintoshing of Intel platforms. But we still have a wee while before the end of that road...
-
WWAN modules are kind of deprecated nowadays with the advent of shared SmartPhones connection through either Bluetooth, HotSpot or USB cables. Granted the wireless options require the appropriate wireless card in the Hack. This being said, 4G/LTE EM7305/DW5809e 100/50Mbps module (Qualcomm MDM9215 chipset) was reported to be working Ok (see @Crashdoom's posts) so look that up in mini-PCIe format and, if you can't find that (which you most probably won't), consider an M.2 adapter for the WWAN slot. EM5809e is a 3 x antennas model and so, will perfectly be usable in the E6230 (5 x antenna cables). https://source.sierrawireless.com/devices/em-series/em7305/#sthash.toR558bX.c5oN0X4a.dpbs
-
No Optimus with an AMD dGPU. It's an nVidia technology.
-
WEG user manual clearly stipulates that for Whiskey Lake UHD620, you must fake iGPU id 0x3EA5. Why don't you try that? You could also try CFL layout 0x3EA50009.
-
There's a lot of mixed results on these natively unsupported Atheros cards. Some cannot work due to country code set onto the card. Wisdom would dictate to replace your card by a fully supported Broadcom model.
-
Re: USB type-C, I suggest you run Hackintool app to try and generate the relevant USB ports mapping for your system. The app will generate kexts and SSDT-table; you can use either or but do not mix them. Re: Trackpad, afaik that's the best you will get with an I2C device Re: Sleep, you 1st need to disable hibernation (see our FAQ section on the matter) and make sure you have injected the correct properties for your USB ports (see above about Type-C ports) Re: Fn-F11/Fn-F12 brightness keys, you may manage to enable those with our documented SSDT patching. Details have been provided in my E7270 guides so look those up. Basically, you'll need to add SSDT-XOSI.aml + SSDT-BRT6.aml to your ACPI patched tables and add BRT6 + _OSI + OSID renaming to your bootloader config,
-
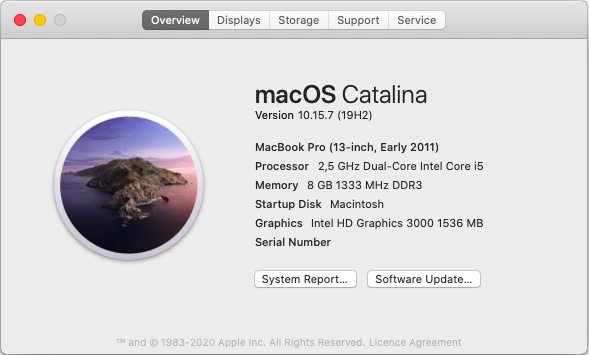
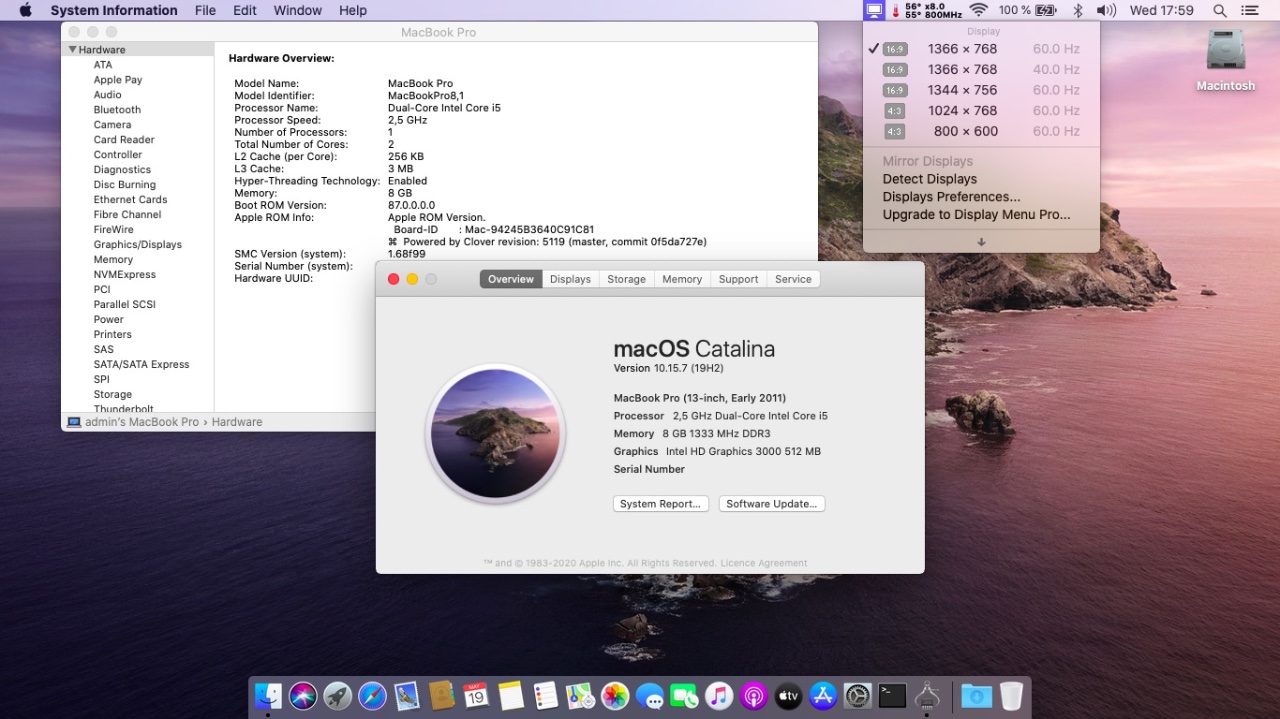
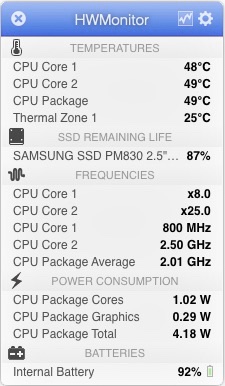
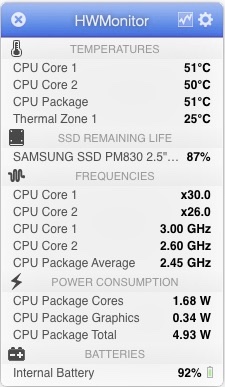
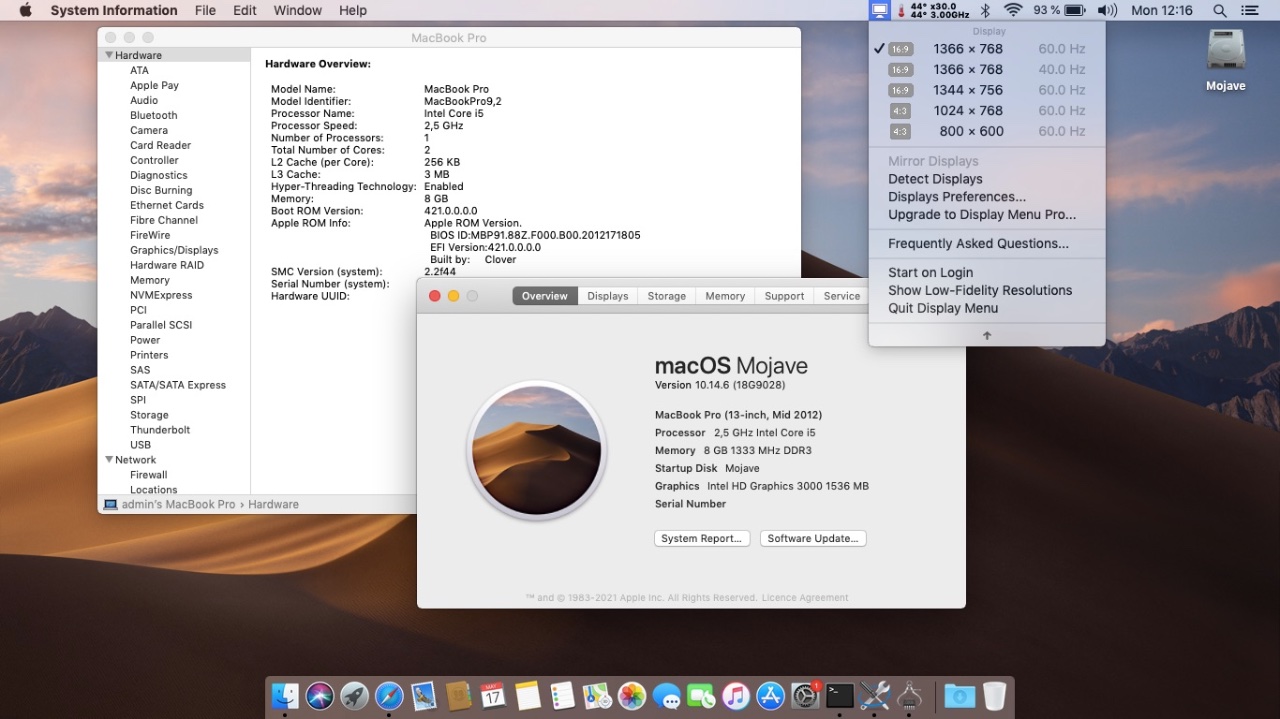
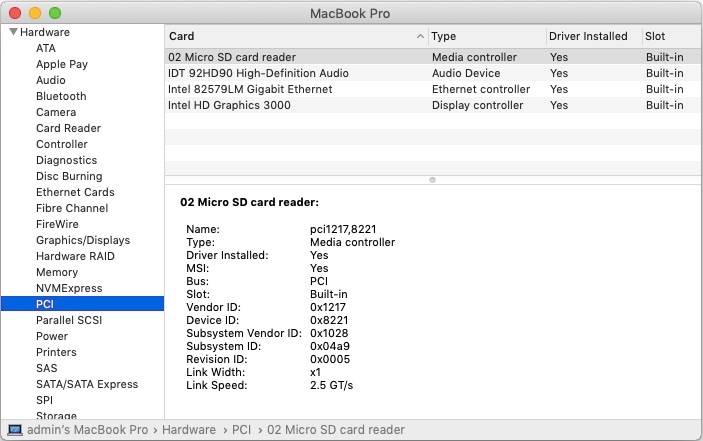
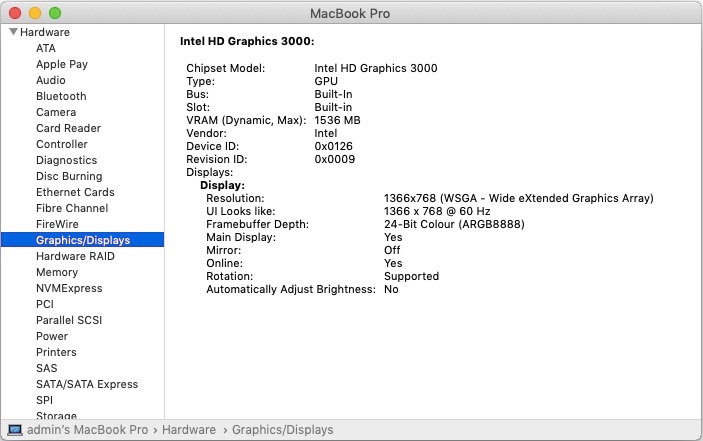
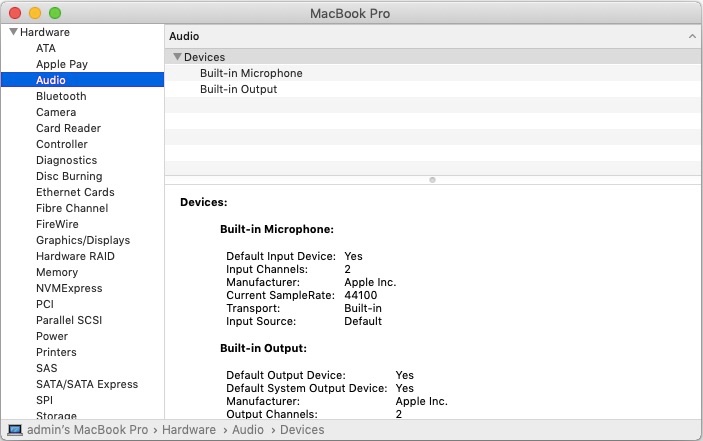
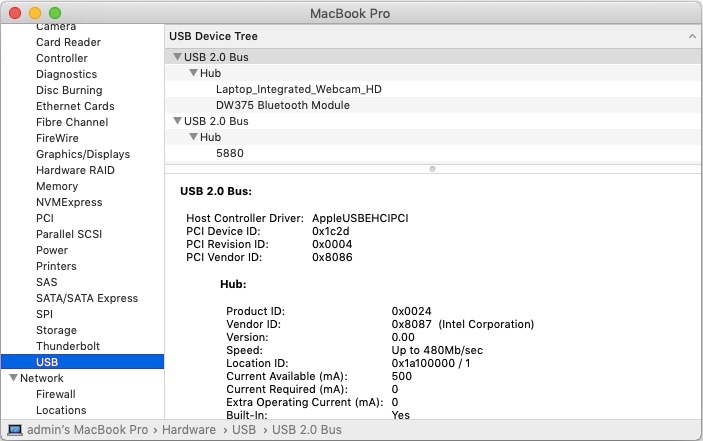
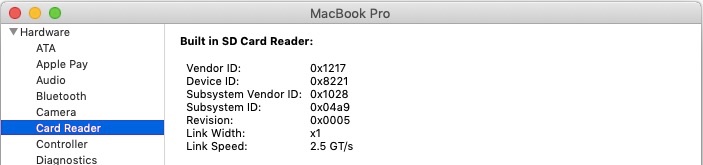
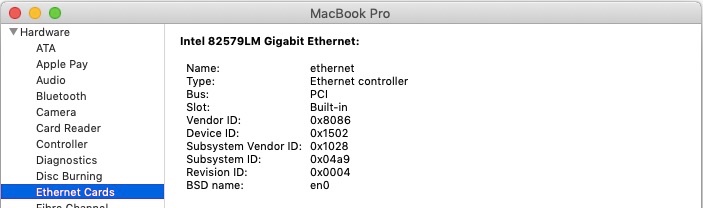
Target macOS release: Catalina 10.15.7 Proceed with the knowledge that, HD3000 lacking compatibility with Metal, only OpenGL graphics acceleration can be achieved. It works Ok but minor graphics defects and/or slightly degraded graphics performance may be noticeable at times. It's not totally as smooth as in High Sierra though entirely usable. Due to installation problems with Catalina versions post 10.15.3, this particular installation relies on dosdude1's Catalina patcher. As such SMBIOS is back to MacBookPro8,1. Also note that, despite several efforts, I never managed to boot the Catalina USB installer, whether native or patched. As such, this installation is one made directly from Mojave (or any other previous macOS version). Working: full graphics acceleration on HD3000 graphics (after specific tuning) HDMI output DVI + DP output through port replicator E-Port K07A002 VGA output (with SNB framebuffer patch) full audio, including jack microphone input and headset output (with AppleALC kext and layout-id 12) HDMI audio (with SNB framebuffer patch) built-in Gigabit Ethernet (with AppleIntelE1000e or IntelMausiEthernet kext) DW375 bluetooth OOB (on/off supported with Broadcom Controller Transport patch injected to FakeSMC kext) native SpeedStep at CPU multipliers x8/10/12/14/16/21/22/25 (with AICPUPM patch + generated CPUPM SSDT) Turbo boost to x32 3.2GHz at Turbo multipliers x26/27/28/29/30/31/32 system sleeps Ok through lid closure, power button, Fn-F1, Apple menu->Sleep and energy savings settings with hibernation mode set to 0 (sleep to RAM) and /var/vm/sleepimage file deleted. Wakes Ok through lid opening and power button wireless & bluetooth with any compatible card battery management and monitoring (with ACPIBatteryManager kext) SD card reader (with injection of compatibility with Apple's default device 14e4:16bc) integrated webcam OOB keyboard backlight control OOB (for backlit models) left combo eSATA/USB2.0 + right USB2.0 ports OOB ExpressCard slot OOB Not Working: N/A Not tested: SmartCard reader 1) Preparation from Mojave or earlier macOS version download latest Catalina installation package off the AppStore download latest DosDude1's patcher from his repository site run the patcher and point to your downloaded Catalina installation package, then choose "Install on this machine", not "Create a bootable Installer" You will then install Catalina either on your existing disk/partition or any specific partition that you may have prepared before whilst the patcher does its stuff, update Clover to a version that fully supports Catalina. You may use version r5119 for instance: Clover_r5119.pkg.zip once Clover is updated, launch Clover Configurator app and mount the freshly created EFI partition of the USB installer Clover Configurator.zip open this EFI partition and add the (unzipped) SSDT-EC table below to the EFI/Clover/ACPI/patched folder: SSDT-EC.aml.zip copy the (unzipped) Clover config below to the EFI/Clover folder, overwriting any existing one: Clover_config_E6220_MBP8,1_Cat.zip 2) Catalina installation once the 1st installation phase has completed, system will reboot boot the "macOS Install from..." temporary partition until you're left with only the final Catalina partition DosDude1's patcher does all the necessary patching so there's nothing more to do to get HD3000 supported 3) Catalina updates DosDude1's patcher only operates on Catalina full installation package. If you subsequently install Security Updates, you may not manage to reboot and re-use Catalina as you could find it difficult to repatch the updated installation. Proceed with than in mind if you must. NB: The Clover config provided in the pack contains HD3000 VRAM binary patches in disabled mode. Enable and patch HD3000 kext accordingly if you want to increase VRAM settings.
-
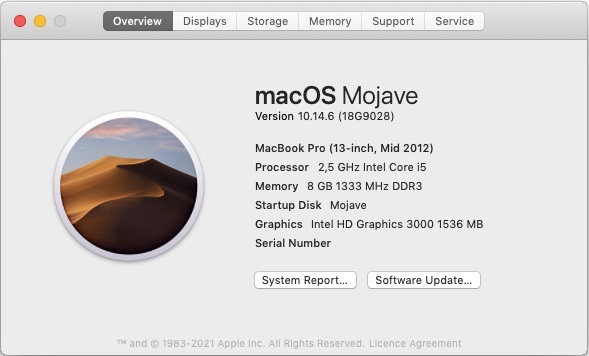
Target macOS release: Mojave 10.14.x (all versions) Proceed with the knowledge that, HD3000 lacking compatibility with Metal, only OpenGL graphics acceleration can be achieved. It works Ok but minor graphics defects and/or slightly degraded graphics performance may be noticeable at times. It's not totally as smooth as in High Sierra though entirely usable. SMBIOS switched from MacBookPro8,1 to MacBookPro9,2 in order to ensure full compatibility with Mojave. Working: full graphics acceleration on HD3000 graphics (after specific tuning) HDMI output DVI + DP output through port replicator E-Port K07A002 VGA output (with SNB framebuffer patch) full audio, including jack microphone input and headset output (with AppleALC kext and layout-id 12) HDMI audio (with SNB framebuffer patch) built-in Gigabit Ethernet (with AppleIntelE1000e or IntelMausiEthernet kext) DW375 bluetooth OOB (on/off supported with Broadcom Controller Transport patch injected to FakeSMC kext) native SpeedStep at CPU multipliers x8/10/12/14/16/21/22/25 (with AICPUPM patch + generated CPUPM SSDT) Turbo boost to x32 3.2GHz at Turbo multipliers x26/27/28/29/30/31/32 system sleeps Ok through lid closure, power button, Fn-F1, Apple menu->Sleep and energy savings settings with hibernation mode set to 0 (sleep to RAM) and /var/vm/sleepimage file deleted. Wakes Ok through lid opening and power button wireless & bluetooth with any compatible card battery management and monitoring (with ACPIBatteryManager kext) SD card reader (with injection of compatibility with Apple's default device 14e4:16bc) integrated webcam OOB keyboard backlight control OOB (for backlit models) left combo eSATA/USB2.0 + right USB2.0 ports OOB ExpressCard slot OOB Not Working: N/A Not tested: SmartCard reader 1) 10.14 USB installer creation Using a USB key of 8GB minimum, create a Mojave USB installer through the following Terminal command: sudo <path>/Install\ macOS\ Mojave.app/Contents/Resources/createinstallmedia --volume /Volumes/<USB key> where: <path> = location of Mojave installation package (eg: /Applications if freshly downloaded) <USB key> = name of formatted USB volume (eg: USB_8GB) The process will take several minutes. Once completed: install Clover bootloader on the USB installer with the following non-UEFI/legacy customised settings (my E6220 just would not boot from USB in UEFI mode): Install Clover in the ESP Boot Sectors -> Install boot0af in MBR Clover for BIOS (legacy) booting -> Clover EFI 64-bits SATA BIOS Drivers, 64 bit -> ApfsDriverLoader / FSInject / HFSPlus / SMCHelper BIOS Drivers, 64 bit -> GrubEXFAT / GrubNTFS you may use version r5097 attached below or any subsequent version available at Dids' Github repo: Clover_v2.5k_r5097.pkg.zip once Clover is installed, launch Clover Configurator app and mount the freshly created EFI partition of the USB installer Clover Configurator.zip open this EFI partition and transfer the files & folders from the E6220 Mojave Clover pack below to the EFI/Clover folder. Clover_Pack_E6220_Moj.zip copy Clover package + Clover Configurator app to the root of your USB installer for subsequent use later 2) Basic 10.14 installation (no HD3000 support/no graphics acceleration) boot the Mojave USB installer at the Clover main menu, select the "Install macOS Mojave" partition but don't press [ENTER] press [SPACE], select -v verbose option in the menu, then boot with the selected options proceed with installation, 1st creating & formatting the target Mojave partition through Disk Utility as/if required (GUID scheme, HFS (journaled) format) on 1st reboot, boot from the USB installer again and boot the freshly created "macOS Install from <target Mojave partition>" temporary partition repeat this reboot sequence until the temporary partition is no longer offered and only the target Mojave partition is offered, marking the effective completion of Mojave's installation 3) Post-installation basic tuning Once the target Mojave partition has booted, complete the 1st boot system setup Once at the desktop, install Clover bootloader on the Mojave partition/disk with the customised non-UEFI/legacy settings listed above or for operation in UEFI mode according to BIOS mode Once Clover is installed, launch Clover Configurator app and mount the freshly created EFI partition of the Mojave partition/disk Open this EFI partition and transfer the files & folders from the above E6220 Mojave Clover pack to the EFI/Clover folder You may then reboot and verify that Mojave boots directly off your disk through Clover If you wish to cache add-on kexts rather than inject them through Clover at boot time, copy them to /L/E folder and rebuild your cache through the following Terminal commands: sudo chmod -Rf 755 /L*/E* sudo chown -Rf 0:0 /L*/E* sudo touch -f /L*/E* sudo kextcache -i / 4) Post-installation graphics tuning Fine-tuning for natively unsupported HD3000 iGPU may now take place using the files available in the package below, as derived from early findings with Mojave and the work done dosdude1 & AsiententBot at MacRumors & InsanelyMac: HD3000_10.14.zip Place an uncompressed copy of the above HD3000_10.14 folder to the root of your Mojave partition/volume Reboot in single-user mode (at Clover main menu, press [SPACE] and select -s option) At the single-user mode prompt, mount your Mojave volume: mount -uw / For Mojave 10.14.4 and later, remove GPUSupport + SkyLight + OpenGL + CoreDisplay vanilla frameworks: rm -Rf /S*/L*/PrivateFrameworks/GPUSupport.framework rm -Rf /S*/L*/PrivateFrameworks/SkyLight.framework rm -Rf /S*/L*/Frameworks/OpenGL.framework rm -Rf /S*/L*/Frameworks/CoreDisplay.framework For Mojave 10.14.4 and later, install 10.14.3's replacement frameworks: cp -Rf /HD3000_10.14/Frameworks/CoreDisplay.framework /S*/L*/Frameworks/ cp -Rf /HD3000_10.14/Frameworks/OpenGL.framework /S*/L*/Frameworks/ cp -Rf /HD3000_10.14/PrivateFrameworks/GPUSupport.framework /S*/L*/PrivateFrameworks/ cp -Rf /HD3000_10.14/PrivateFrameworks/SkyLight.framework /S*/L*/PrivateFrameworks/ Install the legacy kexts required for HD3000 support: cp -Rf /HD3000_10.14/Extensions/*.* /S*/L*/E* chmod -Rf 755 /S*/L*/E* chown -Rf 0:0 /S*/L*/E* touch -f /S*/L*/E* Quit single-user mode and resume normal macOS startup: exit macOS Mojave should then complete full boot and now run with (OpenGL-only) graphics acceleration. Note that this entire graphics-tuning process will require to be repeated after each Mojave update. 5) Mojave updates Once a Mojave update has completed its installation, the above graphics fine-tuning process must be re-applied through single-user mode. NB: The Clover config provided in the pack contains HD3000 VRAM binary patches in disabled mode. Enable and patch HD3000 kext accordingly if you want to increase VRAM settings.
-
So your Precision 7720 is indeed a quad core Kaby Lake model. What kind of disk is this Apacer 240GB? If SATA, all should be Ok. If NVME, it would have to be seen. Samsung NMVE SSDs such as the PM981 and PM991 are known to cause issues so I don't know if the same would apply to the PM961 but it looks like you use it for Windows, not for macOS. nVidia Quadro P4000 dGPU is Pascal, therefore unsupported since macOS Mojave. You'll need to disable (through DSDT/SSDT patching) in order to save your battery life. For the rest, all should be Ok though I can't guarantee you'll obtain 4K resolution on your built-in LCD. You'll just have to identify the exact model of SD card reader to assess compatibility. I'd say it's likely to be a Realtek PCIe device of some sort so compatibility is an open question. Will have a detailed look at your posted OC setup which is incorrect for the moment with settings applicable to Broadcom wireless or graphics among other things.
-
Please start by posting your system's specs; ideally in signature like most of us do.
-
Precision 7720 is 7th gen Kaby Lake when Precision 7x10 (eg: 7510, 7710) are 6th gen Skylake. Post your hardware specs, get to know your hardware and seek to use a setup appropriate to your own computer, not one from a different model whose name looks close to your own. https://dortania.github.io/OpenCore-Install-Guide/prerequisites.html#prerequisites