Hervé
-
Posts
10069 -
Joined
-
Last visited
-
Days Won
569
Content Type
Profiles
Articles, News and Tips
Forums
Everything posted by Hervé
-
Check that you have CPU power management with HWSensors app (provided you use the various sensors kexts that come with associated FakeSMC). If you see CPU multiplier & frequency oscillating in the x8/800MHz to x?/, you have proper CPU speedstep. You say you have a new battery but is it kosher/genuine? There are lots of offerings on the web these days that deliver crap batteries... I've made that experience myself. Battery life also depends on the model you went for: 3 or 6-cell. I get 3 to 4hrs with my non-Dell 6-cell replacement on the E6220, whereas I get well 4 to 5hrs on the Dell 65Wh 6-cell model of my E6230.
-
You troubles come mostly from the USB ports or lack of it... BW360 will work again OOB once you sort our the USB ports. The M6300 will be like D630/D830 of same generation: you need to make up the relevant USB injector. You can very easily derive it from your IOReg USB port analysis and the SMBIOS profile you use. Grab the USB injector kext of my D630 bootpack or EC guide and you'll see how it's made up.
-
Did you setup CPU speedstep/power management with the SSDT generator tool?
-

Latitude E6430s: trouble booting to 10.11.4 El Capitan installer
Hervé replied to bnichols024's topic in The Archive
The disk device name can be used too; for instance in the above example, the command diskutil cs revert /dev/disk2 would normally work too; it's a bit simpler than having to type the entire UUID. -
Latitude E6430s: trouble booting to 10.11.4 El Capitan installer
Hervé replied to bnichols024's topic in The Archive
Well, if you have a CoreStorage volume, you now know what to do... -
Latitude E6430s: trouble booting to 10.11.4 El Capitan installer
Hervé replied to bnichols024's topic in The Archive
You probably need to boot your installer then, once at the main screen, go to Utility->Terminal, identify your logical drive and revert it from CoreStorage to legacy mode. You'll find explanations and guidance here, in the post-installation tuning part. -
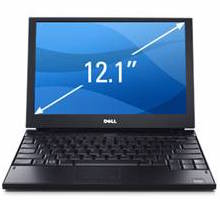
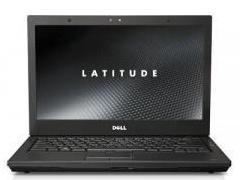
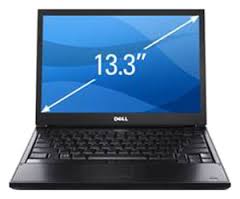
We still get the odd query regarding these models from time to time, so here is a recap of why they make unworthy Hackintoshes. E4200/E4300: These were Dell's 1st gen ultraportable 12" and 13" models of the E Series. They're based on Intel Core2Duo CPUs, Intel GS45 Express chipset and Intel GMA 4500MHD integrated graphics. Whilst OS X can be installed on these laptops, it cannot run with graphics acceleration due to unsupported GPU. The reason for this is that Apple never used the integrated GMA 4500 of this Intel chipset in any model of its Mac line-up and therefore never developed drivers for it. As such, there is no graphics acceleration whatsoever for these laptops (and never will be). Despite many attempts by a lot of people, no graphics acceleration can be obtained through patching of existing GMA 950/X3100 kexts or 1st gen Intel HD kexts. Consequently, without any form of graphics support, these laptops make very poor and unworthy Hackintoshes. E4310: This was Dell's 2nd gen 13" ultraportable E model. It is based on Intel Arrandale 1st gen "i" Core CPUs, Intel QS57 Express chipset and integrated 1st gen Intel HD graphics with an eDP display connector as opposed to an LVDS connector. The trouble is that, whilst OS X fully supports 1st gen Intel HD graphics, it only supports displays with LVDS connector because that's what Apple used in their Arrandale-based MacBook Pro 6,x models. Only partial graphics acceleration can be obtained with displays using an eDP connector, not full graphics acceleration and this appear further limited to Mountain Lion 10.8.5 and Mavericks only. There is a bible on the matter at InsanelyMac. However, latest updates of Mavericks will probably lead to a full garbled screen. With partial graphics acceleration only at best, the E4310 makes for a poor performing and unworthy Hackintosh. Dell manufactured no further E4xxx ultraportable models, instead they concentrated on the E6xxx series which includes the 12"/13" E6220/E6320 (SandyBridge) and E6230/E6330 (IvyBridge), all of which support OS X with full graphics acceleration (at time of writing).

-
Latitude E6430s: trouble booting to 10.11.4 El Capitan installer
Hervé replied to bnichols024's topic in The Archive
Hmm, I understood Capri FB #4 had a limited number of ports and, therefore, would not support external displays such as VGA, DVI or HDMI... -
Latitude E6430s: trouble booting to 10.11.4 El Capitan installer
Hervé replied to bnichols024's topic in The Archive
So it was the DualLink DSDT parameter set to 1 that caused your issue. It's set to 0 for screen res up to 1440x900, to 1 for anything above such as 1600x900 or higher. -
Latitude E6430s: trouble booting to 10.11.4 El Capitan installer
Hervé replied to bnichols024's topic in The Archive
What happens when you boot without cache and in verbose mode? -
Latitude E6430s: trouble booting to 10.11.4 El Capitan installer
Hervé replied to bnichols024's topic in The Archive
Depending on where you have your kexts, you may or may not need to repair permissions and rebuild your cache: With Clover, kexts placed in EFI/CLOVER/kexts/XXXX folder are injected at boot time, not cached With Enoch, kexts placed in /Extra/Extensions are injected at boot time with boot option KernelBooter=kexts=Yes but they are not cached Regardless of boot loader, kexts placed in /L/E or /S/L/E require to have their permissions repaired and the cache rebuilt with following Terminal commands: sudo chmod -Rf 755 /L*/E* sudo chown -Rf 0:0 /L*/E* sudo chmod -Rf 755 /S*/L*/E* sudo chown -Rf 0:0 /S*/L*/E* sudo touch -f /L*/E* sudo touch -f /S*/L*/E* sudo kextcache -Boot -U / (or sudo kextcache -system-prelinked-kernel) Please note that kext injection induces a slightly slower boot than kext caching. You also need to bear in mind that most E6x30 laptops need BIOS up to and to higher than a certain version or they face graphics corruption in OS X. That's worth checking too on your E6430s. But, at this stage and until you can confirm what the likely problem is with verbose boot mode, I'd say you're missing the Sandy/Ivy Bridge CPU power management patch (AsusAICPUPM) mentioned by Bronxteck above. If you missed it in your Config.plist, select it through the appropriate Clover menu once you've pressed the SPACE bar after the Clover logo. -
Latitude E6430s: trouble booting to 10.11.4 El Capitan installer
Hervé replied to bnichols024's topic in The Archive
Yes, boot with Enoch option cpus=1 (or Clover equivalent), then replace your current VoodooPS2Controller kext with this one and you will no longer experience this systematic KP. -
What model of nVidia, is it the 940M as listed in some HP published specs? What about the rest like audio, LAN, wireless, SD card reader, etc. ? You have a Skylake platform, so you have no other choice but El Capitan (Skylake support introduced in 10.11.1 kernel and Skylake HD520/HD530 support just got introduced in 10.11.4). Keep in mind that there are no Skylake MacBook for the moment (only 27" iMac), that's expected later on this year so you're ahead of the game. Hardly any Skylake laptops actually run OS X with complete support. There's only limited success afaik. If your GeForce proved unsupported, you'd have to rely on the integrated HD520 graphics; that should work on the basis that 10.11.4 supports HD520/HD530. All in all, you're going to need a lot of patience until Apple releases Skylake-based MacBook laptops.
-
Or use: sudo kextcache -system-prelinked-kernel That usually works fine on 1st attempt.
-
You can forget about ML on a Broadwell or Skylake platform. ML supports Intel CPUs up to Haswell generation and, for those 4th gen CPUs, only in 10.8.5. You will have to target Yosemite 10.10 (minimum) or current El Capitan 10.11, knowing that there is limited support for Skylake platforms at the moment... For the rest, well, you'll have to post your system's specs.
-
You need the patched AppleHDA kext (in /S/L/E) or Clover on-the-fly AppleHDA patch + the dummy IDT kext (in /L/E or /S/L/E) for audio to work. Alternative, the attached patched AppleHDA kext (from Yos) will work fine on its own from /S/L/E. IDT-76e7_patched_AppleHDA_v272.18.kext.zip
-
What exactly is your issue? Battery reported as goosed/needing replacement or just trouble obtaining the status in the Finder's bar? If the former, i.e. you're getting the consistent and permanent "dying battery" message, then you probably need to consider replacing your ageing battery. If the latter, check the battery management kext you use and consider Rehabman's ACPIBatteryManager v1.5x/v1.60.x. What battery management kext are you using?
-
The DSDT applies to all E6230, no matter their CPU model; it's the generated speedsted-related SSDT that is CPU-specific.
-
ML is totally obsolete these days (Apple dropped support for it) and does not support Broadwell platforms afaik. As such, you would not be able to natively run ML on a Latitude E3550. Opt for a much newer and free version like Yosemite or El Capitan; they run absolutely fine, especially on recent hardware like Broadwell or (gradually) Skylake platforms. If I remember well, Broadwell support was introduced in Yosemite 10.10.2 or 10.10.3. Haswell CPUs were supported in ML, but only in ultimate version 10.8.5.
-
Can you please post your specs? If you installed Mavericks with myHack, you can copy/paste the output of Terminal command lspci -nn.
-
You can grab the patched DSDT off my E6230 guide to obtain your desired behaviour, assuming you've disabled hibernation of course. In terms of patch, you basically need to mod the _PRW methods of the EHCx/XHC/GLAN/HDEF devices to set (0x--, 0x03) or (0x--, 0x04) to (0x--, 0x00) as detailed in Rehabman's 6 Series/7 Series patches list. Or you can apply Rehabman's patches if you prefer.
-
It would seem you copied the Enoch installation package on your USB installer (that's for a future use once OS X is installed on your disk partition) but you did not install the bootloader on your USB installer ! It's never going to boot without that key step. Ok, so your iMac reported the app could not run because from an unknown developper but you can't just ignore that message. On your iMac, go to your Security PrefPane and either authorise the app to run once or modify your security settings to allow downloaded app from anywhere. Do think of calling on OS X built-in help if you encounter error messages that you don't fully understand. It's kinda basic...
-
Check out that you don't have 2 x PS2 controller kext, like one in /L/E and another in /S/L/E or in CLOVER/kexts/10.11 or CLOVER/kexts/Other. Dr Hurt's kext definitely works as tested on E6220, E6230, E6440 or E7740. So, you need to find out what you did wrong. Detailed list of your actions and returned results could help... Are you sure you've installed this kext?
-
I literally just posted revised packs in my thread with an updated DSDT. The revised 10.11 pack also includes Dr Hurt's VoodooPS2Controller which does not trigger KP on startup. Make sure to follow the guide rigorously.
-
Seems the revised kext is not taken into account. Place it in /L/E, then repair permissions and rebuild your cache with the usual Terminal commands.