Hervé
-
Posts
10079 -
Joined
-
Last visited
-
Days Won
569
Content Type
Profiles
Articles, News and Tips
Forums
Everything posted by Hervé
-
After initial installation, yes, but it seems you never got to that stage, did you? Anyway, that stuff is about 3yrs old and I can't remember it all; though I do remember that the D620n was a bastard to get going...
-
Maybe the boot loader associates/injects the wrong device description to the PCI id, though it would be surprising... According to the literature those nVidia (vendor 0x10de) chips have the following device ids: Quadro NVS 135M = 0x042b GeForce 8400M GS = 0x0427
-
Maybe your DSDT contains the reference to the NVS 13M, I don't know. It's just cosmetic. There's an article in the Articles page of the web site that explains how you can change this; I invite you to read it. Your GPU device will be located at address 0x00010000 under a name like GFX0 or VID or AGP, something of that line. You can easily image your existing OS X installation partition from the USB installer. All you need to do is boot to main installer screen, then go to Utilities->Disk Utility and make an image of your HDD partition on the USB key. If there is not sufficient space, reduce the existing HDD partition and make one of the necessary space to hold the desired image. Something like 16Go should be more than enough.
-
Is the bootpack (/Extra folder) present on the ML partition? You can check it out from the USB installer by going to Terminal and typing: ls -la /Volumes/<ML partition name>
-
No, that's graphics not initialising. Try with boot option GraphicsEnabler=No.
-
Why do you use the -x flag to boot in safe mode? Boot with -f -v flags instead. Make sure that myHack installed the bootpack on your ML standard installations, I fear it did not... Reboot your USB installer, then, once at the installation main screen, go to Utilities and run myHack->Install Extra->my own, targeting your local HDD ML partition, not the USB installer. You should then be able to run standard ML (still with boot option arch=x86_64) without graphics support for your NVS 110M.
-
And refer to this thread for full keyboard layout recognition.
-
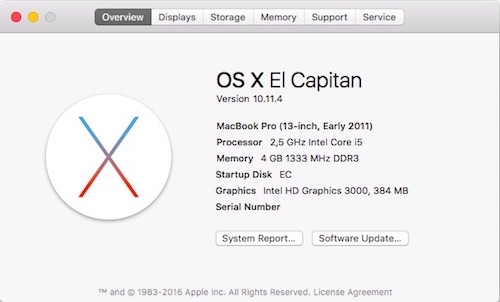
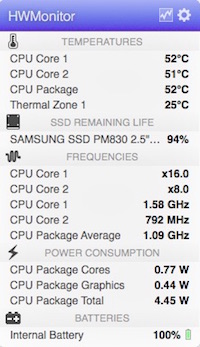
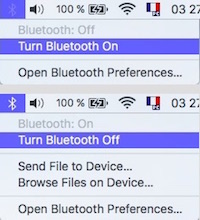
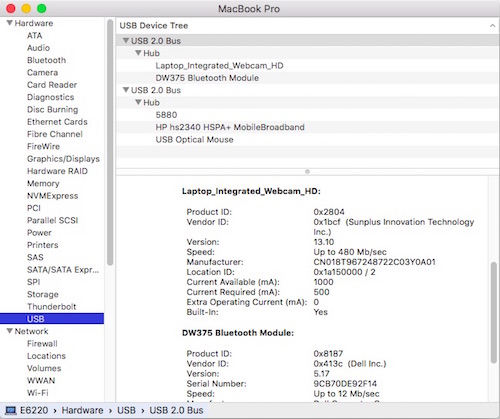
 Last update: 01 Nov 2016 Target OS X release: El Capitan 10.11.x This is an Enoch-based installation using the well-known/well-documented vanilla manual method detailed below: Working: full QE/CI with HD3000 graphics OOB HDMI output OOB DVI + DP output OOB through port replicator E-Port K07A002 VGA output (with patched AppleIntelSNBGraphicsFB kext) full audio, including jack microphone input and headset output (with patched AppleHDA kext) HDMI audio (with patched AppleHDA + AppleIntelSNBGraphicsFB kexts) built-in Gigabit Ethernet (with AppleIntelE1000e kext v3.1.0) bluetooth OOB (on/off supported with patched BroadcomBluetoothHostControllerUSBTransport PlugIn of IOBluetoothFamily kext) native SpeedStep at CPU multipliers x8/10/12/14/16/21/22/25 (with patched AppleIntelCPUPowerManagement kext, generated SSDT, tuned Kozlek's FakeSMC (SMC keys=1.69f4 (or 1.68f98)/SMC compatible=smc-huronriver) and MBP8,1 SMBios profile) Turbo boost to x32 3.2GHz at Turbo multipliers x26/27/28/29/30/31/32 system sleeps Ok through lid closure, power button, Fn-F1, Apple menu->Sleep and energy savings settings with hibernation mode set to 0 (sleep to RAM) and /var/vm/sleepimage file deleted. Wakes Ok through lid opening and power button wireless with any compatible card battery management and monitoring (with ACPIBatteryManager kext v1.60.5) SD card reader (with DSDT patch for compatibility with Apple's default device 14e4:16bc) integrated webcam OOB keyboard backlight control OOB (for backlit models) left combo eSATA/USB2.0 + right USB2.0 ports OOB ExpressCard slot OOB Not Working: N/A Not tested: SmartCard reader 1) 10.11 USB installer creation Double click on InstallESD.dmg found in Install OS X El Capitan.app/Contents/SharedSupport to mount the dmg image Then mount BaseSystem.dmg (hidden file) open /Volumes/OS\ X\ Install\ ESD/BaseSystem.dmg Use Disk Utility to restore the contents of BaseSystem.dmg on a USB key (or HDD partition) formatted Mac OS extended (journaled). Remove link for Packages in folder System/Installation of your USB key rm /Volumes/OS\ X\ Base\ System\ 1/System/Installation/Packages Copy folder Packages located in InstallESD.dmg to folder System/Installation of your USB key cp -R /Volumes/OS\ X\ Install\ ESD/Packages /Volumes/OS\ X\ Base\ System\ 1/System/Installation Copy the 2 hidden files (BaseSystem.dmg & Basesystem.chunklist) of InstallESD.dmg to the root of your USB key cp /Volumes/OS\ X\ Install\ ESD/BaseSystem.* /Volumes/OS\ X\ Base\ System\ 1 Install Enoch r2795 (latest at time of writing) on the USB installer with all default settings Enoch-rev.2795.pkg.zip Copy the above Enoch r2795 installer package to the root of the USB installer Copy the following (unzipped/extracted) E6220 bootpack to the root of the USB installer E6220_i5-2520M_HD3000_EC-Pack.zip E6220_i5-2520M_HD3000_EC-Pack_#2.zip E6220_i5-2520M_HD3000_EC-Pack_#3.zip E6220_i5-2520M_HD3000_EC-Pack_#4.zip Create a folder called Kernels under /System/Library (normally, it won't exist at that stage) Copy the appropriate El Capitan vanilla kernel to /System/Library/Kernels. Copies of the kernels are available here. 2) 10.11 installation Boot the 10.11 USB installer (it may take a little time to kick in) with -f -v boot flags At OS X installer main screen, open up Disk Utility in Utilities menu If applicable, partition your target disk in GPT/GUID scheme Create your target 10.11 partition and format it as OS X Extended (Journaled) Close Disk Utility and proceed with OS X 10.11 installation as usual 3) Post-installation fine-tuning Reboot the 10.11 USB installer (it may take a little time to kick in) At OS X installer main screen, open up Terminal in Utilities menu Verify CoreStorage installation disk mode diskutil list If CoreStorage activated for Fusion drive, revert to legacy mode diskutil corestorage revert <device> (for example: /dev/disk1) Identify your freshly made 10.11 partition name df Copy the Extra folder from the USB installer to your identified 10.11 disk partition cp -R /Extra /Volumes/<your fresly made 10.11 partition name> (for example: cp -R /Extra /Volumes/OSX_disk) Reboot the 10.11 USB installer, press a key at delay bar (or F8) to interrupt boor process and select your freshly made 10.11 disk partition. You'll then be booting El Capitan for the 1st time Complete the 1st boot installation finalisation Once at the 10.11 desktop, run the Enoch r2795 package from your USB installer to install Enoch on your HDD; it should be installed on the 1st partition of the disk Eject the 10.11 USB installer and put it aside Disable hibernation (can be done later, but should be done): open up Terminal and type the following commands sudo pmset hibernatemode 0 sudo pmset hibernatefile /dev/null sudo rm -f /var/vm/sleepimage Reboot your finalised El Capitan installation After reboot, enabled audio and optimise prelinked kernel: copy all kexts from /Extra/Extensions to /Library/Extensions (ignore and acknowledge the permissions-related error messages) copy patched AppleHDA from /Extra/Extensions/Copy_to_SLE to /System/Library/Extensions repair kexts permissions and rebuild cache: sudo chmod -Rf 755 /S*/L*/E* sudo chown -Rf 0:0 /S*/L*/E* sudo chmod -Rf 755 /L*/E* sudo chown -Rf 0:0 /L*/E* sudo touch -f /S*/L*/E* sudo touch -f /L*/E* sudo kextcache -Boot -U / Edit /Extra/kernel.plist and set KernelBooter_kexts parameter to No <key>KernelBooter_kexts</key> <string>No</string> Boot time will be faster in that configuration mode where add-on kexts are cached from /L/E, not injected from /E/E. NB: After any kexts modification, whether to /S/L/E or to /L/E, you must repair permissions and rebuild cache as detailed above. Again, E6220 laptops fitted with a CPU other than an i5-2520M will require a different and suitable SSDT table than provided in the above pack (can be looked up on the web or created with SSDT generator tool -> See RampageDev's blog for detailed guide). - - - - - - - - - - Edit #1: 12 Apr 2016 Updated pack #2: fixes some incorrect settings in _PRW methods of DSDT devices EHCx/GLAN/HDEF that could prevent proper wake. - - - - - - - - - - Edit #2: 28 Jul 2016 Revised bootpack #3 with updated DSDT devices to improve compatibility with MacBookPro8,1 and remove the need for VoodooSDHC kext which causes issues with lid sleep and wake in general. wireless: renamed RP05.PXSX to RP05.ARPT SD card reader: renamed RP06.PXSX to RP06.SDXC + added compatibility with Apple's own pci14e4,16bc lid: renamed LID to LID0 - - - - - - - - - - Edit #3: 01 Nov 2016 Revised bootpack #4: replaced older VoodooPS2Controller v1.8.9 which caused KP from 10.11.4 onwards by Dr Hurt's Release 4 which works perfectly in El Capitan ported DW375 Bluetooth module + DW5550/HP hs2430/F5521gw WWAN module patches to FakeSMC (avoids patching vanilla kexts) added AppleHDA_IDT_92HD90 + patched AppleHDA v274.12 kexts (latter to be copied to /S/L/E) added Patched_AppleRTC_v2.0 + patched AICPUPM up'ed to v918.0.0 + patched IOGraphicsFamily up'ed to v92.4.1 (all to take precedence over vanilla kexts in /S/L/E) added the correct USBInjector kext tuned to MBP8,1 SMBIOS profile
-
The Chameleon boot plist is always found in /Extra folder. Its name is self explanatory...
-
BCM94352Z: no 5GHz wifi connexion (Lenovo Z51-70)
Hervé replied to mixmaster57's topic in The Archive
ypdeveloper, please use the forum Search facility. https://osxlatitude.com/index.php?/topic/2120-inventory-of-supported-and-unsupported-wireless-cards/ https://osxlatitude.com/index.php?/topic/8739-patching-airportbrcm4360-kext-for-unsupported-mac-models/ https://osxlatitude.com/index.php?/topic/8834-lenovo-z51-70-bcm94352z-no-5g-wifi-connexion/&do=findComment&comment=58087 -
Please refer to the list provided in post #2. It clearly stipulates what you need to do!
-
Reboot with Clover option equivalent to Chameleon/Enoch's cpus=1, then replace your VoodooPS2Controller by Dr Hurt's version linked here. Rebuild your permissions & cache and all will be Ok afterwards. This was verified on my Alps-based E6220, E6230 and E6440 and by others on E7440, etc.
-
So you now need to modify the FakeSMC AGPM patch to replace the NVS 135M GPU ids by 10de/0427. Are you running on the D630's DSDT (your screenshot clearly shows GPU displayed as NVS 135M...). If you want to keep that, you really should modify it to reflect your true hardware.
-
Remember that the 10.7.5 bootpack contains the option to boot in 32bit kernel mode (arch=i386). Since you'll be initially installing and running standard 64bit ML, make sure you manually overwrite the Chameleon boot plist option with arch=x86_64.
-
Yep, it's the FakeSMC plugin. Right click on the kext, select "Show Package contents", then browse to the PlugIns subfolder. Delete the GPUSensors kext. Then rebuild your cache with myFix (quick) and reboot. For Chameleon, you can apply the app to your USB installer; no need to use myHack. If you want to run ML on that system, I advise you to 1st install ML 10.8.5 using the 10.7.5 full pack from here and to subsequently install all updates (apps, security, etc.). You'll run it in 64bit kernel mode initially, i.e. without any form of graphics support. Once you've completed all updates, you may then apply the MLPF hack and run in 32bit kernel mode. It seems you can pick up MLPF v0.3 from here these days.
-
Well, the 2 x systems are very closed in terms of specifications, hence why the 1720's DSDT loads Ok on the Vostro 1400 but the 2 x DSDT clearly differ. Compare them. There's clearly something missing or incorrect for OS X in the Vostro 1400's default DSDT table. Remember that you do not extract a DSDT from BIOS to just use it "as is". That's useless as OS X is perfectly capable to read the raw table from BIOS. You only specifically use a DSDT file/table because you've patched it.
-
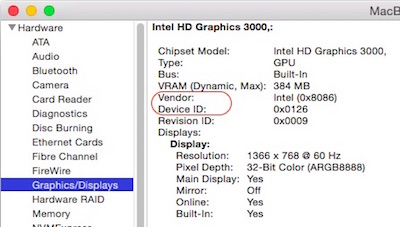
I mean exactly that: the GPU PCI vendor + device ids as displayed in lspci info or SysProfiler->Graphics. They're required to patch the AGPM kext accordingly. Example on my HD3000-based E6220:
-
+1. With patched AppleHDA, you need to put laptop to sleep then wake it when you switch from speakers to headphones. Failing that, headphone volume is extremely low until sleep/wake is done.
-
This is same family and generation (chipset GM/PM965) as good old Latitude D630/D830 or Precision M2300/M4300 even though, unlike its M65 predecessor (chipset PM945), this particular model's physical design is based on the older style of Inspiron 6x00 laptops. I understand some folks got full QE/CI under Mavericks (through I'm not 100% sure) so, in theory, it should also be Ok with Yosemite and/or El Capitan, especially as it's based on a G8x chip which is supported by those OS X versions. You may also try the nVidia Web driver. Check if the nVidia kext load when you boot; then I would expect you to need to play a little with DSDT patching of the discrete graphics device and possible the SMBIOS profile http://www.notebookcheck.net/NVIDIA-Quadro-FX-1600M.8838.0.html http://www.nvidia.com/download/driverResults.aspx/89538/en-us
-
Which version of myHack are you using? v3.1.2 or v3.3.1. The latter is recommended rather than the former. If you upgrade Chameleon, I advise you not to go beyond r2468 (I had trouble with version r25xx and beyond though I did not test them all individually). Versions r2377, r2395 or r2401 should be Ok too. What does your KP indicate? Check that you boot in 32bit kernel mode and that your FakeSMC does not contain the GPUSEnsors PlugIns; it KPs on the nVidia 110M chip.
-
No, you got it all wrong. Since ML was introduced back in 2012, no OS X version runs in 32bit kernel mode so boot option arch=i386 is useless and will not allow you to boot the OS. Furthermore, you cannot -and never will- get GMA X3100 graphics (or GMA950 or nVidia GeForce 7xxx) fully supported under any OS X versions with a 64bit-only kernel. There are no drivers and those 32/64bit drivers provided in SL 10.6.2 are buggy in 64bit mode. Again, and as you've already experienced yourself, you certainly can install ML, Mav, Yos or EC without problems on your GM965 / GMA X3100 laptop; no issues on that front; but you never will get graphics acceleration, which renders the system more or less useless due to the (poor) performance issue. For SL or Lion, you would indeed need to ensure 32bit kernel mode with option arch=i386; that's what Bronxteck meant. Don't waste your time on this machine with anything past Lion 10.7.5. There is just no point at all.
-
Yosemite Installation Guide - Latitude E5440 Intel i5 - Clover UEFI
Hervé replied to jorgexgb's topic in The Archive
Try and remove the AppleHPET kext; it may fix your BT (and USB) issue. It certainly does on my E6440 and gets the BT of my Intel Advanced N6235 fully working... -
[SOLVED] e7440 can't boot after successful installed
Hervé replied to aronyfhj's topic in The Archive
Dr Hurt's revised VoodooPS2Controller works fine in 10.11.4 too. Most handy for E Latitude to get full Keyboard recognition... I've linked to it in several other posts. -
Look up the "OOB" column in the inventory. It means "Out of the Box", i.e. native support without any additional kext or patching ...
-
Dr Hurt's VoodooPS2Controller build should work Ok.