-
Posts
10068 -
Joined
-
Last visited
-
Days Won
569
Content Type
Profiles
Articles, News and Tips
Forums
Everything posted by Hervé
-
http://www.osxlatitude.com/edp/documentation/
-
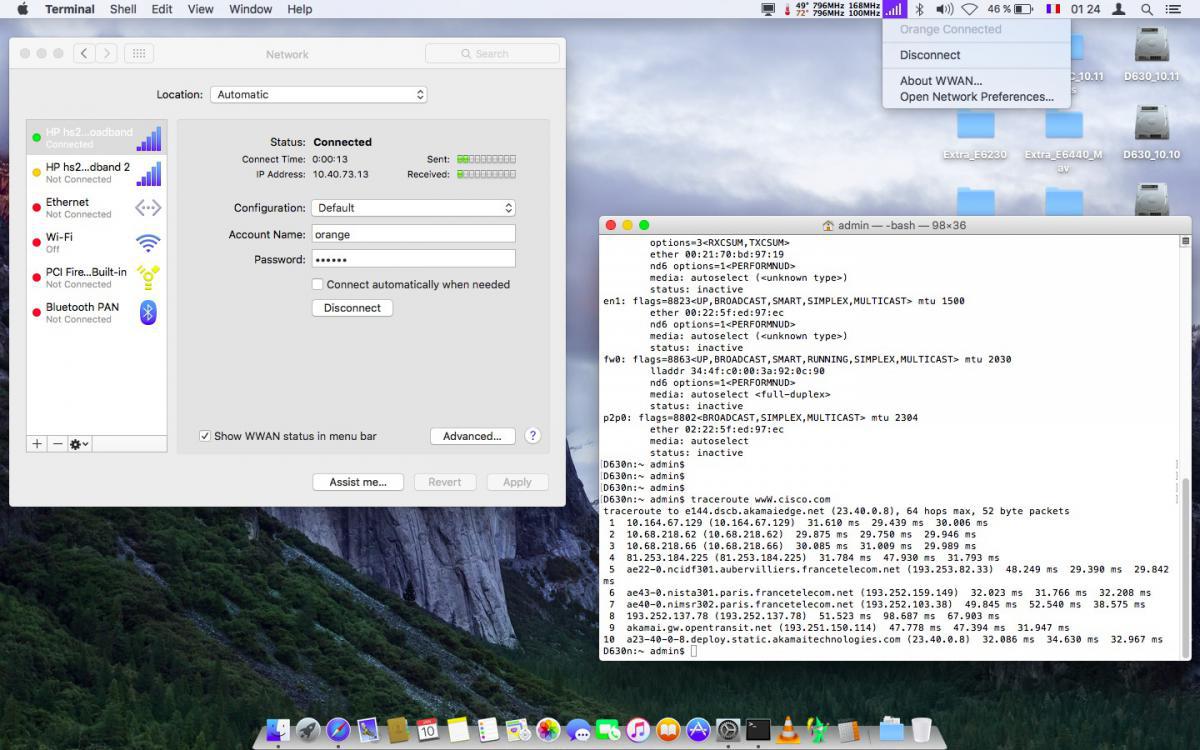
I've updated the guide to avoid any confusion since there clearly was some with El Capitan. Please follow the revised instructions to the letter: For [...] Yosemite and El Capitan, proceed as follows: Remove the 3 WWAN modems listed in Network Preferences Make a backup of vanilla CellPhoneHelper kext found in /S/L/E Make a copy of CellPhoneHelper.kext from /S/L/E to your desktop Open up the Desktop kext and browse through to the Contents folder to patch the Info plist as detailed below Once your plist has been updated, move the patched kext from your Desktop to /S/L/E and replace the original kext Repair permissions, rebuild cache and reboot The patch basically consists of a pasted copy of the Sony Ericsson W350 entry, modified with the Ericsson FF5521gw, HP hs2340 or Dell DW5550 PCI device ids (entered in decimal values) and the Sony Ericsson reference for Device Vendor. It seems you took the shortcut of copying/pasting the code I had previously published as an example in the thread. That applied to Mav/Yos and will not work in EC... I've modified the guide to avoid this. Basically, you need to start from the W350 entry provided in CellPhoneHelper v1.4.0 of EC. You should notice the code differs a little between the EC version of the kext and earlier OS X versions; that's why the patch you made was not working.
-

Login app store get "your device or computer could not be verified"
Hervé replied to eric4h's topic in The Archive
Well, it seems you'll apparently find what you need with a simple Google search on "BCM5761 kext"... -

Login app store get "your device or computer could not be verified"
Hervé replied to eric4h's topic in The Archive
Please post an lspci output of DCPIManager output to confirm model and check if it's covered at all by existing Broadcom kexts. The E6x20/E6x30 are fitted with an Intel 82579LM LAN card, so the LAN driver used for those models will be of no use on your E5430. If your Broadcom LAN card is indeed unsupported, you'll have to fallback on the null Ethernet option as suggested by Bronxteck; it does work. -
My Yosemite DP guide should be considered obsolete, even if 99% of it remains accurate. I'll endeavour to write a 10.10.5 in the next few days...
-
Updated for El Capitan. Don't reuse the patch from previous OS X versions, the plist entries have been slightly modified in 10.11. Patch your vanilla EC kext according to the details above.
-
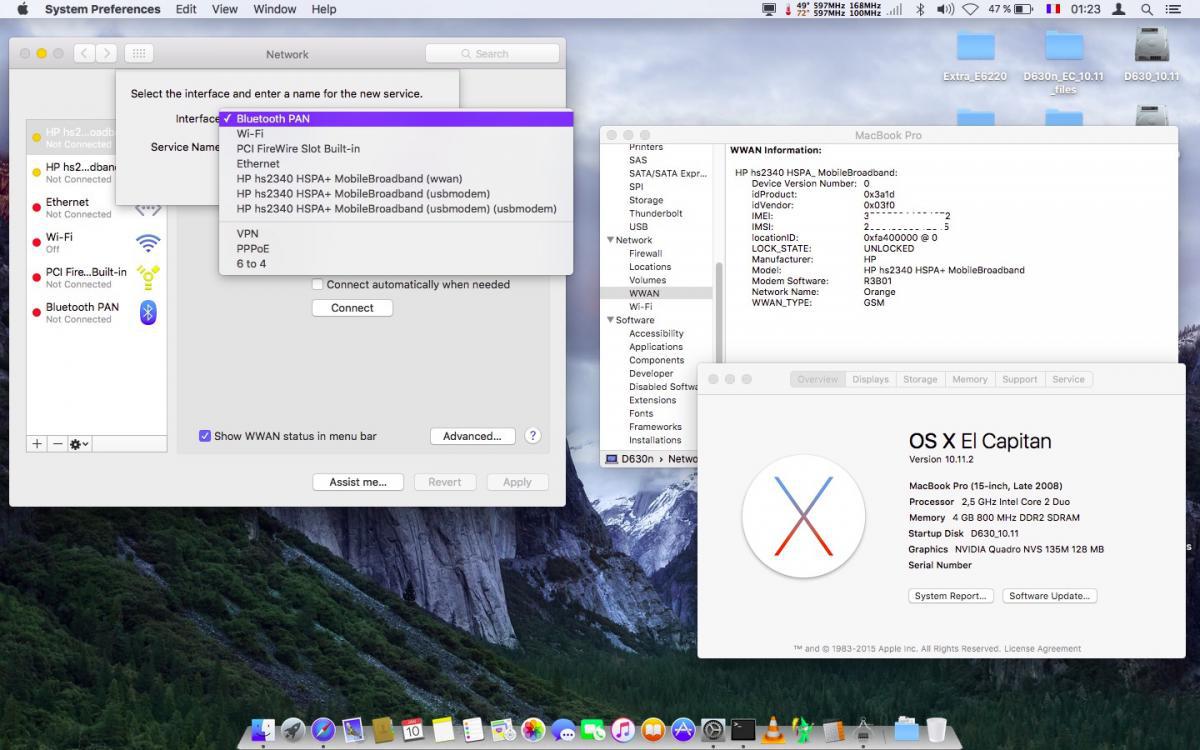
Ha, it would appear you did not patch the kext properly. You need to rigorously follow the instructions as detailed in the specific thread for DW5550 module. Hint: DW5550 is an Ericsson module, not a Novatel one, nor a DW5520... I've verified myself and had no issue using my HP hs2340 as a WWAN module in 10.11.2:
-
I guess you actually meant that it never appears in the Network PrefPane, even when trying to add the interface manually. To me, your module has not properly registered as a WWAN module. Whilst it's listed in the SysProfiler->WWAN section, I was expecting to see a lot more information. I'd double check your patch if I were you. Or maybe it no longer works in EC... I'll check it out.
-
Well try your DSDT with either of the DSM method, but not both.
-
If you already have audio, I'd say it's not a matter of AppleHDA kext but of DSDT patch and Intel HDMI audio...
-
I can't be 100% certain but I would expect HDMI audio to be managed through the integrated HD4600. This may require to use Rehabman's FakePCIID kexts. Your patched DSDT shows 2 x consecutive and different DSM methods in HDAU device. This is incorrect to me... Method (_DSM, 4, NotSerialized) { If (LEqual (Arg2, Zero)) { Return (Buffer (One) { 0x03 }) } Return (Package (0x04) { "layout-id", Buffer (0x04) { 0x01, 0x00, 0x00, 0x00 }, "hda-gfx", Buffer (0x0A) { "onboard-1" } }) } } Method (_DSM, 4, NotSerialized) { If (LEqual (Arg2, Zero)) { Return (Buffer (One) { 0x03 }) } Return (Package (0x04) { "layout-id", Buffer (0x04) { 0x0C, 0x00, 0x00, 0x00 }, "hda-gfx", Buffer (0x0A) { "onboard-1" } }) }
-
Check that the DSDT compiles without errors before you modify the code. Raw DSDT tables often have code that returns compilation errors from the onset. If it does compile properly, replace all references to B0D3 by HDAU, not just the device itself.
-
It's perfectly normal to get error messages for each kext you copy to /L/E or /S/L/E telling you that the files were improperly installed. That's because those kext files must have specific rights (=permissions) to be used. That's why you have to enter the chmod and chown commands; these repair permissions. The other touch and kextcache commands are for rebuilding the kext cache and prelinked kernel. In order to avoid the error regarding prelinked kernel, you can re-run the last 2 commands or replace: sudo kextcache -Boot -U / by sudo kextcache -system-prelinked-kernel You're obviously new to all this, so please don't hesitate to read up about hackintoshing on the many numerous sites so that you actually understand the various actions you undertake.
-
The tool is a Linux shell script (hence the ".sh" file extension), not an application per sé. You don't double click it, you execute the script from Terminal. You can open up Terminal, type "sudo ", then drag the ssdtPRGen.sh icon from wherever it is into the Terminal window. That should launch it. All details, direct from the creator, here: https://github.com/Piker-Alpha/ssdtPRGen.sh. 1st line under Help Information shows the command line syntax required to execute the script.
-
Please search the forum before posting, this model has been discussed in many threads before. In addition, we cannot guess what kexts (drivers) you used for keyboard and mouse, nor the model of wireless card you have in the E5420. As you probably know if you've done your little research, Intel wireless cards are not supported in OS X. You can look up our (non-exhaustive) list of supported/unsupported wireless cards in the R&D->Wifi forum subsection.
-
For HD4600 to be accelerated, you need to patch your DSDT to inject desktop id 0x0412 or inject it through Clover and use Rehabman's FakePCI kexts (FakePCIID + FakePCIID_Intel_HDMI_Audio + FakePCIID_Intel_HD_Graphics).
-
Here is the patched DSDT required to get the built-in LCD working on the D520: Patched_D520_DSDT.aml.zip Patches applied to the extracted raw DSDT table: 1) Fixed incorrect _HID statement for AMW0 device (not linked to LCD issue, but erroneous code that needs fixing to be able to recompile the table) incorrect code: Device (AMW0) { Mutex (WMIX, 0x01) Name (_HID, "*pnp0c14") /* incorrect statement */ Name (_UID, 0x00) fixed code: Device (AMW0) { Mutex (WMIX, 0x01) Name (_HID, "PNP0C14") /* correct statement */ Name (_UID, Zero) 2) Injected some basic GMA950 characteristics into VID device @0x00020000 (=IGPU) with a DSM method original code: Device (VID) { Name (_ADR, 0x00020000) Method (_DOS, 1, NotSerialized) { Store (Arg0, MIS4) SMI (0x9E, MIS4) } patched code: Device (VID) { Name (_ADR, 0x00020000) Method (_DSM, 4, NotSerialized) /* DSM method to inject device characteristics */ { Store (Package (0x06) { "device_type", Buffer (0x08) { "display" }, "model", Buffer (0x0D) { "Intel GMA950" }, "AAPL,slot-name", Buffer (0x09) { "Internal" } }, Local0) DTGP (Arg0, Arg1, Arg2, Arg3, RefOf (Local0)) Return (Local0) } /* end of DSM method */ Method (_DOS, 1, NotSerialized) { Store (Arg0, MIS4) SMI (0x9E, MIS4) } 3) Added a DTGP method to complete the above injection (placed between OSID and SOST methods) added code: Method (DTGP, 5, NotSerialized) { If (LEqual (Arg0, Buffer (0x10) { /* 0000 */ 0xC6, 0xB7, 0xB5, 0xA0, 0x18, 0x13, 0x1C, 0x44, /* 0008 */ 0xB0, 0xC9, 0xFE, 0x69, 0x5E, 0xAF, 0x94, 0x9B })) { If (LEqual (Arg1, One)) { If (LEqual (Arg2, Zero)) { Store (Buffer (One) { 0x03 }, Arg4) Return (One) } If (LEqual (Arg2, One)) { Return (One) } } } Store (Buffer (One) { 0x00 }, Arg4) Return (Zero) } 4) Injected built-in display characteristics with a PNLF device (placed between LID and PBTN devices) added code: Device (PNLF) { Name (_HID, EisaId ("APP0002")) Name (_CID, "backlight") Name (_UID, 0x0A) Name (_STA, 0x0B) }
-
Nothing wrong with those specs for Hackintoshing purposes.
-

E6420 El Capitan-Difference between Lo and Hi Res for config./DSDT?
Hervé replied to ssprod's topic in The Archive
Erm... with a bit of effort... DSDT for HiRes E6420 model available here: https://osxlatitude.com/index.php?/topic/7091-dell-latitude-e6420-with-i5-2410m-hd3000-and-1600x900-lcd-mavericks/ And SSDT files for i5-2520M is also available here for instance: https://osxlatitude.com/index.php?/topic/6503-dell-latitude-e6320-with-i5-2520m-hd3000-and-1366x768-lcd-mavericks/ https://osxlatitude.com/index.php?/topic/7914-dell-latitude-e6220-with-intel-i5-2520m-hd3000-and-1366x768-lcd-mavericksyosemite/ You've been on this forum long enough to be aware that there is no known issue generating CPU-specific SSDT tables using Piker Alpha's renowned tool. It's available at the end of a Google search on "Piker SSDT generator"... https://www.google.fr/#q=Piker+SSDT+generator -
Sounds like the bootloader did not install properly... Try and reinstall it.
-
No, but you'll need to set DualLink to Yes (or 1). Can be done through DSDT patch or configured as a bootloader (Chameleon/Enoch/Clover) parameter.
-
From a chipset/CPU point of view, this PC will support all modern Mac OS X / OS X versions from Snow Leopard 10.6 to the latest El Capitan 10.11. As stipulated by JakeLo in the previous post, full compatibility will depend entirely on the discrete/add-on graphics card fitted to this machine. The integrated Intel GMA X4500 bears no support whatsoever in OS X. I've seen that some of those old RM One were fitted with nVidia G210; that's supported Ok. Failing that, there are plenty of cheap entry level cards that should fit in there and that are compatible with OS X. Eg: the cheap and chearful nVidia GT610. You can search the forum (and the Net), plenty of posts on that matter.
-
Battery information should work with Rehabman's ACPIBatteryManager v1.60.4 but may require DSDT patching. Often the case with EC... Shutdown/restart is also a typical issue sorted by DSDT patching. Rehabman's has a whole set of DSDT patches on his repository. Look it up. For the RT5370-based wireless dongle, check the Ralink/Mediatek web site. They list drivers per chip and per OS. You'll soon see if it is supported under OS X or not. Mavericks or Yosemite drivers, if they exist, should work without issues under EL Capitan. From memory, I believe it is. Check our non-exhaustive list of supported/unsupported wireless cards here.
-
You download EC from AppStore using a system running OS X (SL 10.6.8 being the minimum version). OS X has been free of charge since Mavericks... You'll need to be logged in AppStore using a valid Apple id; whether it's yours or your friend's is irrelevant. You'll obtain the downloaded app in the Applications folder under the name "Install OS X El Capitan". This app file can just be copied/transferred to any media, whether a disk, a USB key or even a SD card for instance. It really is just plain bog standard common sense and explained... on Apple's web site! http://www.apple.com/osx/how-to-upgrade/
-
Dozens of post explaining how to cancel hibernation on the forum...


