-
Posts
10068 -
Joined
-
Last visited
-
Days Won
569
Content Type
Profiles
Articles, News and Tips
Forums
Everything posted by Hervé
-

[SOLVED] E6330 - A21 - Mojave - boot to black screen
Hervé replied to anhgiang's topic in The Archive
You'll have to post the DSDT patched by Jake and the A21 DSDT. -

[SOLVED] E6330 - A21 - Mojave - boot to black screen
Hervé replied to anhgiang's topic in The Archive
I would not recommend you use a patched E6230 DSDT on your E6330, no. Whilst this may not be the cause of your problem, it may lead to some hardware being unsupported even though there is little chance since the 2 x models are extremely close. You issue of booting to a black scree and sleep is more likely due to an incorrect CPU power management SSDT. Did you generate yours or, since you have the same CPU as I do now in my E6230, use the SSDT I posted in my pack? -
The firmware only applies to the Bluetooth module of the card, not the wifi part. On p10 (2nd post from the top), @astray provided a link to the Windows driver that updates BT firmware to v4689. You can use this safely to update the card. Then, you may use the following patching kexts in macOS. All this works for me but the card already worked well when showing firmware version v5799 or v5803 (see posts on p5 to p7).
-
Graphics corruption is in fact due to Capri Framebuffer's layout 0x01660003 having a default memory size set at 16MB. Patching this down to 8MB solves the graphics corruption issue with all BIOS versions post A11. Patch is detailed in my E6230 guide.
-
@milchkuh There you are:
-
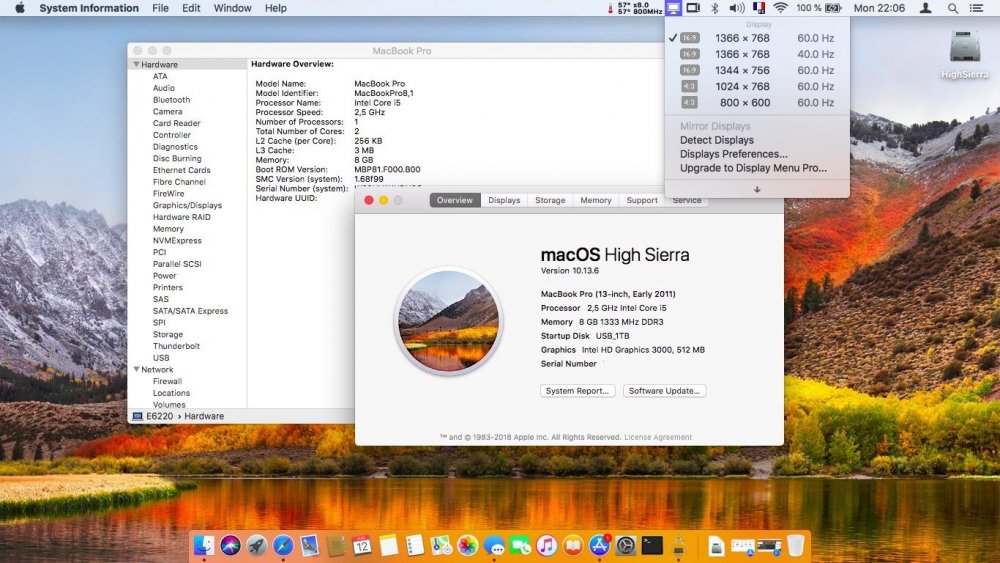
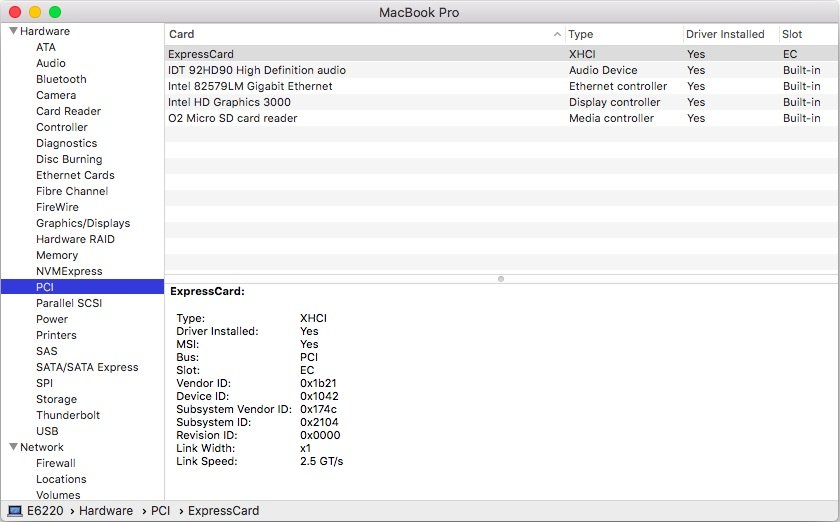
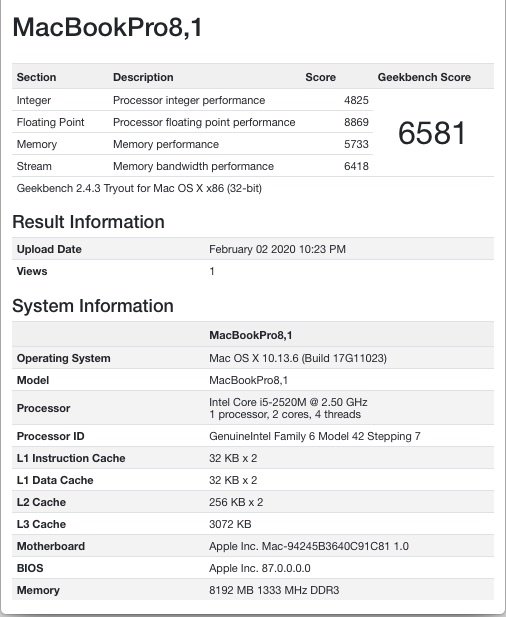
Last update: 16 May 2021 Target macOS release: High Sierra 10.13.x This is a Clover-based installation using the well-known/well-documented vanilla manual method detailed below: VGA: HDMI: Working: full QE/CI with HD3000 graphics OOB HDMI output OOB DVI + DP output OOB through port replicator E-Port K07A002 VGA output (with AppleIntelSNBGraphicsFB kext patch) full audio, including jack microphone input and headset output (with AppleALC kext and layout-id 12) HDMI audio (with AppleIntelSNBGraphicsFB kext patch) built-in Gigabit Ethernet (with AppleIntelE1000e or IntelMausiEthernet kext) DW375 bluetooth OOB (on/off supported with Broadcom Controller Transport patch injected to FakeSMC kext) native SpeedStep at CPU multipliers x8/10/12/14/16/21/22/25 (with AICPUPM patch + generated CPUPM SSDT) Turbo boost to x32 3.2GHz at Turbo multipliers x26/27/28/29/30/31/32 system sleeps Ok through lid closure, power button, Fn-F1, Apple menu->Sleep and energy savings settings with hibernation mode set to 0 (sleep to RAM) and /var/vm/sleepimage file deleted. Wakes Ok through lid opening and power button wireless & bluetooth with any compatible card battery management and monitoring (with ACPIBatteryManager kext) SD card reader (with DSDT patch for compatibility with Apple's default device 14e4:16bc) integrated webcam OOB keyboard backlight control OOB (for backlit models) left combo eSATA/USB2.0 + right USB2.0 ports OOB ExpressCard slot OOB Not Working: N/A Not tested: SmartCard reader GeekBench v2.4.3 (32bit) gives a good 6500+ rating: 1) 10.13 USB installer creation Using a USB key of 8GB minimum, create a High Sierra USB installer through the following Terminal command: sudo <path>/Install\ macOS\ High\ Sierra.app/Contents/Resources/createinstallmedia --volume /Volumes/<USB key> where: <path> = location of High Sierra installation package (eg: /Applications if freshly downloaded) <USB key> = name of formatted USB volume (eg: USB_8GB) The process will take several minutes. Once completed: install Clover bootloader on the USB installer with the following customised settings: Install Clover in the ESP Boot Sectors -> Install boot0af in MBR Clover for BIOS (legacy) booting -> Clover EFI 64-bits SATA BIOS Drivers, 64 bit -> FSInject-64 / ApfsDriverLoader-64 / AppleImageLoader-64 BIOS Drivers, 64 bit -> GrubEXFAT-64 / GrubNTFS-64 you may use version r4689 attached below or any subsequent version available at Dids' Github repo: Clover_v2.4k_r4689.pkg.zip once Clover is installed, launch Clover Configurator app and mount the freshly created EFI partition of the USB installer Clover Configurator.zip open this EFI partition and transfer the files & folders from the E6220 High Sierra Clover pack below to the EFI/Clover folder Clover_pack_E6220_HiSie.zip Clover_pack_E6220_HiSie_#2.zip 2) 10.13 installation boot the High Sierra USB installer at the Clover main menu, select the "Install macOS High Sierra" partition (but don't press [ENTER]) press [SPACE], select -v verbose option in the menu, then choose to boot with the selected options proceed with installation, creating & formatting the target High Sierra installation through Disk Utility as/if required on 1st reboot, boot off the USB installer and select the freshly created "macOS install from <target High Sierra partition>" repeat this until this partition is no longer offered and only the target High Sierra partition is left to boot 3) Post-Installation tuning Once the target High Sierra partition has booted, complete the 1st boot configuration finalisation Once at the desktop, install Clover bootloader on the High Sierra partition/disk: if operating in BIOS legacy mode, use the customised settings listed above if operating in BIOS UEFI mode, install Clover with UEFI settings instead Once Clover is installed, launch Clover Configurator app and mount the freshly created EFI partition of the High Sierra partition/disk Open this EFI partition and transfer the files & folders from the above E6220 High Sierra Clover pack to the EFI/Clover folder You may then reboot and verify that High Sierra boots off your disk through Clover After that reboot, finalise post-installation tuning actions such as disabling hibernation, allowing all apps download from anywhere, changing all serial numbers, etc. Please note that: Clover config of the pack contains enabled HDMI-audio + VGA output + DVI output patches Clover config of the pack contains disabled 384MB-to-1GB and 512MB-to-2GB VRAM patches. To be enabled if desired. Must be accompanied by the patch of Info.plist of AppleIntelHD3000 kext to add the necessary key: <key>VRAMSize</key> <integer>xxxx</integer> where xxxx=512|1024|1536|2048 Caching add-on kexts from /L/E is faster than injecting them from E/C/k/O After any kexts modification, whether to /S/L/E or to /L/E, repair permissions and rebuild cache Other E6220 laptops fitted with a different CPU will require a different (and suitable) SSDT table than provided in the above pack (can be looked up on the web or created with Pike R Alpha's SSDT generator tool). In such cases and in order to avoid CPU power management-related kernel panics (KP), NullCPUPowerManagement kext is recommended to be used temporarily until the CPU-specific SSDT is generated. The kext just needs to be added to /Library/Extensions followed by permissions repair/cache rebuild. - - - - - - - - - - Edit #1: 17 Aug 2019 Revised bootpack #2: repatched DSDT (from freshly extracted A14 BIOS) and added support for Fn-UP/Fn-DOWN brightness keys Hackintool-generated USBPorts kext to replace USBInjectall Edit #2: 16 May 2021 Added a note about installing Clover on target High Sierra partition according to BIOS mode (legacy vs. UEFI)
-
I'll try and grab my E6220 off my daughter and see if I can make a fresh Clover-based HiSie installation. It's still running with Enoch, though installation and updates were all made with Clover. I'll then post the Clover EFI folder.
-
Maybe you should try the pin masking...
-

Which is Dell Latitude e - series is easiest to Hackintosh
Hervé replied to Alzaka's topic in The Archive
It's easy to confuse some of the older Latitude E7xxx series with the newer Latitude 7xxx Series. There is added confusion when you realise that last E-Series E7470 sold alongside a sister model labelled 7470 within the E-Series (like a few other Exx50/xx50 models). E7450 is 5th gen Broadwell (HD 5500 or nVidia GeForce 840M); this is getting older now... E7470/7470 is 6th gen Skylake (HD 520) 7480 is generally Kaby Lake (HD 620/HD 640) but also sold as 6th gen Skylake (HD 520) 7490 is 7th gen Kaby Lake (HD Graphics 620)/ 8th gen Kaby Lake R (UHD Graphics 620) We have guides for all those models. Provided the 7480 model you were offered is Kaby Lake, it'll be a better machine than a Skylake 7470/E7470. If you go for a Broadwell E7450, go for a model without the nVidia graphics. -
For Snow Leopard, you're supposed to use myHack v3.1.2, not v3.3.1 (which has a bug for SL)... It's clearly stated here.
-
All the kexts we provide in our bootpacks support the associated features; we vouch for this. They've been throughly tested and validated before they were posted. But they are only guaranteed to work on a full vanilla installation. Given that Snow Leopard does not install with myHack v3.3.1, I suspect you're either running a distro, not a vanilla Snow Leopard installation or that you've mixed things by using myHack on a non-myHack build. Once you details what you did a little more, we may be able to provide further assistance.
-
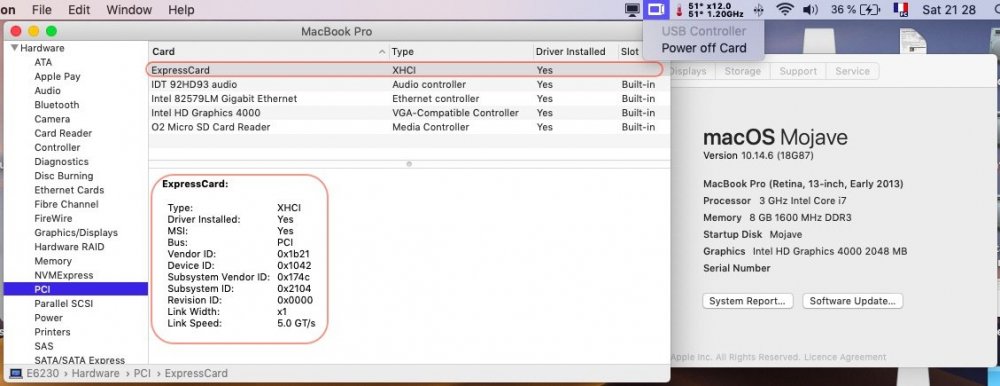
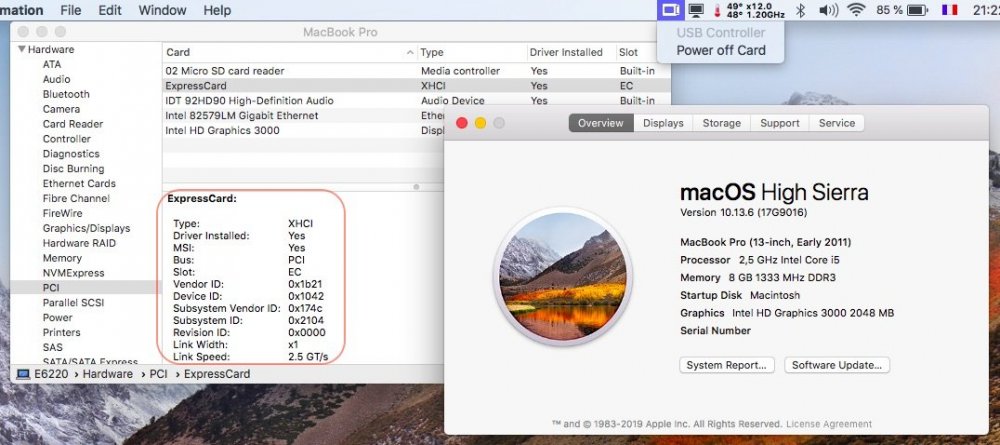
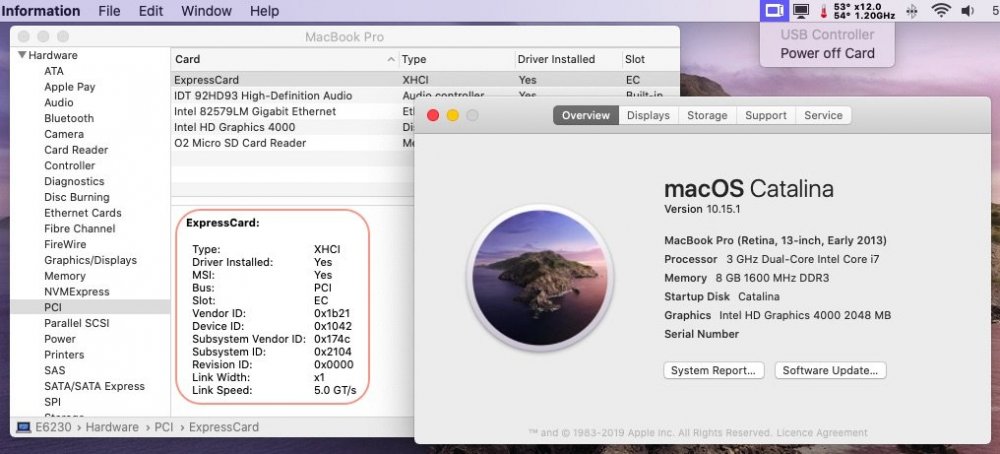
GMYLE BC628 EC34 card still works in High Sierra, Mojave and Catalina too. And still with Rehabman's good old GenericUSBXHCI kext v1.2.11. GenericUSBXHCI.kext.zip Now... where did I put that other Renesas-based NEC ExpressCard ???
-
If you use the kexts provided in our bookpacks (available in this very section), all you have to do is to tick the associated "display" box in the Energy Savings PrefPane. You must have missed it but the buck stops at Lion 10.7.5 for the Latitude D620, whether the GMA 950 model of the nVidia NVS 110M model. Starting with ML, Apple switched to 64bit-only kernel & kexts and there are no support for those GPUs in 64bit mode. ML can only run with the MLPF hack which basically converts it to a bastardised fat binary DP1 version (and it's a little buggy). Forget about any other version. Snow Leopard literally flies on those D620 -even if they only have 2GB of RAM- and is, by far, the best version to run on them. It's just all outdated, not to say obsolete, these days.
-
Why don't you start by removing all those useless kexts you inject and/or possibly cache? AirportBrcmFixup BroadcomWiFiInjector FakePCIID_Broadcom_WiFi
-
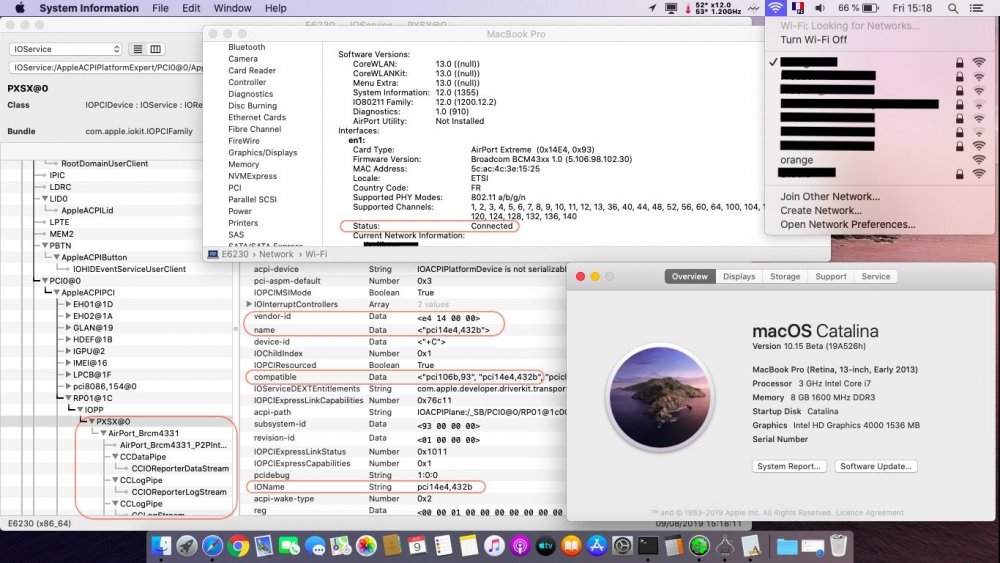
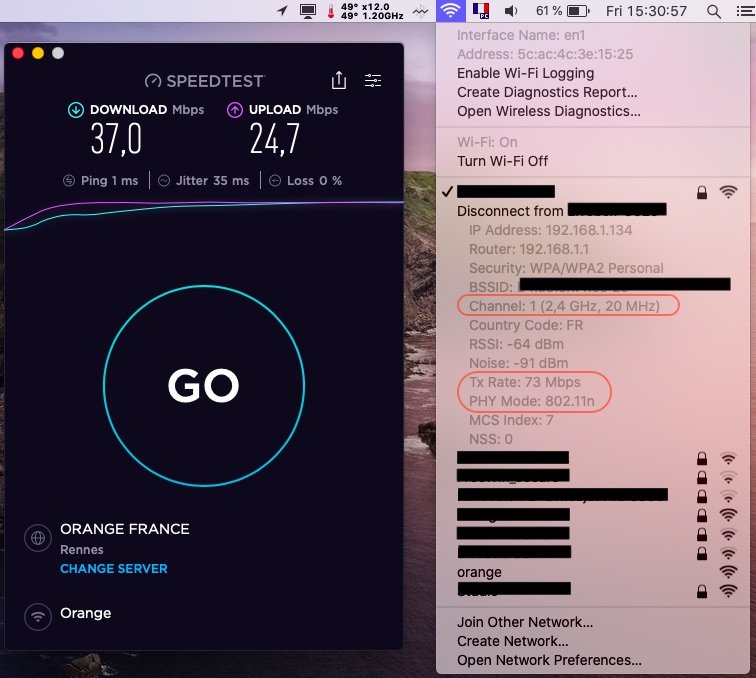
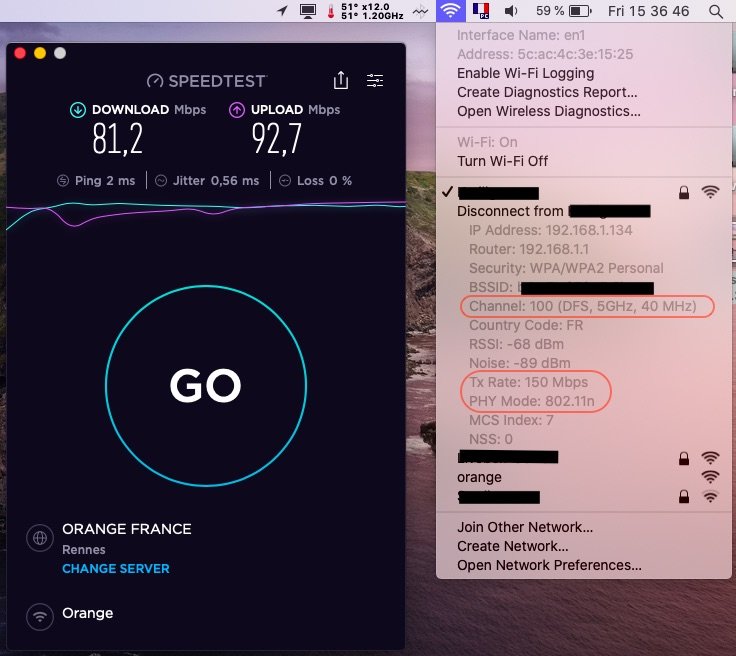
DW1510 works OOB; you must have done something wrong... I took my Apple BCM94360CD out of my Latitude E6230 and connected a DW1510 with a single antenna. Here is how it goes under Catalina Beta 5: Ookla results are as follows (only 1 x antenna connected, so reduced rates/performance):
-
It's not dropped; still covered by the AirPortBrcm4331 kext.
-
Yes, I had mentioned that in my original guide back in April.
-
You could try iMac13,2 or iMac14,2; those had nVidia GPUs.
-
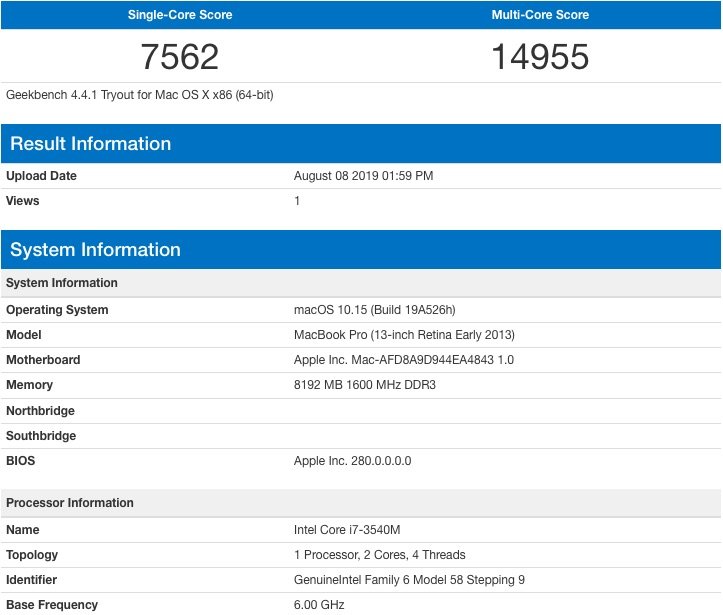
Rest assured it's no real or proper overclocking: I've just run my E6230 fitted with an i7-3540M @3GHz with a configured bus speed of 200kHz (i.e. twice the normal CPU bus speed); Booted up Ok and reported a CPU speed of 6GHz ("About This Mac" maxed out @4.3GHz) with Turbo speed up to 7GHz when running GeekBench; it never crashed. Do you think my little mobile i7-3540M really ran at 7GHz? I could probably declare a 300kHz too if I wanted. If it pleases you, stick with your "overclocking" settings. You certainly won't break anything. For the rest, read up the info posted at the link I posted previously or consult the Clover Wiki. For Catalina, I guess you ought to try MP5,1 or MP6,1.
-
Yes, I remember playing with similar things with Clover on my old Latitude D630 years ago. @Bronxteck, do you remember? You probably simply increased the declared bus speed and, whilst it seems it can provide overclocking, it actually just affects the reported CPU frequency. I remember going all the way to ridiculous fake speeds (like 6GHz) and the laptop would still boot but it clearly was not running at 6GHz! Anyway, quite rapidly, the laptop stopped working properly. It's no proper or real o/c as far as I'm concerned (else we'd all be doing it!). Slice explained here how GeekBench computes its score so, naturally, the higher the bus speed you declare, the higher the score. But it's kind of fake... If you wanted to verify if you have overclocking or not, you need to do some real comparative application performance measurements, not just rely on GeekBench. More info on the Clover CPU settings here if you want. On my side, I always set the bus speed so that the CPU speed is properly reported in "About this Mac": for instance, setting bus speed of a Sandy Bridge/Ivy Bridge/Haswell/etc. at 100kHz will lead to a reported speed of, say, 2.7 or 3GHz, rather than 2.69 or 2.99GHz. But it really is more cosmetic than anything else.
-

[SOLVED] Need Help on Dell Inspiron i5570-7987SLV-PUS
Hervé replied to razor7's topic in The Archive
Ok, so: audio codec is ALC256 and should be supported by AppleALC and the relevant layout(s) Realtek RTS5129 may or may not be supported with Sinetek's kext (unfinished project) Sunplus Webcam will work OOB or not at all- 26 replies
-
- 1
-

-
- i5570
- i5570-7987slv-pus
-
(and 2 more)
Tagged with:
-

[SOLVED] Need Help on Dell Inspiron i5570-7987SLV-PUS
Hervé replied to razor7's topic in The Archive
Readable details of specs are missing so here they are: Intel dual-core Kaby Lake-U/Y i7-7500U @2.70GHz (Turbo boost up to @3.5GHz) Intel HD Graphics 620 (PCI id 8086:5916) 15.6 built-in LCD Full HD @1920x1080 or HD @1366x768 ? 4GB DDR4-2400 Realtek RTL8101/2/6E Gigabit Ethernet (PCI id 10ec:8136) Qualcomm QCA9377 802.11ac Wireless LAN (PCI id 168c:0042) Audio ? USB ports ? Video outputs ? Card reader ? Webcam ? Note that the Qualcomm WLAN card is unsupported and will have to be replaced by a supported model or USB dongle. See our FAQ section. I recommend you lookup the other Inspiron 5570 threads in this section, many contains useful info + copies of Clover setups. You can use the forum Search facility if required.- 26 replies
-
- i5570
- i5570-7987slv-pus
-
(and 2 more)
Tagged with:
-

[SOLVED] Need Help on Dell Inspiron i5570-7987SLV-PUS
Hervé replied to razor7's topic in The Archive
No, if only if were just that! There are many many mistakes and missing items with your Clover setup (config + kexts). Try the attached instead: CLOVER.zip- 26 replies
-
- i5570
- i5570-7987slv-pus
-
(and 2 more)
Tagged with:
-
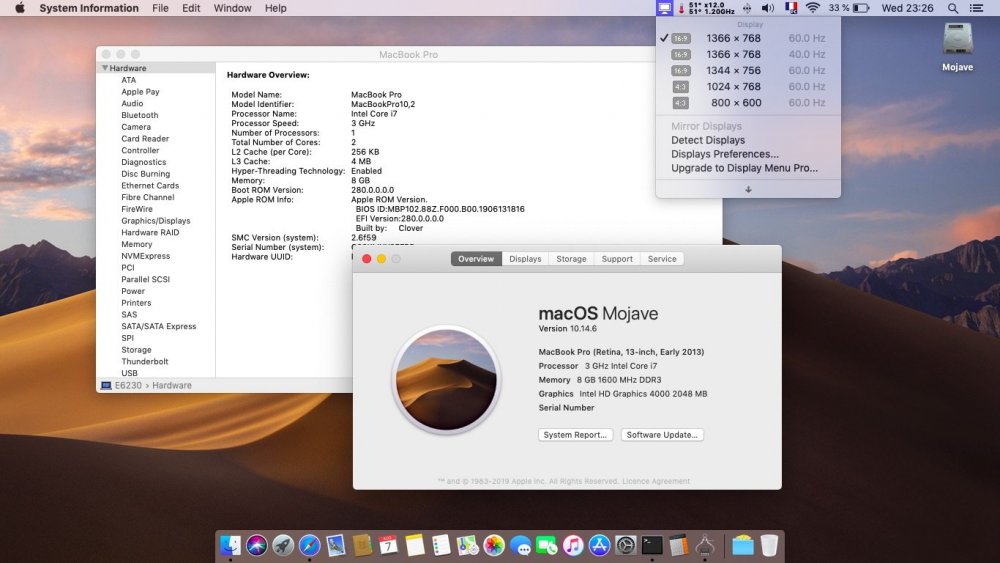
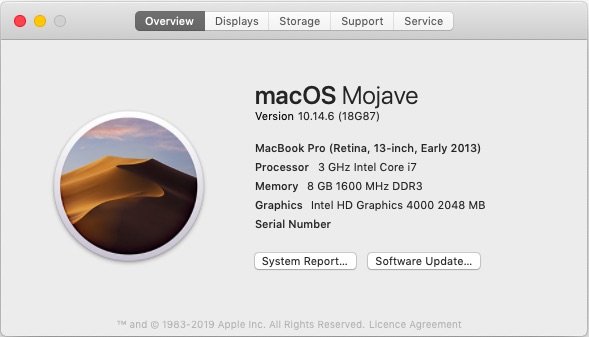
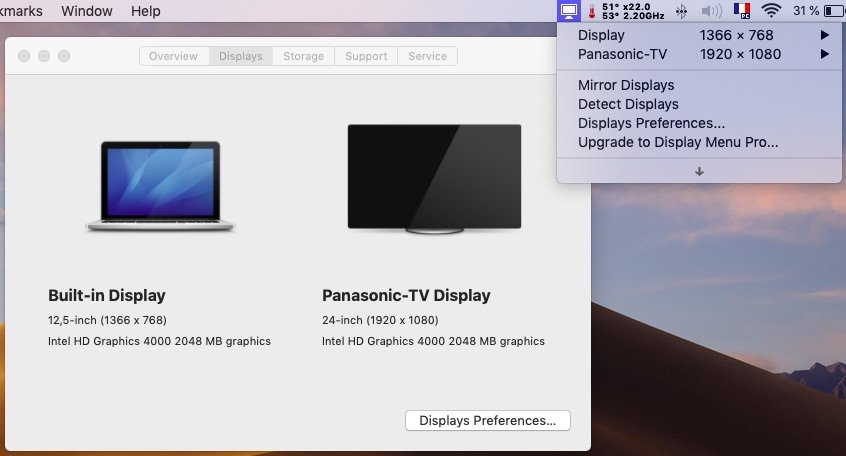
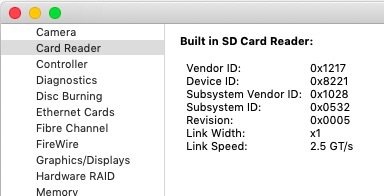
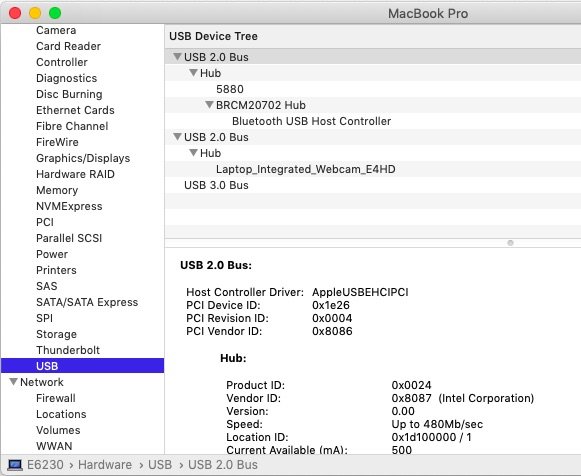
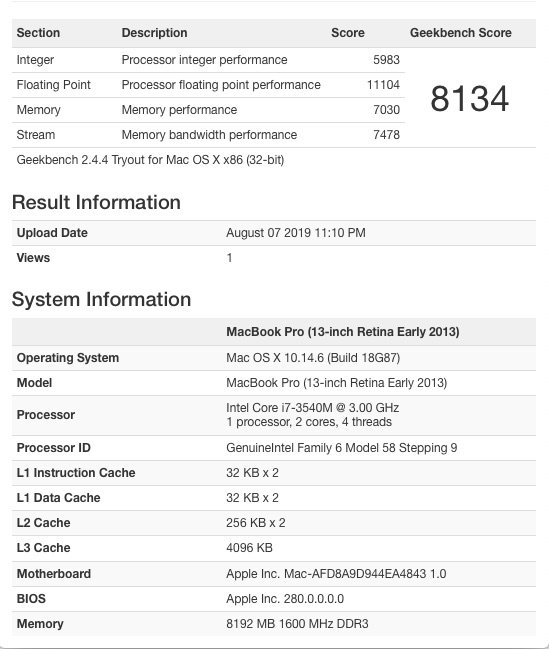
Last update: 29 Mar 2020 Target macOS release: Mojave 10.14.x This is a Clover-based installation using the well-known/well documented vanilla method detailed below: Working: full graphics acceleration on Intel HD4000 graphics (with Lilu v1.3.7 + WEG v1.3.0) multi-display with HDMI OOB audio, including jack microphone input and headset output (with AppleALC v1.3.9 & layout 12 + CodecCommander v2.7.1) HDMI audio (with Capri Framebuffer patch) built-in GigEthernet LAN connection (with AppleIntelE1000e v3.1.0 or latest IntelMausiEthernet kext) wireless and bluetooth with any compatible card integrated webcam (OOB) full CPU power management, including Turbo boost (with CPU-specific generated ssdt) sleep (Lid, Energy Saver settings, Apple menu, Fn-F1, PWR button) & wake (Lid, PWR button) battery management (with ACPIBatteryManager v1.90.1) SD card reader (with DSDT patch for compatibility with Apple's default reader) keyboard (with Dr Hurt's VoodooPS2Controller R6 + DSDT patch for brightness control) touchpad including tap-to-click (with Dr Hurt's VoodooPS2Controller R6) left combo eSATA/USB2.0 + right USB3.0 ports (with Hackintool's generated USBPorts + Rehabman's FakePCIID kexts for multiplexing) ExpressCard slot OOB Not working: VGA output unsupported Not tested: SmartCard reader fingerprint scanner GeekBench v2.4.4 (32bit) gives a slightly improved 8100+ rating: 1) 10.14 USB installer creation Using a USB key of 16GB minimum, create a Mojave USB installer through the following Terminal command: sudo <path>/Install\ macOS\ Mojave.app/Contents/Resources/createinstallmedia --volume /Volumes/<USB key> where: <path> = location of Mojave installation package (eg: /Applications if freshly downloaded) <USB key> = name of formatted USB volume (eg: USB_16GB) The process will take several minutes. Once completed: Setup your BIOS for UEFI mode install Clover bootloader on the USB installer with the following customised settings: Clover for UEFI booting only Install Clover in the ESP UEFI Drivers AudioDxe DataHubDxe FSInject SMCHelper ApfsDriverLoader AptioMemoryFix Fat PartitionDxe Ps2MouseDxe UsbMouse.Dxe VBoxHfs Themes (optional) Install Clover Preference Pane (optional) you may use version r5035 attached below: Clover_v2.5k_r5035.pkg.zip once Clover is installed, run Clover Configurator app and mount the freshly created EFI partition of the USB installer Clover Configurator.zip open this EFI partition and transfer the files & folders from the Latitude E6230 Mojave Clover pack below to the EFI/Clover folder: E6230_Mojave_pack.zip E6230_Mojave_pack_#2.zip E6230_Mojave_pack#3.zip E6230_Mojave_pack_#4.zip if your E6230 is fitted with a different CPU than those cared for in the bootpack (i5-3340M/i7-3540M), remove the SSDT.aml table from Clover's EFI/Clover/ACPI/patched folder (default table is for i7-3540M); you'll generate you own CPU-specific power management table in post-installation phase. 2) 10.14 installation boot the Mojave USB installer at the Clover main menu, select the "Install macOS Mojave" partition (but don't press [ENTER]) press [SPACE], select -v verbose option in the menu, then choose to boot with the selected options proceed with installation, creating & formatting the target Mojave installation through Disk Utility as/if required on 1st reboot, boot off the USB installer and select the freshly created "macOS install from <target Mojave partition>" repeat this until this partition is no longer offered and only the target Mojave partition is left to boot Reboot the target Mojave partition via your USB installer 3) Post-installation tuning Once the target Mojave partition has booted, complete the 1st boot configuration tuning Once at the desktop, install Clover bootloader on the Mojave partition/disk with the customised settings listed above Once Clover is installed, launch Clover Configurator app and mount the freshly created EFI partition of the Mojave partition/disk Open this EFI partition and transfer the files & folders from the above Latitude E6230 Mojave Clover pack to the EFI/Clover folder You may then reboot and verify that Mojave boots off your disk through Clover If your E6230 is fitted with a different CPU than the models stated above, download Pike R Alpha's SSDT generator tool and generate your own CPU-specific SSDT. Copy the resulting SSDT.aml file to Clover's EFI/Clover/ACPI/patched folder. - - - - - - - - - - Edit #1: 16 Aug 2019 Updated pack #2: revised patched (A19) DSDT to fix to a small coding error causing issues with battery monitoring. - - - - - - - - - - Edit #2: 20 Aug 2019 Updated pack #3: added the USBPorts kext I had forgotten in pack #2. - - - - - - - - - - Edit #3: 29 Mar 2020 Updated pack #4: fixed a small copy/paste mistake in HDMI audio patch in pack #3.


