Search the Community
Showing results for tags 'High Sierra'.
-
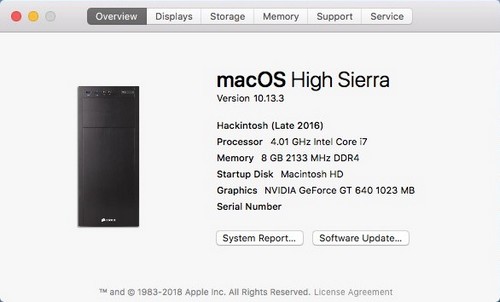
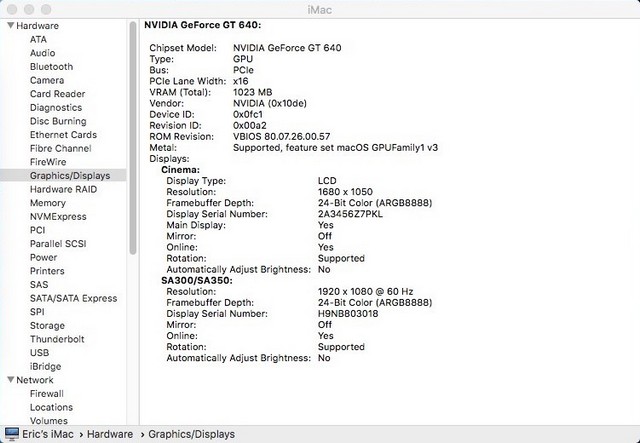
Hi. I recently installed High Sierra on my Z170-XP SLI based system and have everything working except the GT 640 graphics are quite choppy. Things like opening notification center and launchpad lag. I have full QE/QI support or whatever. I'd assume since this is a natively supported card I don't need any web drivers. Using iMac14,2 SMBIOS. If it matters I'm using a 20in Cinema Display (the old one) on DVI and a Samsung off the HDMI output with an HDMI to DVI adapter. I've attached my EFI folder if you need it. This card was moved from my 2008 Mac Pro running El Capitan and it worked just fine on there. Thanks. EFI.zip

-
System specs Dell optiplex 3050 Bios versio 1.7.9 Core I3 7100 (7th gen)/3.9 ghz dual core Intel 250 express Intel HD graphics 630 working with no fake id's and no injections 4gb DDR4 2400 mhz 500gb HD Sata Realtek RTL8168H/8111H Gigabit Ethernet Create High Sierra USB and add attached clover folder to esp Bios Setting System configuration >SATA Operation>AHCI disable wake from usb device if you have issues with the system turning back on after shutdown. Exit >F12 once you see dell logo screen If you do not see your usb device You will have to add it as a boot option in General>Boot sequence>boot list option>add boot option Working: USB Ethernet Display port sound in head phone port and internal speaker Not working: HDMI audio rear audio port MacOS 10.13.4 Switched to SMBios 18,1 with 18,2 I could not get rid of the display glitch issue. Optiplex 3050 OS 10.3.3 EFI.zip
-
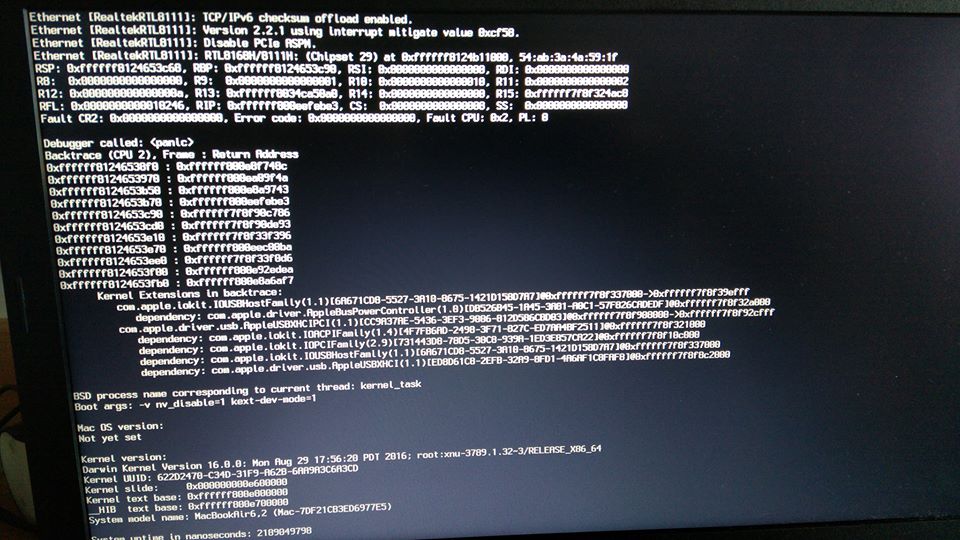
I'm trying to install High Sierra on Dell Latitude E5450 Intel i5-5300 with HD Graphics 5500 (no dedicated GPU) The Bios Version A07 SATA SSD (Samsung EVO 850) that is in AHCI mode I have tried using bootpack from: https://osxlatitude.com/index.php?/topic/10207-e5450-fresh-install-high-sierra-and-few-problems/ But I'm stuck at "Still waiting for root device" (the attached screen is exactly before the message). Here are the "origin" AML files (from my system) and the clover folder (removed binaries but kept all info.plist for kexts to fit in 2MB). Clover version is rev 4330 (UEFI mode). BIOS DVMT is set to 64MB (using the utility that I can't remember the name since I set it up for Sierra) I even tried cloning the USB stick (install partition) to the SSD and booting from there, but the same happens. What am I doing wrong? Thank you in advance. Note: I had Sierra successfully installed on this laptop, and I have High Sierra successfully installed on another E5470 with Skylake booting with the same Clover version. e5450-origin.zip e5450-clover.zip
-
A first-time Hackintosher needing some assistance. Could anyone assist with the necessary kexts and config.plist required to get to boot? Two weeks in and I'll take anything I can get right now even if it's for Sierra, HFS or APFS. LAPTOP specs: Dell Latitude E6520 - i7-2620M - 8GB RAM - HD3000 - NVS 4200 - Crucial 525GB SSD - WD 250GB HDD Finally got a bootable High Sierra image from Hackintosh Zone and able to boot into clover, though get stuck during boot using either legacy or UEFI. Using Legacy I get the 'Still waiting for root device error' - Applied the USBBusFix flag, aptiofix to no avail with UEFI I get the prohibited sign (Verbose mode does reveal some other error) FakeSMC is added. I've tried the Sandy-Bridge config.plist as well as generic ones for legacy & UEFI to no avail I've attached my current EFI folder, EFI_CLOVER.zip
- 39 replies
-
- 1
-

-
- High Sierra
- Help Needed
- (and 2 more)
-
macOS High Sierra on Lenovo Yoga 500 14ISK Connect the USB flash drive (16gb) to the Mac, format it with name UNTITLED in Disk Utility (You need GUID Partition Map with Mac OS Extended (Journaled)) Download macOS High Sierra installer application from the App Store* and be sure the complete installer is located in the /Applications/ directory Open the “Terminal” application found in /Applications/Utilities/ and paste this: sudo /Applications/Install\ macOS\ High\ Sierra.app/Contents/Resources/createinstallmedia --volume /Volumes/UNTITLED && say Boot Installer Complete When installer finished you will be informed that the process has completed Install CLOVER onto USB EFI partition, choose in tab Drivers64UEFI: - CsmVideoDxe-64 - EmuVariableUefi-64 - fat-64 - OsxAptioFixDrv-64 Copy file HFSPlus.efi into folder EFI/CLOVER/Drivers64UEFI/ Replace standard Clover config.plist with Intel HD 520 Configuration Install Clover Configurator and fix memory and Audio: Memory (Check your Memory): Slot: 0, Size: 8192, Frequency: 1600, Type: DDR3, Channels: Single Channel, Slot Count: 1 Audio: Reset HDA, Inject Layout 15 Download all attached kexts and put it`s into folder: EFI/ CLOVER/KEXTS/Other on USB EFI partition Reboot system in BIOS (or boot from your USB stck from Lenovo if you use another Laptop) Make Load Default Settings on your BIOS and then: - make USB as main boot priority - Hotkeys Mode -Disabled - Intel Virtual technology - Enabled - Graphic Device - UMA Only - Secure Boot - Disabled F10 (SAVE) and boot from USB Install OS X High Sierra on your HDD (You need GUID Partition Map with Mac OS Extended (Journaled)) After installation Load System Form Your HDD - use USB bootloader first time Install Clover onto your HDD EFI partition Copy all EFI partition from USB stick to HDD EFI Reboot from HDD Fix Brightness with this method - https://youtu.be/Dcs5t_23Ge0 Whats works: - LAN and Bluetooth - Keyboard Keys Light - Trackpad (with some issues - cant dragging with two fingers) - Audio ALC 236 (with keyboard hotkeys) - HDMI (with sound but without volume option) - Screen brightness (with keyboard hotkeys but not Fn11-12 like on Lenovo, use Fn-Pause+ScrLk - remapped by Prefs/Keyboard/Shortcuts/ to F11-12 without Fn) - Camera - Card reader - Touch Screen (only for one finger) - Battery management Also possible updates from AppStore Whats does not works: - WiFi - I`m using USB wifi module, but still find new wifi module for Lenovo M.2 slot - Trackpad works with gestures, but dragging only with one finger - it is not comfortably That`s all, if you will install it too, let`s make up other problems together! UPDATE 08 Feb 2018 Sleep and Wake works good with Macbook Air 6,1 SMBIOS But have new troubles, after wake up can be lost bluetooth or sound (need to click it in System Preferences for activation) ACPIBatteryManager.kext.zip CodecCommander.kext.zip AppleALC.kext.zip FakeSMC.kext.zip IntelGraphicsDVMTFixup.kext.zip IntelGraphicsFixup.kext.zip Lilu.kext.zip RealtekRTL8111.kext.zip Shiki.kext.zip VoodooPS2Controller.kext.zip
-
My Dell Latitude E7450 (A17 set to UEFI) with integrated graphics only is able to boot Clover from the USB stick I created, but the High Sierra installation is not an option in the Clover menu - only my hard drive partitions are listed. I have tried creating the stick by manually creating the USB install stick using this guide and then replacing the files in the EFI partition with the generic bootpack + E7450_HD5500_Only_A17_HS.zip from here. The stick is a USB 3.0 stick and I've tried it both in an "on board" USB 3.0 port and in a USB 2.0 port in the dock - same result. The stick was created in a VirtualBox machine running Sierra. Since the App Store update resulted in one of those ~20 MB downloads, I used macOS High Sierra patcher to download the full installer. Please advice what futher information I should provide to debug this. Thanks in advance.
-
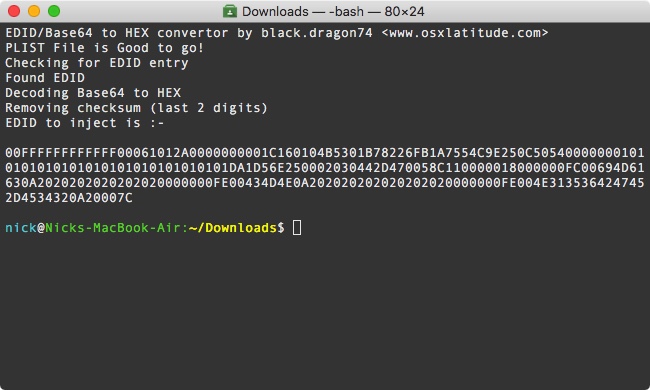
Hello friends, Many of you have noticed that after upgrade to high sierra whenever you machine sleeps, be it a display sleep or a system sleep, the screen turns out fully white with garbled lines, or it might turn black with just the cursor moving. If you try and press few keys you will find out that the machine works but the display doesn't. If you want to know a little background info, read on, else skip to fix. On my ASUS R541UJ this bugged me a lot. I tried hell lot of things like, re patching DSDT, trying with all 15 ig-platform-id (for Kabylake), still, the issue persisted. I also have an ASUS A555LA (which I am trying to make a perfect MacBook Air). So, in my process of making my A555LA a perfect MacBook I added a ALS (ambient light sensor device) and then, changed vendor-id along with product-id of the laptop's display to that of Apple's display i.e. PID: 0x9cf2 VID: 0x610 for MacBook Air's display.. Whatever I do on my A555LA, I replicate the same on my 2 other ASUS laptops. So, I did the same on my R541UJ (the one affected by this annoying bug) And to my surprise, that issue was fixed! Then, I disabled the ALS device in my custom SSDT (I generally make a dynamic configurable SSDT that works for all my machines, See here) and that issue didn't come back. So, I finally came to the conclusion that it was due to incorrect vendor-id and product-id of my display in IODisplayEDID or EDID. Enough talking, let's see how you can fix this in a few simple steps. How to fix: In order to fix this, as you might already know from above, we need to change our display's product and vendor id to that of Apple's display. There are 3 ways for this, Injecting custom EDID using clover, Using a display override, Using a custom override kext (DispalyMergeNub). I love CLOVER so will be covering that part of the fix in this guide. Also, injecting EDID with clover is preferred as it will also work when booting recovery partition. (Not the same with Display Overrides and DisplayMergeNub) Update your CLOVER to latest version (nothing to do with this fix but is a good idea to have you boot loader up to date) Download Darwin Dumper from here Download FixEDID app from here Download my script attached to this post. Open Darwin dumper and uncheck everything except EDID. Then, select run from the left pane. It will dump your EDID and then it will open a folder where it dumped the files. In the folder you will find an EDID folder. Upon opening it you will see 3 files namely, EDID.bin, EDID.hex, EDID.txt (All three files are your EDID dump except in different formats). We need the one in BIN format for FixEDID.app Copy EDID.bin from DarwinDump*/EDID to your Desktop (Dump* is the darwinDumper output folder) Open FixEDID.app and select open EDID binary file. Choose the EDID.bin file you copied to desktop. If you look below "Open EDID binary file" button, you will see a drop down menu saying "Apple iMac Display 16:10" Select it and choose "Apple MacBook Air Display 16:9" (Note: You may try experimenting with different models, I personally use "Apple MacBook Air Display 16:9" on my A555LA and "Apple MacBook Pro Display 16:10" on my R541UJ) Make sure display class is set to "AppleBacklightDisplay" for we are overriding our internal LVDS display. (AppleDisplay is used for external displays like that on HDMI or DP) Click on Make button (Note: You won't see any sort of confirmation but the app has done it's work) Close FixEDID and come back to your desktop. You will see a host of new files there. (3 files to be precise) For this guide, you just need DisplayVendorID-xxx folder. Open it any then you will find a file named "DisplayProductID-xxxx" Copy this file to the Desktop. Now we need to extract EDID that is in base64 format and then convert it to HEX format as required by CLOVER. Worry not, I got you covered. Now is the time to run my script. Assuming my downloaded script is in Downloads folder, open terminal and type: # Change working directory cd ~/Downloads # Make script executable chmod a+x get_edid.sh # Run and get EDID to inject ./get_edid.sh ~/Desktop/DisplayProductID* ` This script wil give you EDID you need to inject using CLOVER, like: Copy that EDID and paste it in your config.plist under Graphics > EDID > Custom (You can use clover configurator as that will save you from manual PLIST editing which is not recommended for novice users) Also, set Boolean Inject to True (YES) under config.plist > Graphics > EDID. See below screenshots for reference: Any Plist Editor(Xcode): Clover Configurator: Reboot and Voilà! You won't face that dreaded issue ever again until you remove custom EDID. LOL. You can verify if the EDID is being injected by opening terminal and typing: ioreg -l | grep "IODisplayEDID" ` The output should match the output of get_edid.sh Problem Reporting: See How to generate proper problem reporting files Note: This issue mostly seems to effect machines running High Sierra on Kabylake hardware (maybe Skylake too?). I have personally tested this on Sierra (with and without skylake spoofing) turns out that Sierra is not affected by this. Note: Upon booting up with custom EDID in place you will see that your colors are not such bright and crisp. YMMV. (Coz our's isn't a Apple branded display ). To fix that, open system preferences > Display. Select "Color" tab and choose "Apple RGB Display" Hope this helped someone! Regards get_edid.zip
-
- 9
-

-

-
- black screen
- after sleep
- (and 2 more)
-
Hi, First let me thank everyone for all the guides, notes and contribution. Really thank you. Ok.. I have a Dell E6430 laptop. I changed the Wireless card for one compatible, and installed a 500GB SSD. I'm installing High Sierra. I followed the guide "Dell Latitude / Inspiron / Precision / XPS - Clover Guide" and all the installation process went perfect. I just go trouble to manage to start the mac OS without the Pendrive, but that's working now. Now my problem is the post installation. I followed the rest of the guide but for some reason it's not working. My issues are the following: USB Port not working. (This one is very weird, only the left usb port works. The right ones are not working) Sound is not working. Battery status not working. Webcam is not working. HDMI (not tested yet) VGA (not tested yet) So far my biggest concern is the USB and sound, . I used the E6430_A12.zip. Please find attached a copy of my EFI folder of the USB installer. The same content is in the EFI partition of the laptop. Any help will be truly appreciated. Thanks in advance CloverUSBContent.zip
-
Has anyone been able to successfully install high sierra on Lenovo Z51-70... i never had problems installing el capitan or sierra but i am simply not able to get to high sierra installation...please help me out....
-
Hi crew I installed fresh copy of HS on my E7440, and it runs smooth. But I ran into a problem with post installation guide. I get 'Attempting system restart.. MACH Reboot' when I restarted. I think it happens when I generate new Serial number. If you ask why I think that, it's because before I proceed with post installation guide, I wanted to check if I'm able to login with an apple ID. Instead I got 'Account limit reached', and after Googling I figured it's because of the serial number. So I generated one and restarted. Then it hit me with mach reboot. went back to previous config, and booted again fine and continued with post installation. Then again Mach reboot. P.S: Tried MacBookAir6,1/6,2 , both same result. P.S2: File System: HFS+ Clover Installer: v4289 Clover Configurator: v4.55
-
Just updated my Optiplex 780 SFF Core2Duo GMA4500 onboard graphics to High Sierra. Everything seems fine except when I open browser to browser web pages, the pages appears for a brief moment and then becomes blank. Clover folder is attached. If anyone can point me to what graphics settings I need to change please? Optiplex CLOVER.zip
-
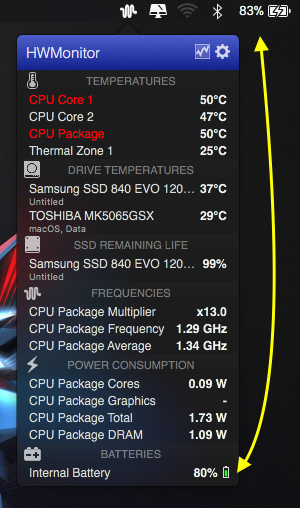
 Hi All. I have a problem with my hackintosh. Everything was running smoothly but I just noticed that my battery charge status was differently with HWMonitor(real charge shows) and battery status on menu bar. See attached picture. Second one is my boot was slow even on SSD- Samsung 840 Evo. It took 32 seconds(trim enabled) and 28 seconds(trim disabled) to boot my hackintosh. I have reporting files attached. Any help will be greatly appreciated. My specs: Dell inspiron 5558 A14 Bios i5 5200u(broadwell) Nvidia 920m(disabled via dsdt) 12GB RAM 120GB Samsung 840 Evo SSD(main drive) 500gb Seagate & Toshiba HDD(im changing secondary drive-CD Caddy as im migrating files) Kext used and patches can be seen on my reporting file. Thank you EDIT - additional info: Im dualbooting High Sierra & Windows Windows 10 boots in 7 seconds I am using APFS Clover UEFI Noticed also that HWMonitor shows that my ssdlife is 99% while on windows(hd sentinel and ssdlife pro shows 100%) Troubleshooting done: •disabled nvidia via bios •fixed usb power and usb limit via ssdt for usbinjectall •tried booting with all kext removed. Left Fakesmc, usbinjectall, realtek only for booting •tried reseating all hw(memory, hdd, cmos battery, wifi card, HDD caddy) But issue still persist - slow boot and battery not shown properly reporting-6.zip
-

E6420 Second SATA Port Not Working In macOS 10.13 High Sierra
taddeusz posted a topic in The Archive
I upgraded my E6420 hackintosh to High Sierra and I immediately noticed that I'm no longer able to boot from the secondary drive bay. I usually have my Windows drive attached to the primary SATA port and have one of the drive adapters that lets me install a second hard drive in leu of the optical drive. I had my macOS installed there so I can dual boot between the two. With High Sierra that no longer works. When I try to boot macOS from the secondary port it KP's and is garbled so I can't read what it says. When the drives are switched around macOS boots and recognizes another drive is there but complains that it's having trouble reading it. I can boot Windows from the secondary port just fine so it's not a sudden hardware failure. It sounds like I might need to modify my DSDT but I wouldn't have the slightest clue what I need to do. I know High Sierra is still really new but any ideas? -
 My E6230 running High Sierra always recognized External drive on USB2.0 as internal disk. But the drive on the usb3.0 port was recognized correctly as external. How to fix this? External icon patch on AppleAHCIPort applied.
 -
 Hey guys! How to install El Capitan or Sierra on this system? I created a bootable UEFI Installer stick with uni beast, but it's failed to booting the installer, just restarting (verbose mode says nothing). When finally got into verbose mode, got a Kernel panic I think. I attached a picture from the error. Tried some clover configs, but still getting error. First I tried Sierra installer then El Capitan but getting the same error. System: Acer Aspire V15 V5-591G-55TU Mobo: Skylake USOPP_SLS Bios: Insyde corp latest version CPU: Intel Core i5-6300HQ 2.30 GHz (Skylake) GPU: Geforce GTX 950M 2 GB (optimus, disabled), Intel HD 530 Ram: 8 GB DDR4 (4+4 GB) Wifi: Qualcomm Atheros QCNFA344A, Replaced to BCM94352Z Ethernet: Realtek 8168B/8111B Audio: ALC 255 (layout-3 fix) Card Reader: Realtek HDD: 1 TB Dual-boot with Windows 8.1 UPDATE! (2017.08.11) Successfully installed Sierra 10.12.6 on this system UPDATE: SEE HERE FOR HIGH SIERRA: HIGH SIERRA ASPIRE V5-591G-55TU High Sierra is more stable on this system than Sierra Working: Wi-Fi and Bluetooth with BCM94352z: (enabled with Fake_PCIID_Broadcom_WiFi.kext, Fake_PCIID.kext, BrcmPatchRAM2.kext and BrcmFirmwareRepo.kext. Install them with Kext Utility or another kext installer) (Original WiFi is Qualcomm Atheros, unsupported but BT works) Hand-off with BCM94352z Full Graphics enabled on HD 530, HDMI, VGA. ALC 255 Audio: with layout-3 fix (you can use AppleHDAPatcher, or download AppleALC.kext (place it to EFI/CLOVER/kexts/other)) (Internal speakers, Internal microphone, Headphone jack (microphone not tested) Ethernet Realtek 8168B/8111B App Store, Messages, FaceTime, Siri, iCloud (native) Integrated webcam (native) 3.0 USB (native) Touchpad and Keyboard: Fn keys are good, the weird thing is the Brightness key. On my keyboard it's Pause Break:Br-up, Fn+F12:Br-dwn. Battery info: Install ACPIBatteryManager.kext with kext utility or other installer. Sleep mode (native) Not working: Original Wi-Fi: Qualcomm Atheros QCNFA344A unsupported, you need switch to BCM94352Z or just use a mini usb wifi dongle. NVIDIA GTX 950M: Optimus not supported. Card Reader: Unsupported For WiFi: Use an USB Wifi dongle tp-link archer t1u for example (5GHz support) (OR)Change your M.2 Wifi card to a compatible one: BCM94352Z and install drivers Thank you Jake Lo for help! I attached the CLOVER folder ("aspire_v5_v591g-55tu.zip" this one is without DSDT patches) for everyone who need it. Just in case I attached my CLOVER folder with using DSDT too. ("aspire_v5_591g-55tu_wDSDT.zip" i'm using this right now) Display pane: If you see error: "Could not load Display preference pane" in System Preferences > Displays, you should use a kext created for this system to get it working. (attached as "correct_prefpane_v5-591g.zip") Install it with kext utility, restart, and then should be good now. I suggest updating to 10.12.6, maybe this update also fix this issue. I'm using Sierra in Dual-boot with Windows 8.1. To do this in a clean install or with Windows installed first try my little minimal guide: Dual-boot clean install (on one drive): 1. Boot into your Mac installer, Create 2 partitions in GUID table (1 for Win (I used FAT32 but I think it's no matter what), 1 for Mac), 2. Install Mac, boot with your USB, *mount your EFI partition (use terminal or an EFI mounter app), create EFI folder if it's empty, copy the CLOVER folder I attached to the EFI folder, restart, 3. Boot into your Win installer, Format the partition you created for Win, install. 4. Now, it's automatically booting into Windows. To use Clover open cmd in administrator, type: 5. You're done! It will booting into Clover when you start the system, and you can select Win or Mac (or another OS if installed on a 3rd partition). Dual-boot with Windows installed first (on one drive): If you already have Windows and you don't want to lose all your data there is a hope: You need bootable Mac Installer and a full system restore image (you can search for it). (You may see errors if your EFI partition is not 200 MB) 1. Boot into your Windows, resize your partition or create one for Mac. 2. Boot into your Mac installer and in Disk Utility format the partition you created. 3. Restore from image: select your full system restore image. 4. When it's finished restoring you just need to restart, then boot to the system with your usb. 5. Do Step 2. from "*" from clean install dual-boot above. but KEEP "Microsoft" FOLDER IN IT! 6. Do Step 4. from clean install dual-boot above. 7. You're done! You can select your old Windows and your new macOS! (I only tried with Windows 8/8.1/10. I don't know Windows 7/Vista/XP!) Here is a video from dual-booting on one drive with Windows installed first: https://www.youtube.com/watch?v=0_Q8uPkwcWQ aspire_v5_v591g-55tu.zip aspire_v5_591g-55tu_wDSDT.zip correct_prefpane_v5-591g.zip