Search the Community
Showing results for tags 'guide'.
Found 11 results
-
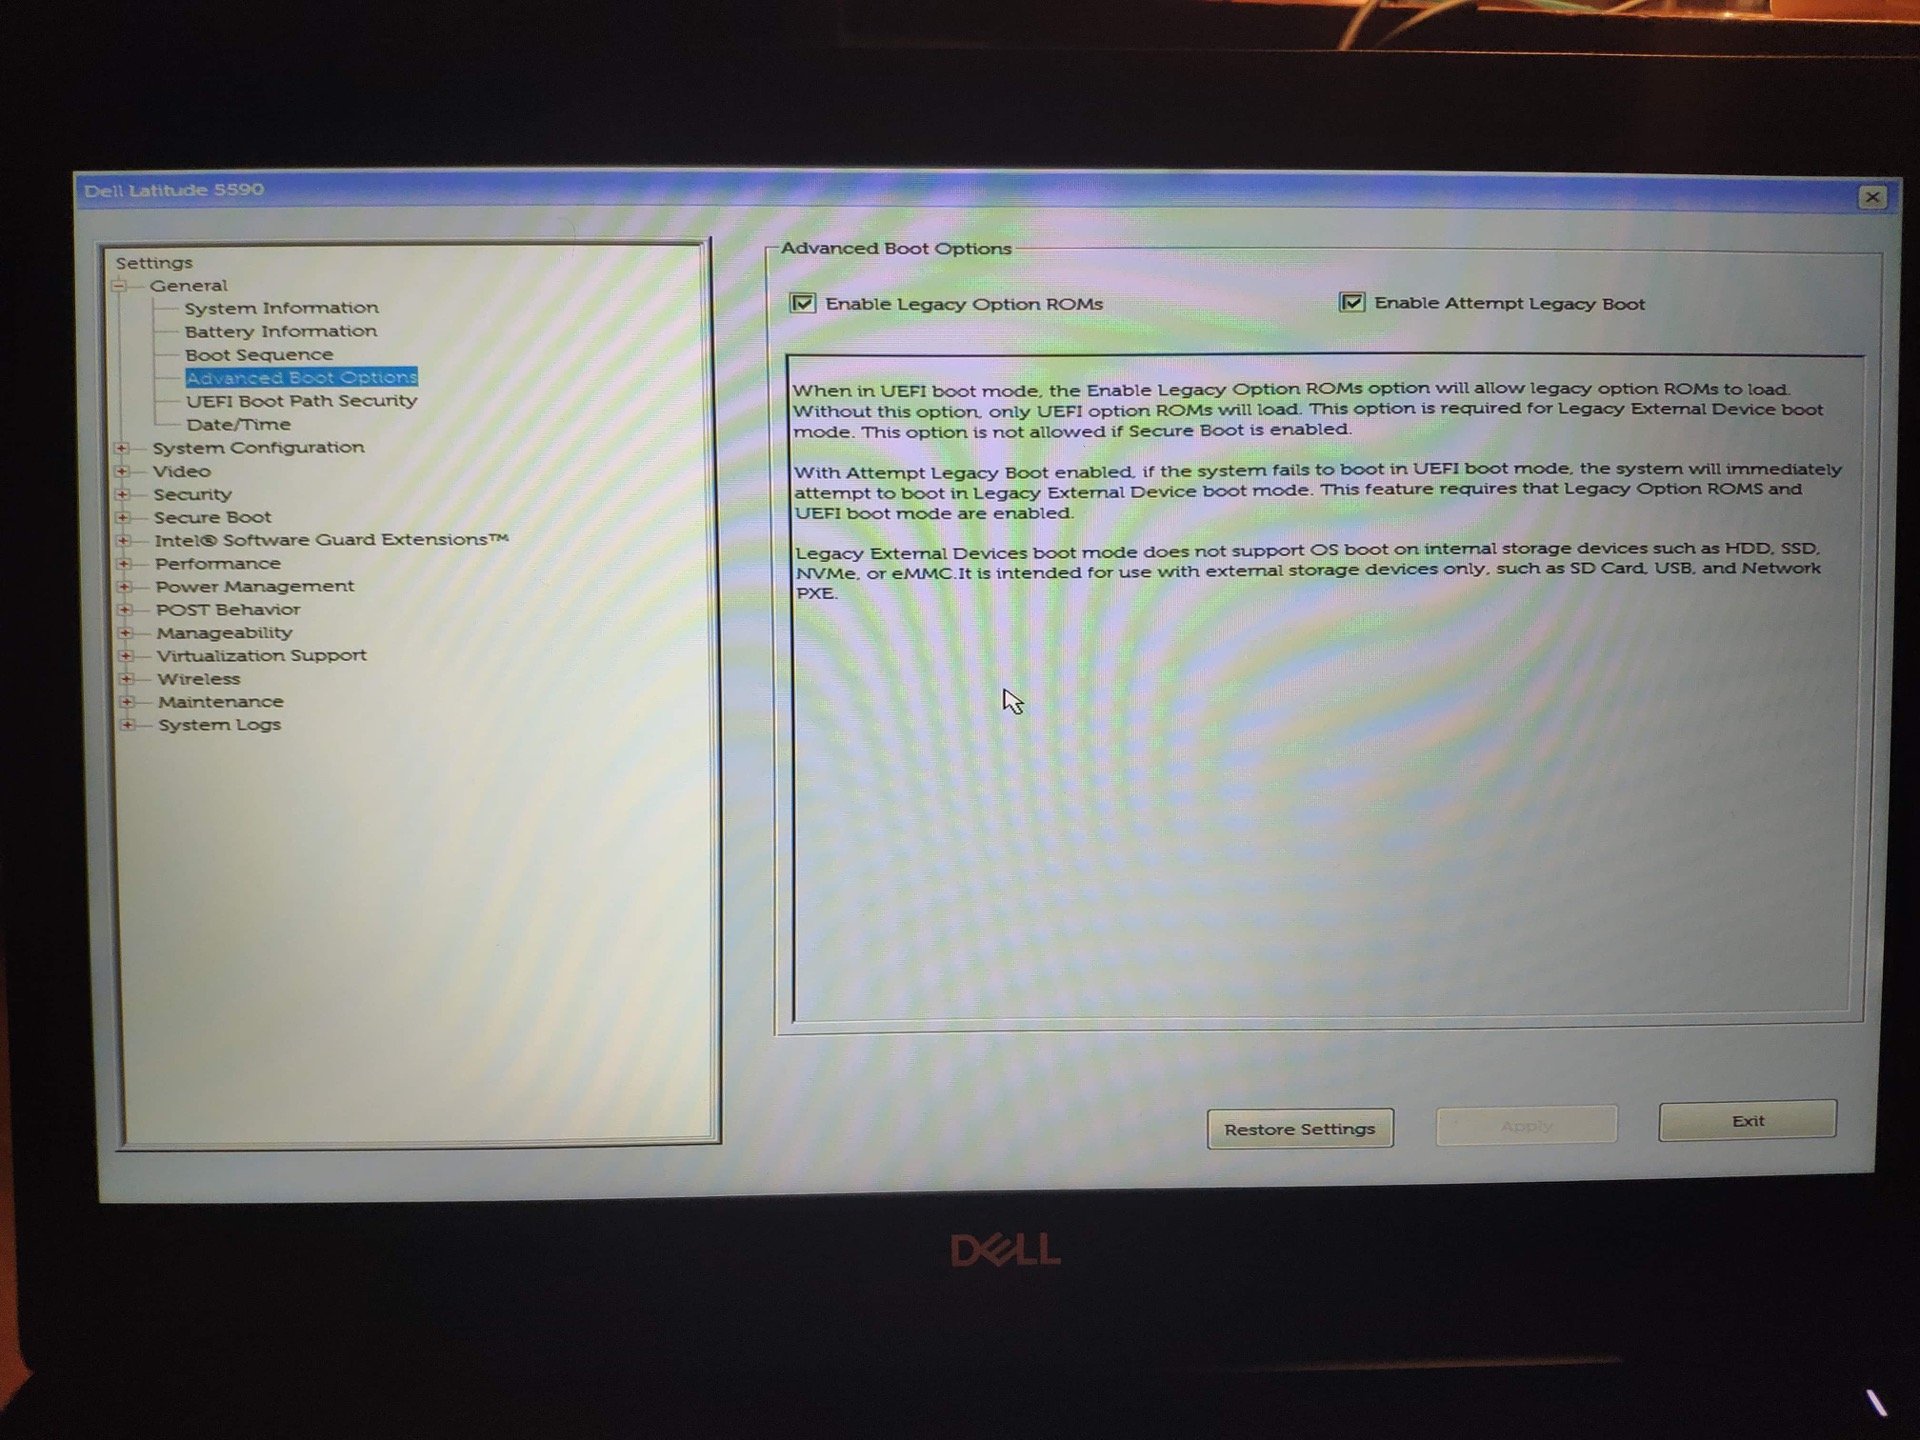
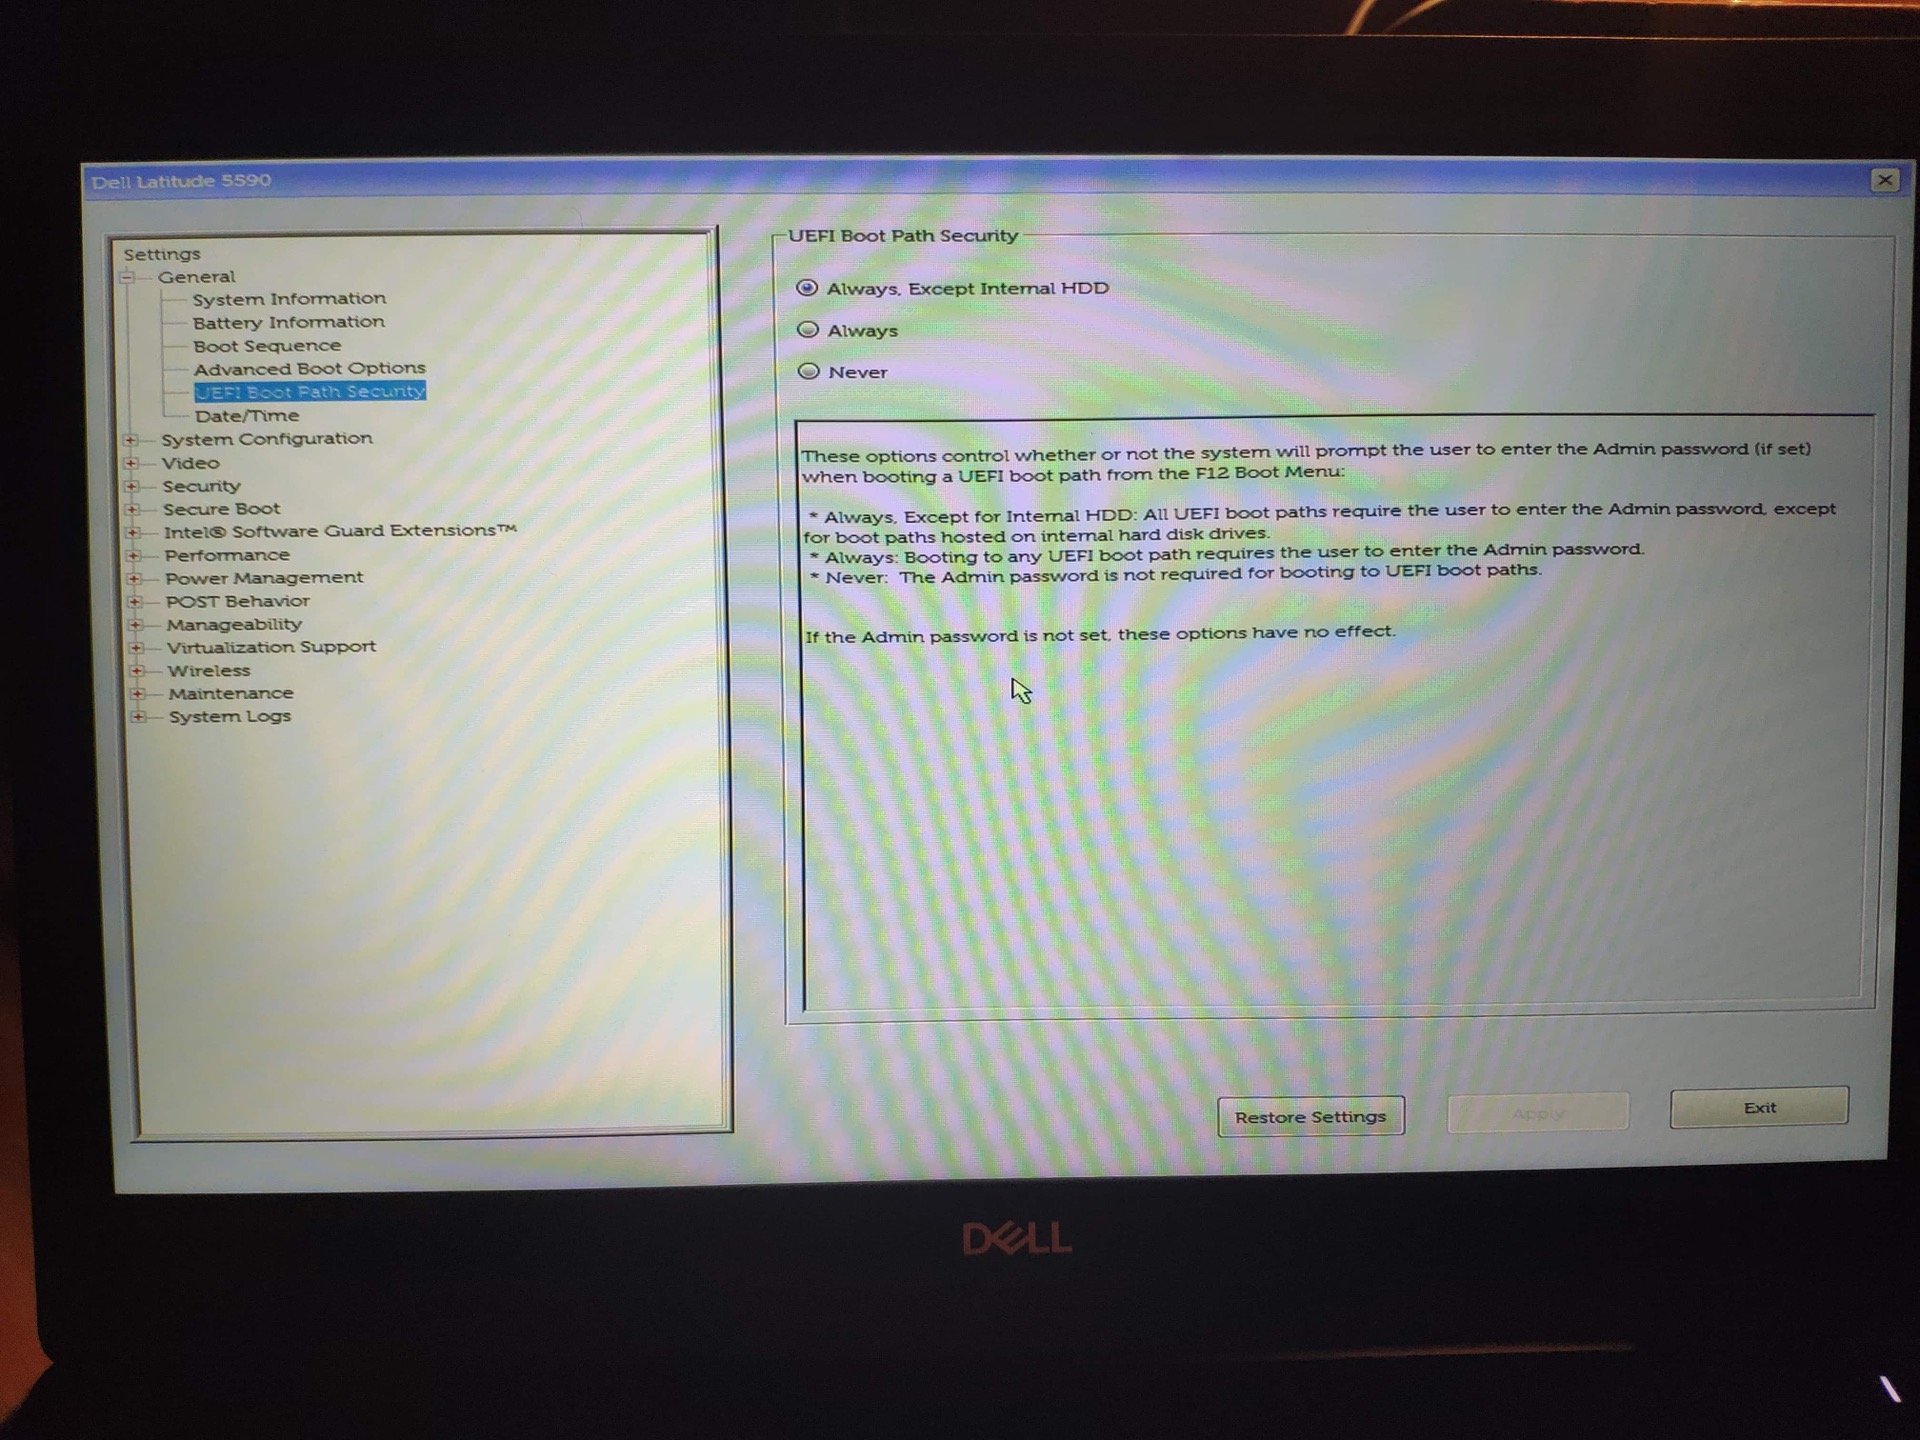
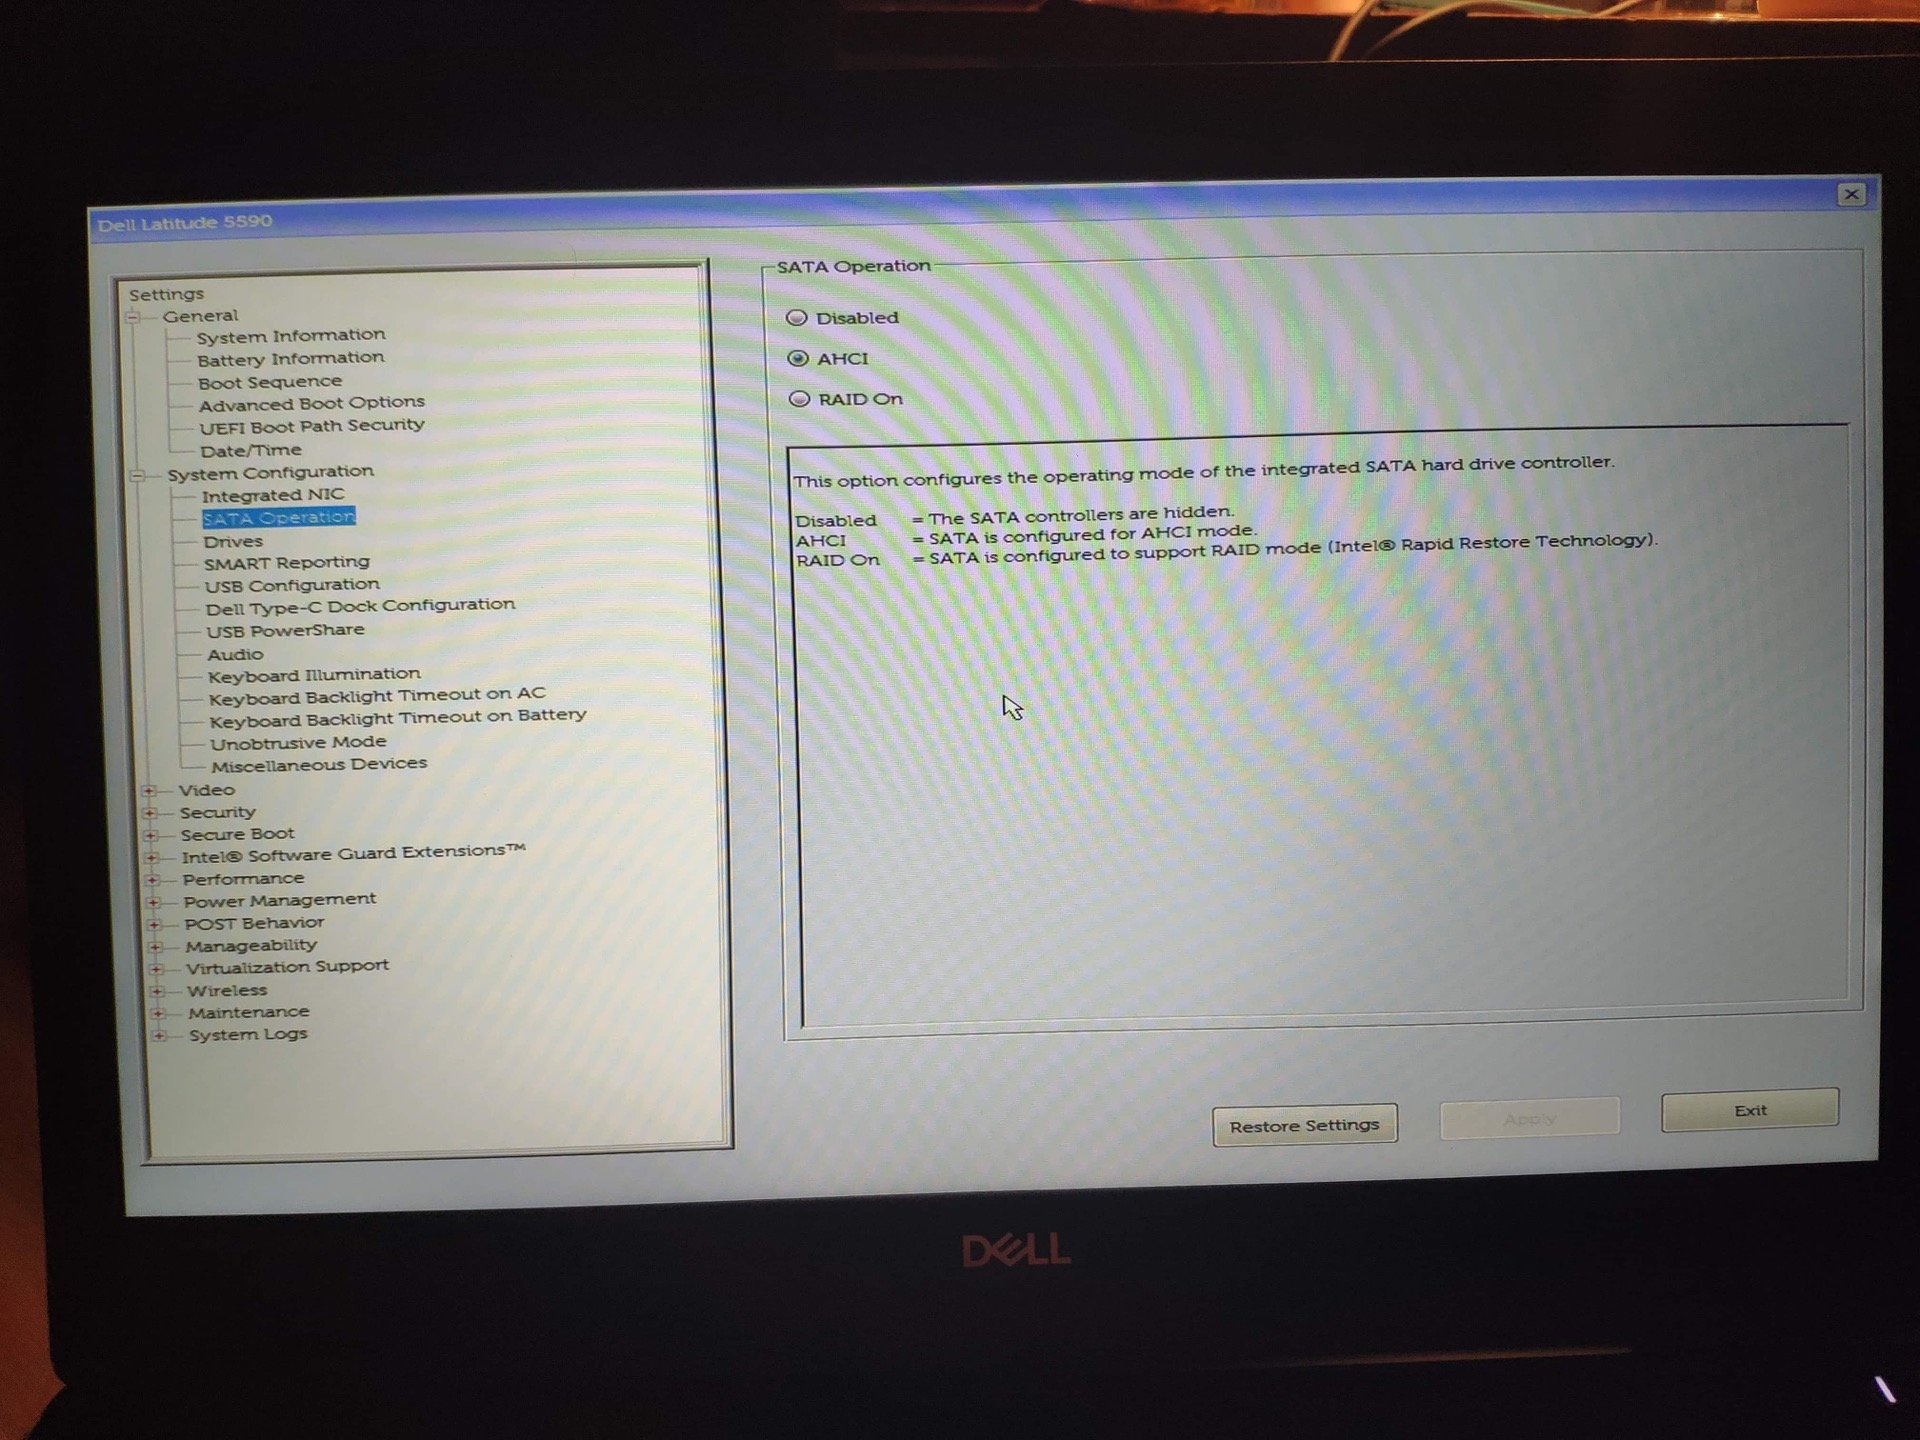
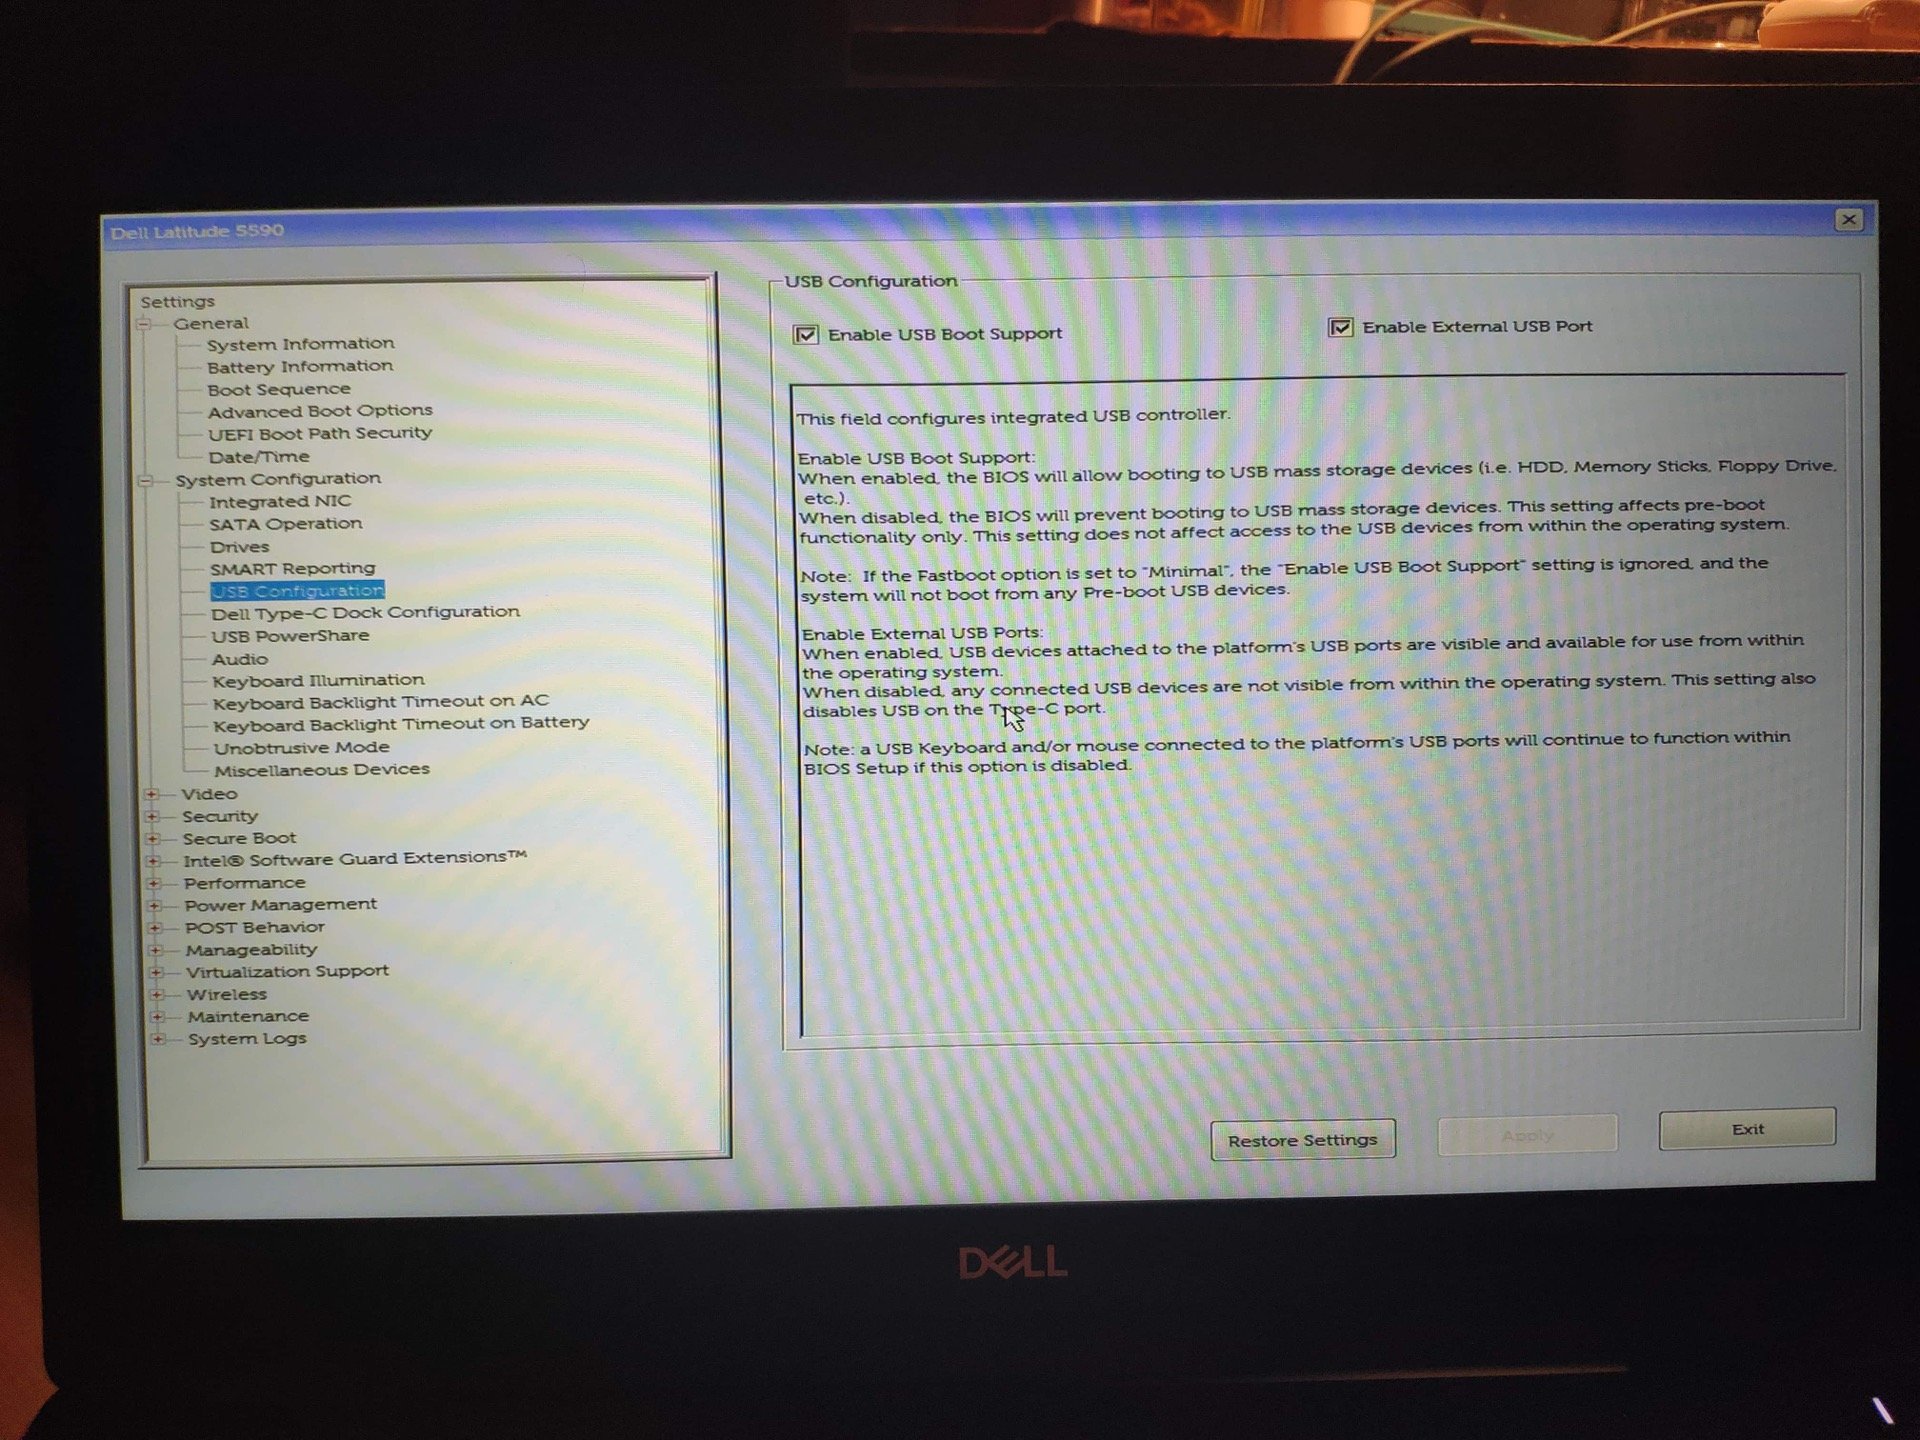
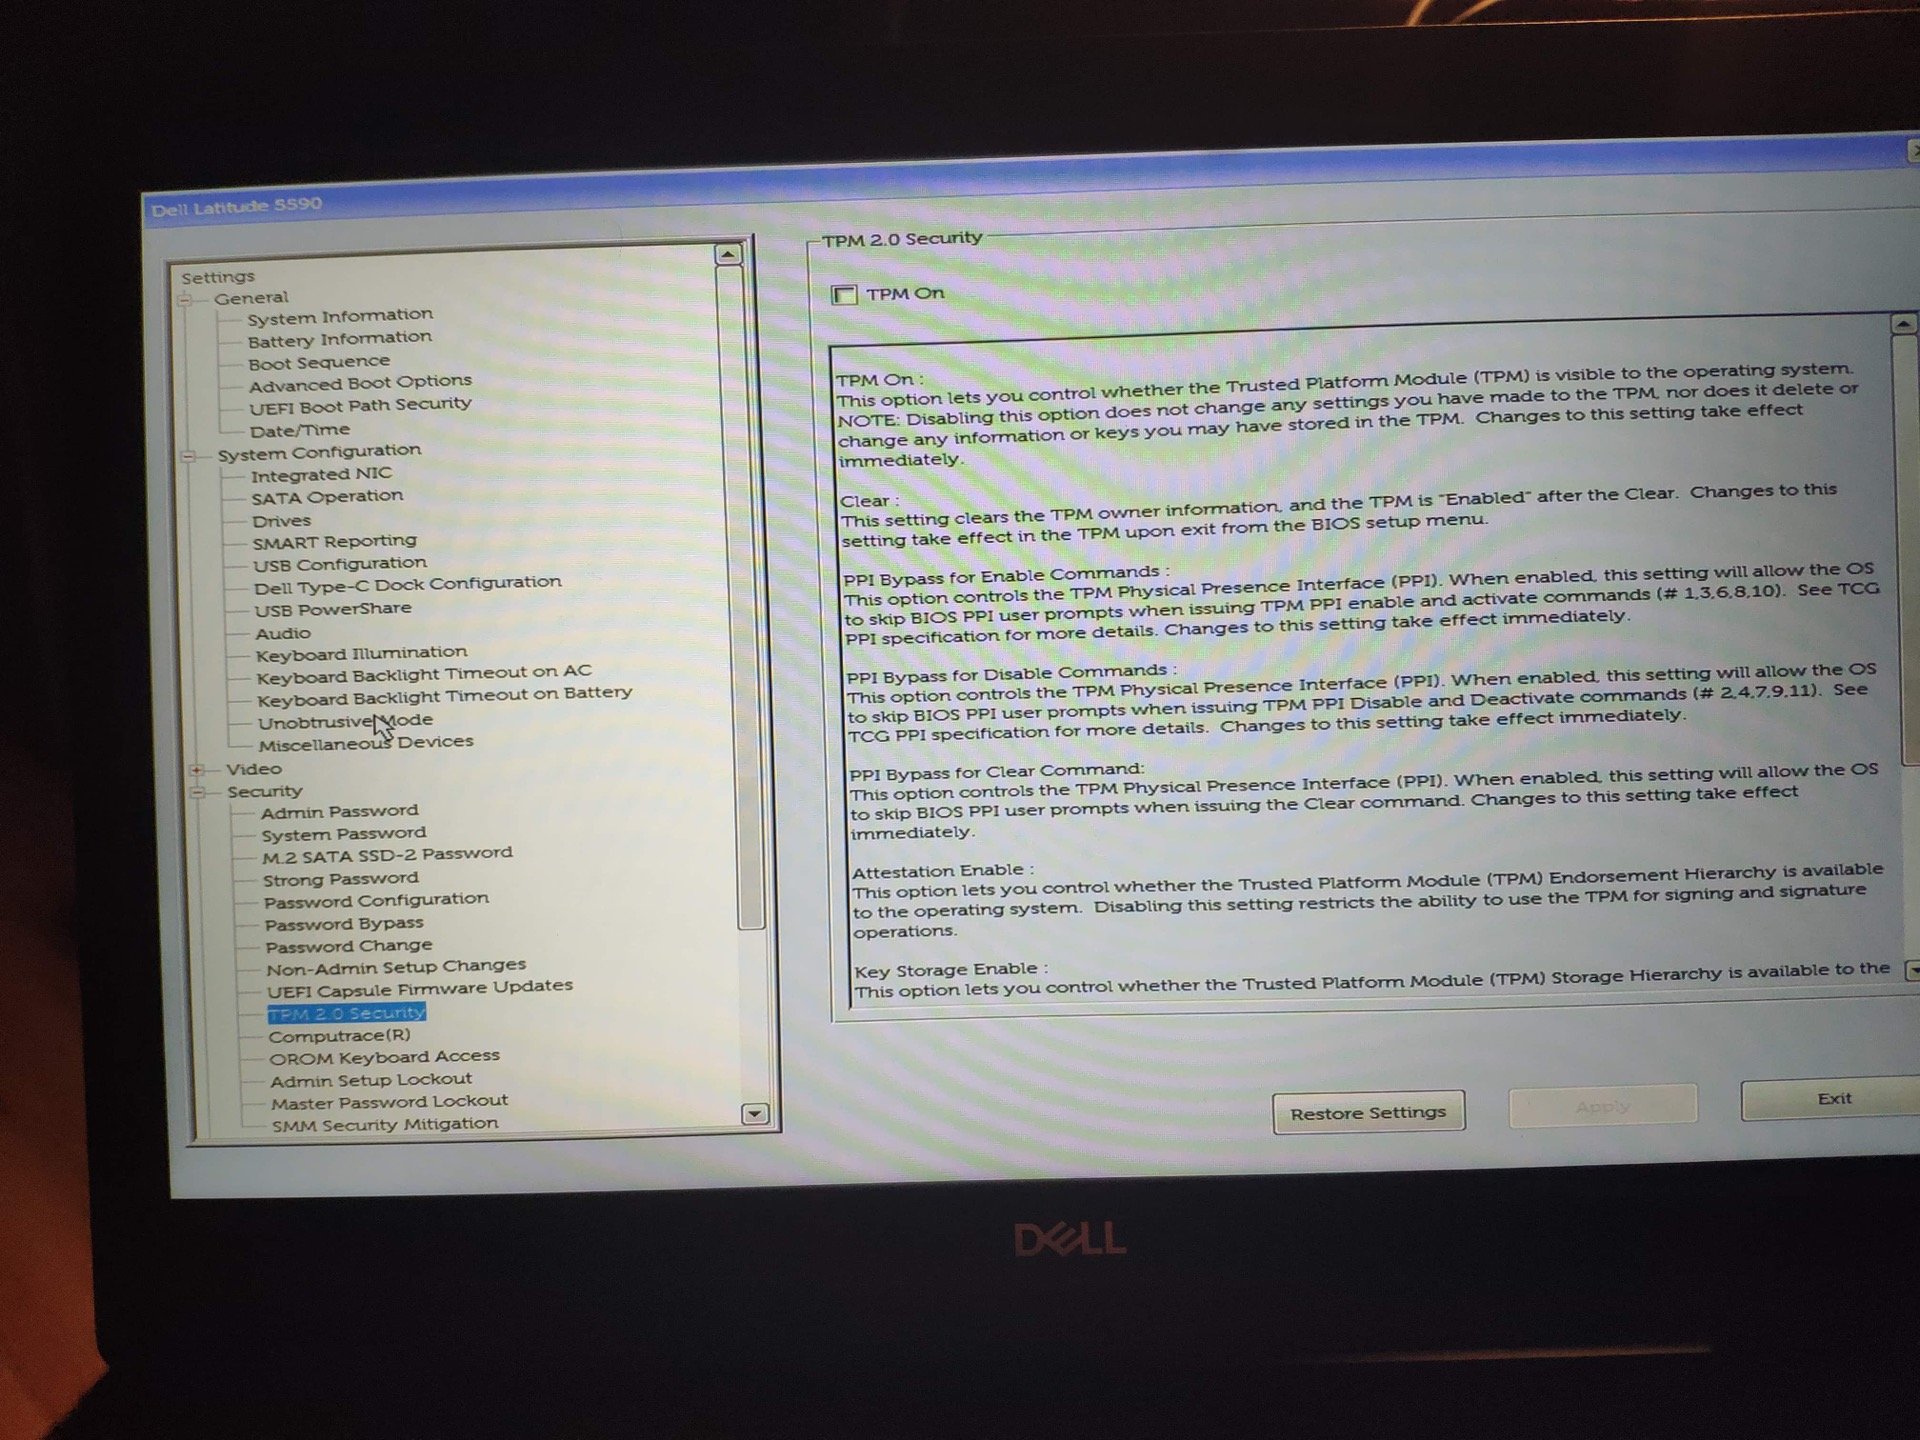
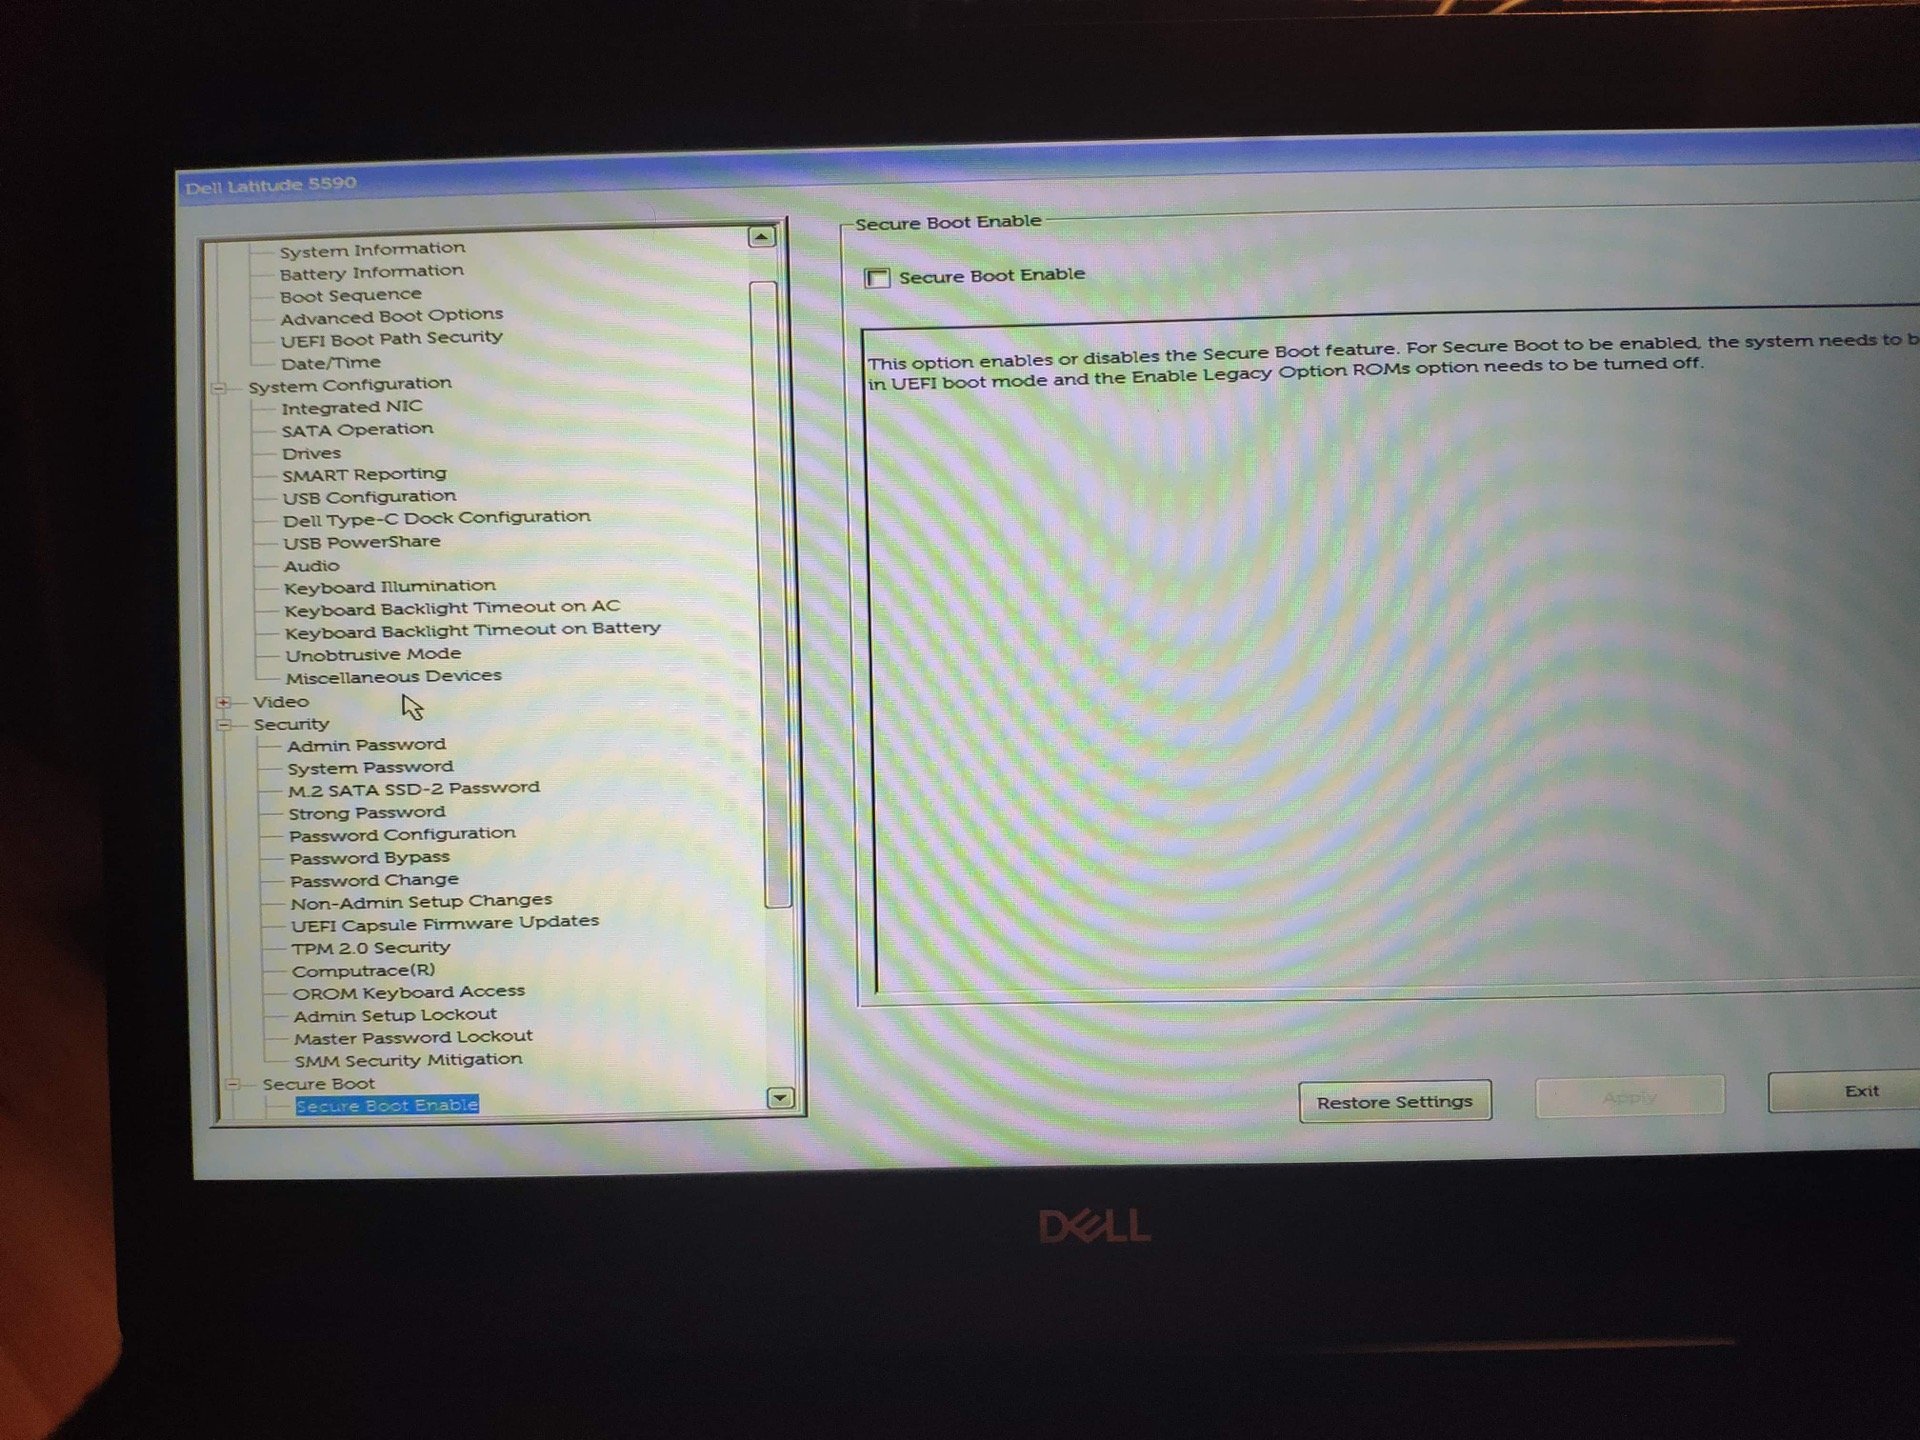
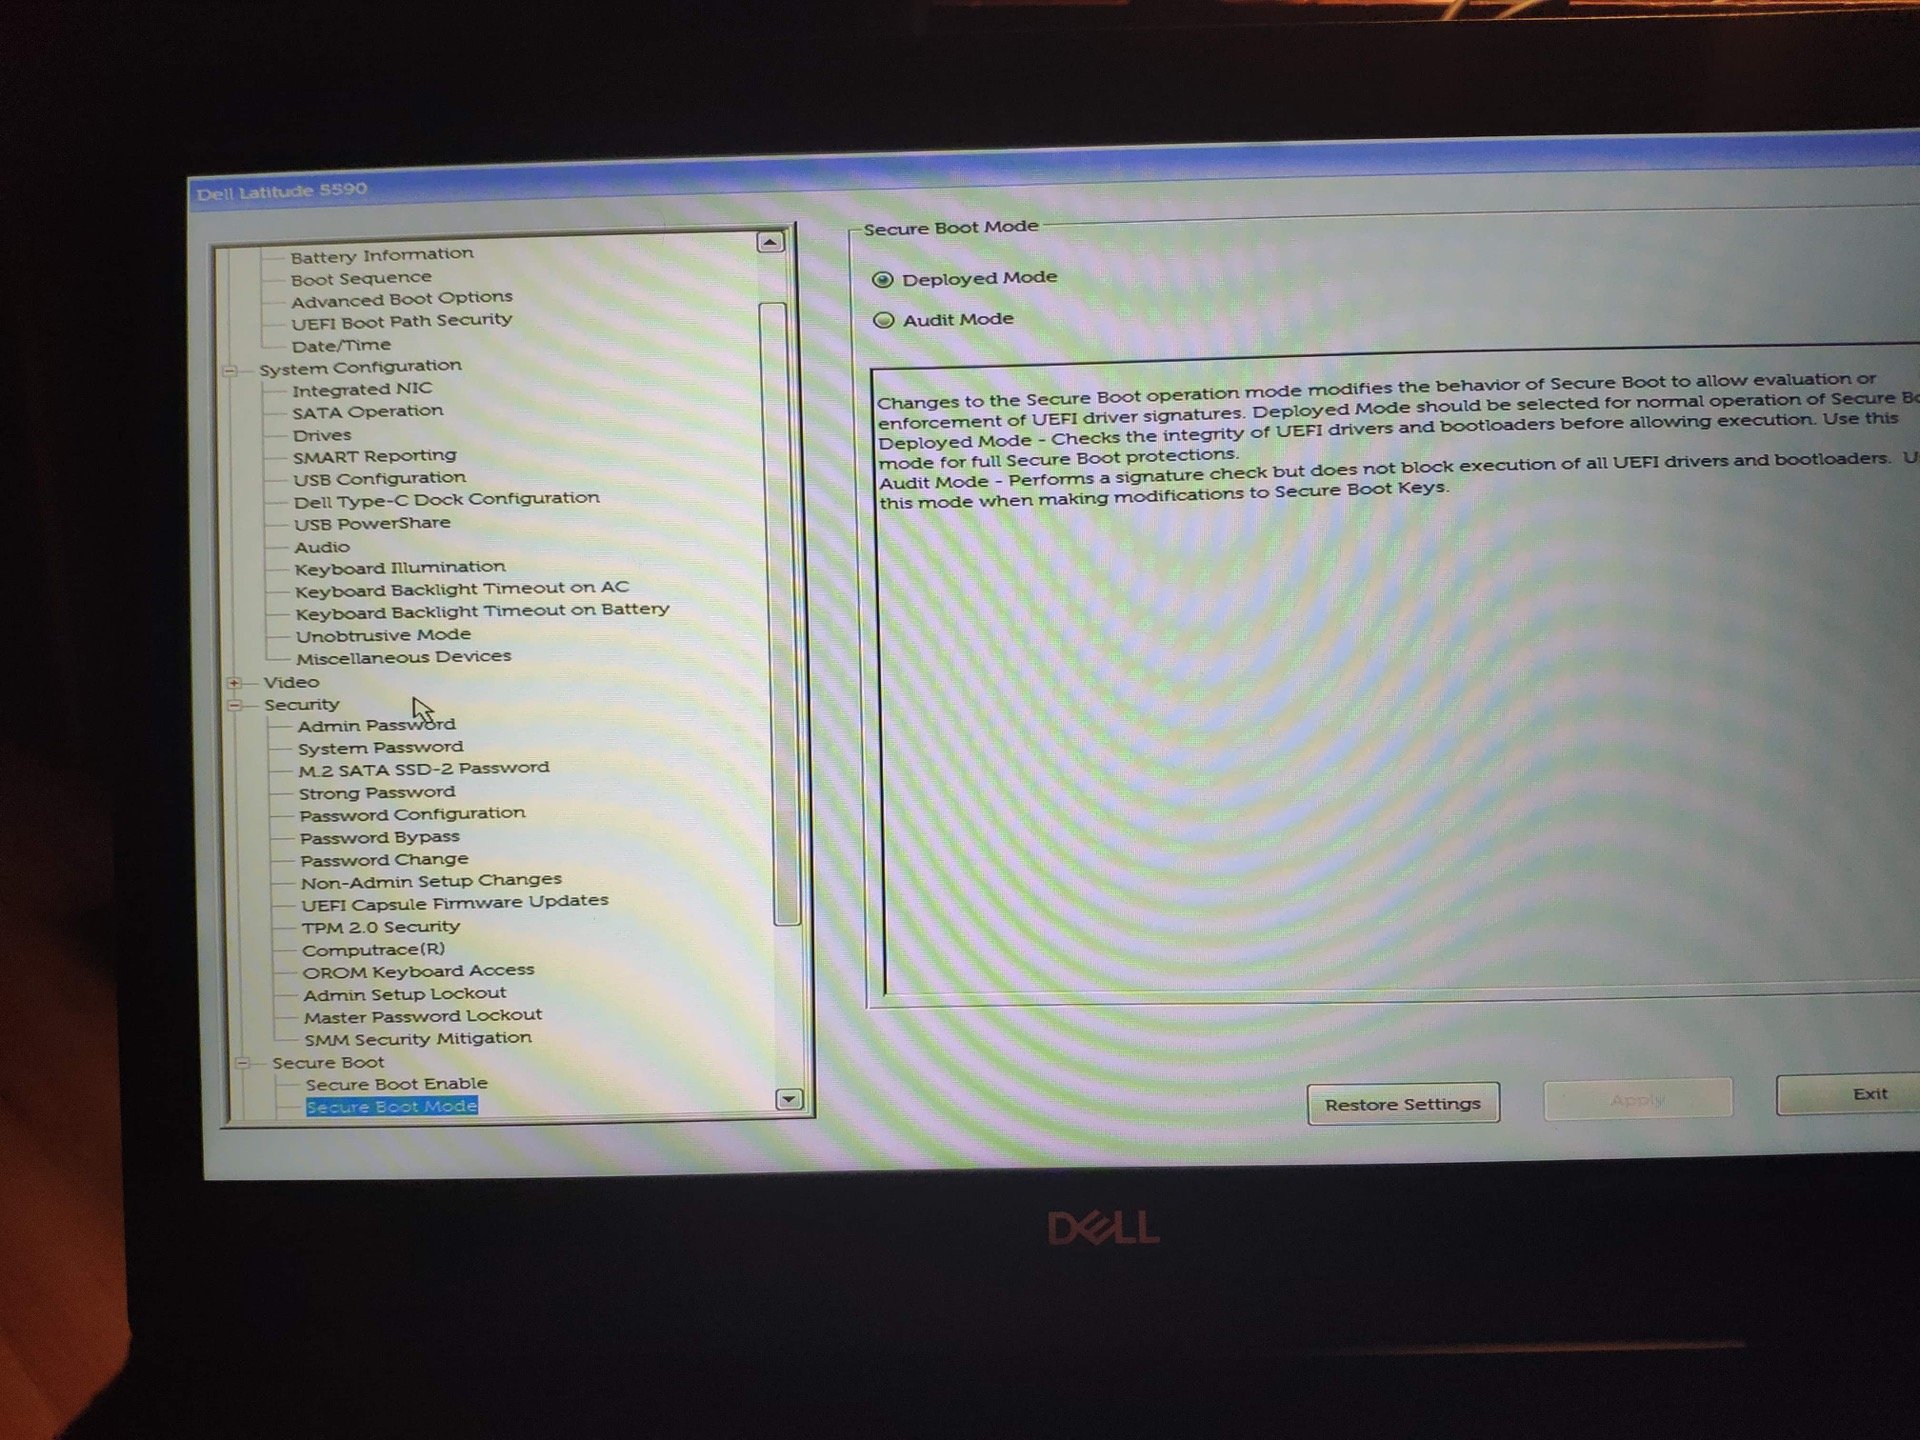
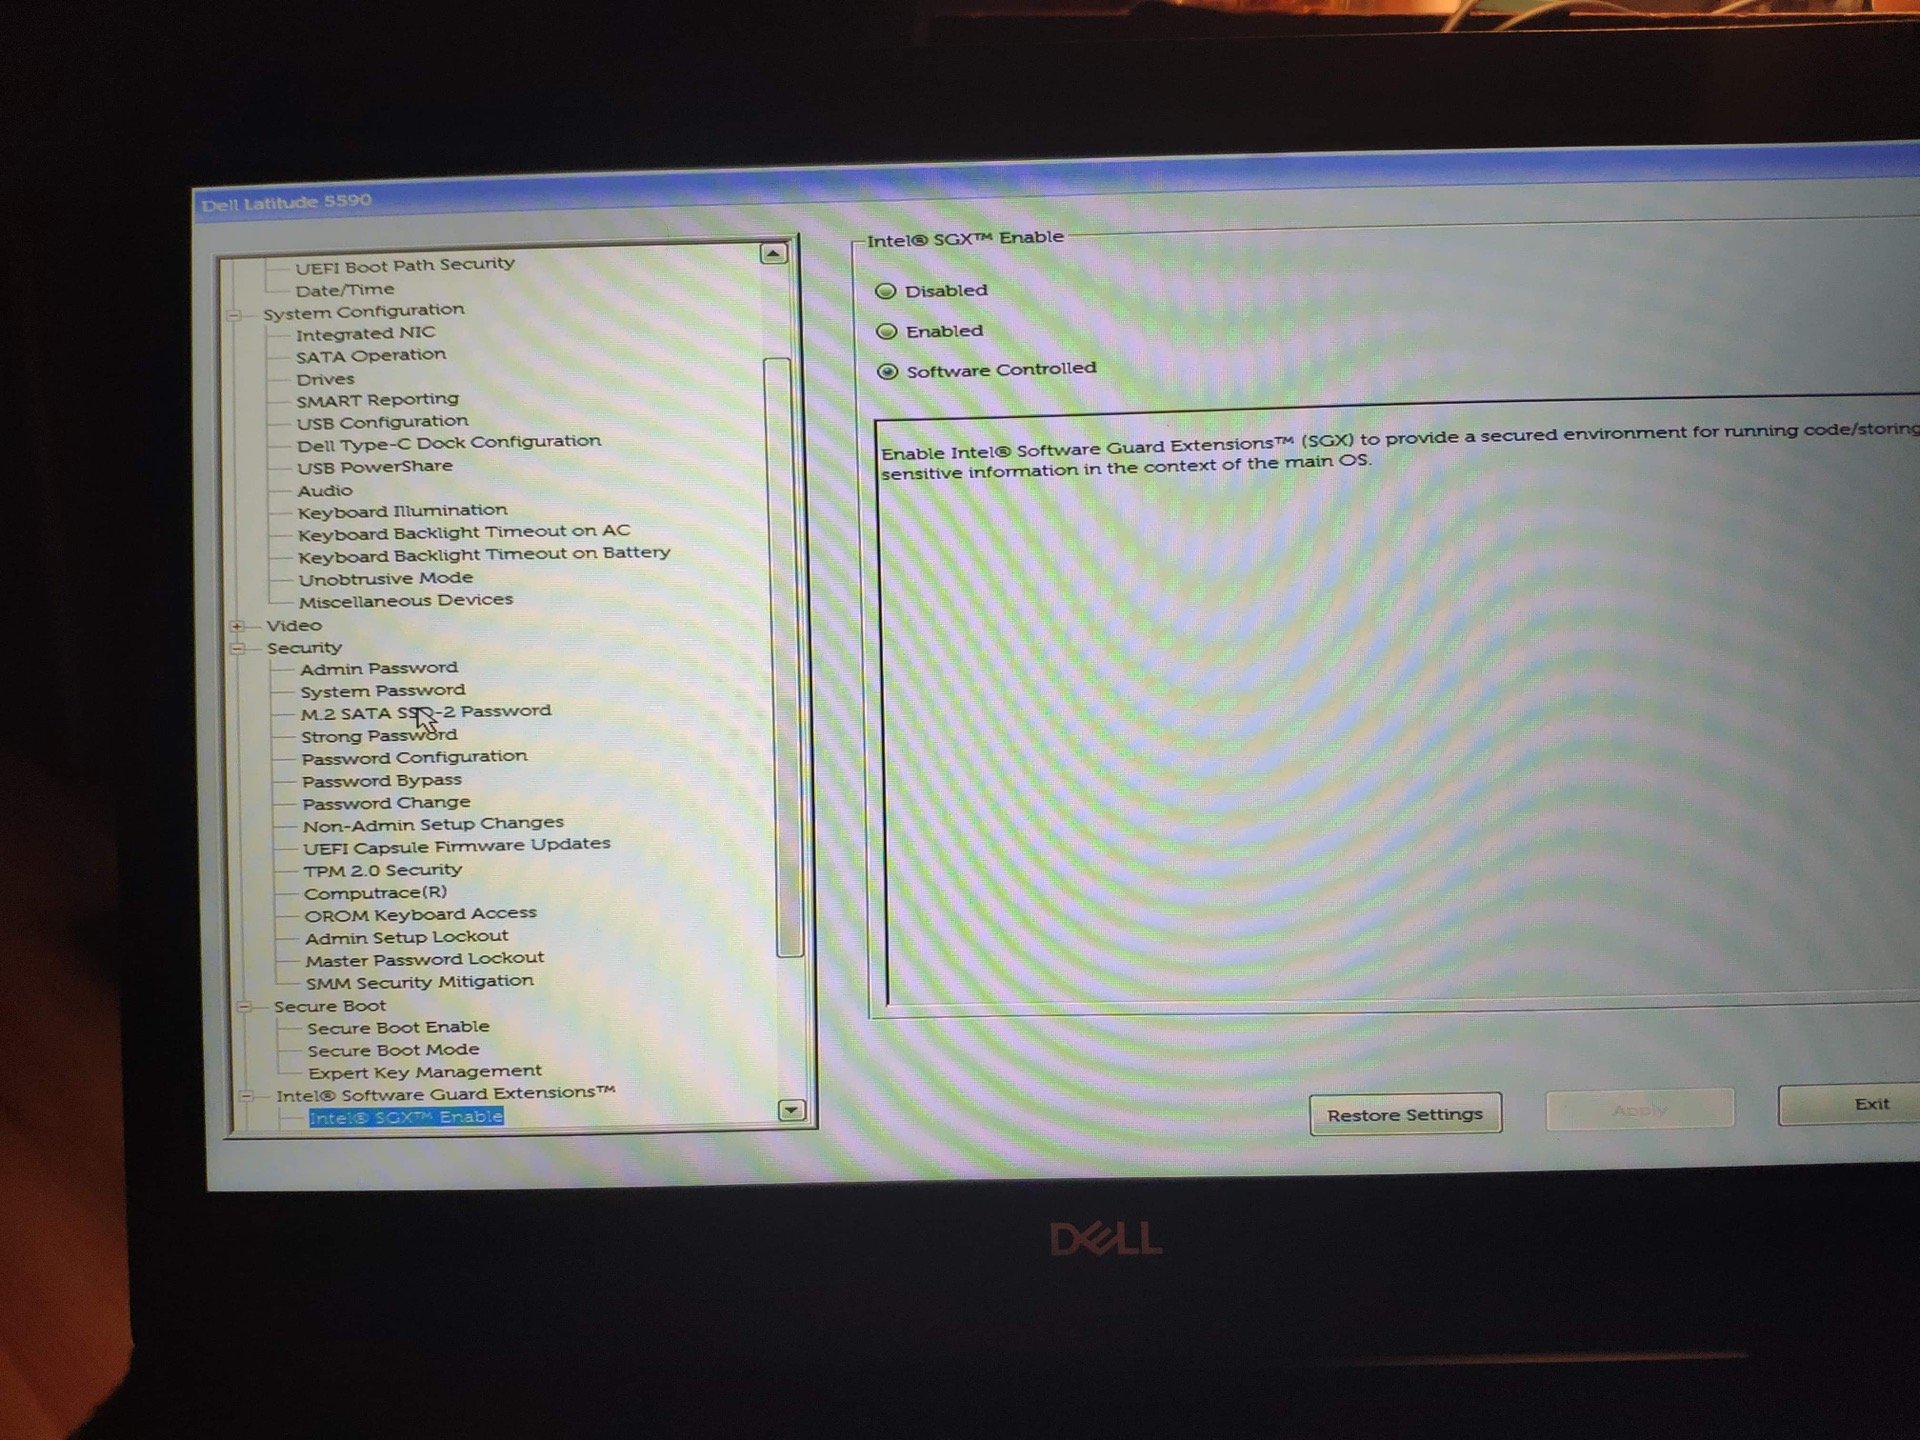
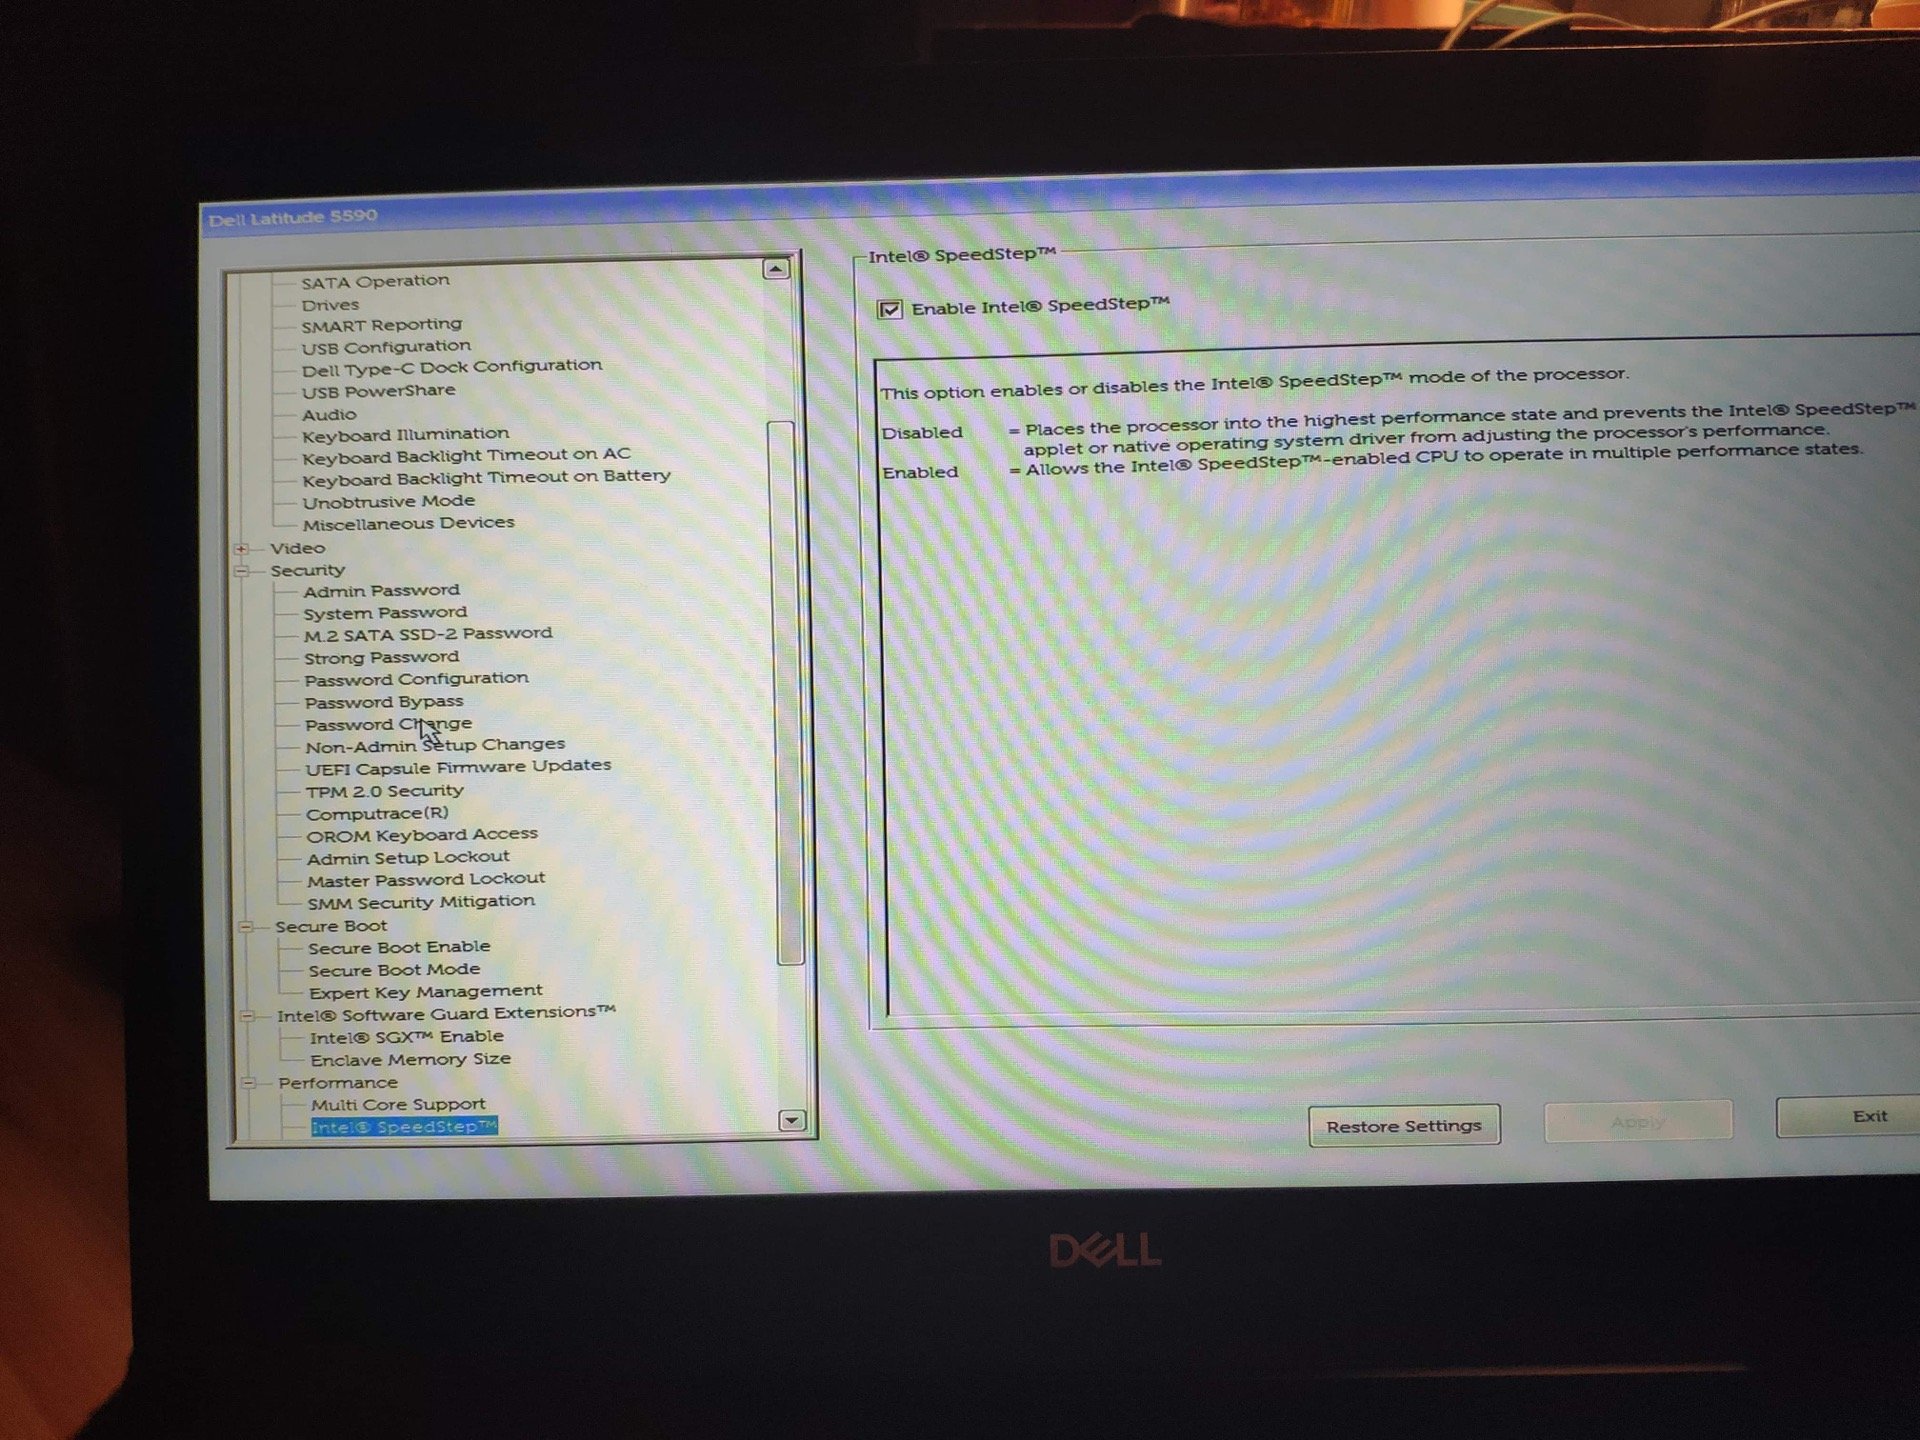
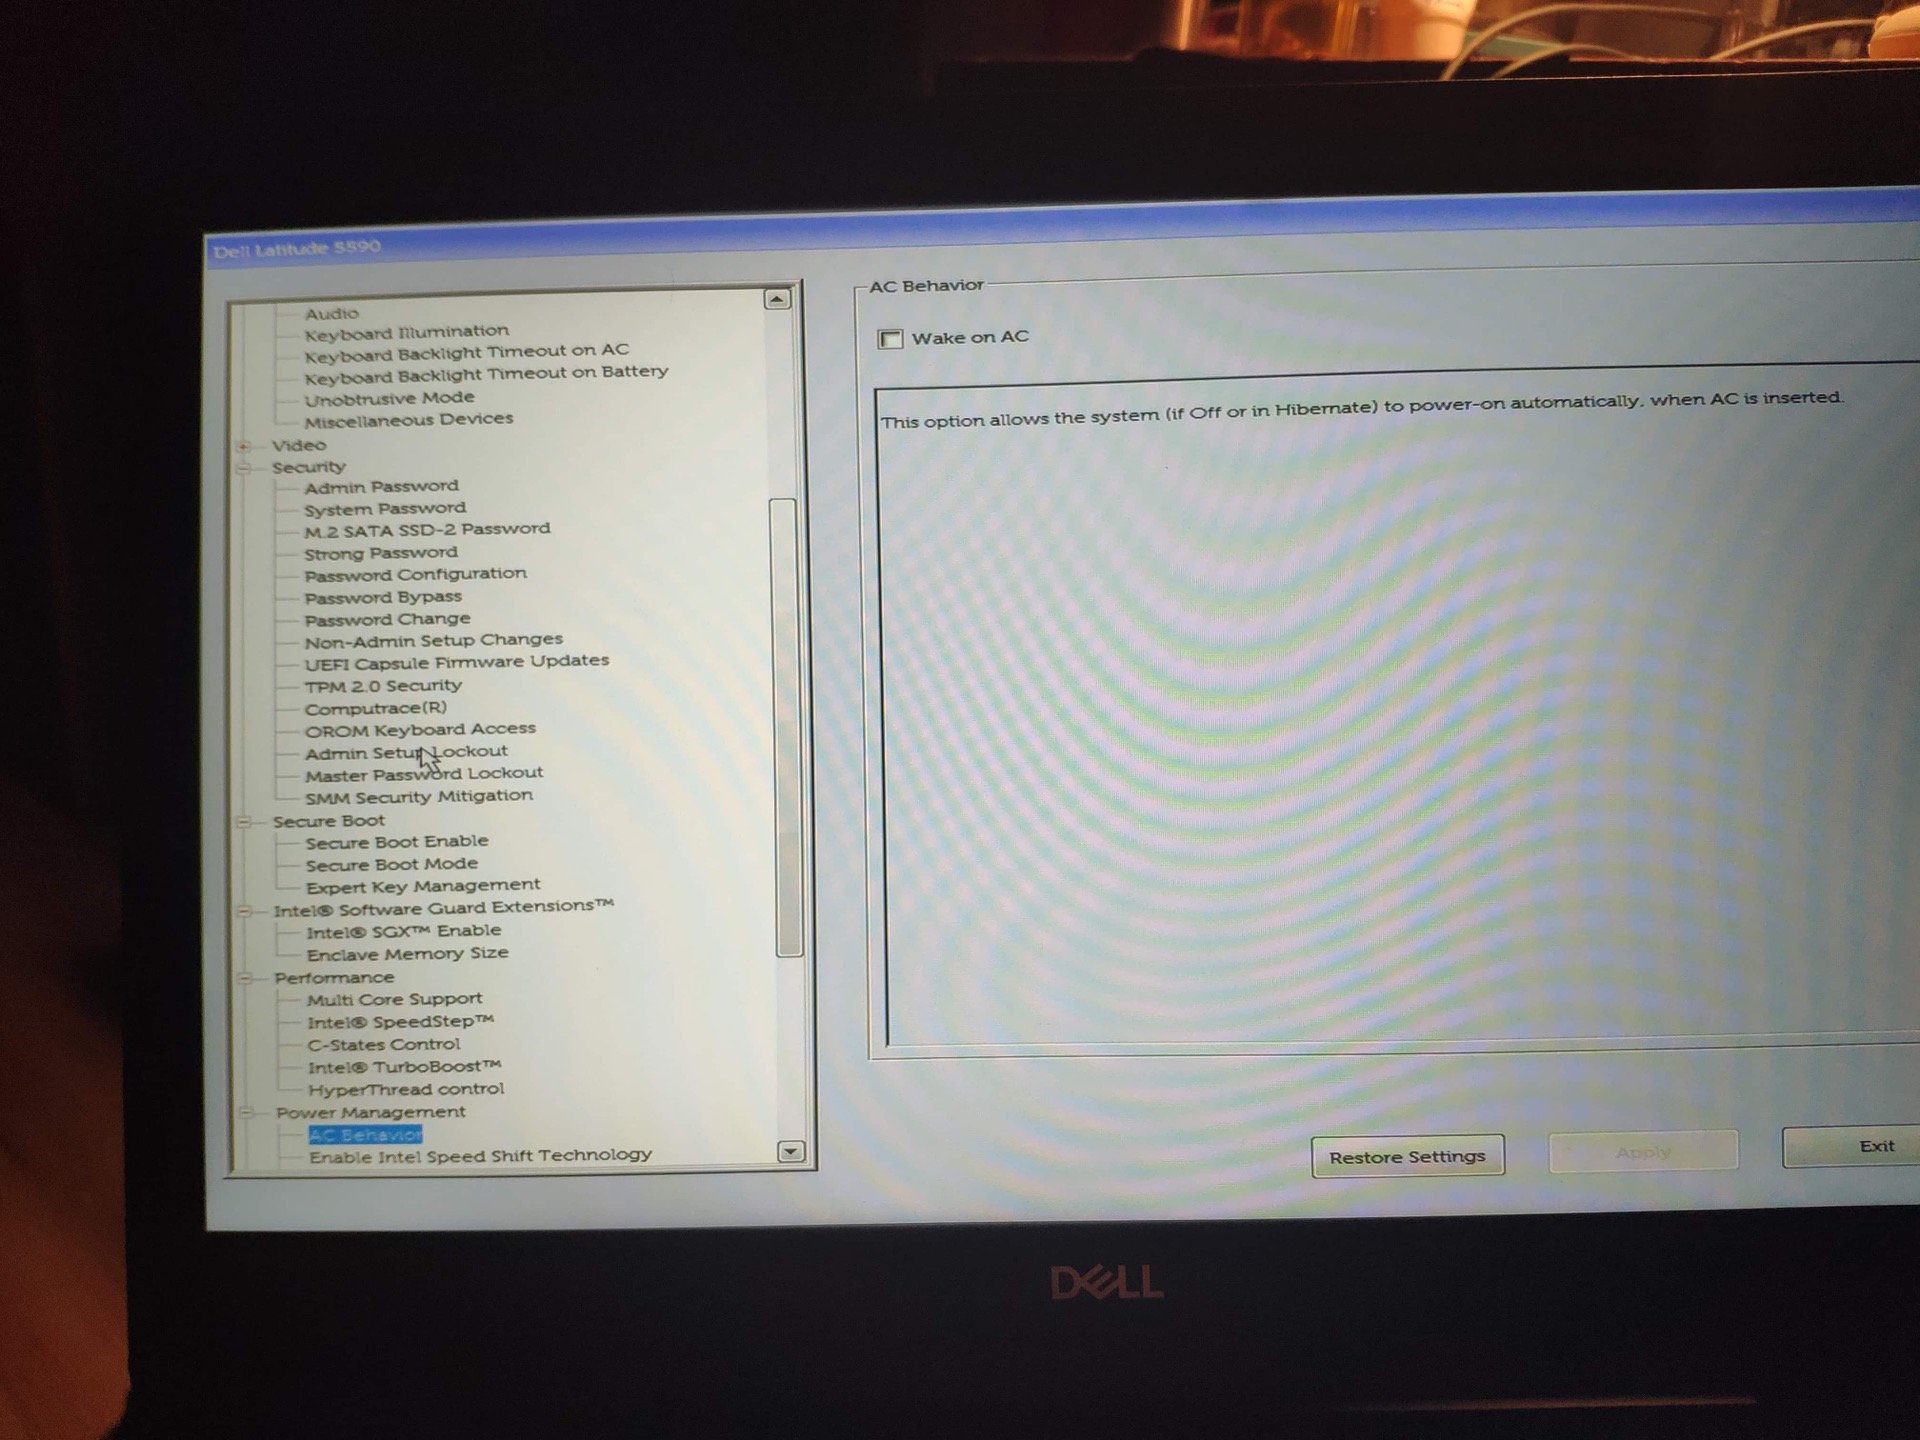
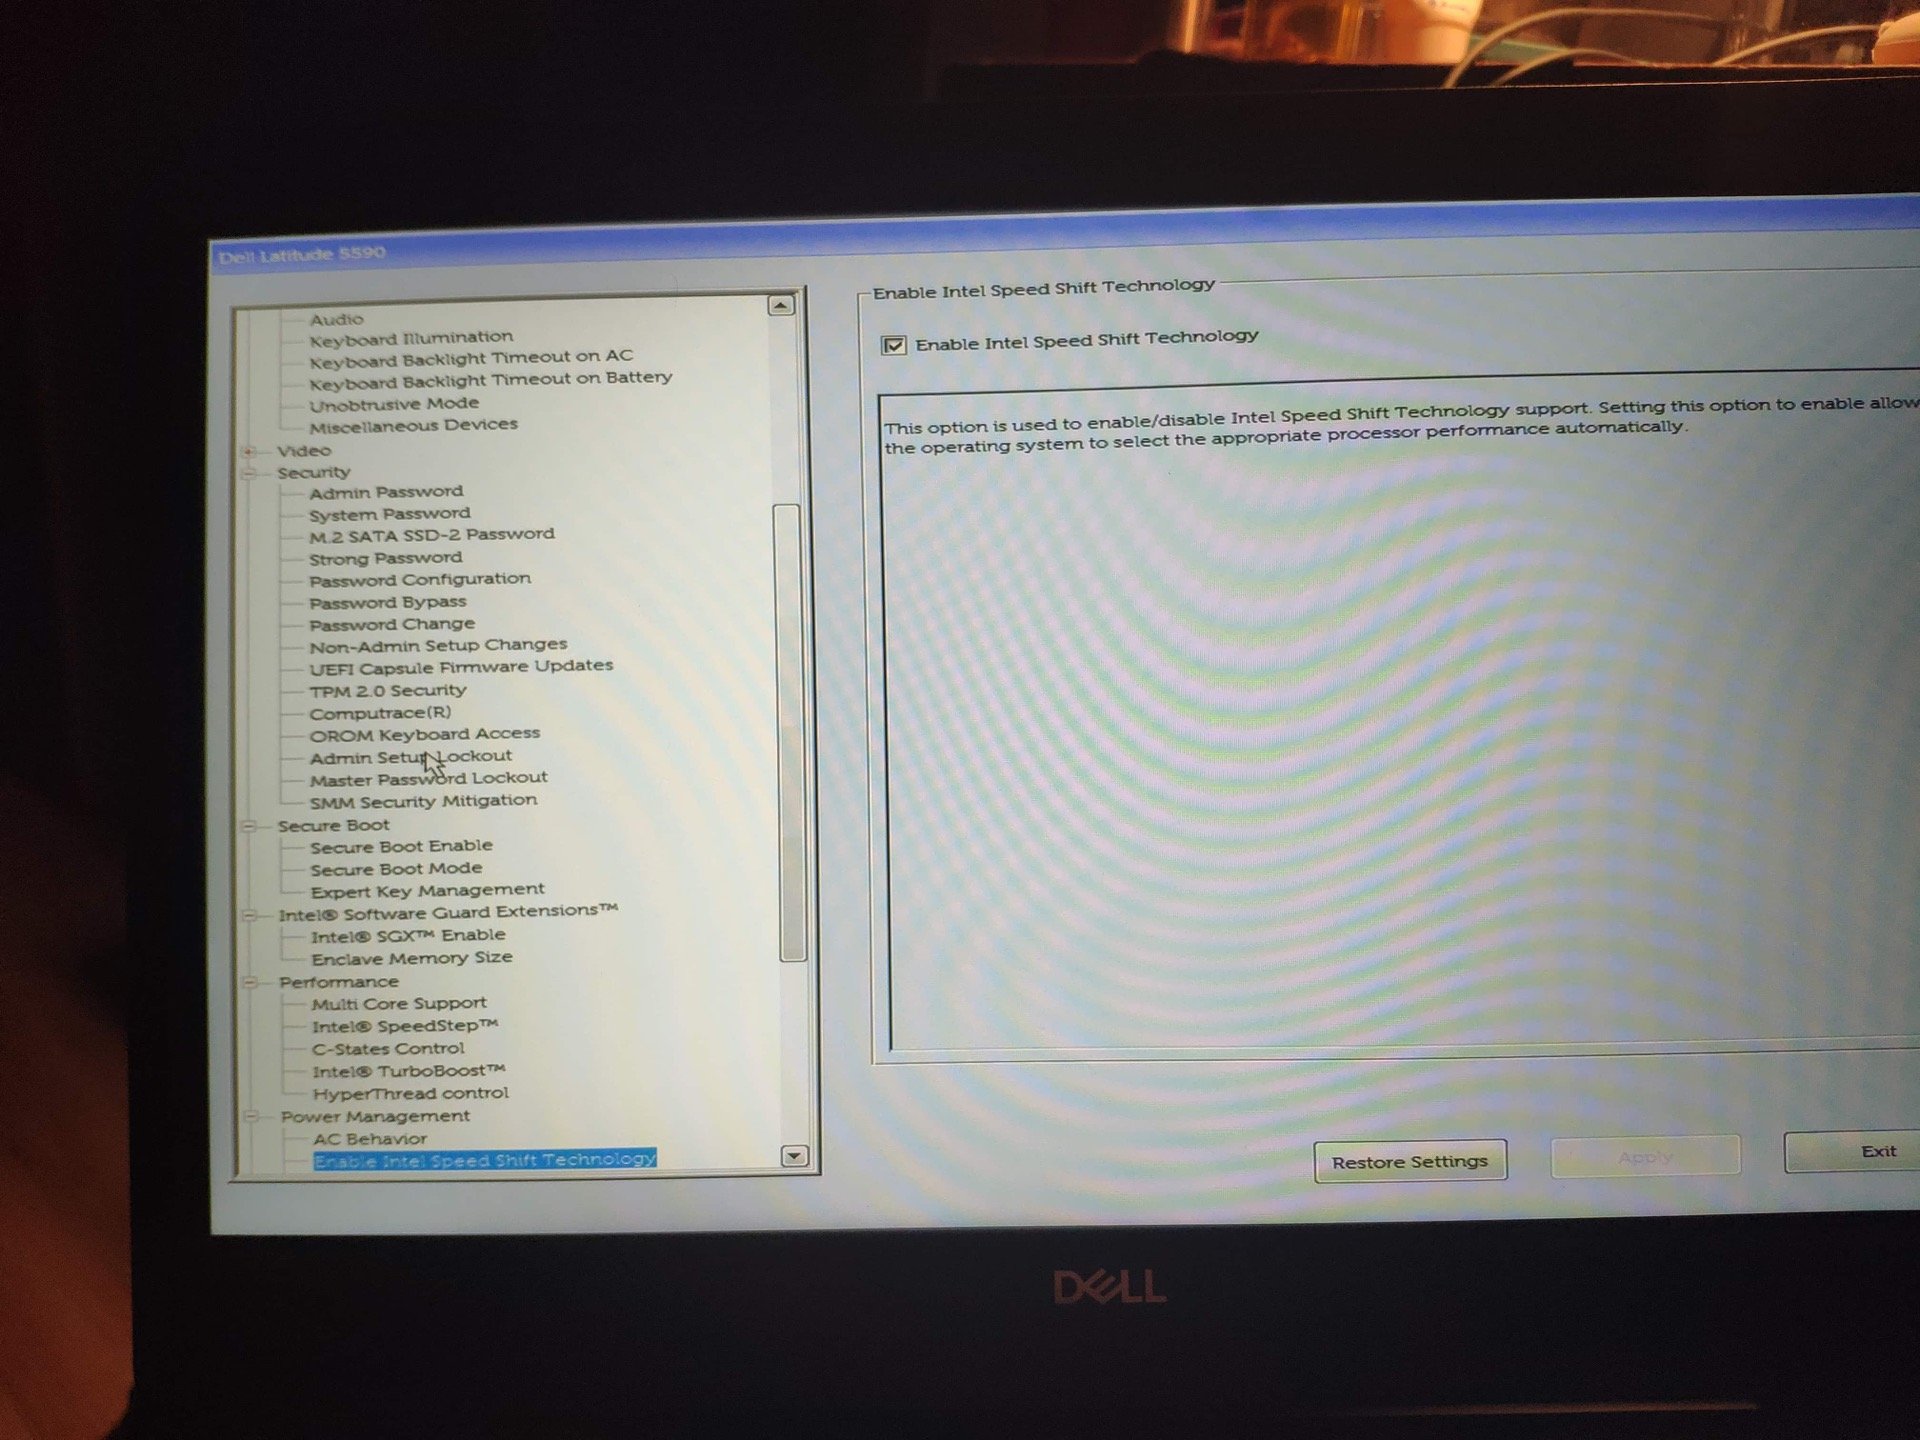
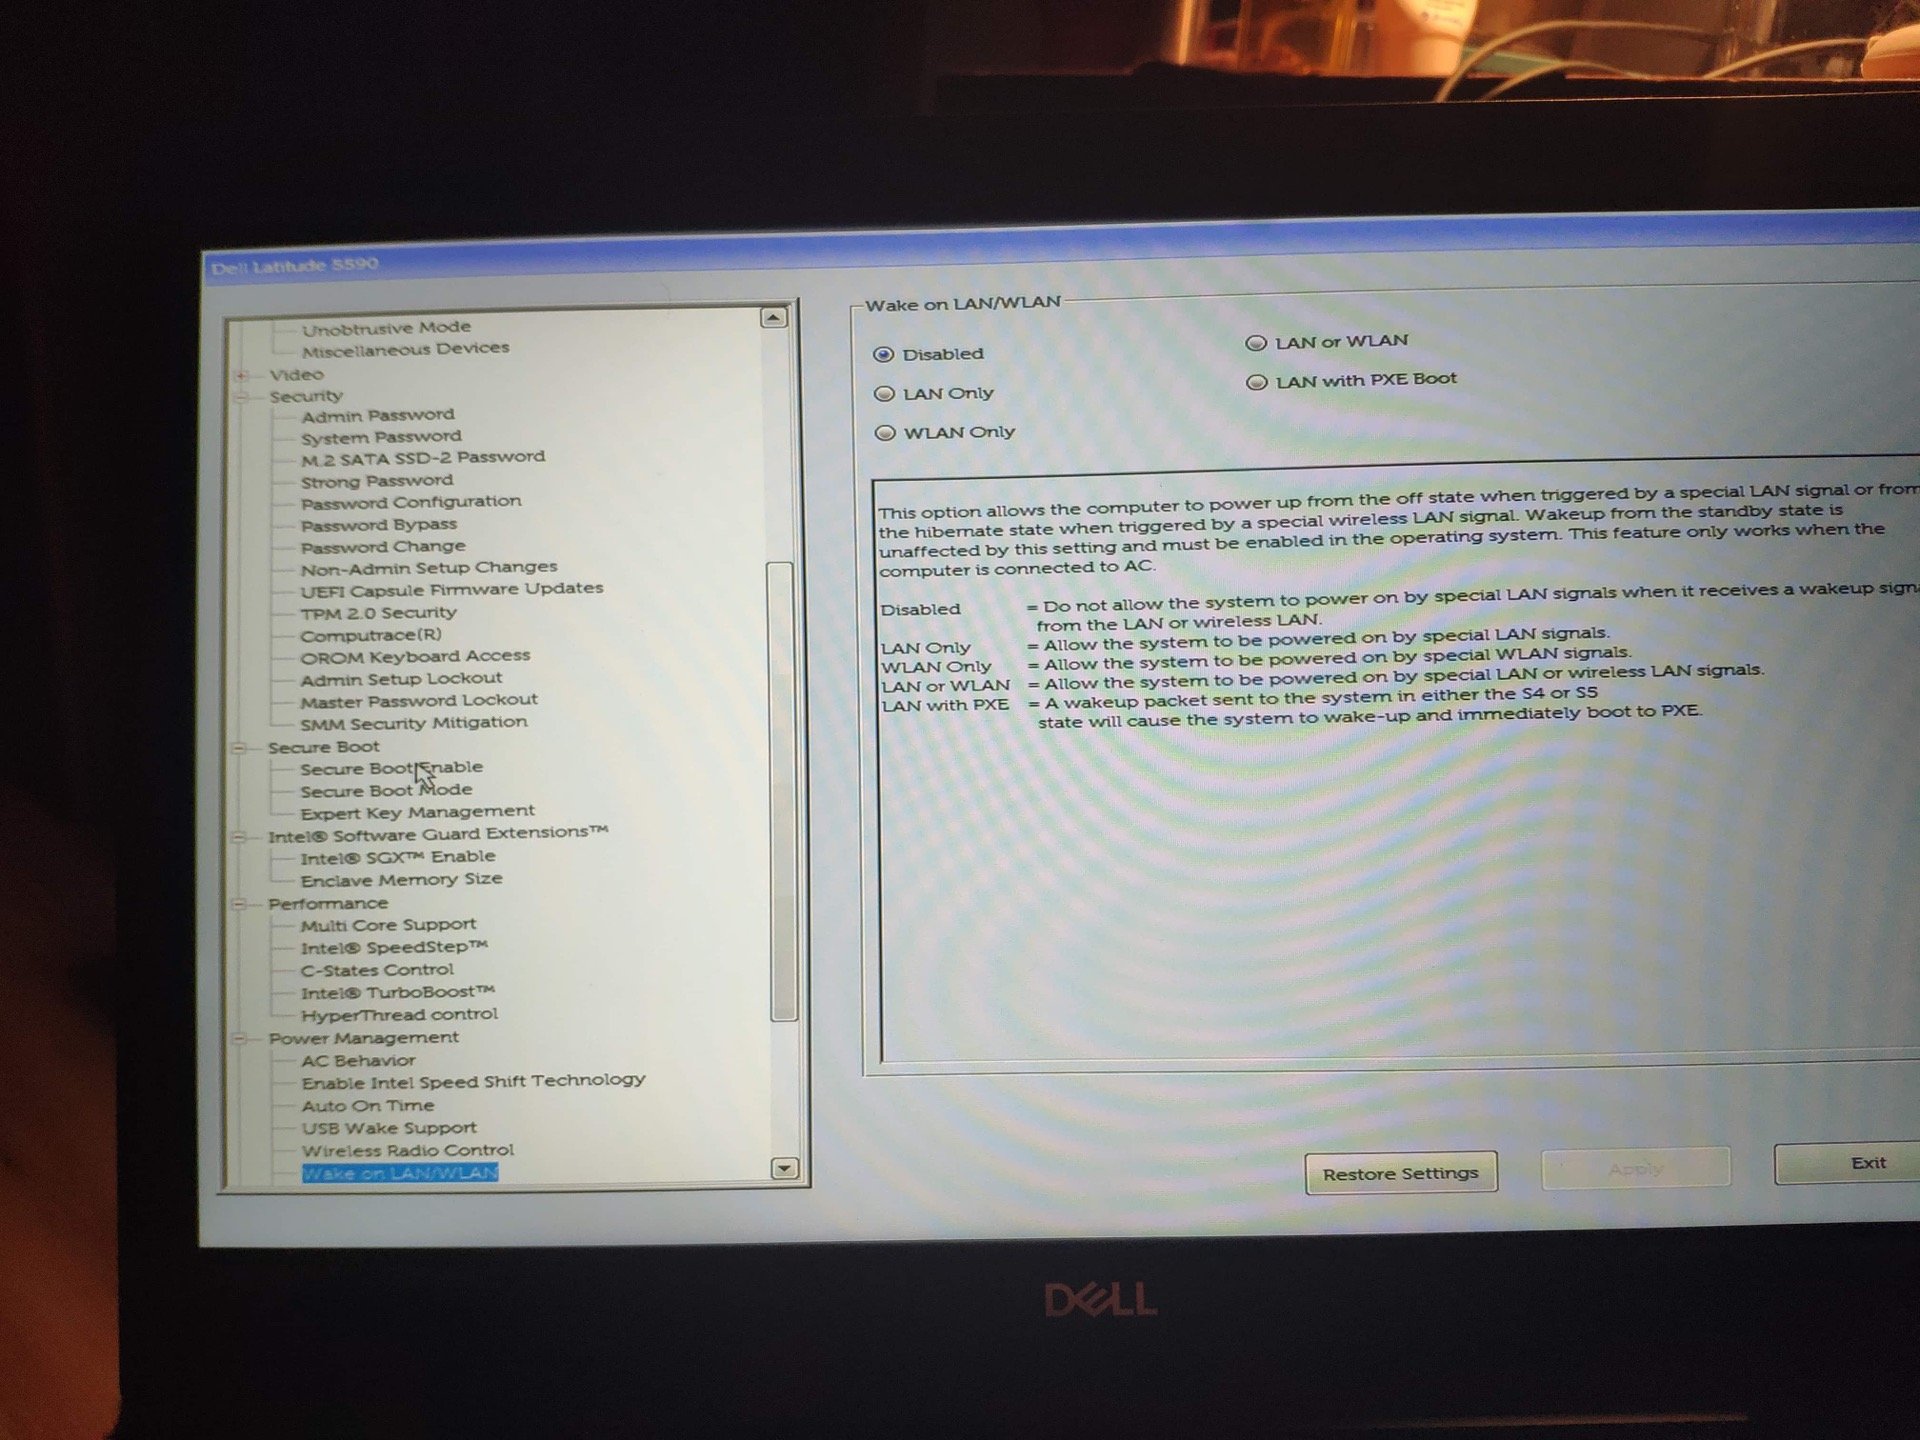
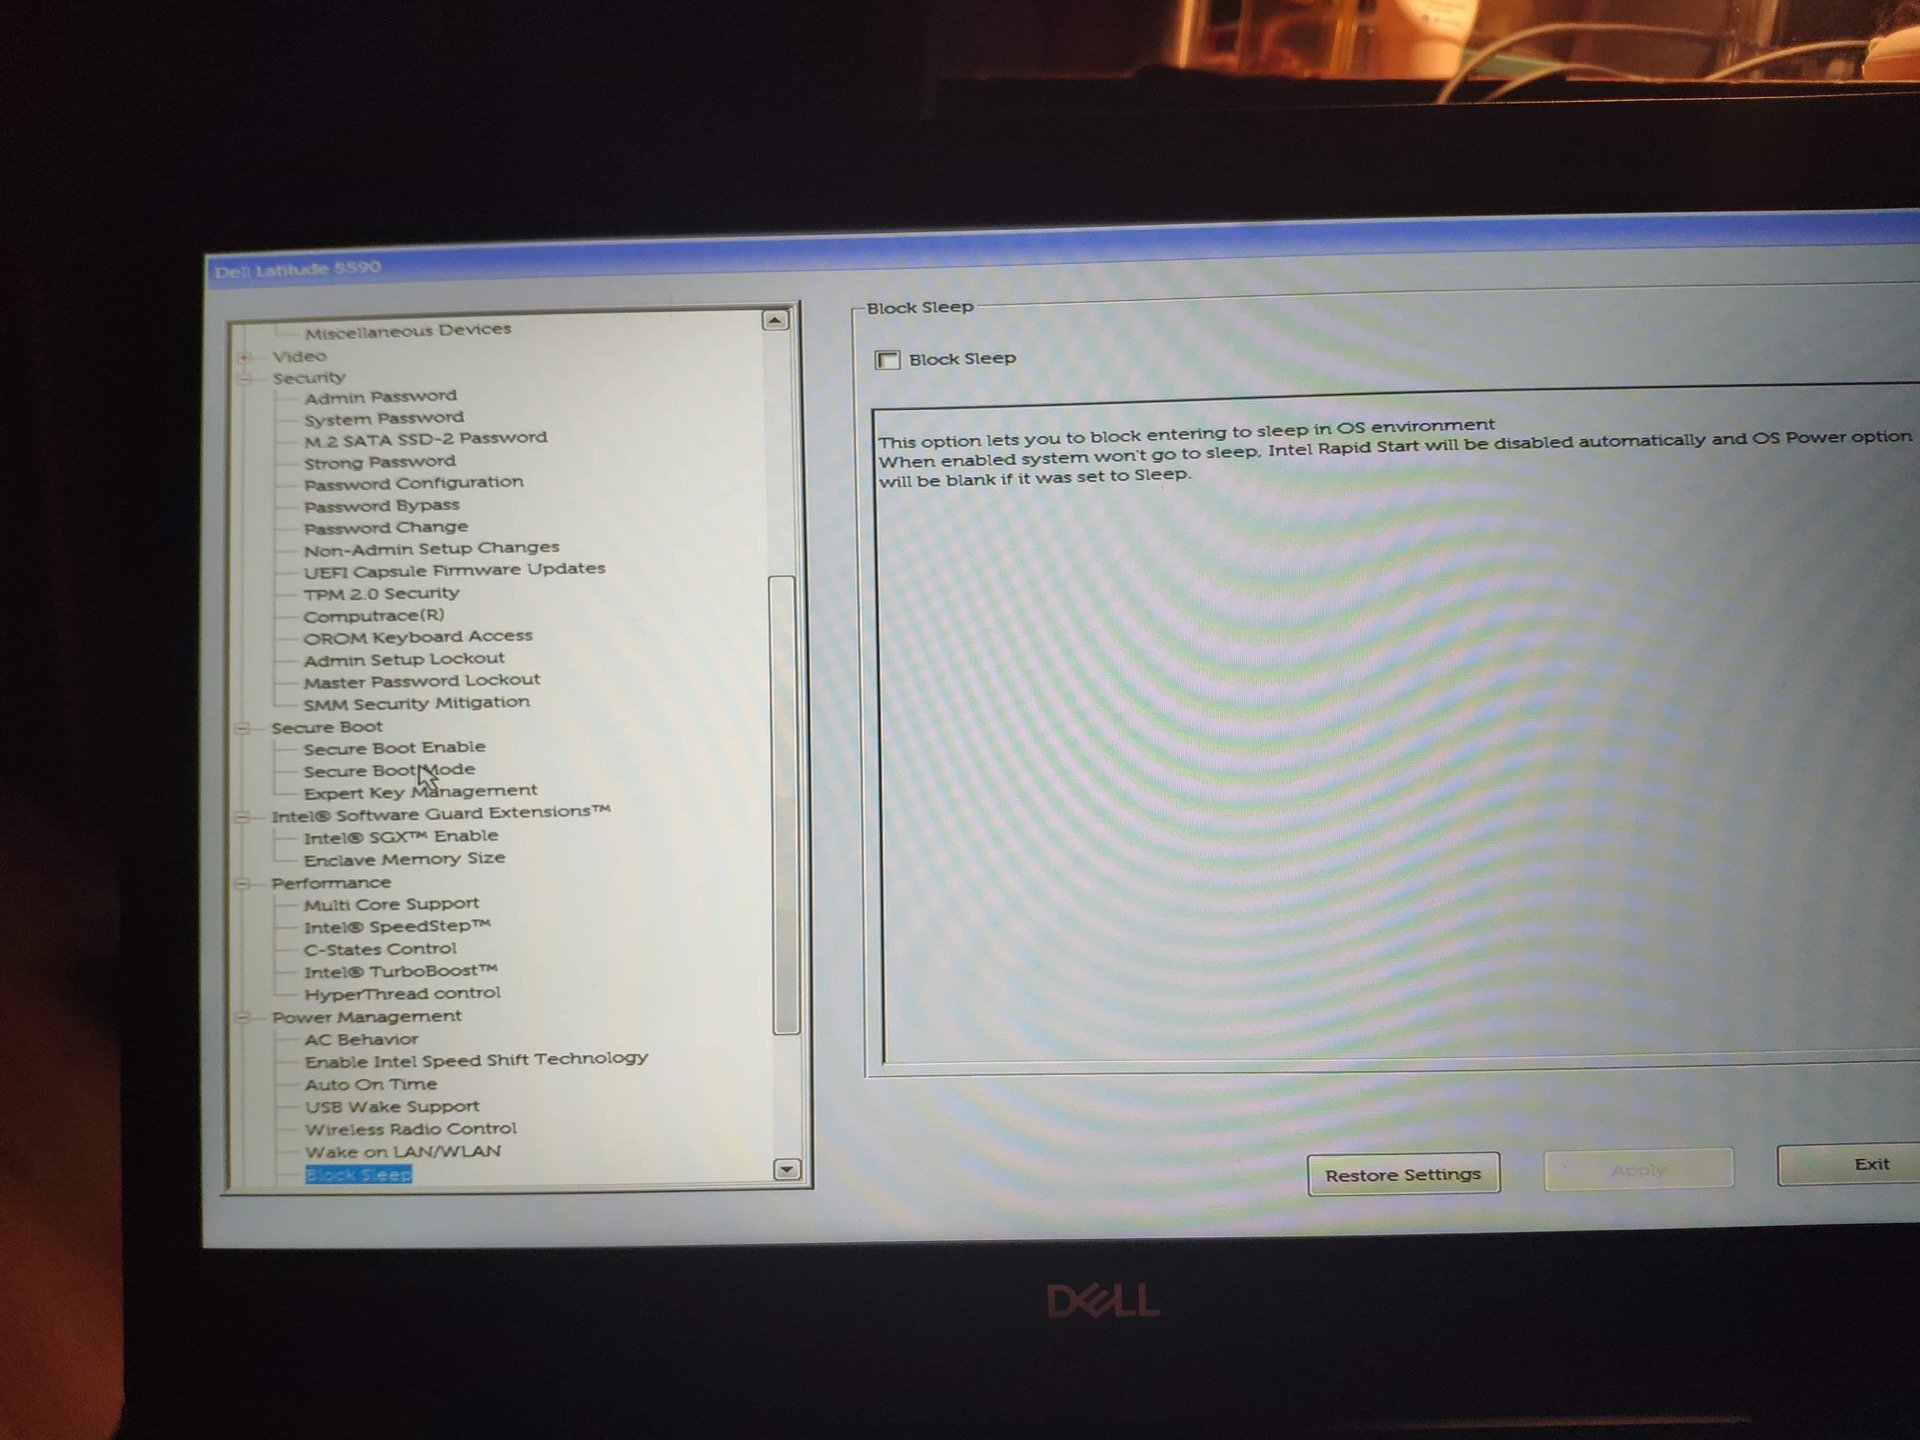
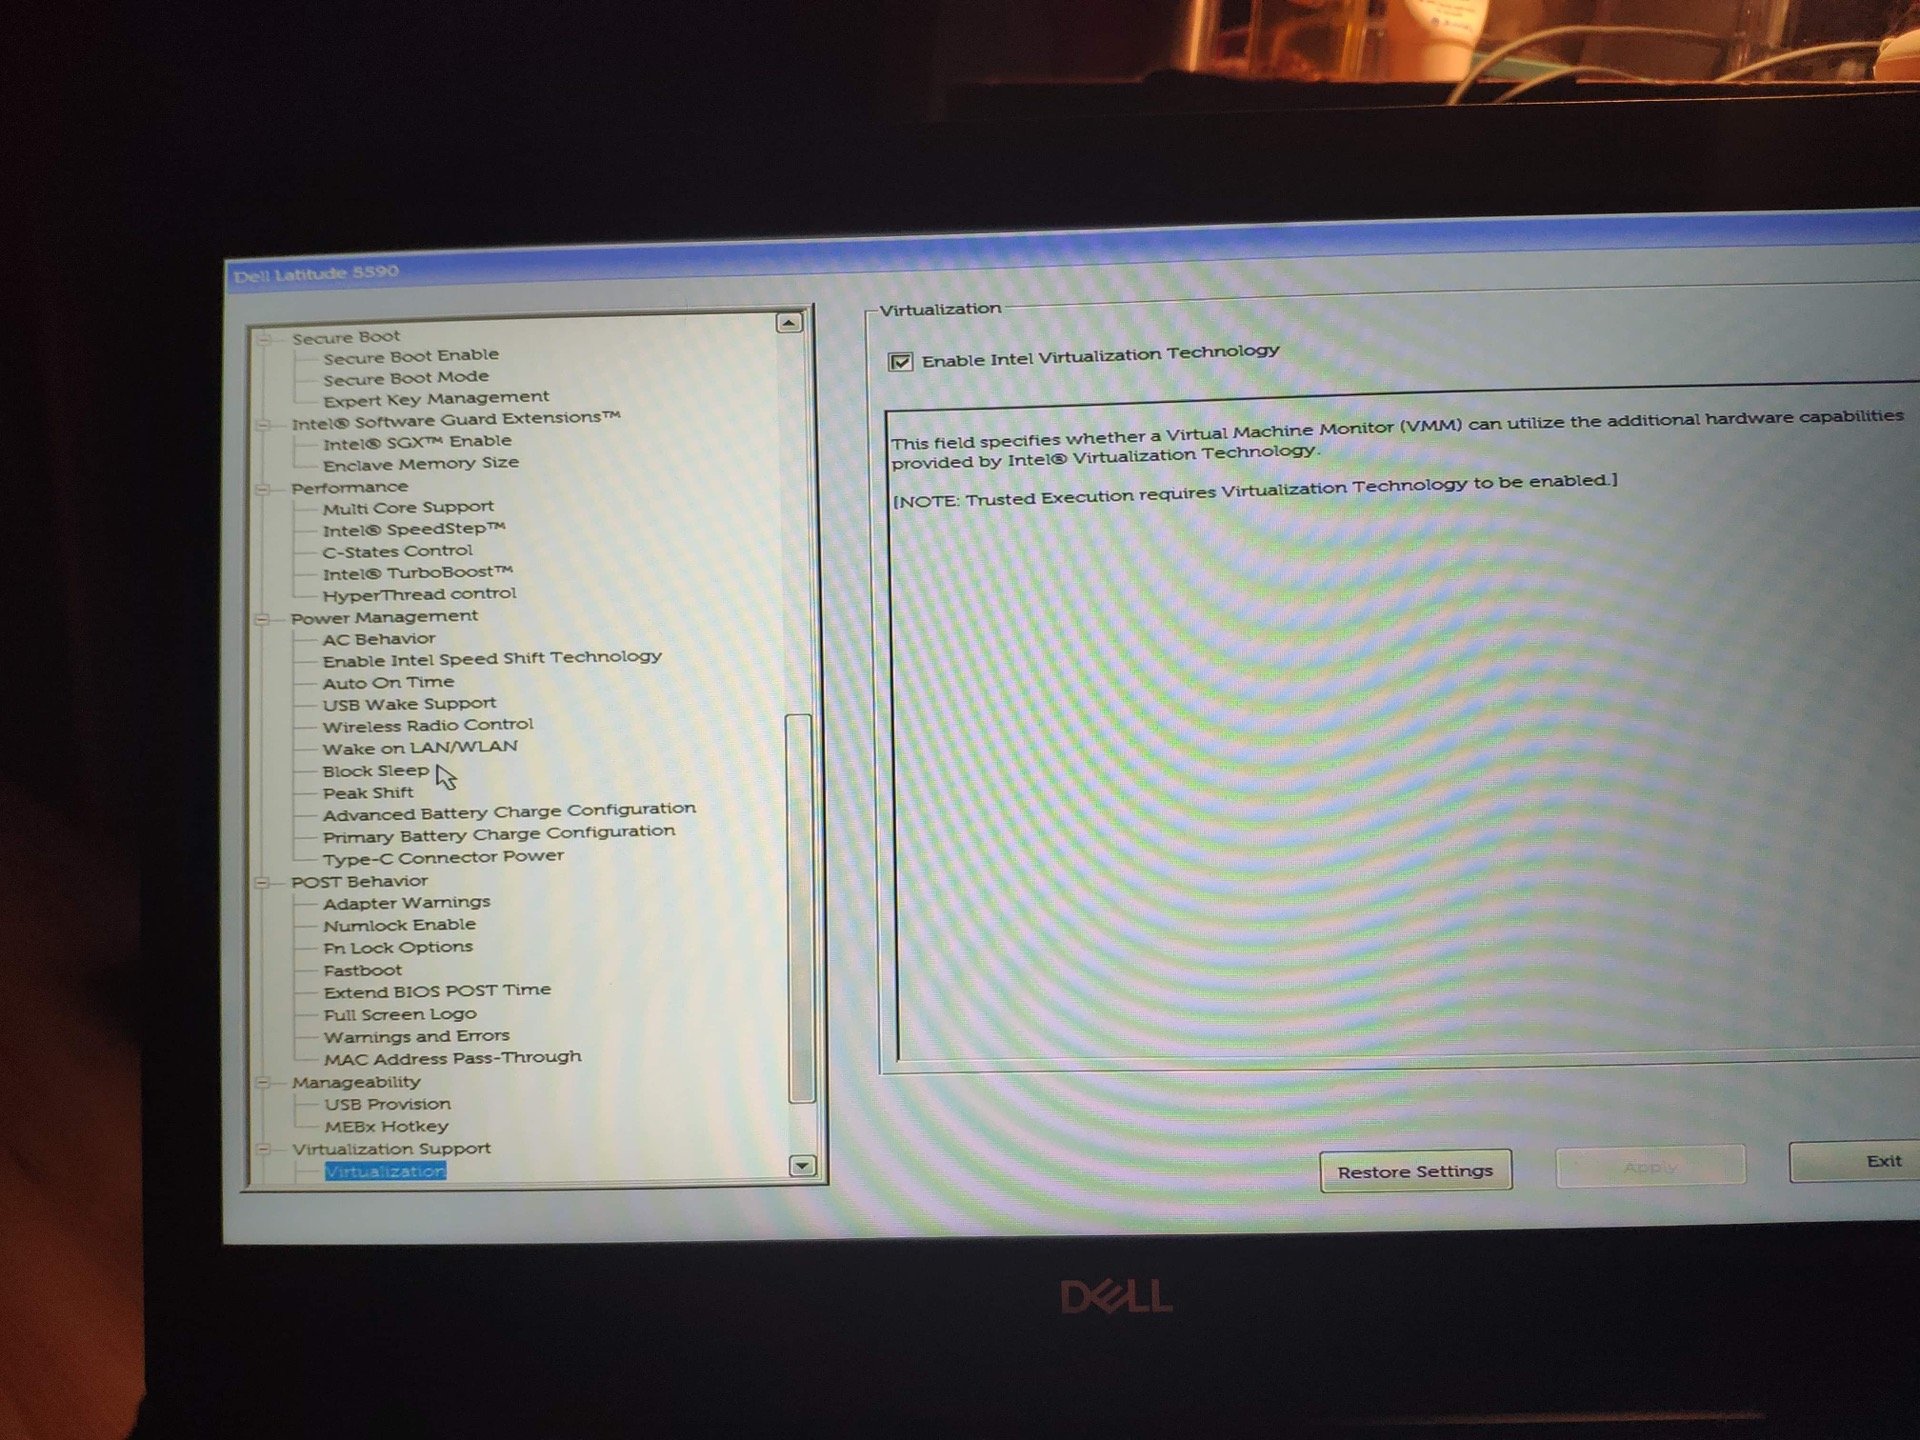
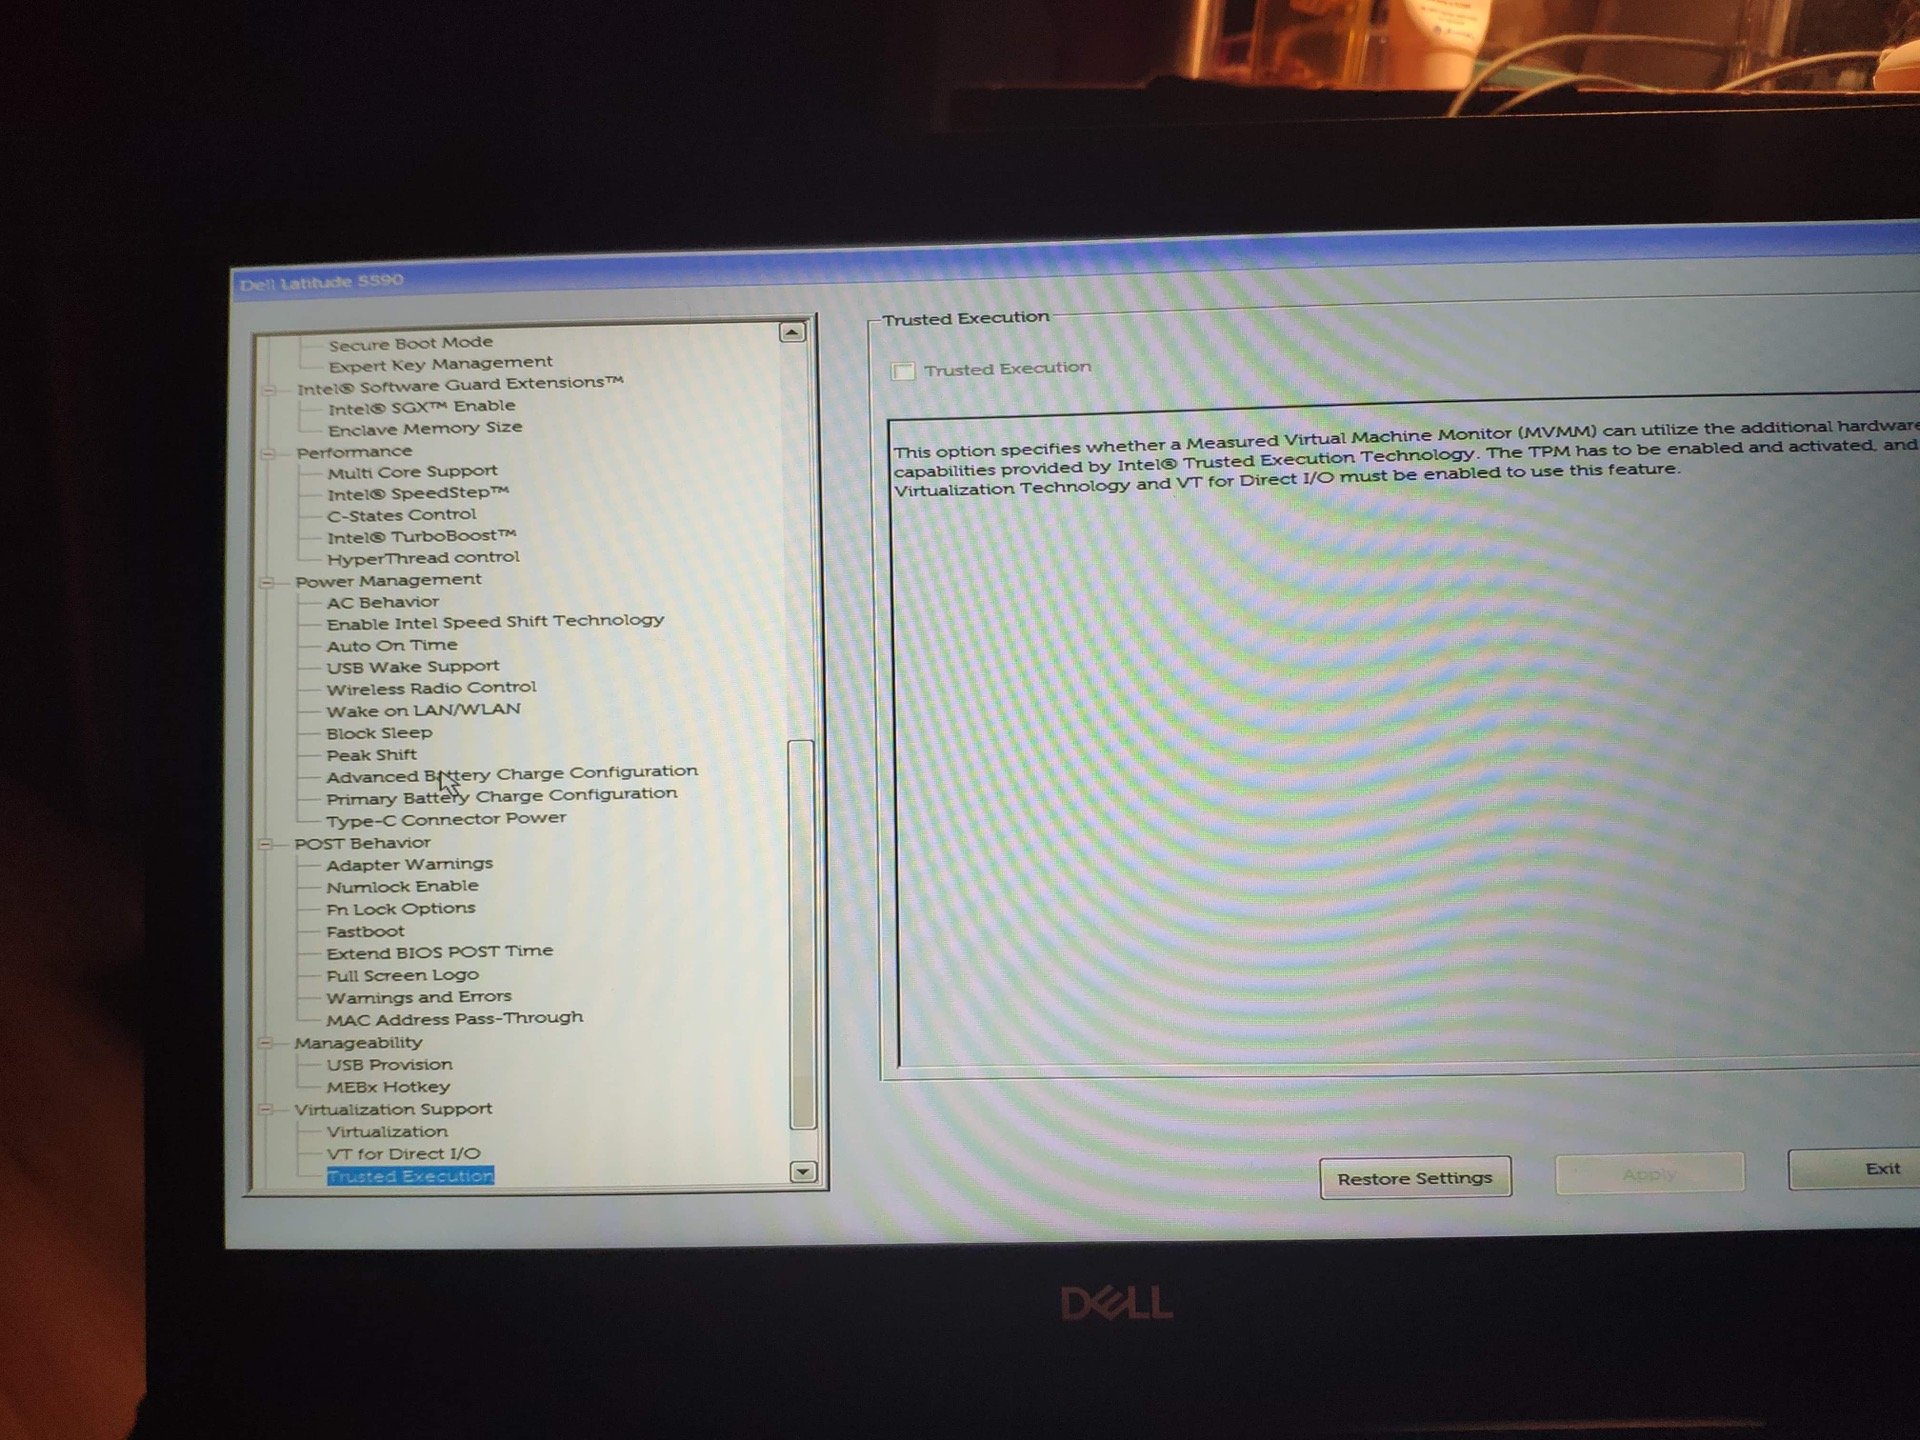
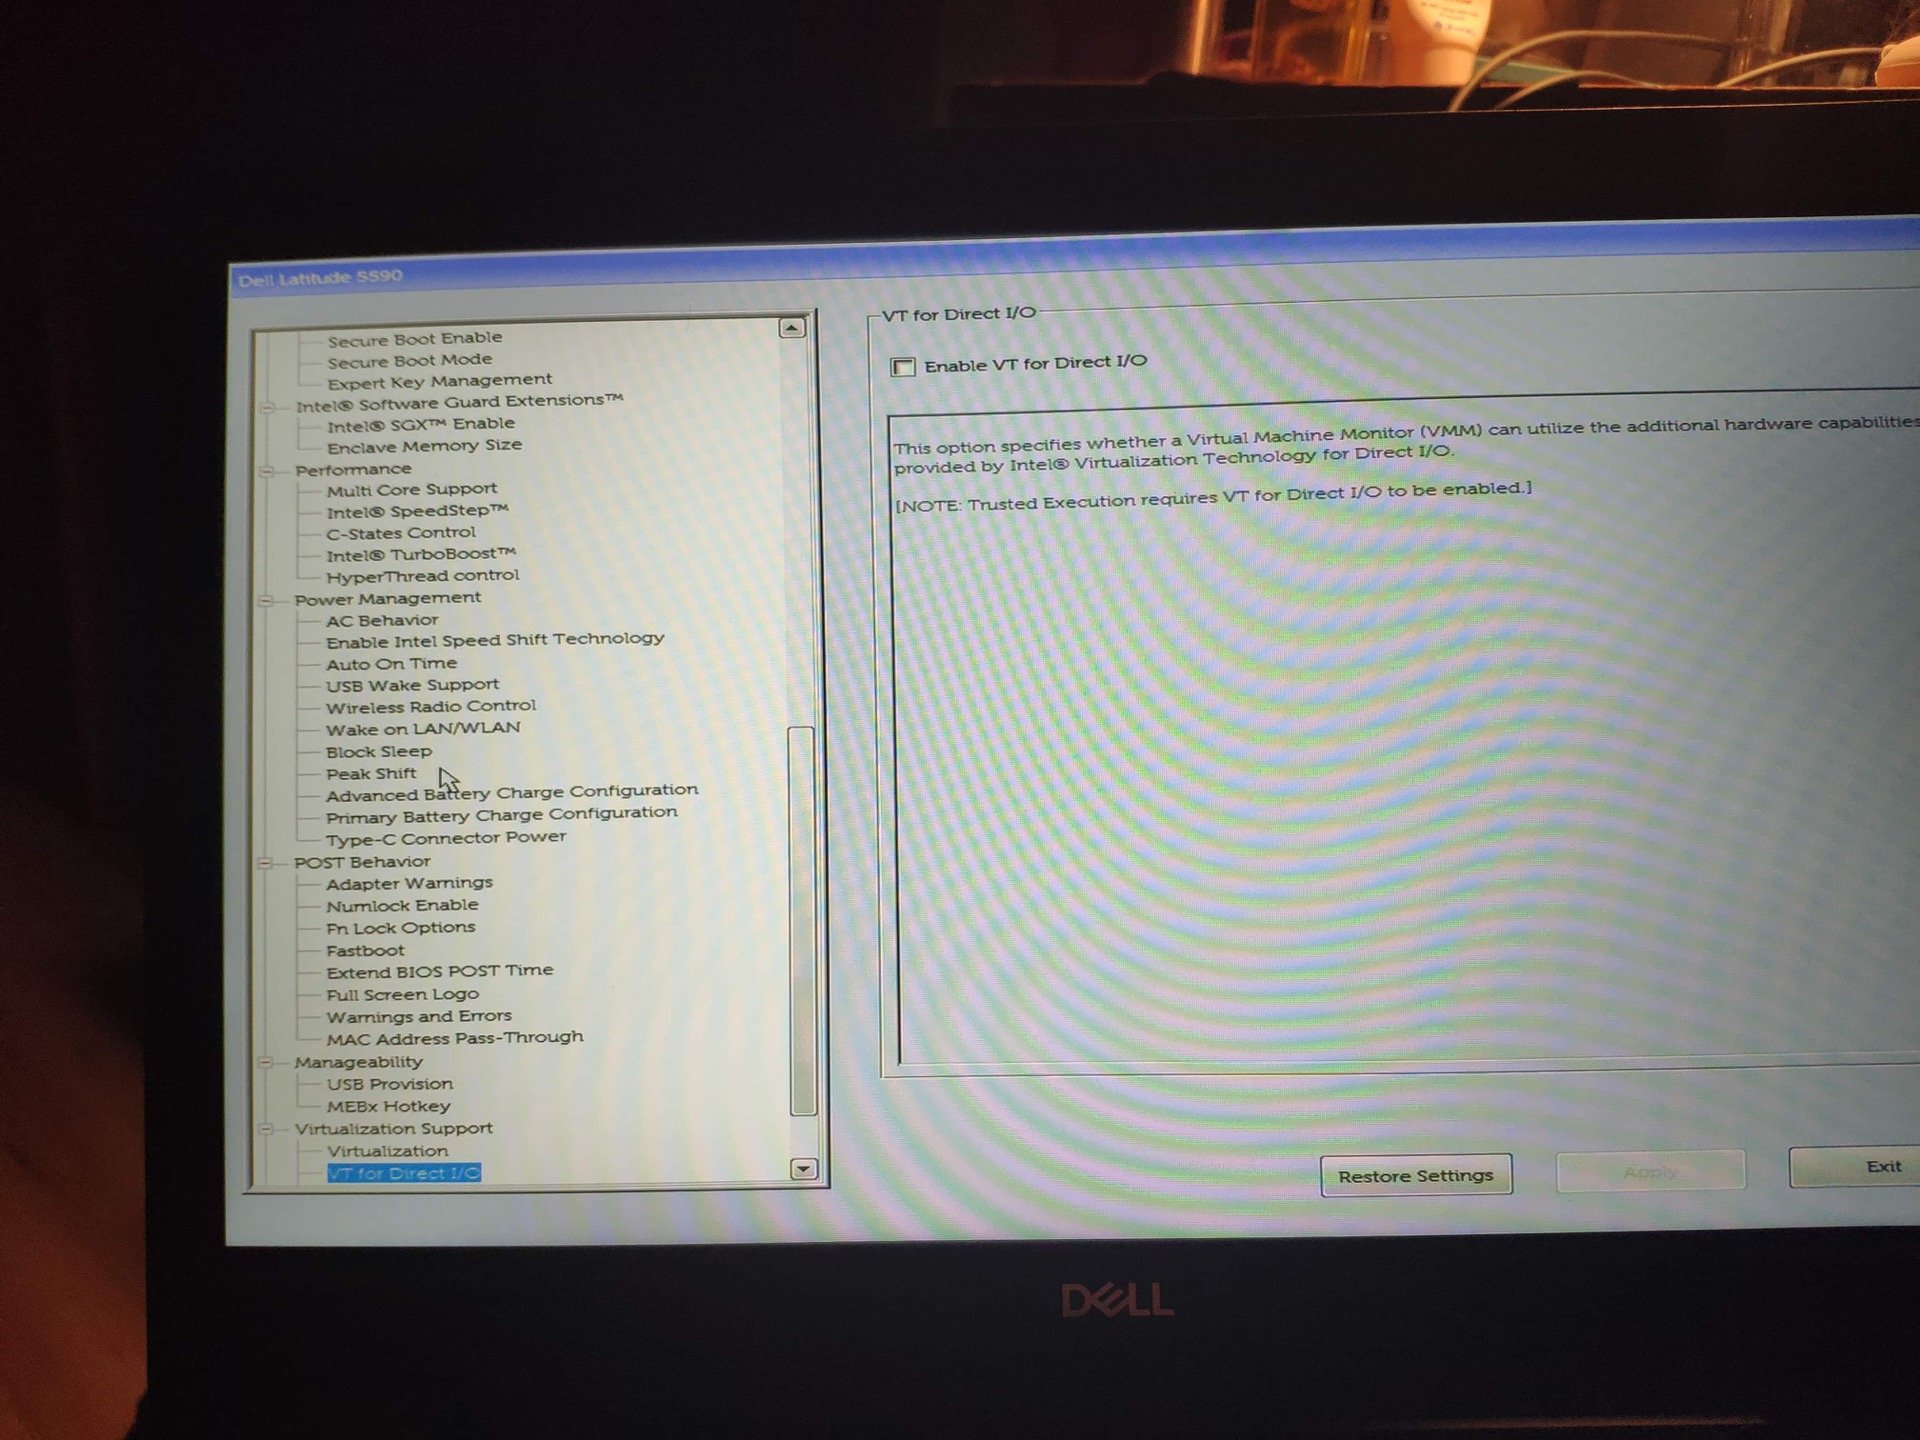
Hi, I'm trying to install macOS 10.14.1 on Latitude 5590 and make the guide. So... 1. Configurate BIOS (v. 1.5.0) Attachments below; change something or it looks ok? 2. Create boot pen https://www.tonycrapx86.com/threads/unifail-install-macos-mojave-on-any-supported-intel-based-pc.259381/#uefi_settings I think that the last solution is the best for create bootable pen drive but need some changes to works with Dell. I mixed folders and can boot the installer. For beginners - mount EFI partition by Clover Configurator and overwrite folders with EFI.zip (Edit: 28.11.2018). 3. Config On installer touchpad (I2C HID and Alps Virtual HID) not work. I don't have a mouse, so is it possible for the touchpad and track pointer to work? I tried file from but 1. not work, 2. i haven't found how to fix it by file and code from the second page. Boot video - WiFi won't work because all Intel Wifi devices aren't supported . BIOS options

-
Requirements Pendrive 2.0 (>=8GB) "Install macOS Sierra app" (https://itunes.apple.com/de/app/macos-sierra/id1127487414?l=en)(Around 5GB) Working Mac Installing Clover to USB Get a USB 2.0 Pendrive (8GB and above) Before you can partition the USB, you must determine what the disk identifier is. With the USB plugged in to the computer, use 'diskutil list': In Terminal: diskutil list In my case, output: /dev/disk0 (internal, physical): #: TYPE NAME SIZE IDENTIFIER 0: GUID_partition_scheme *1.0 TB disk0 1: EFI EFI 209.7 MB disk0s1 2: Apple_CoreStorage MacOS 500.4 GB disk0s2 3: Apple_Boot Recovery HD 650.0 MB disk0s5 4: Microsoft Basic Data DATA 498.8 GB disk0s4 /dev/disk1 (external, physical): #: TYPE NAME SIZE IDENTIFIER 0: Pendrive *8.0 GB disk1 As you can see my pendrive is available at /dev/disk1 (check yours). Now we are going to create partitions, In Terminal: diskutil partitionDisk /dev/disk1 1 GPT HFS+J "install_macos" R Output: Started partitioning on disk1 Unmounting disk Creating the partition map Waiting for the disks to reappear Formatting disk1s2 as Mac OS Extended (Journaled) with name install_osx Initialized /dev/rdisk1s2 as a 7 GB case-insensitive HFS Plus volume with a 8192k journal Mounting disk Finished partitioning on disk1 /dev/disk1 (external, physical): #: TYPE NAME SIZE IDENTIFIER 0: GUID_partition_scheme *8.0 GB disk1 1: EFI EFI 209.7 MB disk1s1 2: Apple_HFS install_macos 7.7 GB disk1s2 Now as you can see partitions are created and your pendrive is ready to install clover. Download the Clover installer. Current builds are available on sourceforge: http://sourceforge.net/projects/cloverefiboot After Downloading the Clover installer, Install it to the Target "install_macos" partition using "Change Install Location". Select "Customize". Check "Install for UEFI booting only", "Install Clover in the ESP" will automatically selected. Check "BGM" from Themes. Check "AptioMemoryFix.efi", "EmuVariableUefi-64.efi", "OsxFatBinaryDrv-64.efi" from Drivers64UEFI. After making your selections, Click "Install". Finally, one more EFI driver is needed, HFSPlus.efi: Download from : https://github.com/JrCs/CloverGrowerPro/raw/master/Files/HFSPlus/X64/HFSPlus.efi. Copy to /EFI/Clover/drivers64UEFI. Kext Setup Remove all folders from EFI/CLOVER/kexts/ except 'Other'. Now Download These, FakeSMC.kext: https://github.com/RehabMan/OS-X-FakeSMC-kozlek VoodooPS2Controller.kext: https://github.com/RehabMan/OS-X-Voodoo-PS2-Controller USBInjectAll.kext: https://github.com/RehabMan/OS-X-USB-Inject-All Lilu.kext: https://github.com/vit9696/Lilu IntelGraphicsFixup.kext: https://github.com/lvs1974/IntelGraphicsFixup RealtekRTL8100.kext: https://www.insanelymac.com/forum/files/file/259-realtekrtl8100-binary/ Setting config.plist Download it from the attachments, Unzip and replace EFI/CLOVER/config.plist Building the MacOS Installer In Terminal : sudo "/Applications/Install macOS Sierra.app/Contents/Resources/createinstallmedia" --volume /Volumes/install_macos --applicationpath "/Applications/Install macOS Sierra.app" --nointeraction sudo diskutil rename "Install macOS Sierra" install_macos Now your Bootable USB is ready to install. Turn off your Laptop. Installing Make sure you have adequate bios settings Then Follow: Power on laptop with pendrive connected to it. Continuously press "ESC". Select "Boot From USB" (i.e. F9) and select pendrive from the menu. Now it boots into Clover, with left-right arrow, select options. Select "Graphics Injector Menu". Under "Inject Intel" select "FakeID" and replace "0x00000000" to "0x12345678". Now return to main screen and select "install_macos". When grey screen comes, select DiskUtility. Format whole Hard Disk as "Mac Os Extended (Journaled)" with Name as "MacOS" Now quit DiskUtility and click "Install Mac OS Sierra" and select the newly created partition in previous step. Now installer will begin installing files (~15-20mins) and the restart. After restart again boot into clover(Follow Step 1-5) and again select "install_macos". Now Install screen will appear and continue installation. This time installer will install files to your target partition and create Recovery HD partition. Later on restarts. After restart again boot into clover(Follow Step 1-5) and again select "MacOS". If everything goes well, you will finish up the installation process and arrive at the Mac OS Sierra desktop. Install clover to hdd. Congratulations!! Your Installation is complete!! Now you need to fix things one by one. Will Provide fixes when I get time.
-
Does this laptop supports hackintosh? Please Help.
-
Hello, I'd like to contribute to the forum and I have decided to write a detailed guide how I installed macOS Sierra 10.12.1 on my E6220 with Core-i7 2620m, HD3000, 8GB RAM, 128GB SSD. I have received few personal messages for help, although there’s a perfect Enoch guide by Herve: https://osxlatitude.com/index.php?/topic/7914-dell-latitude-e6220-with-i5-2520m-hd3000-and-1366x768-lcd-mavericksyosemiteel-capitansierra/ and excellent generic El Capitan guide by Jake Lo: https://osxlatitude.com/index.php?/topic/8506-dell-latitude-inspiron-precision-el-capitan-clover-guide/ I will follow Jake’s guide, but I will add more stuff and this guide will be useful for all Sandy bridge E6x20 Many thanks to all OS X latitude forum members, who helped me when I was very new to OS X. Let’s start. You need: 1. E6220 2. 8GB USB or bigger 3. Access to real mac to create install USB or if you have Windows/Linux you can use a virtual machine using virtualbox or vmmare You should update your BIOS to A13 and set it to the following settings : https://osxlatitude.com/index.php?/topic/8281-e6220-bios-settings/ Download macOS Sierra from Apple store. Prepare USB using the following instructions: 1: Prepare Bootable USB Drive This step extracts the OS X Installer contents, then installs Clover bootloader to the USB stick. 1. Insert the USB drive on a running OS X system 2. Open /Applications/Utilities/Disk Utility 3. Highlight the USB drive in left column 4. Click on the Partition tab 5. Click Current and choose 1 Partition 6. Click Options... 7. Choose GUID Partition Table 8. Under Name: type USB (You can rename it later) 9. Under Format: choose Mac OS Extended (Journaled) 10. Click Apply then Partition 11. Go to Applications, right click on “Install macOS Sierraâ€/Show Package Contents/Contents/ SharedSupport 12. Mount InstallESD.dmg 13. Launch ShowHiddenFiles and select “Show Special Files†( app attached at the end of guide) 14. Mount BaseSystem.dmg (hidden) from “OS X Install ESD†15. Use Disk Utility to restore “OS X Base System†to USB (see image below) 16. After restore is complete, USB is now renamed to “OS X Base Systemâ€. Go ahead and rename it to “Install macOS Sierra†17. Go to “Install macOS Sierraâ€/System/Installation and delete the alias “Packagesâ€. 18. Copy “Packages†from root of “OS X Install ESD†to “Install macOS Sierraâ€/System/Installation 19. Copy BaseSystem.dmg and BaseSystem.chunklist (hidden files) from “OS X Install ESD†to root of “Install macOS Sierra†20. Launch ShowHiddenFiles and select “Hide Special Files†21. Download Clover EFI boot loader 22. Open Clover package installer 23. Hit Continue, Continue, Change Install Location... 25. Choose “Install macOS Sierra†26. Hit Continue, then hit Customize. Select these items: • Install Clover in the ESP • Bootloader/Install boot0af in MBR • CloverEFI/CloverEFI 64-bits SATA You can also select a Clover theme. 27. Click Install 28. After installation of Clover, the hidden EFI Partition will appear on the Desktop Now you will need to browse the EFI partition and put the necessary files in the correct locations: DSDT.aml and ssdt.aml should be copied to EFI partition and folders CLOVER->ACPI->patched Important note: if you have different CPU and you use my ssdt.aml - you will get kernel panic. If you have i5-2520M which seems to be the most common - you can get ssdt.aml from the files provided in Herve’s guide - https://osxlatitude.com/index.php?/topic/7914-dell-latitude-e6220-with-i5-2520m-hd3000-and-1366x768-lcd-mavericksyosemiteel-capitansierra/ If you have another CPU - then don’t use ssdt.aml and find NullCPUPowerManagement.kext, which should be added along with the other kexts. As of this writing, I do not know which is the latest such kext working OK with Sierra. If someone is ready to provide it - I can add it to the post. You can use a shell script ssdtPRGen.sh to generate ssdt.aml for your CPU after the install. The script is provided in the Tools zip to this post. You might want to google for a newer version. Kexts should go to EFI/CLOVER/kexts/10.12/ config.plist goes to EFI/CLOVER/ Please use Clover Configurator to generate a new serial. Just start Clover Configurator - File - Open - select config.plist from EFI/CLOVER/ and open it. Then SMBIOS from the left-hand list and click the magic wand and select first laptop picture and from the menu Macbook Pro 8,2 or 8,1 if you have the i5 processor. You can choose year of manufacture and click the buttons ‘shake’ to get different serials generated. When done - click File - Save. Now you can reboot computer and start the installation. You can press F12 before boot and choose USB. If you get kernel panic - one common reason would be if you have empty DIMM A slot, and only 1 RAM stick in DIMM B. Move the RAM to DIMM A and try again. For a new installation of macOS, you MUST erase and format the destination drive according to the following steps before continuing. a. From the menu bar, click Utilities -> Choose Disk Utility b. Highlight your target hard drive for the macOS installation in left column. c. Click Erase tab d. Under Scheme: GUID Partition Map e. Under Name: type Macintosh SSD (You can rename it later) f. Under Format: choose Mac OS Extended (Journaled) g. Click Erase h. Click on Partition Tab to add more partition if you prefer i. Close Disk Utility Click Continue, Continue, Agree Select Macintosh SSD, or name of your existing drive, where you want to install macOS and click Continue Upon completion, system will restart Press the F12 to choose boot device Choose <Your USB Installer device> When Clover boot screen appears, choose Macintosh SSD or name of your existing drive The system will boot into the new drive, and complete the installation… Launch the terminal and enter the following command diskutil list If you something about virtual drive like this: /dev/disk1 (internal, virtual): Please enter the below command if you have only one disk and you are not setting up dual-booting: diskutil cs revert /dev/disk1 Otherwise you have to find out which is the correct ending number from the data you see from “diskutil listâ€. Then create a folder and mount EFI partition: sudo mkdir /Volumes/efi sudo mount -t msdos /dev/disk0s1 /Volumes/efi Now it’s the time to run Clover installer and install on your HDD/SSD in a similar way like when preparing the USB, however please select couple of more options: • Install Clover in the ESP • Bootloader/Install boot0af in MBR • CloverEFI/CloverEFI 64-bits SATA • Install RC scripts on target volume • Install Clover Preference Panel Copy DSDT, SSDT, kexts and config.plist to the EFI partition of your HDD. You can use EFI mounter if for some reason - it is not mounted after Clover install. Now let’s fix the audio: Copy AppleHDA_IDT92HD90.kext to /Library/Extensions Copy AppleHDA.kext to /System/Library/Extensions Repair permission and rebuild cache. Run command from terminal sudo chmod -Rf 755 /L*/E* sudo chown -Rf 0:0 /L*/E* sudo touch -f /L*/E* sudo chmod -Rf 755 /S*/L*/E* sudo chown -Rf 0:0 /S*/L*/E* sudo touch -f /S*/L*/E* sudo kextcache -Boot -U / Make sure to disable hibernation as it's a prerequisite to get sleep & wake to work Ok on a Hackintosh: • sudo pmset hibernatemode 0 • sudo rm -f /var/vm/sleepimage • sudo pmset hibernatefile /dev/null Remove USB and reboot. You system should start fine, but you might notice that if you tap on the touchpad - it does not click. Moreover, Trackpad preference panel may not load. This is easily fixed by deleting: /System/Library/PreferencePanes/Trackpad.prefPane and replacing it with a Trackpad panel from El capitan. Link to download: http://www.megafileupload.com/85j1/Trackpad.prefPane.zip I still had a persisting problem that whatever I set in Trackpad preferences - it’s not saved after reboot, so I used Dr. Hurt's app - Touchpad Settings.app , which I copied to the Applications folder and allowed access from System Preferences - Security & Privacy - Accessibility - Allow the apps below to control your computer and I added Touchpad settings. I really hope that this will be very helpful to people new to hackintoshing and have Sandy Bridge models E6x20. PS. I may have missed something and fix it later. More stuff could be added later, or improve formatting. Feel free to criticize me and point out if I am doing something the wrong way English is not my native language, but I think I have provided clear enough explanations. Tools.zip E6220-i7 2620m.zip
-
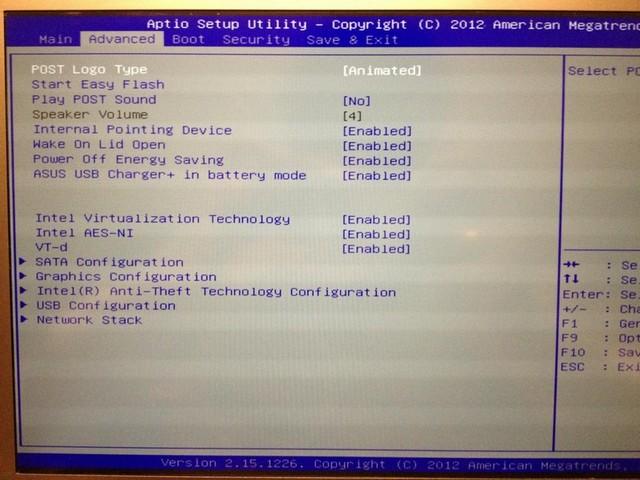
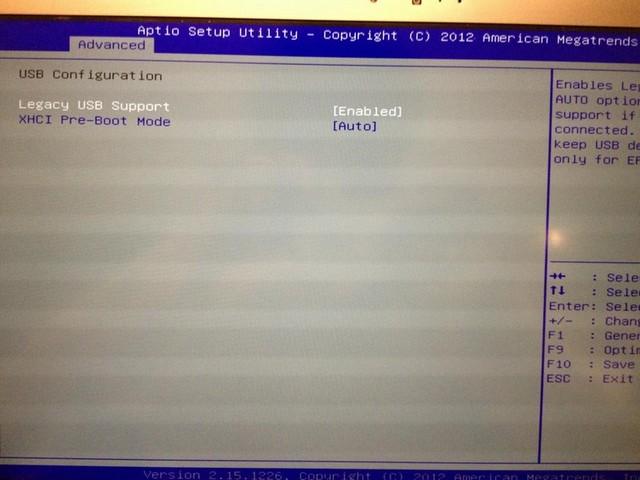
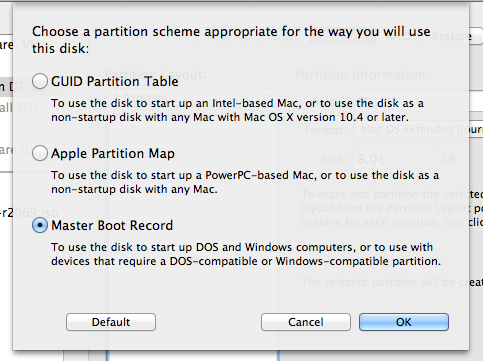
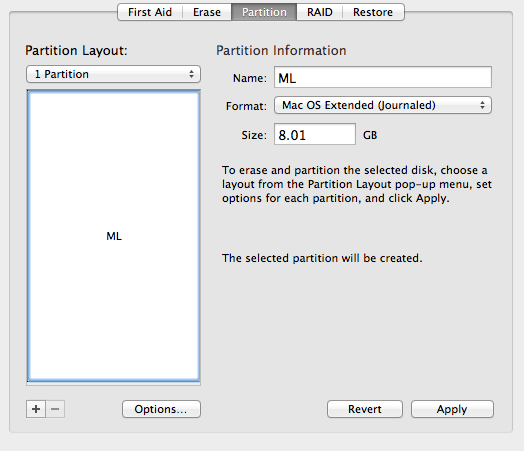
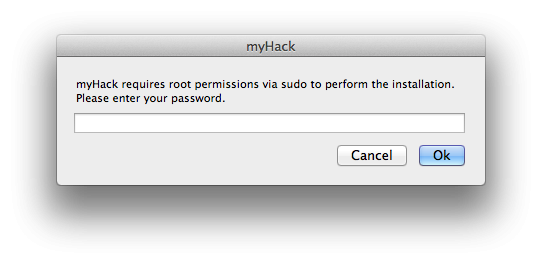
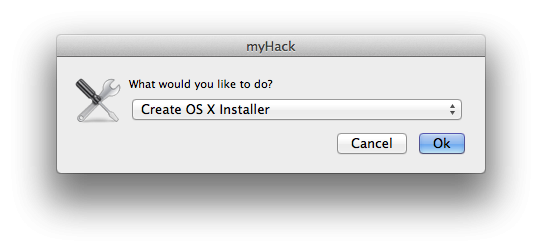
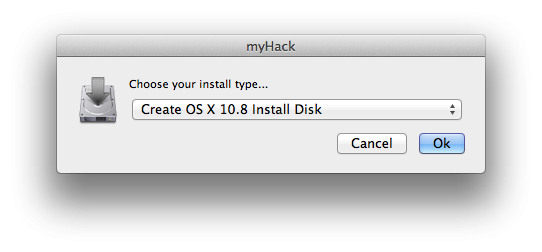
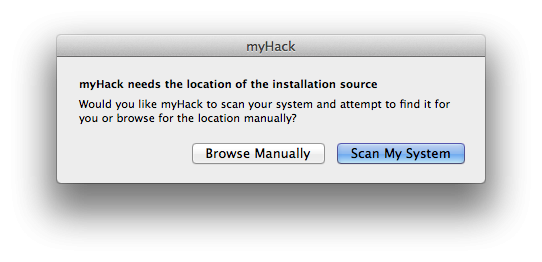
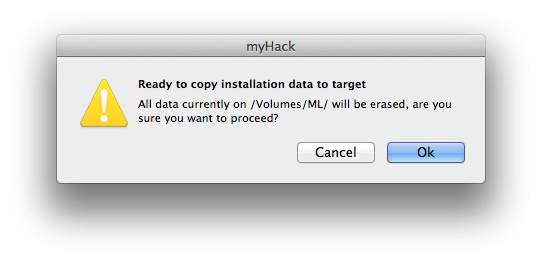
BIOS To get into the BIOS, press F2 at the Asus logo screen. Make sure you make the necessary edits. I have attached pictures with the necessary changes. This is found under "SATA Configuration". Make sure you set the "SATA Mode" to "AHC"I. This is found under "Graphics Configuration". Make sure that you set "DVMT Pre-Allocated" to "64M". This is found under "USB Configuration". "Legacy USB Support" should be enabled and "XHCI Pre-Boot" should be "Disable" (You have to do this to Newer models of the UX32VD have a "Launch CSM" and "Secure Boot" option. If you have one of these newer models, you will need to disable "Secure Boot" (it is found under "Boot" tab). You will then need to enable "Launch CSM" (under the "Advanced" tab). USB Installer To make the USB Installer you will need: Access to OS X MyHack 8GB USB Mountain Lion or Lion from the Mac App Store First, you will need to make the USB installer. You will be using MyHack, there are very clear concise instructions here. I also have attached pictures to make things easier for you. Open up Disk Utility and let's partition it so that it can be use MyHack. Note: *YOU WILL LOSE ALL DATA WHEN YOU PARTITION!* Apply the settings like so: Next let's open up MyHack, when it launches you will be asked for the root password. Type in the root password and a dialog similar to this will appear: Choose "Create OSX Installer", then click OK. Then you will be asked to choose which version of OSX you want to use, choose: 10.9 for Mavericks 10.8 for Mountain Lion 10.7 for Lion 10.6 does not support Ivy Bridge (DO NOT USE SNOW LEOPARD) Then you will be asked to choose where to create the installer. MyHack automatically lists all legible drives, just choose your USB from earlier. Next, it will ask you to choose the InstallESD.dmg or "Install OSX xxxx.app" Click on "Scan My System", and MyHack will automatically list all the possible files. Just choose the InstallESD.dmg found in "Install OSX xxx.app/Contents/SharedSupport/". You are all set for the time being. In couple of minutes, MyHack will ask you to confirm that you want to create the installer on the USB. Click on "Ok" and just wait for MyHack to be finished. Once MyHack has created the USB, download the DSDT I have attached and move it to /Extra/ on the USB. This will enable you launch the USB with no problems. Installation Plug in your USB installer into your UX32VD. Press ESC at the Asus logo screen. Choose the modded USB. Note: Once bootloader loads up (you'll see an image of an apple on a USB), select your USB (use your arrow keys) then type "-x" then press enter. Post-Installation This guide is a work a progress. Extra.zip
-
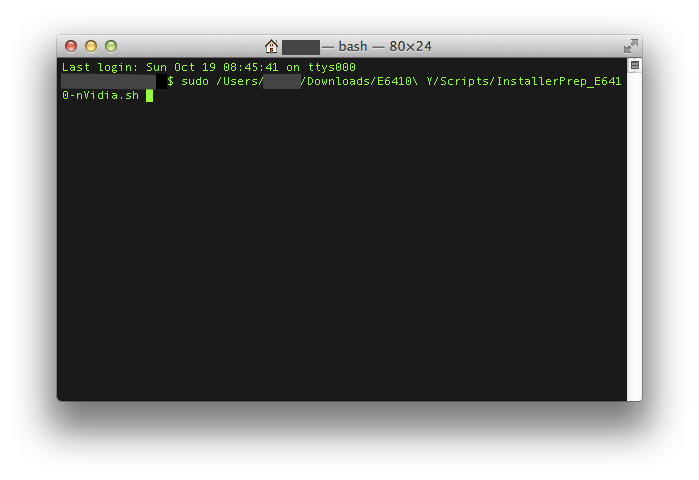
The Guide (DiskMaker X, Chameleon) Hello all, As of last night/this morning, I finally got my E6410 nVidia to work with OS X Yosemite! This is my third guide for the E6410 nVidia (the first one was on Mountain Lion, the second on Mavericks). Since myHack 4.0 is not ready yet, I have written this guide to use DiskMaker X, Chameleon 2.2 r2401, and a couple of shell scripts written by myself. Feel free to examine or modify the scripts to conform to your needs. If you do however, please note any changes you make so we can help you if you need it. If you experience any problems with the guide, please refer to the Troubleshooting section in Post #3. The machine I am working with is a Dell Latitude E6410 with nVidia graphics: 2.53 GHz Intel Core i5 4 GB 1067 MHz DDR3 NVS 3100M 512 MB BIOS version A14 What works: Webcam Trackpad & Nub (thanks to bpedman and yeahoon) Wifi - Dell 1510/Broadcom 4322 (thanks to Darvinko) Ethernet Graphics (1280x800; max resolution for my LCD) Bluetooth (thanks to alerphjuan) Two-Finger Scrolling with Trackpad SD Card Reader Audio What doesn't work: Sleep iMessage/FaceTime Before you begin: If you are new to this, please first read about what a hackintosh is and what creating/using/maintaing one entails (a simple google search for "hackintosh" worked for me) Read through this guide COMPLETELY before beginning This guide assumes that you have backed up all your data (if you need it) and are okay with erasing EVERYTHING on your hard drive I am not responsible if your laptop doesn't turn out as you'd hoped/expected (don't expect everything to work ) Although this guide may look long and daunting, it should only take about 1-3 hours (3.5 hours max). I tried to make it as quick and easy as I could If you have any questions/comments/concerns that you would like to share, please post them in the Help & Support -> Dell Systems -> Latitude E Series -> E6xxx -> E6410 (nVidia/Intel (depending on your graphics configuration)) - Yosemite Help Thread: http://forum.osxlati...forum/51-e6xxx/ If you have agreed with/done the above, you may proceed with the guide... You will need the following: A working Mac/Hackintosh A Dell Latitude E6410 with an nVidia NVS 3100M (the guide assumes you have the NVS 3100M Graphics Card, though it should still work with Intel Graphics, just without QE/CI, or full graphics accelleration), A12 (or greater) BIOS A hard drive that you are okay with erasing completely An 8 GB or greater flash drive that you are okay with erasing A copy of OS X Yosemite from the Mac App Store (It's free!) This zip file:E6410 Y.zip Patience, hope, and a pinch of faith in the guide Once you have those 7 things (the last one especially ), continue... Upgrade/Clean Installs and MBR Support: For those of you coming from any version of Mountain Lion/Mavericks that was previously installed on your E6410 using my old guide, you may skip Steps 19-28 if you would like to perform an "Upgrade" installation. Simply select the partition that you have Mountian Lion/Mavericks on and install. For those of you that never had OS X on your E6410 or those that just want to start fresh, you will need to perform a "Clean" install. Please read through the entire guide and complete all steps for the best results. Also, for those who have MBR Disks, you can install Yosemite by copying the OSInstall.frawework file from the MBR Support folder to "[iNSTALLER ROOT]/System/Library/PrivateFrameworks/" after you finish Creating the Installer. You may be prompted to Overwrite/put your password in. Select yes and input your password when prompted. Creating the Installer Make sure your Yosemite copy is in the Applications folder on your working Mac/Hackintosh Extract the E6410 Y.zip file that you downloaded above to a convenient location. No matter where you do it, just remember the location! Plug in your 8 GB or greater flash drive nowNOTE: If the drive doesn't show up on the desktop/in Finder, make sure it is partitioned/formatted as the following (you may use Disk Utility to do this): 1 Partition, GUID Partition Table, and Mac OSX Extended (Journaled) Open the E6410 M folder and then the Applications folder. Run DiskMaker X 4b4 by double-clicking it and "Open" if asked if you want to open it Click "Yosemite (10.10)" The program should find the copy of Yosemite in your Applications folder as long as you didn't rename it. If it did, click "Use this copy" and proceed. If it doesn't/finds a copy located somewhere else, click "Use another copy" and select the right one. Choose "An 8 GB USB thumb drive" and select the flash drive (NOTE: Make sure you select the correct one if you have more than one connected to your system; the application will erase the selected flash drive) You will then be warned about erasing the disk. If it is the right one, select "Erase then create the disk" Click "Continue" at the next promptNOTE: Try not to do/run any other applications while this is running. It opens windows and modifies things via the GUI. You may also miss certain prompts. If you do, the program has a tendency to timeout, causing you to re-run it and start over. After about a minute, you will receive a prompt to enter administrative credentials. Enter this here and click "Ok" The process will take 20-40 minutes depending on the computer/flash drive being used When it finishes, you will hear a "roar"... at this time click "Quit" to exit or "Make a donation" to support the creator Rename your flash drive to "E6410Y" by finding "Yosemite Install Disk - 10.10" in the Finder sidebar, right clicking it, and then selecting "Rename 'Yosemite Install Disk - 10.10'" Return to the Applications folder inside the E6410 Y folder. Run Chameleon-2.2svn-r2401 by double-clicking it. Click "Continue" (x3) Click "Agree" when prompted Click "Change Install Location ..." Select the E6410Y drive in the list and click "Continue" Next, click "Install" When prompted, enter your administrative password. After about 3-10 seconds, it should finish. Click "Close" when it does. Now, return to the E6410 Y folder and find Scripts. Open it, and find the InstallerPrep_E6410-nVidia.sh and InstallerPrep_E6410-Intel.sh. Keep this window open and move on to the next step. Open up Terminal (Spotlight search for it or navigate to /Applications/Utilities), type in "sudo[sPACE]" (without the quotes) and drag the correct version of the InstallerPrep shell script to the Terminal window. It should look something like this (for nVidia): NOTE: Your window will most likely look different then mine (black text, white background); I just have a different theme enabled. Hit the Enter/Return key and type in your password. You won't see each character show up, but once you're done, just hit Enter/Return and if you entered it correctly, the script will run. When it finishes, press any key to exit the script Eject the Drive and disconnect it from the machine Installation Plug your Installation flash drive into the E6410 Make sure your battery life is greater than 50% if you plan on not connecting to a power source Turn on the laptop and press F12 to enter the "One time boot menu..." Select "BIOS Setup" from the list by using the up and down arrow keys to scroll and the Enter button to select Click on "Load Defaults" and then OK At the warning (If you get one), click OK Then, expand the "System Configuration" settings (in the left pane) by clicking on the red "+" next to it Click on "SATA Operation" (also in the left pane) and select "AHCI" At the warning (If you get one), click OK Expand the "Virtualization Support" settings (in the left pane) Click on "Enable VT for Direct I/O" Uncheck "Enable VT for Direct I/O" Click on "Apply" in the bottom right and then "Exit" Turn the machine back on if it doesn't come up by itself and press F12 again to enter the "One time boot menu..." At the menu, select "USB Storage Device" When you reach the bootloader (the silver screen with different hard drives and flash drives on it), make sure the "E6410Y" is selected and wait for the computer to boot If you (and I) did everything right, the machine should boot up into the installer without a hitch (If it doesn't, refer to the Troubleshooting post below) Select your language and click on the arrow below to continueSTART SKIPPING STEPS HERE FOR UPGRADE INSTALLATIONS At the next screen, select "Utilities" from the menu bar on top Click on "Disk Utility" When it opens, select the hard drive (not the partition; you should see a "Partition" tab to the right; you won't see this if you've selected a partition) you are okay with erasing completely (again, make sure it's the right one) When you've verified you've selected the hard drive, navigate to the "Partition" tab (again, you won't see this if you selected a partition) Select "1 Partition" from the drop-down under "Partition Layout" (unless you're an advanced user; then you can select as many as you need/want) Then, next to "Format", select "Mac OS Extended (Journaled)" Give your partition a name (on a normal mac, the partition is normally labeled "Macintosh HD") Then click on "Options..." and make sure "GUID Partition Table" is selected; if it's not, select it Lastly, click on "Apply" When that finishes, hit Command+Q (or just click the red "X" in the top left of the window) You should now be at the Install OS X screen now; Click "Continue" and "Agree"STOP SKIPPING STEPS HERE FOR UPGRADE INSTALLATIONS Select the partition/disk you would like to install OS X to and click "Install" (and "Continue" if not connected to a power source) The process will take about 20-50 minutes If/when the machine reboots (you may have to hold down the power button to turn it off, and then press it again to turn it back on), press F12 again and boot from the "USB Storage Device" Press a key to interrupt the boot from USB, select the drive/partition on which you installed Yosemite and boot the OS Post Installation Proceed through the Setup process When you reach the Desktop, open up System Preferences and then Security & Privacy in the top row Click the little padlock in the bottom left of the window and enter your password Click the bubble next to "Anywhere" and then click "Allow From Anywhere" when prompted Close System Preferences and navigate to the E6410 Y folder on the flash drive Open up the Applications folder and then run Chameleon-2.2svn-r2401 Click "Continue" (x3) Click "Agree" when prompted Click "Change Install Location ..." if the drive currently selected is not the correct one. If it is, proceed to Step 11. Select the drive/partition you installed drive in the list and click "Continue" Next, click "Install" When prompted, enter your administrative password After about 3-10 seconds, it should finish. Click "Close" when it does. Now, return to the E6410 Y folder and find Scripts. Open Terminal and type "sudo[sPACE]" (without the quotes) and drag the correct version of the PostInstall shell script to the Terminal window. See the above picture... Hit the Enter/Return key and type in your password. You won't see each character show up, but once you're done, just hit Enter/Return and if you entered it correctly, the script will run. When it finishes, press any key to exit the script Eject the Drive and disconnect it from the machine Reboot You should see the bootloader now and it should begin loading Yosemite shortly. Enjoy OS X Yosemite on your E6410! Finally, I would like to thank everyone who has helped make this a possibility (Special thanks to Darvinko, Tengokuu, dafob, jebediah, alerphjuan, jansenspencer, roar2000, Dr. Monkey, and the everyone else over in the Mountain Lion and Mavericks Help threads), bpedman & yeahoon (for the trackpad/trackstick) as well as the creator of DiskMaker X. I couldn't have gotten this working without them. Remember: If you have any questions/comments/concerns that you would like to share, please post them in the Help & Support -> Dell Systems -> Latitude E Series -> E6xxx -> E6410 (nVidia/Intel (depending on your graphics configuration)) - Yosemite Help Thread: http://forum.osxlati...forum/51-e6xxx/
-
NOTE:Modetor/Admin feel free to move this post if it is on wrong place.Thanks Hello everyone,i am trying to install mavericks on my dell 3521 but so far no success at all.i have searched many places for the guide but no good results.so can any of you who have the same laptop as mine please help... someone said i needed the patched dsdt and ssdt but i am complete noob i tried but failed on virtualbox.please help me how to install + need to change my wiif card any cheap card suggestions. OVERVIEW Series Inspiron 15 Model Number 3521 PROCESSOR Processor Name Core i3 (3rd Generation) Variant 3217U Chipset Mobile HM76 Express Clock Speed 1.8 Ghz Cache Memory 3 MB DISPLAY Screen Size 15.6 inch Resolution 1366 x 768 Pixel Screen Type HD LED Display with True Life STORAGE Hard Disk Capacity 500 GB Hardware Interface SATA RPM 5400 MEMORY RAM 4 GB DDR3 Expandable Memory Upto 8 GB Memory Slots 2 (Unused Slot - 0) GRAPHICS Graphic Processor Intel HD Graphics 4000 hoping to get help from the biggest hackintosh community PS:i have dsdt.dsl + dsdt.aml in attachment which i got from ubuntu following a guide...what do i do with this???? thanks in ad. DSDT.zip
-
I want to install Mavericks on my Asus P9X79.Please Help me. Specifications: GPU------ Gigabyte Nvidia GeForce GTX 770 CPU------ Intel Core i7 4820K 3.7GHz 2011-LGA Ram------ 16GB DDR3 I tried to different installation guides but till now none of them succeeded.... (Sorry for my English). HELP ME PLEASE!!!
-
I know that there are many people who have intel gma 4500 graphics who get low resolution. I myself had this problem, so here is a way to fix this. This worked on my dell latitude e6400 with os x mavericks installed. Note: QE/CI is still not supported on this graphics card Just go to this link, and download the zip file. First, install the AppleIntelGMAX3100FB.kext using any kext installer. After rebuilding system caches (can be done through kext wizard), run the package in the zip. In the installer, make sure it is pointed to your main system hard drive, and custom install resolution. After that, reboot your computer, and there you go! I was able to go up from 1280 by 768 to 1440 by 900. You should also make sure you change resolution in org.charmelon.boot.plist GMA 4500M.zip
-
- 2
-

-
- intel gma 4500
- graphics
- (and 2 more)
-
I've been looking all day for a guide to installing Snow Leopard onto my d630. I DO NOT HAVE NVIDIA, it is the intel graphics 1200x800 model d630 with Intel Core 2 Duo. I also do not have access to another system with OSX already on it, so I haven't been able to follow the official guide on this site. I have the Snow Leopard Retail disk, and I even tried using iboot (chameleon, stolen and rebranded) and following a guide on tonycrapx86. Nothing has worked....I have used countless bootflags, and none of them let me get to the install screen. My other computer has Windows 8 so I can't do any of the "Disk Utility" stuff. Can someone please help me get OSX installed on my machine? Thanks. This is getting really frustrating. Here's what happens with every install attempt: - I put in iboot (chameleon, stolen and rebranded) - I switch to the Snow Leopard Disk - F5, Press enter, bam - Apple logo (sometimes with the spinning loader on the bottom, sometimes not) - After about 20 seconds, the computer screen either: Freezes, goes entirely black, or goes entirely white. Any help would be hugely appreciated.
-
I'm bringing this over from the thread I created in tonycrapx86 is hopes that I could perfect the details that still aren't working. Here and hope it's a good starting point. You're going to need to get the appstore Mountain Lion app and at least an 8Gb USB. Processor: i7 740QM Graphics: Nvidia GTX460M What's working: Graphics - Full acceleration. Wifi Trackpad with 2 finger scroll Keyboard Audio Fn keys Bluetooth Webcam What isn't working: Sleep Shutdown stays at black screen Keyboard Backlight Microphone Multiple monitors only work when connected before at boot time. Installation: Follow the unifail guide When it comes to booting the USB drive, use the kernel flag PCIRootUID=0 Let the installation complete and reboot from the USB drive again with PCIRootUID=0 Follow the setup until you reach the desktop. At this point open the terminal and type in the following without quotation marks: "defaults write com.apple.Finder AppleShowAllFiles TRUE" "Killall Finder" Open your USB and pass the Extra folder to your Desktop, open that Extra folder and in the boot.plist edit PCIRootUID from 1 to 0. Then place this extra folder in the root directory of your partition. If you can't find it, go to the menu bar Finder->Preferences and select to check the checkbox that says "Hard Disks", this should put your partitions on your desktop. Unzip the Installation kit and run the chameleon installer. After the installation try boot from hard drive. If you fail, boot from the USB again with PCIRootUID=0 and recheck your steps. If you successfully booted back in to lion. Run the kext utility in the installation kit folder and drag the kexts from the installation kit on to the Kext Utility Window. I recommend Trying to install one by one if anything goes wrong. After this, reboot and you should have all the working stuff. Open the AppStore and install the update to 10.8.1, it shouldn't affect anything and you should reboot without an issue. TIP: The best way to do tests is to have 2 partitions and use Carbon Copy Cloner to make a bootable backup. I'd appreciate if anyone else can help me with the what isn't working yet. UPDATE ON KEYBOARD BACKLIGHT: It turns out that if I boot in to Linux, restart and boot in to ML, backlight keyboard is working, however if I turn the backlight off I can't turn it on again except by repeating this process. 10.8.2 G73JW Kit.zip