Hervé
-
Posts
10077 -
Joined
-
Last visited
-
Days Won
569
Content Type
Profiles
Articles, News and Tips
Forums
Everything posted by Hervé
-
Follow the E7x70 guide available in our Guides section. CPU model is irrelevant.
-
I had detailed it in my old E6440 guide; have a look there, the patch remains identical; or look up the Darwin injection in lt E6230 guide; it's the line where OSYS is set to a specific value when the OS is Darwin or Windows 2006.
-
Did you inject Darwin, either in DSDT or through Clover? That's usually necessary on Ivy Bridge platforms to enable USB3 controller.
-

e6530 E6530 post catalina upgrade video glitches
Hervé replied to Smart Tek Peru's topic in The Archive
Yes, sorry for my mistake, I was writing about CPU PM in relation to Sandy + Ivy Bridgers and wrote "Sandy" instead of "Ivy." All E6x30 are of course 3rd gen Ivy Bridge, not 2nd gen Sandy bridge. JakeLo's guide does indeed mention a version of BIOS that, for years, was not to be exceeded but subsequent versions can actually be used if you apply the Capri FB memory size patch. I can vouch for it, I'm using BIOS A19 on my E6230 that, for years, was said not to be updated beyond BIOS A11 or A12 to avoid graphics corruption and garbled screen. Since you're on a highest BIOS version, it's not as if you have anything to lose by applying the patch anyway. I'm pretty sure you'll find it works and that'll save you the hassle of downgrading BIOS which requires a 2 phase approach: 1) downgrade to the lowest possible BIOS (eg: version A01/A02/A03) 2) upgrade to BIOS A11 For the rest, yes, you can follow Jake Lo's guide since you probably did not use his Clover pack in the 1st place. -
That would be surprising but you could check in IOReg with IORegistryExplorer. Note that if your M4800 has USB3 and USB2.0 ports as I expect it does since it's a Haswell platform, you should probably install Rehabman's latest FakeCPIID + FakePCIID_XHCIMux kexts to gain USB multiplexing and get all the USB hubs properly reported.
-
e6530 E6530 post catalina upgrade video glitches
Hervé replied to Smart Tek Peru's topic in The Archive
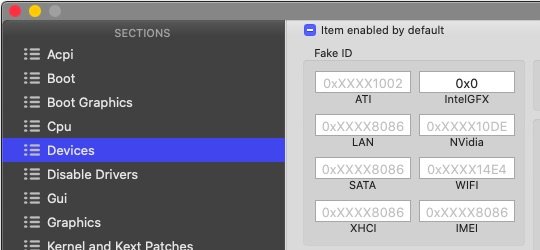
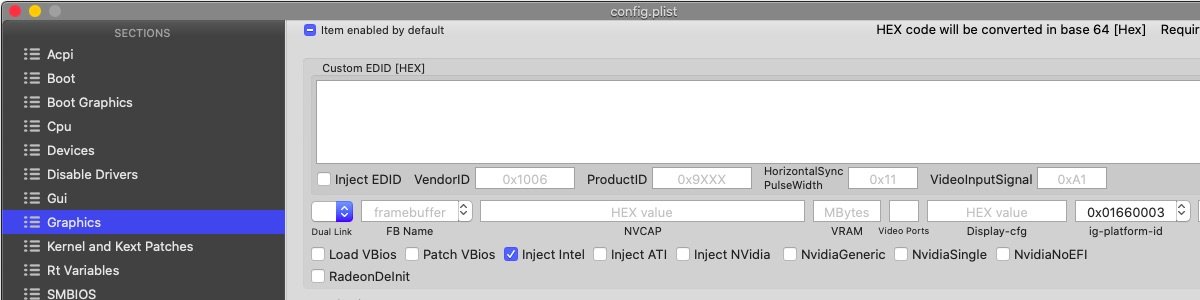
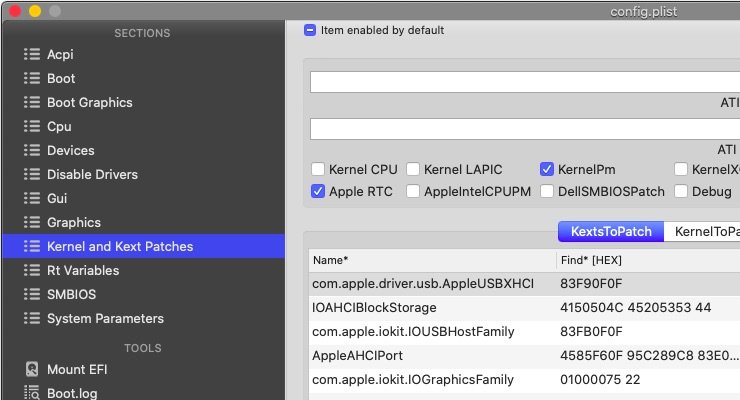
-> Moving to the correct Dell support section. Please make every effort to post in the correct sections in the future. Guides sections are clearly labelled "No support here"... You need to apply the Capri framebuffer memory size patch; details are available in my E6230 guide posted in the Guides section. Then there are a few things that need to be looked up and adjusted in your Clover config: 1) Devices: I suggest you remove that very incorrect entry; there is absolutely no need to fake any iGPU with the iGPU of the E6x30 Series 2) Graphics: remove "inject intel" + the ig-layout-id you currently inject. Lilu + WEG take care of that and the layout-id you inject through Clover contradicts what you already inject in DSDT, i.e. the HiRes layout 0x01660004 which is accompanied with DualLink boolean set to true. I presume you have a HiRes screen... 3) Patches: KernelPm patch is for Haswell and later platforms for which CPU power management got transferred to the kernel. Your E6530 is Ivy Bridge and therefore CPU power management is managed by the AppleIntelCPUPowerManagement kext. You need to enable AppleIntelCPUPM patch instead which applies to Sandy Bridge and Ivy Bridge platforms. IOGraphicsFamily patches are obsolete now and WEG takes care of everything. You can remove this. You're mixing direct cached kext references with com.apple.xxxxx; If, at some point in the past, the 2nd got mandatory, things reverted back to what they initially were and I'm not sure the com.apple.XXXXX still works these days. But I guess you can tell us if that's the case or not.
-
I got error on reinstall Niresh Catalina in my Dell E7440
Hervé replied to mukhtar's topic in The Archive
Sorry but we can't support Niresh, we've no idea what's been included in that distro. As a general rule, it's best to stay off these things. If you want to keep using it, I suggest you seek support at their forum. -
Arf, BIOS 1.12.2 posted today !!! Anyway, you probably don't run it yet...
-
My guides include clear instructions with regards to Clover: version + installation settings. If you choose to copy an existing EFI folder from a different computer and build, I cannot vouch you'll be in the verified working conditions and, therefore, cannot really assist more. I'm sure you'll understand that I'm not prepared or willing to troubleshoot an installation that was not done by following the detailed instructions I posted. If you run the same version of BIOS (at time of writing, latest remains 1.11.0 afaik), the DSDT is the same; it does not differ according to CPU model. If it did, Dell would provide different BIOS for different laptop models! As such, there's nothing to do on the matter; it's just that some people cannot boot with my patched DSDT for reasons I cannot comprehend. This being said, the patched DSDT serves 1 purpose only: activate brightness control through Fn-F11/Fn-F12. Jake Lo posted SSDT alternatives, so you can use that instead rather than my patched DSDT. All you really need for Catalina compared to Mojave is: add the ECDV to EC renaming in your Clover config; rest of the config is identical update Lilu kext and Plugins to latest versions
-
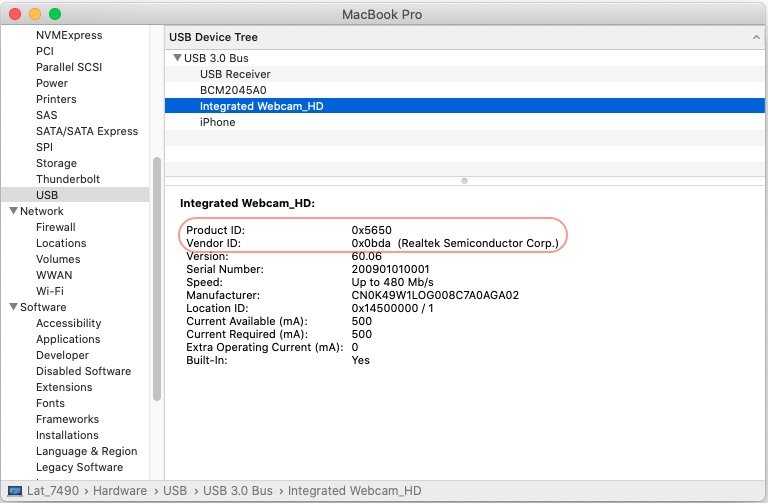
These days, you'd start with Rehabman's USBInjectAll kext and once macOS is running you can fine tune USB ports with Hackintool app which scans and detects all the USB ports on your computer. Hackintool can then generate 2 things: a table called SSDT-UIAC.aml which is to be used with USBInjectAll and a kext USBPorts which is to be used on its own (i.e. without USBInjectAll and SSDT-UIAC). This being said, you can check if your USB-internal webcam is detected through SysInfo; if it is, it'll be listed in the USB section where you'll see its PCI ids (vendor + device). It would look fairly similar to this with, additional USB hubs for USB2.0:
-
Best is probably to use a DW1560 if you want wireless working.
-
What's the model? Its PCI id? Is it USB or PCIe?
-
What's the model?
-
Dell Alienware 15R4\17R4\17R5 Installation and help!!
Hervé replied to crackjackhack's topic in The Archive
If you cannot disable the nVidia card and/or can only run on it, you'll be limited to High Sierra since that's the last version with Web Drivers available. GTX 1070 is Pascal and that's only supported with Web Driver; no such driver since Mojave and there won't be (you can Google for the whole story between nVidia and Apple). You'd only be able to run Mojave or Catalina on the Intel iGPU and have the nVidia chip disabled through DSDT/SSDT patching in order to save battery life. Then Catalina needs renaming of the Embedded Controller ACPI device and you're not doing that. See our thread entitled Minimum requirements for Catalina. It's pinned to the Our Picks column on the forum main page.- 6 replies
-
- 1
-

-
- alienware 15r4
- alienware
- (and 2 more)
-
If this relates to the Latitude E6420, JakeLo posted a High Sierra guide here and Clover packs here. With regards to these Olarila builds, I would suggest you 1st inquire about them on the Olarila forum.
-
The lspci exec of the above package is 32bit and therefore cannot be run in Catalina. I'll try and post a 64bit version asap. Meantime, a quick alternative is the dspci 64bit exec provided with DPCIManager v1.5 package.
- 1 reply
-
- 1
-
-
Please consult our inventories available in R&D->Wireless & Bluetooth forum section. If, as I presume, you need an M.2 card, DW1560 is your best shot. Alternatively, DW1830 if your slot can physically take the card and you have 3 x antenna wires at your disposal.
-
Intel DX58SO2 motherboard : AppleAHCIPort.kext and AHCIPortInjector.kext
Hervé replied to esmith1966's topic in The Archive
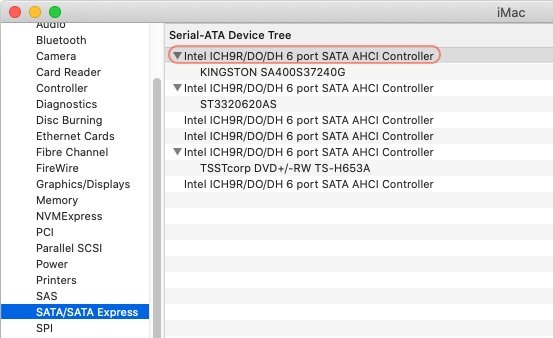
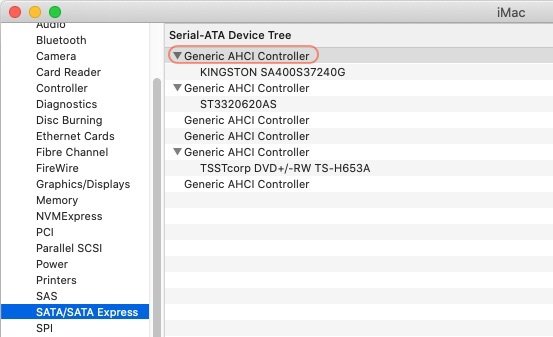
AppleAHCIPort is a vanilla kext, still part of the /S/L/E kexts set in Catalina. As for AHCIPortInjector, the name speaks for itself; it's not a kext per sé but an injector and you'd only use it if your I/O SATA controller in AHCI mode was not natively recognized by Catalina and displayed as "generic" in SysInfo. It's an alternative to patching AppleAHCIPort's Info.plist file. In the present case of Intel DX58SO2 motherboard, it's the X58 chipset with Intel 82801JIR I/O controller, i.e. ICH10R. You can obtain the PCI id of your SATA controller through tools such as DPCIManager. If required, you'd add the id to AHCIPortInjector's Info.plist file before injecting the kext or, ideally, caching it from /L/E. All in all, it's the same as before/usual with Catalina and, most importantly, it's just cosmetic! Example without injector / with injector: Alternatives include: injecting a natively supported AHCI SATA controller id through DSDT under our SATA ACPI device injecting an equivalent entry to AHCIPortInjector into FakeSMC's Info.plist faking the id of natively AHCI SATA controller in Clover config possibly injecting a property for the SATA controller in Clover's Devices section (to be verified)
-
Inspiron 5667: HoRNDIS kext not working on installation
Hervé replied to Jose Barona's topic in The Archive
'love the "Before you even. start" section of that site! We should have the same here... -
[SOLVED] E5550 Upgrading to 10.15.1 crash during install
Hervé replied to snarkjazzo's topic in The Archive
Can't see anything wrong in the stuff you attached. When you initiate the update from 10.15, the app will run and begin to install files; quickly you'll be back at the black screen with Apple logo and the (slow progressing) progress white horizontal bar. Then, the laptop will reboot and you should then boot the "install macOS Catalina from ..." in verbose mode. You'll then see if the laptop KPs or not. It's important to note that you must reboot that "install macOS ... from ..." partition until only the Catalina partition is offered. -
DELL Latitude E6420 High Sierra screen freeze after idle state
Hervé replied to withoutname's topic in The Archive
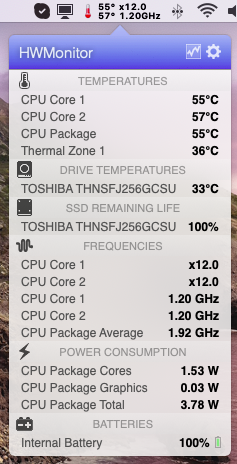
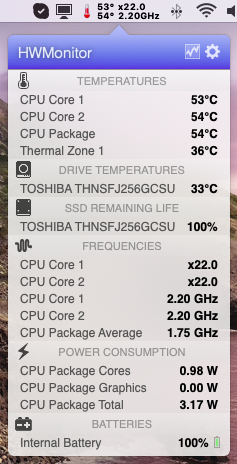
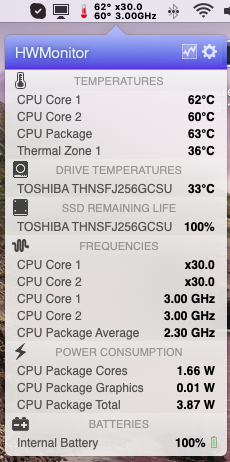
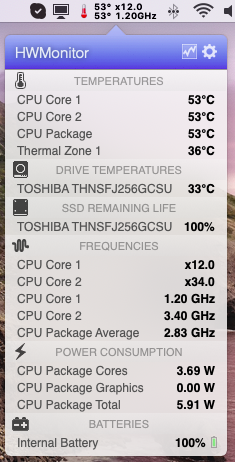
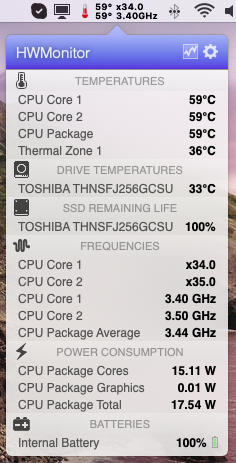
You can monitor CPU speed and T° with HWMonitor app. It's available with any recent/latest copy of FakeSMC package you download. Eg: Rehabman's. Then, there is Intel's own Power Gadget tool.
-
With a trackpad that works flawlessly with all gestures like real Mac, how about a pre-owned MacBook or MacBookAir? Coming back to reality, Dell 12" Latitude laptops are usually pretty good though built-in LCD aren't that great. I would not recommend anything older than IvyBridge these days but an E6230 is dead cheap on the 2nd hand market (<200$/€) and everything works; you can even fit a real Mac wireless card in it. Then there is the Haswell E7240 model but I've no experience with these. Broadwell E7250 are now available in the 200-250$/€ price range and fully supported too though wireless slot is a tiny 2240 M.2 slot so choice is limited. There are 2 x screens available: a basic 1368x766 or an excellent IPS Full HD touchscreen. The i7-5600U with HD5500 graphics and 8GB RAM is a pretty cheap and decent laptop. Whilst they come with mSATA SSDs, the B-key M.2 slot supports NVME SSDs. I can't remember if it can boot from it but I think it can boot from SD card which can be a nice bootstrap alternative. I recently used one and loved it; probably my next purchase. These models are fitted with an Alps TouchPad which is pretty well supported with DrHurt's VoodooPS2Controller version R6 and you can have several gestures, not just scrolling or single-tap clicking. Skylake and later 12" Latitude models will come at a higher price and not everything works, especially as later models come with I2C and poorly supported TouchPads. I understand they also have a tendency to heat up a lot.
- 1 reply
-
- 1
-
-
DELL Latitude E6420 High Sierra screen freeze after idle state
Hervé replied to withoutname's topic in The Archive
HD3000 is far from being a great iGPU and it's not bug free after Yosemite. Did you apply the 512MB to 2GB VRAM patch at all? You could try that. How are CPU SpeedStep and CPU T°? Did you check your logs? The only thing I missed was your USB controller renaming (EHCx to EH0x) being disabled. You could re-enable that in the ACPI section of your Clover config but I doubt it'll make a difference unless you're using some external USB device. -
There is no new tool for this beyond what existing many years ago and it's not really useable any more with today's macOS versions. There are no readily available ACPI patches either. This being said, I have a Latitude E6230 and I can't say I hear the fan much except, occasionally, when I'm doing something that's CPU intensive and pushes it in Turbo mode for some extended time. Now the fan goes on for a reason so what you can do is use HWMonitor to keep an eye on your CPU T° (assuming you use FakeSMC and its sensor plugins rather than VirtualSMC) and renew the thermal paste on the CPU/under the CPU heatsink. It dries up after a few years and our E6x30 aren't the freshest thing around any more. You've no idea how much good this can do!
- 1 reply
-
- 1
-
-
It's beyond the scope of this forum but I invite you to Google for that Windows AHCI settings change; little homework, as usual... You'll find it's very easy, 'takes 5mins max.