Hervé
-
Posts
10077 -
Joined
-
Last visited
-
Days Won
569
Content Type
Profiles
Articles, News and Tips
Forums
Everything posted by Hervé
-
I guess you were doing it wrong manually then because that script basically does exactly what I described in the inventory...
-
No, clearly you have not read the instructions! You're supposed to replace IO80211Family kext in /S/L/E by High Sierra's... I've also made the effort to illustrate behaviour... https://osxlatitude.com/forums/topic/11138-inventory-of-supportedunsupported-wireless-cards-2-sierra-catalina/?do=findComment&comment=94899
-
Wifi: you'll have to provide full identification of the card. Realktek is meaningless in itself, we need the exact model to assess compatibility with macOS Bluetooth: cache or inject Rehabman's Broadcom firmware patching kexts (you can Google for these) Nvidia 920M: it's Kepler and should be supported but there's no support for Optimus dualGPU technology on Hackintoses. You can only run either on the HD5500 iGPU or the Nvidia 920M if your BIOS supports Optimus enabling/disabling Brightness control: install SSDT-PNLF (you can Google for it)
-
It's all explained in our dedicated wireless cards inventory #2...
-

DELL PRECISION 7510 (SKYLAKE) - SHORT BATTERY LIFE
Hervé replied to nickelnoff's topic in The Archive
No, there's nothing else known to drain a battery, except the heavy graphics-oriented nature of the OS. Maybe you ought to reconsider your UEFI method and switch to SSDT to disable (=power off) your dGPU. That's a guaranteed method. -
You're using SSDT-EC to create/add a dummy EC device in ACPI but, ideally, you should have just renamed ECDV to EC through Clover. There are several things to say about your addd-on kexts: USB_injector kext may not be suitable anymore. Instead, use Rehabman's USBInjectAll, after which you may run Hackintool app to generate your system-specific USBPorts kext USBInjectAll.kext.zip you're using latest WhateverGreen kext so AppleBacklightFixup is obsolete and should be removed you're using VirtualSMC alongside ACPIBatteryManager and this may be the actual cause of your problem. I'd revert to FakeSMC and its PlugIns if I were you FakeSMC.kext.zip Thereafter, make sure you disable hibernation and revert to plain old sleep as explained in our FAQ section.
-
Try Mieze's BrcmPatchRAM3 kext; she posted her work in Headkaze Catalina's thread on the matter at InsanelyMac.
-
Obviously the High Sierra installation package did not download properly since it should be about 6GB if memory serves me right. It happens sometimes for reasons that elude me. You could double check your SMBIOS settings and renew your serial numbers before retrying through the AppStore or maybe Google for those download scripts/line commands to get the package directly off Apple's repo. Anyway, this is getting off-topic so let's close this thread and re-assess situation in a new and more relevant one.
-
Asking for start pack for Inspiron 3847 /i5-4660 Desktop
Hervé replied to trifle's topic in The Archive
-> moving to the correct and appropriate DESKTOP section. Please make every effort to post in the right section in the future. -
Correct, delete. AppleBacklightFixup (like a few others) is now obsolete with WEG.
-
DELL PRECISION 7510 (SKYLAKE) - SHORT BATTERY LIFE
Hervé replied to nickelnoff's topic in The Archive
I've no idea about the particulars of that said UEFI configuration. But if you do not see the dGPU in IOReg, I guess it would do the job... NB: No signature, so no specs in signature as stated in post #1. -
DELL PRECISION 7510 (SKYLAKE) - SHORT BATTERY LIFE
Hervé replied to nickelnoff's topic in The Archive
Little chance of seeing AICPUPM loaded on a Skylake system... CPU power management is handled by the kernel since Haswell! AICPUPM last applies to Ivy Bridge. Unsupported but not disabled dGPUs drain battery on Hackintosh laptops, hence why we always try to disable them through specific SSDTs. -
Moving to the correct and appropriate "Bootloaders" section. In the future, please make every effort to post in the correct section and, once again, search the forum before posting to verify if your query/questions have not been raised before (I've asked you before). As it happens, it's already been the case...... So, again, all you have to do is set up the "Boot" section of your Clover config properly. Use Clover Configurator app to that effect. Select the target partition/volume by its name (or select "LastBootedVolume" if you only have 1 x macOS partition/volume) and make sure you set boot delay (i.e. Timeout) to 0. That's all, it's as simple as that. I suggest you read the documentation on Clover's wiki seeing you need to learn about it.
-
[Solved] Dell Latitude 7490: clean Catalina installation
Hervé replied to kissman's topic in The Archive
All details are provided in my Latitude 7490 guide, please read it. And please stay on-topic in this 7490 thread. If you wish to discuss a different laptop model, please open a new thread; a little discipline is required and expected here... -
[Solved] Dell Latitude 7490: clean Catalina installation
Hervé replied to kissman's topic in The Archive
You may not have a 7490 that matches the same specs as mine. It's perfectly Ok not to use my DSDT which is only used to inject the code required to enable the brightness keys. Remove the DSDT of my pack and try to patch your own extracted one afterwards if you so wish. -
A few things are required to successfully run macOS Catalina on a Hackintosh, whether through a new/fresh installation of a direct upgrade from a previous OS X/macOS version/release. 1/ Embedded Controller: As mentioned here by @MaLd0n at InsanelyMac, since beta #5, macOS Catalina requires Embedded Controller (EC)-related patching for many computers. It's therefore important to check your Embedded Controller device (aka "PNP0C09" id) in DSDT/ACPI and apply the mandatory device renaming to "EC" in Clover's config (or directly in DSDT), failing what, Catalina will never boot. For instance, most Dell laptops since the era of the Latitude E4x00/E5x00/E6x00 range have an Embedded Controller device called "ECDV" in DSDT; in Clover, the necessary ACPI device renaming is as follows: Description: Changes ECDV to EC Find: 45434456 (ASCII for "ECDV" in hexadecimal notation) Replace: 45435F5F (ASCII for "EC__" in hexadecimal notation) Other known names for the Embedded Controller include "H_EC" or "EC0". If you find no Embedded Controller device in ACPI, this patch is not necessary. 2/ Clover: Clover needs to be at a minimum version supporting Catalina. Versions r503x, r504x and r505x are generally Ok. At the date of general release of Catalina, we recommend using Clover r5093 as the minimum version. Clover versions are available off Dids' Github repo. 3/ Add-on kexts: Lilu and associated plugins also need to be at versions updated for Catalina. At time of writing, we recommend the following minimum versions, all available off Acidanthera's Github repos: Lilu v1.3.8 Whatevergreen v1.3.3 AppleALC v1.4.2
-
Dell Latitude 7490 Mojave 10.14.6 dw1820 boot problem
Hervé replied to Gemini44's topic in The Archive
Try and cache your add-on kexts from /L/E rather than inject them from Clover. -
Dell Latitude 7490 Mojave 10.14.6 dw1820 boot problem
Hervé replied to Gemini44's topic in The Archive
It certainly looks Ok from a device property injection point of view. 2 x things left to do: get rid of that SATA-100-series-unsupported kext you inject. Why did you install this? It certainly ain't in my pack though no impact to be expected on wireless... check the MAC @ printed on your DW1820A label and compare to the MAC @ shown in Mojave (i.e. 30:52:cb:84:0f:f1). If different, you probably don' have a real #0VW3T3 model... -
Target macOS release: Mojave 10.15.x This is a Clover-based installation using the well-known/well documented vanilla method detailed below. 1) 10.15 USB installer creation Using a USB key of 8GB minimum, create a Catalina USB installer through the following Terminal command: sudo <path>/Install\ macOS\ Catalina.app/Contents/Resources/createinstallmedia --volume /Volumes/<USB key> where: <path> = location of Catalina installation package (eg: /Applications if freshly downloaded) <USB key> = name of formatted USB volume (eg: USB_8GB) The process will take several minutes. Once completed: Setup your BIOS for UEFI mode install Clover bootloader on the USB installer with the following customised settings: Clover for UEFI booting only Install Clover in the ESP UEFI Drivers -> Recommended drivers ApfsDriverLoader / AptioMemoryFix / DataHubDxe / FSInject / HFSPlus / SMCHelper UEFI Drivers -> Human Interface Devices (optional only) PS2MouseDxe / UsbMouseDxe Themes (optional only) Install Clover PrefPane (optional only) you may use Clover version r5093 attached below: Clover_v2.5k_r5093.pkg.zip once Clover is installed, run Clover Configurator app attached below and mount the freshly created EFI partition of the USB installer: Clover Configurator.zip open this EFI partition and transfer the files & folders from the Latitude E7250 Catalina Clover pack below to the EFI/Clover folder of the EFI partition: E7250_Clover_Pack_Catalina.zip 2) 10.15 installation boot the Catalina USB installer at the Clover main menu, select the "Install macOS Catalina" partition (but don't press [ENTER]) press [SPACE], select -v verbose option in the menu, then choose to boot with the selected options proceed with installation, creating & formatting the target Catalina installation through Disk Utility as/if required on 1st reboot, boot off the USB installer and select the freshly created "macOS install from <target Catalina partition>" repeat this until this partition is no longer offered and only the target Catalina partition is left to boot Reboot the target Catalina partition via your USB installer 3) Post-installation tuning Once the target Catalina partition has booted, complete the 1st boot configuration tuning Once at the desktop, install Clover bootloader on the Catalina partition/disk with the customised settings listed above Once Clover is installed, launch Clover Configurator app and mount the freshly created EFI partition of the Catalina partition/disk Open this EFI partition and transfer the files & folders from the above Latitude E7250 Catalina Clover pack to the EFI/Clover folder of the EFI partition You may then reboot and verify that Catalina boots off your disk through Clover After that reboot, finalise post-installation tuning actions such as disabling hibernation, allowing all apps download from anywhere, changing all serial numbers, etc. Please note that: Catalina runs with nearly all the settings used for High Sierra and Mojave, the most notable differences being: need to run with a Catalina-compatible Clover version Clover config must contain new ACPI patch that renames ECDV device to EC need to run Catalina-compatible Lilu + WEG + AppleALC Here too, generate your own CPU-specific SSDT using Pike R Alpha's well-known generator script of you have a different CPU than the i5-5300U fitted to my E7250.
-
[SOLVED] Dell E7450 Catalina apfs module start 1683 error
Hervé replied to KASIM1983's topic in The Archive
Moving to the correct support section. Please make the effort to post in the correct and relevant section in the future. The guide you linked to has not been updated for Catalina... This being said, you probably need to: update Clover to the latest version (eg: r5070 or r5093). At minimum, run a version like r503x/r504x/r505x (tested Ok with for Catalina beta). Install the update with same settings as for Mojave. add Clover ACPI patch renaming ECDV device to EC; this is absolutely mandatory since Catalina beta #5. You can look up the Clover config posted in my E6230 Catalina guide to that effect. update Lilu + WEG + AppleALC kexts to latest versions. You may also look at here for guidance. If you have an existing macOS installation, you may proceed to upgrade directly to Catalina with the downloaded package, provided you've first updated Clover, its config file and your add-on kexts as detailed above. If you proceed with a fresh/new installation, I'd recommend you reformat your target partition to HFS+ from the installer main screen before you proceed with actual installation (APFS conversion will be automatic). -
Dell Latitude 7490 Mojave 10.14.6 dw1820 boot problem
Hervé replied to Gemini44's topic in The Archive
Make sur you follow the BCM4350 guide available in R&D->Wireless section. Once you do that and inject the correct properties, you should find things will work a lot better. -
latitude 7490 Dell lattitude 7490: method to install Catalina
Hervé replied to Tubardus's topic in The Archive
That would have been the correct method, yes; but you must have done differently. Use your original (Mojave?) USB installer to boot up Catalina. -
latitude 7490 Dell lattitude 7490: method to install Catalina
Hervé replied to Tubardus's topic in The Archive
All you had to do, was install r5070 with the exact same settings you had (those listed in my guide). You must have messed up the modules... Re-install accordingly. -
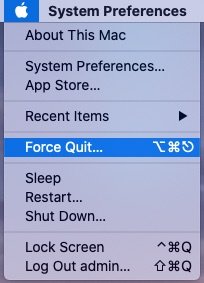
With Catalina 10.15, Apple went further into increasing the security of its OS and the system's/root partition is now locked upon system startup. One of the consequences is that, by default, /System/Library/Extensions folder (/S/L/E) is locked and can not be modified in any way. In the same respect, other reserved folders such as /usr/bin or /usr/sbin are locked too. This can be a problem for such situations where a vanilla kext has to be replaced in /S/L/E or a file of /S/L/CoreServices has to be patched. The trick is basically to mount Catalina's root partition in Read-Write (RW) mode instead of Read-Only (RO) mode. This can be accomplished through Terminal with the following command: sudo mount -uw / followed a restart of the Finder through Terminal command: sudo killall Finder or simply by relaunching the Finder from the Apple menu:

-
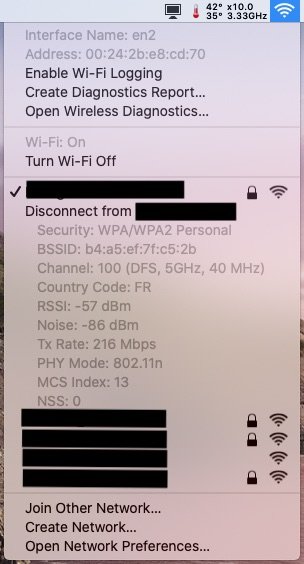
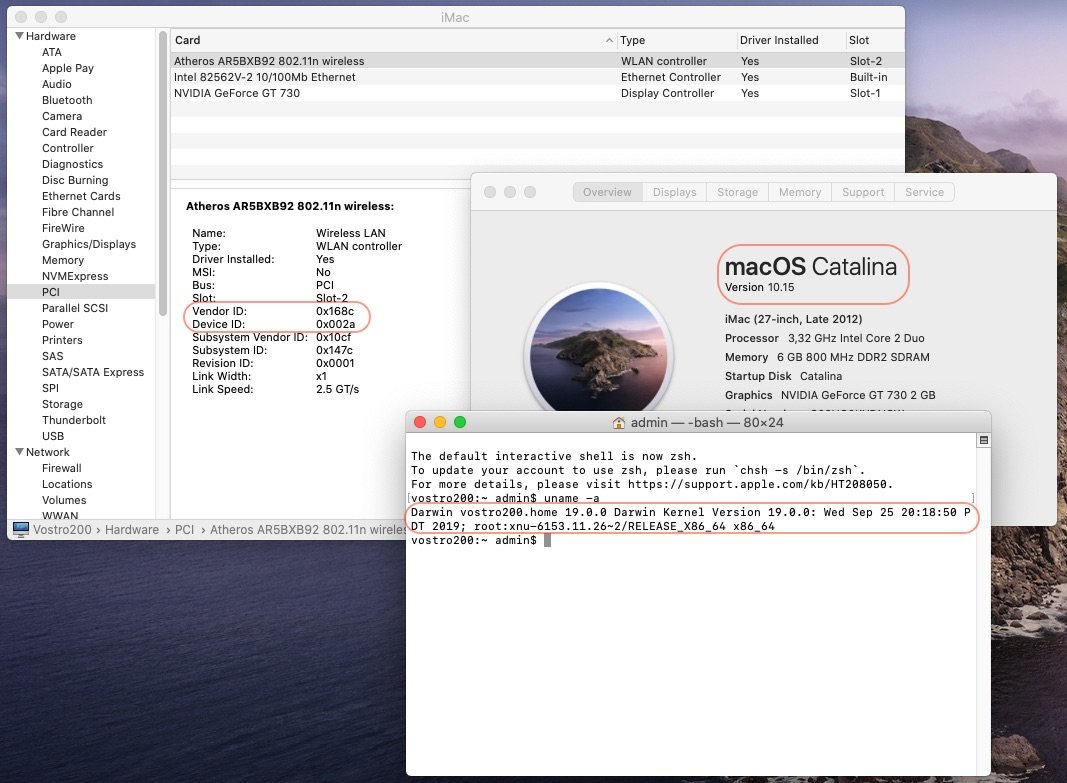
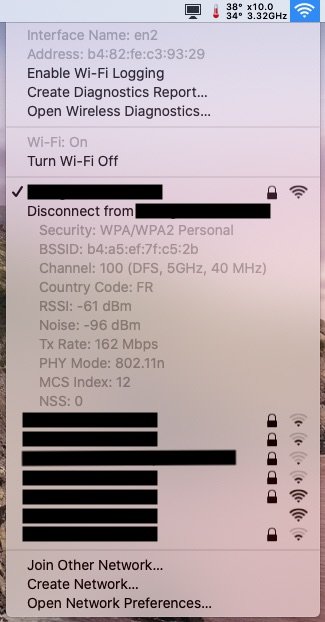
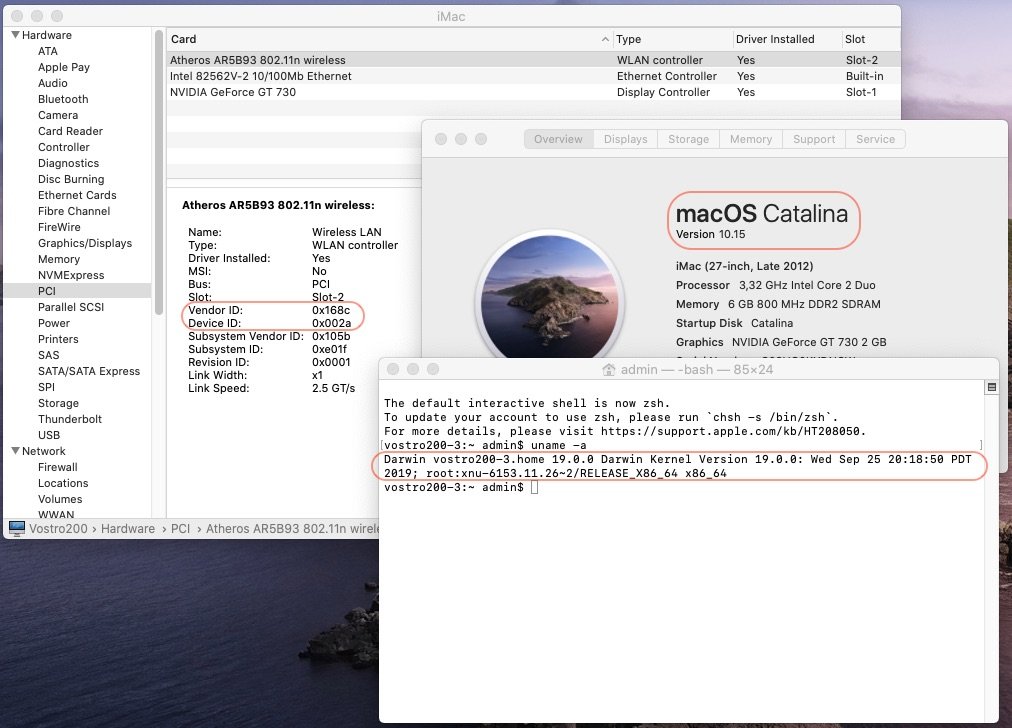
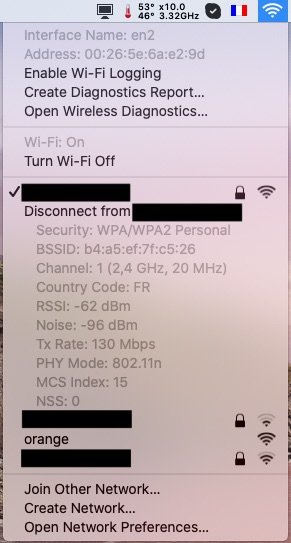
For Catalina 10.15: 1/ DW1510/Broadcom BCM4322-based cards require replacing the vanilla IO80211Family kext in /S/L/E by Mojave's (or High Sierra's) version. Of course, Catalina system partition must first be mounted in RW mode to that effect (see our FAQ section for details). No need to replace IO80211FamilyV2 kext at all. DW1510 802.11n 2.4/5GHz card: 2/ Atheros cards require replacing the vanilla IO80211Family kext in /S/L/E by High Sierra's version. Of course, Catalina system partition must first be mounted in RW mode to that effect (see our FAQ section for details). No need to replace IO80211FamilyV2 kext at all. Atheros AR5BXB92 (AR9280) 802.11n 2.4/5GHz: Atheros AR5B93 (AR9283) 802.11n 2.4GHz: